Announcement

Collapse
No announcement yet.

Just acquired

Collapse
X
 
  • Filter
  • Time
  • Show
Clear All
new posts

    #61
    I have delusions of keeping the tower intact. We'll see how I do. I'm not going to get to it tonight like I thought I would.

    On a lighter note, I took the 850 out to Wally World tonight to pick up a big jug of Sta-bil (must remember to get some into the mower) and some nitrile gloves. I took the long way home, and now I'm sure I have the gear to be reasonably comfortable down though the 40's at highway speed.

    Oh, and several deliveries have come in from eBay. I have a set of '81 850 G turn signals (the square ones) and headlight brakets (black and bent, but OK, really). I also got a handlebar cover from another '80 1000G. I also have made arrangements to pick up some parts in the middle of November: a rear fender, tail fairing (with trim piece) and a grab rail.
    Dogma
    --
    O LORD, be gracious to me; heal me, for I have sinned against you! - David

    Skeptical scrutiny is the means, in both science and religion, by which deep insights can be winnowed from deep nonsense. - Carl Sagan

    --
    '80 GS850 GLT
    '80 GS1000 GT
    '01 ZRX1200R

    How to get a "What's New" feed without the Vortex, and without permanently quitting the Vortex

    Comment


      #62
      Just a little update. I had some time to spend with the #4 carb today. I was able to use a small end mill in the Dremel to cut a deeper slot in the idle mixture screw without having to use an abrasive wheel to slot the screw and the tower at the same time. Not as difficult as I had feared. This was sufficient for the impact driver to grip. Unfortunately, the damaged slot mashed out into the threads in the carb body and did some damage on the way out.

      The same thing happened on #1. Next I'll try using an abrasive wheel to grind a cutting groove in the side of one of these damaged screws, like a tap. Hopefully that'll work to recondition the threads in the carb bodies.
      Dogma
      --
      O LORD, be gracious to me; heal me, for I have sinned against you! - David

      Skeptical scrutiny is the means, in both science and religion, by which deep insights can be winnowed from deep nonsense. - Carl Sagan

      --
      '80 GS850 GLT
      '80 GS1000 GT
      '01 ZRX1200R

      How to get a "What's New" feed without the Vortex, and without permanently quitting the Vortex

      Comment


        #63
        I see my updating is a bit out of date. Here goes.

        Around about Thanksgiving, Josh (TCK) told me he knew of a source for a good rack of BS34SS carbs that I could actually go look at to make sure everything (including diaphragms) was good, rather than roll the dice on eBay or try to rehab the threads in #1 and 4. That sounded like a good idea to me, so we drove out to Germantown to visit Blowerbike. Somewhere in those few hours of BSing, I bought a nice clean rack that still had the idle mix plugs in, with two visually verified good slide diaphragms. Thanks Terry!

        Well, the holidays are over, so today I finally had time to disassemble the new rack. Being fairly clean, everything went pretty smoothly.

        I discovered/(re?)invented a method for removing idle mix screw caps. Instead of drilling them out as I've read about so many times, I decided to try running a screw into them instead. Using the drywall screw I had set aside for digging out the idle mix screw washer and o-ring, three of the four plugs simply turned out by running the screw into the plug's vent hole. Two came out pretty easily. The fourth required three hands. It didn't turn out, so the screw got a pretty good bite in the plug. I turned the carb body over so it was resting on the edge of the (kitchen) table, and grabbed onto the screw with a pair of pliers. Then I had Wendy bang on the pliers until the plug popped out (No, turn the ratchet sideways. OK. Harder. Harder. Harder. Pop.) Surely that's easier than trying to drill them out and risk damaging the screw head.

        A couple things did not go smoothly. The needle jet on #4 was in there pretty tight, and required some light pounding to get it out. No big deal. The real problem is the air jets (as labeled in the carb cleaning pics). 1 and 2 took some effort to break loose. On 3, the screwdriver slot didn't round out so much as crumble. This doesn't worry me too much, because I have a good #3 carb body and all 4 air jets came out of the original carbs easily.

        #4 may be a problem. I guess I can dip it as is and see if that helps. After that I can try heat and if that fails, drill it out. I can't leave it in there, it's the wrong size. Nobody knows what engine these carbs came from. The choke hardware looks like what I've seen on 82-83 850s. Obviously, 34s didn't come from an 850. If someone really wants to know, I can try again to read complete numbers from the jets. I was able to make out enough to know that they're wrong.

        Anyhow, #1 is in the dip. Things are moving forward again.

        Sorry, no pics this time, just more monkeying with carbs. I suppose I could take a boring picture of some of my Christmas loot. My family has used on-line lists for the last couple of years to let each other know what we want/need. So I loaded my list with links to parts on Z1 and Part Shark. They hooked me up with nearly $200 in stuff I would have had to buy myself. I love my family. All the cables, a clutch cover gasket, the one last intake boot, that sort of thing. Plus, I have a birthday in January that Wendy needs to do some shopping for...

        2010 is lookin' good.
        Dogma
        --
        O LORD, be gracious to me; heal me, for I have sinned against you! - David

        Skeptical scrutiny is the means, in both science and religion, by which deep insights can be winnowed from deep nonsense. - Carl Sagan

        --
        '80 GS850 GLT
        '80 GS1000 GT
        '01 ZRX1200R

        How to get a "What's New" feed without the Vortex, and without permanently quitting the Vortex

        Comment


          #64
          OK, #4 came out of the dip today. I was able to drive the needle jet out this time, but no change on the air jet. Just more crumbling. So, I went straight to the left-handed drill set.

          The first size I tried didn't ever bite well enough to turn the screw. I just drilled through the jet. Since the little booger had no ductility to speak of, little tiny pieces were shooting out of the hole. I didn't muster enough sense to put my safety glasses on until one of them hit me in the eye. Genius. Well, the secod size drill I tried was almost as big as the hole. This one bit, and once the jet broke loose, it backed out easily.

          So, I now have a good, clean #4 carb body, which means I have a good rack of carbs! I just need to finish cleaning them and put it all back together. It would be nice to get them back together and get the bike started by the end of the month. February is looking pretty busy already.


          I'm glad that larger drill bit into the head. If not, I would have accidentally drilled out some of the threads in the carb.


          This came out of the "cleaner" set of carbs. You can't know your carbs are clean unless you take them apart, folks.
          Dogma
          --
          O LORD, be gracious to me; heal me, for I have sinned against you! - David

          Skeptical scrutiny is the means, in both science and religion, by which deep insights can be winnowed from deep nonsense. - Carl Sagan

          --
          '80 GS850 GLT
          '80 GS1000 GT
          '01 ZRX1200R

          How to get a "What's New" feed without the Vortex, and without permanently quitting the Vortex

          Comment


            #65
            Your project looks like its coming along. keep the picks coming !

            Comment


              #66
              OK, enough good carb bodies have been through the dip to make a good rack. So, it was time to start messing with soda blasting. I tried one or two different things, and seemed to get the best results using the DIY method that's been going around lately, using 5/16 x 3/16 tubing. I had my compressor set to 90psi, but it can't do that continuously. Pressure probably dipped much lower than that. A couple factors kept me from getting optimal results, but I'm plenty satisfied.


              One blasted, one not. "Soft" focus. Yeah, that's it.


              Both blasted.

              The #1 carb is a little blotchier, but I think they're both plenty good enough for me. I could probably get them even cleaner if it wasn't dark out where I'm doing the blasting.


              Sloppy masking where it fits into the intake pipe.

              Above you can see dramatically the effect of the soda blasting. A much brighter finish, but not noticeably eroded.


              Not completely submerged in the dip.


              Clear coat peeling in the dip.

              Someone around here said that the #1 and #4 carbs have the clear coat. I only noticed it on this one piece. I haven't dipped all 8 BS34 bowls I have, and my new rack of carbs may not have come from a Suzuki. Anyhow, that's what can happen.

              Next up is final cleaning with the "special tool". After that, I'll try to clean up the gang plates and other anodized hardware.
              Dogma
              --
              O LORD, be gracious to me; heal me, for I have sinned against you! - David

              Skeptical scrutiny is the means, in both science and religion, by which deep insights can be winnowed from deep nonsense. - Carl Sagan

              --
              '80 GS850 GLT
              '80 GS1000 GT
              '01 ZRX1200R

              How to get a "What's New" feed without the Vortex, and without permanently quitting the Vortex

              Comment


                #67
                Last night I started reassembling the carbs, and I ran into a bit of a quandary. According to my copy of the factory service manual, the main air jets should be "1.7". The parts in the carbs that came with the bike say "180". All the other jets, needles, etc. match the spec. I don't know if it matters, but the air box doesn't have a stock-style air filter, it has that mesh-looking stuff that the K&N pods look to be made of. Can you all comment on this, please? I had a poke around the web, but wasn't able to find another reference to verify the "1.7" or somehow reconcile it to "180".

                Pics this evening.
                Dogma
                --
                O LORD, be gracious to me; heal me, for I have sinned against you! - David

                Skeptical scrutiny is the means, in both science and religion, by which deep insights can be winnowed from deep nonsense. - Carl Sagan

                --
                '80 GS850 GLT
                '80 GS1000 GT
                '01 ZRX1200R

                How to get a "What's New" feed without the Vortex, and without permanently quitting the Vortex

                Comment


                  #68
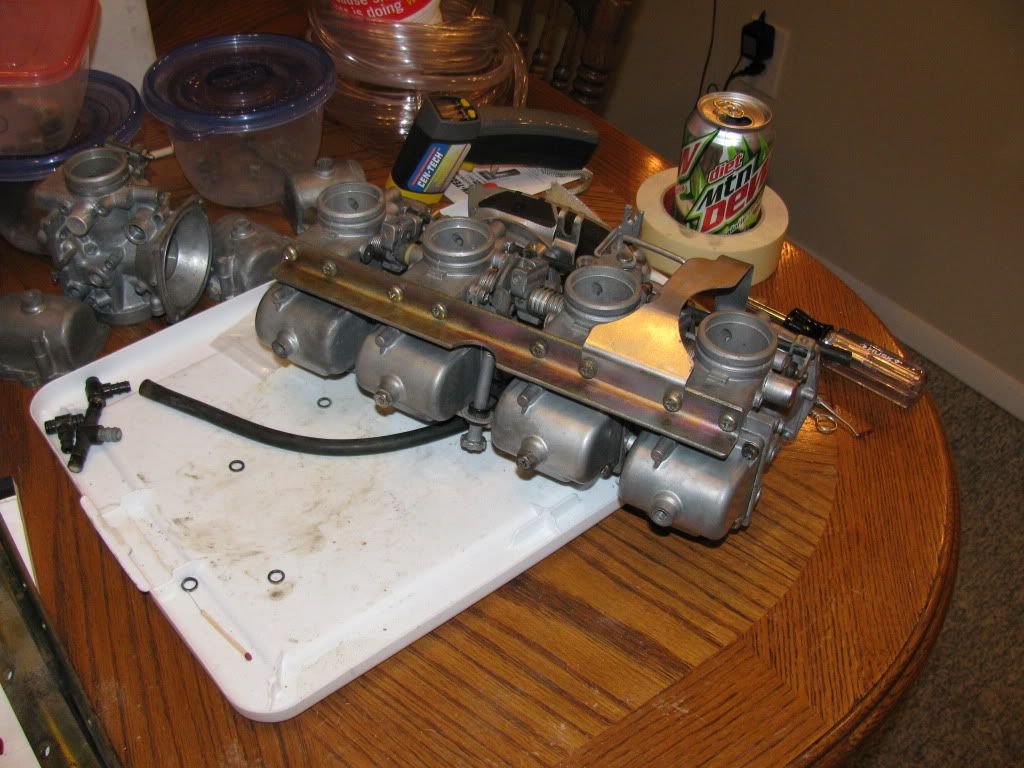
                  OK, I got the full rack reassembled. There are still a few fiddly things to be done, and the bench sync too.

                  Here's pics:


                  It's too bad I don't have a better "before" pic:


                  Here's a look at one of the extra gang plates, another half n' half before/after example of what the soda blast does:


                  Here's a look at how all the anodized bits turned out:


                  I still have a bunch of nasty ugly screws on there. They're doing the job, so I'll probably leave them for now.
                  Dogma
                  --
                  O LORD, be gracious to me; heal me, for I have sinned against you! - David

                  Skeptical scrutiny is the means, in both science and religion, by which deep insights can be winnowed from deep nonsense. - Carl Sagan

                  --
                  '80 GS850 GLT
                  '80 GS1000 GT
                  '01 ZRX1200R

                  How to get a "What's New" feed without the Vortex, and without permanently quitting the Vortex

                  Comment


                    #69
                    All right, time for another update. Before calling the carbs done, I needed to order some new plugs for the pilot jets. In order to consolidate shipping, I wanted to place a minimum number of orders for this and the remaining parts from my Christmas list. Before I ordered all that, I needed to find out just how much I needed for the brakes, so I had to take a detour from things that could actually get it running, and tear the brakes down.

                    Two of the three front calipers shown below came off of this bike. For 30 year old brakes, they felt surprisingly good. Almost firm. But you can see from the pictures that lever feel should not be taken as any kind of measure of the health of a braking system. This junk is on the verge of outright dangerous. Definite leaking; possibly sticking, dragging, locking up, or dangerously reduced braking force at an unforeseeable time. Well, it would probably happen about the time you grabbed the brake really hard, which is not the time one would choose for brakes to fail. If your brakes haven't been rebuilt or regularly flushed for 30 years, they probably look like this. People, please rebuild your old brakes.


                    I didn't get the piston out of the 4th front caliper I have. 100psi air wouldn't budge it. Naturally, I had the same problem on my only rear caliper (for this bike). So, I had to come up with more pressure. Fortunately, I hadn't completely dismantled the front master cylinder yet.


                    I had to use the Might-Vac to suction prime the master, but obviously didn't bother bleeding this little setup. OK, so that got one of the rear pistons moving. Clearly, I didn't want to pump that out while the other refused to budge. Naturally, I picked up my rear-axle-nut-sized Crescent wrench, set the size, and set it across half I didn't want to move. That done, the other piston was finally forced to move. Once it was free, I was able to disassemble the caliper and work the piston out with Channel-Locks. All the pistons I got out were pitted. After seeing the sludge in the calipers, I'm sure no one is surprised by that.

                    Even the casual observer probably noticed the braided stainless lines in the pics above. These came with a complete front brake system I bought off eBay when I was looking for a master cylinder for my 850. They seem to be in serviceable condition, but I can't quite bring myself to trust them. Anyhow, I don't like the bare braided stainless, and they're set up to use the splitter, which I didn't want. PM me if you want them. I'll be building new lines with smoke-colored speedflex from Earl's, with a hydraulic switch, double-banjo bolt at the master.

                    That's all for tonight. More tomorrow.
                    Dogma
                    --
                    O LORD, be gracious to me; heal me, for I have sinned against you! - David

                    Skeptical scrutiny is the means, in both science and religion, by which deep insights can be winnowed from deep nonsense. - Carl Sagan

                    --
                    '80 GS850 GLT
                    '80 GS1000 GT
                    '01 ZRX1200R

                    How to get a "What's New" feed without the Vortex, and without permanently quitting the Vortex

                    Comment


                      #70
                      Steering bearings

                      Well, that last post was actually a couple weeks late. In the mean time, parts have been arriving, including new steering bearings. I had already worked through how to do this for the 850, so I ripped into this job pretty fearlessly. Disassembly of the front end proceeded smoothly, until I hit the same snag everyone else does: knocking out the lower outer race. The bar I had used on the 850 wouldn't grab on the 1000. The inside of the steering tube was too close to the ID of the race. So, it was time to fabricate something.


                      This is a $2 pry bar from my favorite place. I ground the notch into the back edge on the bench grinder. That had the lower race out in a jiffy.

                      The next regular problem with steering bearing replacement is the lower inner race. Break out the Dremel and a cold chisel. First, I used the cut-off wheel to cut the cage and get all the rollers out of the way. After that, I slotted the inner race, but not all the way through. The idea is to weaken the race without cutting into the steering stem. Once slotted, I used the cold chisel in the slot to split the race. Here's the aftermath:


                      It takes a fairly hefty hammer strike to finish splitting the race. I wouldn't want to try this with a claw hammer. I used my 3lb driving hammer. Once the ring is split, use the chisel on the lip of the race to drive it off of the stem. You can see in the picture above that I broke the lip. I thought I had it split at one point, but I was wrong. What I thought was a crack was just a mark from the chisel. Speaking of chisels, you can do this with a wood chisel you don't care about, but because of the narrower angle you have to keep the slot narrower. You also run a risk of pushing through after the race splits and nicking the stem.

                      Here are the old bearings:


                      You can see the ridges in the races that cause the "notch" in the steering. Reassembly is really straightforward. Nothing much to take a picture of. Except maybe the messy job of packing grease into the bearings, which is messy enough to not get the camera involved.
                      Dogma
                      --
                      O LORD, be gracious to me; heal me, for I have sinned against you! - David

                      Skeptical scrutiny is the means, in both science and religion, by which deep insights can be winnowed from deep nonsense. - Carl Sagan

                      --
                      '80 GS850 GLT
                      '80 GS1000 GT
                      '01 ZRX1200R

                      How to get a "What's New" feed without the Vortex, and without permanently quitting the Vortex

                      Comment


                        #71
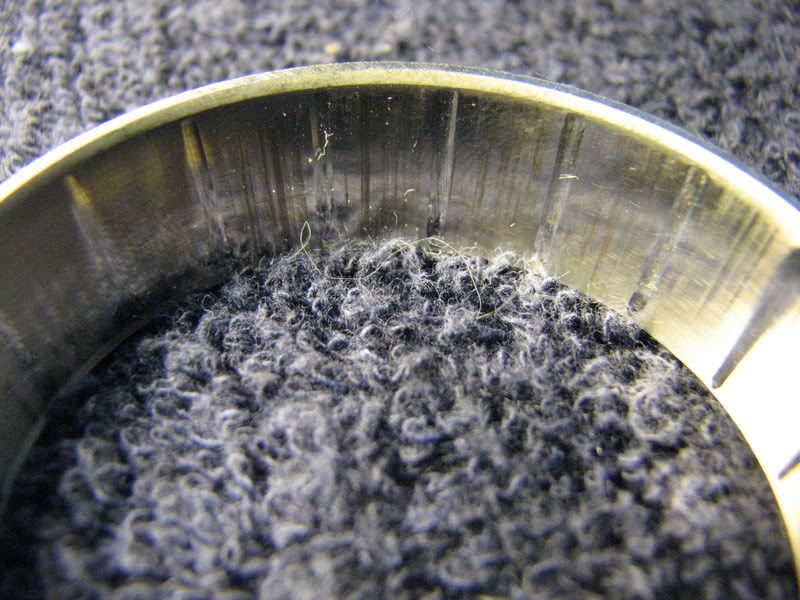
                        In your pictures, you can only see the ridges if you know what you are looking for.

                        Here is a better shot to show you "ridges":


                        To remove the race from the bike I was working on, I chose to use the Dremel with a cut-off wheel to make two cuts in the race.
                        That small piece came out rather easily, since it was weakened on two sides. The rest of it practically fell out.


                        I was not terribly concerned about not nicking the frame or the steering stem with the cut-off wheel.
                        I figured that neither one of them actually touched the rollers, so a slight irregularity would not matter.

                        .
                        sigpic
                        mine: 2000 Honda GoldWing GL1500SE and 1980 GS850G'K' "Junior"
                        hers: 1982 GS850GL - "Angel" and 1969 Suzuki T250 Scrambler
                        #1 son: 1986 Yamaha Venture Royale 1300 and 1982 GS650GL "Rat Bagger"
                        #2 son: 1980 GS1000G
                        Family Portrait
                        Siblings and Spouses
                        Mom's first ride
                        Want a copy of my valve adjust spreadsheet for your 2-valve per cylinder engine? Send me an e-mail request (not a PM)
                        (Click on my username in the upper-left corner for e-mail info.)

                        Comment


                          #72
                          Good job..
                          SUZUKI , There is no substitute

                          Comment


                            #73
                            Groovy bearings, dude.

                            I like making special tools for dirt cheap. I'm getting a small collection going, and they're getting more reuse than I could have guessed. Still, I'll have to remember that. There's always room for more tricks in the bag.
                            Dogma
                            --
                            O LORD, be gracious to me; heal me, for I have sinned against you! - David

                            Skeptical scrutiny is the means, in both science and religion, by which deep insights can be winnowed from deep nonsense. - Carl Sagan

                            --
                            '80 GS850 GLT
                            '80 GS1000 GT
                            '01 ZRX1200R

                            How to get a "What's New" feed without the Vortex, and without permanently quitting the Vortex

                            Comment

                            Working...
                            X