Announcement

Collapse
No announcement yet.

Clock rebuild on a budget.

Collapse
X
 
  • Filter
  • Time
  • Show
Clear All
new posts

    Clock rebuild on a budget.

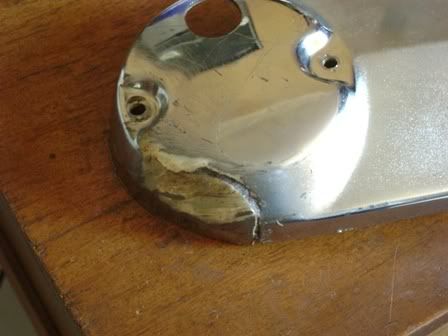
    A while back, I had an all fall down episode on my 1000G, and besides taking out the stator cover it smashed up the clocks pretty badly as well.
    Because the bike is undergoing a rebuild from the frame up when winter comes around in about 6 months time, I have been considering the options, I decided to strip them down and see if they could be salvaged, so that I could ride until then.
    Please let me make it clear right up front, this is NOT an article on how to get your tired clocks back to showroom condition, but rather for those of us on a budget who may have trashed their clocks, like mine and want or need to get the bike back on the road with minimal out lay of cash.
    The whole job took me a day and cost me less than $15 for everything.

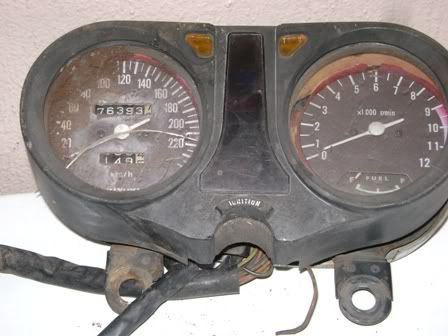
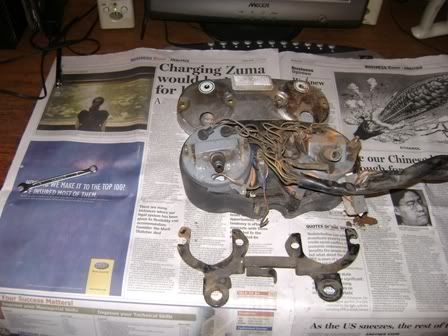
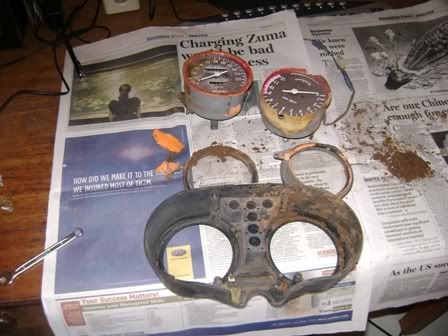
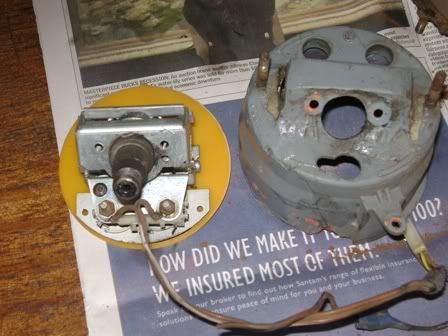
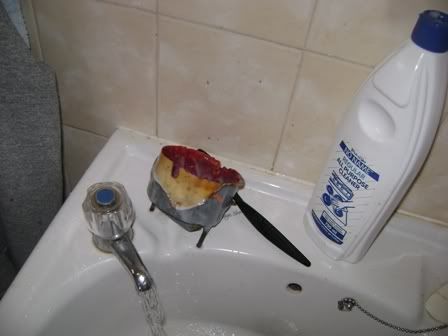
    So lets get started, here is the sad state of affairs that needs to be dealt with.


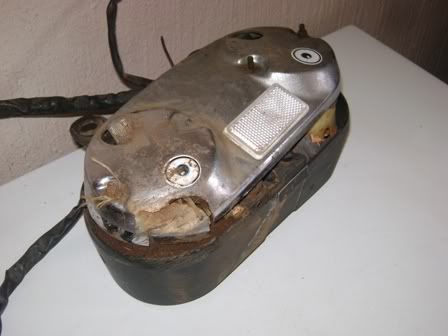
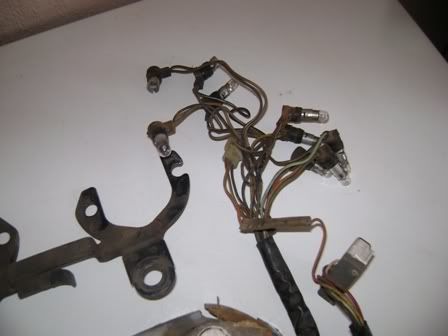
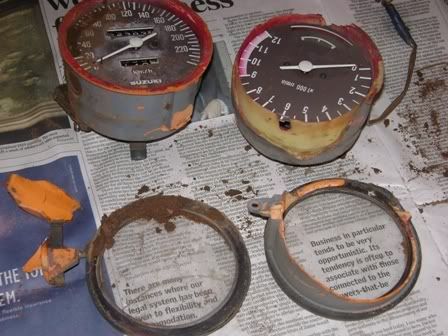
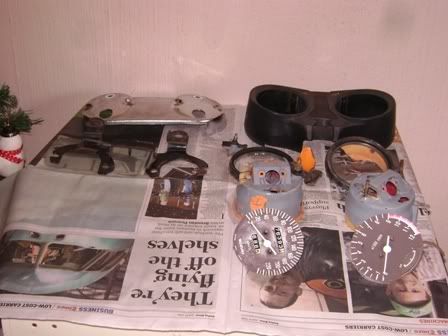
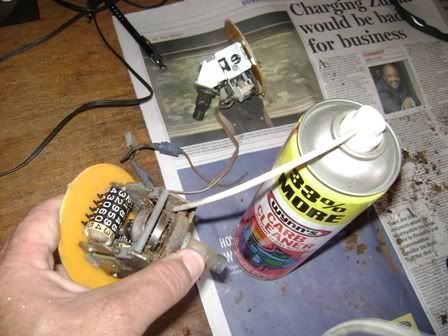
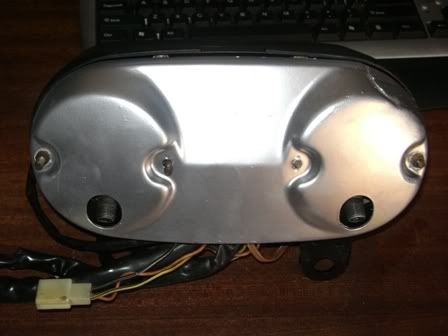
    First thing to do is get the back off so we can get the internals stripped down and remove the few tons of agricultural land in there, this is easy enough, just turn the clocks over and remove the 4 little cap nuts with a size 8 spanner.


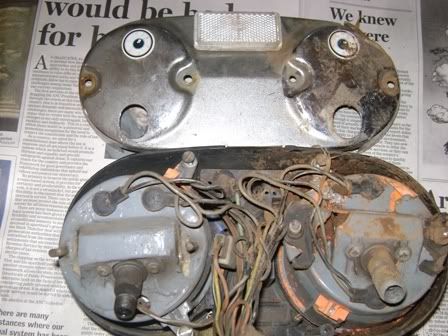
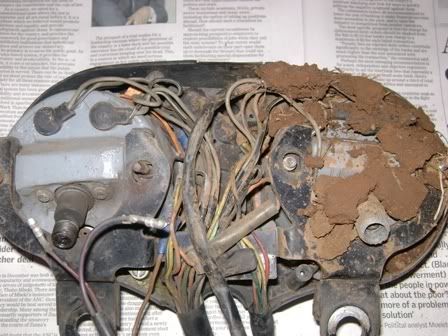
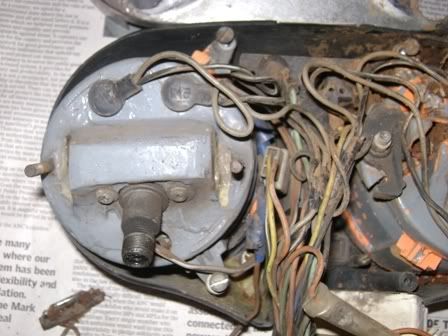
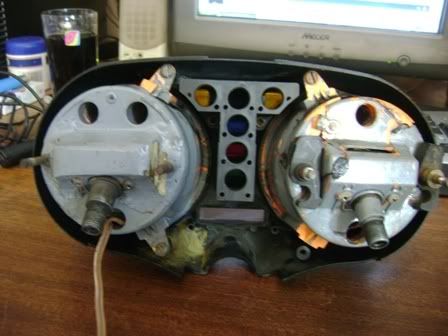
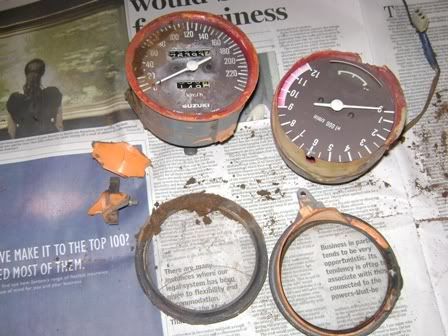
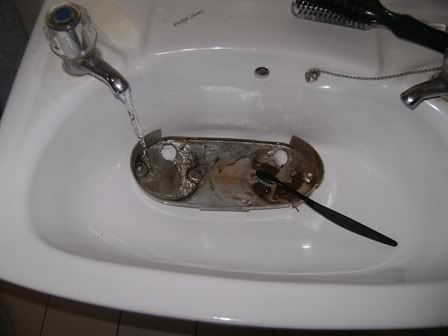
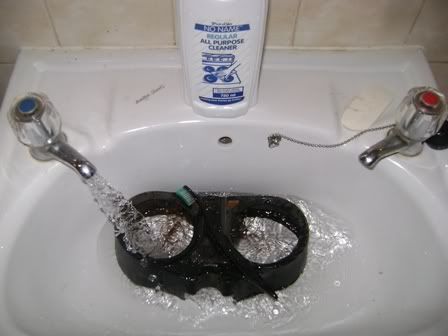
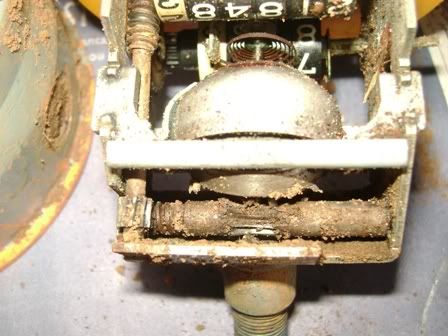
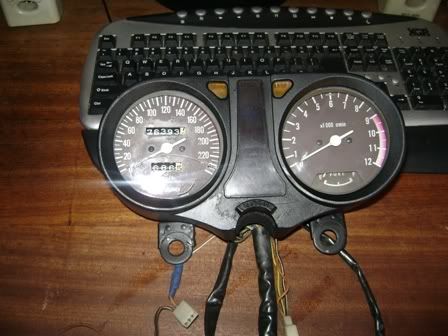
    More farm land, there was tons of the stuff in there, simple enough to get out, I just dunked the entire set under the tap and just rinsed it all out with water, they are being stripped right down anyway, and it can do no harm.

    #2
    Next, remove the mounting bracket, this just lifts out, once you have opened the tab that holds the wiring looms


    It is now easy to remove all the wiring, the little rubber sockets just pull out of their holes, and the unit for the gear position indicator has two little screws, that’s it.
    Do take a pen and paper and make a note of what goes where, so that when you put it all back together, the bulbs all go into their correct sockets, otherwise you may land up with a flashing oil or neutral light when you put the flashers on.


    With the wiring out of the way, all you have now is the upper case with the two instruments in it, remove the instruments by loosening the two screws that hold each one down, one on the top, and one at the bottom of each, clearly seen here.

    Comment


      #3
      Now you have the lot stripped down like this, and we find more carnage inside, your gauge glasses should and may still be on the instrument, depending on the damage, mine came out like this, as the instrument holders broke pretty badly as can be seen here.


      More carnage


      If your instruments are good and in one piece, and there is only housing damage, then just clean and put aside, but if, like mine, the cases have broken open totally and need repair, the next step is to remove the actual instruments, this is done easily enough by loosening the two screws that hold them in their cases, one on each side of the drive cable attachment, then carefully lift them out.

      Comment


        #4


        Now this is what you have, all stripped down and ready for surgery.


        First order of business is to clean everything up and get rid of all the gunk and agricultural land in there that did not come out with the first rinse down. Remember the final result is only as good as your preparation.
        Now depending on your domestic set up, you can either do it in a bucket outside, (not sure how much fun that will be in winter?) or you can do like me, and do it in the basin in the comfort of your bathroom, WARNING the girls in the house do not take well to this.
        Rather get them out the house for the day so you can work undercover, personally I prefer the basin as I think clean running water is better than a bucket full of water that is just getting dirtier and dirtier.
        You will also need lots of household cleaner and the good old tooth brush.


        Comment


          #5


          If you stripped out the instruments and they looked like mine.....(geeeez, how did all that stuff get this far in?)
          They will need to be cleaned up, this is not done in the basin/bucket/under the hose, or whatever, as there are delicate bits in there and you don't want to be scrubbing away with a toothbrush in there and bending fine springs and the like.


          I found the best thing for this is a can of carb cleaner with the pipe on the nozzle, it gets in everywhere and does a great job with no effort, there are very small spaces to get into, and this works a charm, it is also pretty high pressure, so it justs blasts the dirt away.


          The top cover was relatively unscathed, but pretty badly scratched, so I climbed into this first, any of your favorite fillers will work, fill in the scratches and dings and wait to dry, then lots of elbow grease with fine wet and dry sand paper to get a good smooth finish, repeat as required.
          If the cover is cracked, good old cyanoacrylate glue is the best, or as it is better known as Super glue.
          I use Q-Bond which is good for filling and repairing, it consists of a fine powder for filling and super glue, the idea is to sprinkle the powder on the repair and then drop the super glue in, it reacts and sets as hard as steel in seconds.
          Once you are happy, time to spray, I used your normal garden variety spray can, and the colour of choice was Satin Black, i just love the soft finish it gives, I find gloss black too gaudy and matt black too hard.

          While I was busy with the black, I straightened the mounting bracket,(Big Hammer and a vice.) and sanded, and sprayed it at the same time.

          Comment


            #6
            Next were the instrument cases, again, super glue, works a charm, if there are pieces missing, fill as required, glue all together and when done, replace the instrument, and tighten up the two retaining screws.


            Once both instruments were glued back together and re-assembled they were replaced into the top cover with their two screws on each one.


            Next the wiring loom was put back in after being cleaned with a damp cloth and some household cleaner, (you did make notes of what goes where, right, right?)
            And the mounting bracket put back in place.

            Last item left to do was the bottom cover, which was pretty badly beat up, and required quite a lot of filling, sanding and re-shaping, as it would not just glue back together, due to it having distorted quite badly, but Q - bond to the rescue, I glued it back as best as I could, then filled in the gaps with Q-Bond and trimmed off and sanded away the excess.


            Once I was happy with the repair, I sprayed it with a can of Mirror Chrome, yeah, yeah, I know it is not the same and does not shine like they say, but for this project it was as close as I was going to get.

            Comment


              #7
              So the finished product before:


              And after:


              Quite acceptable on any bike I think.
              As I said at the start, this is not about getting your clocks back to factory condition, it is about getting your ride up and mobile in very little time and on a tight budget.
              The whole job took me a day, and cost less than $15 all told.
              I hope it helps someone out there, I really enjoy this site and have gained a wealth of information here, I just hope this thread gives a small bit back to a great community.

              P.S I was not sure where to place this, so Mods please feel free to move it if it is required.

              Comment


                #8
                That's some nice work and, in my mind, what mucking about with these old bikes is all about. I particularly enjoyed the way you included your bathroom in to your workshop. (My missus has to put up with the same thing - crankshaft in the dishwasher, carbs in a saucepan etc).
                79 GS1000S
                79 GS1000S (another one)
                80 GSX750
                80 GS550
                80 CB650 cafe racer
                75 PC50 - the one with OHV and pedals...
                75 TS100 - being ridden (suicidally) by my father

                Comment


                  #9
                  Very well done. Shows what can be done with some time and a little home brewed mechanics.
                  80 GS850GT " Are we having fun yet! "

                  Comment


                    #10
                    You've given me hope! All except for my main plastic body, which is so sun-brittle I have very little hope of saving it. But who knows - maybe a skim coat of epoxy will hold things together well enough to re-assemble the thing and paint it.

                    Either way, nice work!

                    Comment


                      #11
                      Originally posted by hampshirehog View Post
                      That's some nice work and, in my mind, what mucking about with these old bikes is all about. I particularly enjoyed the way you included your bathroom in to your workshop. (My missus has to put up with the same thing - crankshaft in the dishwasher, carbs in a saucepan etc).
                      know what you mean mate, my mrs came home to find her dish washing up bowl full of old engine oil and an exhaust hanging from the shower rail!
                      1978 GS1085.

                      Just remember, an opinion without 3.14 is just an onion!

                      Comment


                        #12
                        Very nice, great pics, great thread.


                        Life is too short to ride an L.

                        Comment


                          #13
                          so how do you get the rim holding in the glass off with out trashing the plastic casing? had pulled mine apart few days ago to try and fix the speedo but didn't wanna force it till i knew
                          thnx

                          Comment


                            #14
                            so how do you get the rim holding in the glass off with out trashing the plastic casing? had pulled mine apart few days ago to try and fix the speedo but didn't wanna force it till i knew
                            Hi, in my case it was not hard, as the plastic cases were trashed alreadt from the prang, but if you want, there are two ways to remove the glass, the first is to gently lift the metal ring that is crimped around the glass with a small screwdriver by slowly prising the crimping open all the way around, then when replacing, re crimping with a pliers, be sure to put something soft between the pliers and the rim so that you do not mark it.

                            The second way is to use a dremel tool with a very thin cutting disk, and to cut the plastic through, all the way around, right below the steel rim that is holding the glass down, once cut through, you can remove the glass and the rim in one piece.
                            To put back together use your favorite adhesive and glue the two bits together, strap the joint with electrical tape to center the two halves correctly amd leave to dry.

                            Both methods are covered on these forums in detail, just do a search.

                            Hope that helps.

                            Comment


                              #15
                              Just a note, I once did a super clean on a tach and used solvent spray to clean the mechanism, when I started the bike the tach went crazy bouncing all over, I discovered that they put a thin oil in that bell looking thing that covers the spinning parts of the tach and most probly the speedo also that dampens out rapid movement, It takes a very small amount but after words my tach worked like it used too. I used a thin silicon oil (a jet engine fuel control oil) but A thin silicon oil I don't will evaporate like other oils, You did beautiful work on that speedo assembly, If you need to add some oil to it you can add it without tearing it all apart again I used a syringe.And by removing those 2 screws holding the mechanism to the plastic holders.

                              Comment

                              Working...
                              X