Announcement

Collapse
No announcement yet.

No power to starter motor

Collapse
X
 
  • Filter
  • Time
  • Show
Clear All
new posts

    No power to starter motor

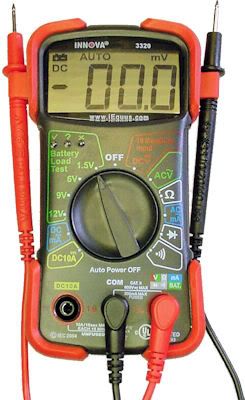
    I am having a heck of a time figuring out why the starter motor isn't getting any juice. I am a little confused about what wires need to be checked and all parts needed to get electricity to the starter motor. I have checked the starter button and kill switch and they are good. The wires from the starter relay to starter button seem good. I have power to the neutral and other console lights. I checked all wires coming out of the ignition switch. I am bypassing the starter switch in the clutch since I don't have that on my bike. I am using a multimeter to make sure there is a good signal through the wires.

    As suggested in some posts I was reading, I put a screw driver across the relay and battery wire. I got a big spark and the starter motor moved. Spent a lot of time cleaning connectors.

    What else can I check to find the weak link between the battery and the starter motor? Does this mean my starter relay is bad or some other part?

    #2
    Do you know the clutch needs to be pulled in ?? opps I see you have jumped the clutch switch
    When you push the starter button you should get 12v on the small wire on the solenoid - goes to the clutch switch then to the start run switch to the starter switch to the fuse block. I think that is the order. Get your volt meter out and start checking hopefully it should be an easy fix
    Last edited by Guest; 09-25-2010, 02:47 AM.

    Comment


      #3
      Originally posted by SqDancerLynn1 View Post
      Do you know the clutch needs to be pulled in ?? opps I see you have jumped the clutch switch
      When you push the starter button you should get 12v on the small wire on the solenoid - goes to the clutch switch then to the start run switch to the starter switch to the fuse block. I think that is the order. Get your volt meter out and start checking hopefully it should be an easy fix
      Actually, power goes from kill switch to starter button, then to clutch switch and on to solenoid. You need to go to Basscliff's marvelous site and print out a wiring diagram- this will make tracing electrical faults much easier.
      When you jump solenoid contacts and starter moves, take voltage reading across battery to see what's happenning. Hopefully, you have pulled all spark plugs to give your starter motor an easy wake up call.
      1981 gs650L

      "We are all born ignorant, but you have to work hard to stay stupid" Ben Franklin

      Comment


        #4
        make sure the solenoid is grounded

        Comment


          #5
          Originally posted by posplayr View Post
          make sure the solenoid is grounded
          I checked all grounds... except the solenoid! For some reason I assumed it was already grounded. Anyways, it's not grounded as far as I can tell, no ground wire coming off it.

          I could use a little more help, where do I run the ground from?

          Side note, I live on Basscliff's web site. I do have one request for him though, get a 1983 GS650G and do all the same pages Love the site and this forum.

          Comment


            #6
            Looking at the solenoid closer there looks like there might be a piece missing. There is a small hole on the left side right below the screw. There is also an indention where a flat piece of metal might have gone. Anyone have a good picture of a solenoid or can direct me on grounding this thing?

            Might also have a problem coming off the starter button. I am losing volts out of it and all the sudden not even pushing a volt down to the solenoid. I am hoping this is because its not grounded.

            Comment


              #7
              The solenoid is energized by the yellow green wire+12v. The circuit is complete by. Ground return to mounting. Make sure there is a ground wire to solenoid. Test light would work to confirm.

              Comment


                #8
                Originally posted by Mop Bucket View Post
                Looking at the solenoid closer there looks like there might be a piece missing. There is a small hole on the left side right below the screw. There is also an indention where a flat piece of metal might have gone. Anyone have a good picture of a solenoid or can direct me on grounding this thing?

                Might also have a problem coming off the starter button. I am losing volts out of it and all the sudden not even pushing a volt down to the solenoid. I am hoping this is because its not grounded.
                On my bike, the solenoid case is grounded by metal bracket. As stated, the G/Y wire comes from clutch safety switch, so when you hit button, 12 volts rolls on down and engages solenoid as long as solenoid case is grounded.Put your meter leads on + bat terminal and solenoid case- any voltage reading? If no reading, solenoid is not grounded! Someone might have substituted a different solenoid.
                1981 gs650L

                "We are all born ignorant, but you have to work hard to stay stupid" Ben Franklin

                Comment


                  #9
                  1) test ur battery to make sure u have good voltage. 2) take the cover off the starter. 3) take a 4 ft piece of decent gauge wire and touch it to the positive battery terminal and solder connection for the yellow green wire. if relay doesnt click then its a bad starter relay. 4) if u hear the relay click but no starter kickover take the same piece of wire ( as long as its decent gauge) and touch it straight from battery + to the starter. if it doesnt turn over the starter is bad. if it does then its the wire between the starter relay and the starter. 5) at the starter relay, test the other big gauge wire that goes from the starter relay to the battery. this should read 12 v at all times. 6) peel back the black corrugated tube/ elec. tape that goes to the start button/ run switches. single out that yellow/green wire and strip a little section to get the + test probe in. turn the key on and press the button. u should get a + of 12 volts. ( there will be some voltage drop because of old wires etc. mine reads 9 v here and starter still kicks) if u get nothing or really low volts its the satrter button. 7) trace the yellow green wire from the button to the clutch lever. ( mine goes into the headlight). side note make sure your pulling the clutch lever when ur hitting the start button. LOL i know, but sillier things have happened. test the wires coming out of the clutch switch, they're still yellow green. one should read voltage when u hit the start button and one should get voltage when you hold the clutch in and push the button. if not the clutch switch is bad. shhheeeewwww!!! 8) if all that checks out and still nothing to the starter then the wire from the clutch switch to the starter relay is probably bad. try stripping a little piece of the wire that you tested at the clutch switch ( the one that has voltage when the clutch is pulled), and touch that piece of wire u still got from the stripped part to the solder connection of the yellow green wire. try to start like normal. if everything else was good this should do it and run a new wire from the clutch lever to the starter relay and be done with it. remember to tape up any exposed wire u stripped to test.

                  it is possible to run a new wire straight from the start button to the yellow green connection at the starter relay, which bypasses the clutch switch but beware!!! the bike will start while in gear and take off ( not recommended) and if u have no helping hands to pull the clutch lever for u while ur holding the test probe and ur jumper wire zip tie the lever down.

                  Comment


                    #10
                    The starter button wasn't working and no juice going to the Solenoid. Sprayed the inside with electric connector cleaner and it started to work again, but I don't trust it much. The Solenoid wasn't grounded. Created a ground and ran it to the battery ground. Once I did that any juice to the solenoid made the starter go. For fun I added some gas to the carbs and nothing. Left if for a few hours was showing the wife the working starter button and boom, it fired once!

                    Thanks everyone for the help the combined ideas got me all the way to a working starting system.

                    Little more research and I will tackle the coils and spark plugs.

                    For those that don't know this was a parts bike I am trying to bring back to life. My first project and having a blast wrenching on it.

                    Comment


                      #11
                      Originally posted by jhicok View Post
                      1) test ur battery to make sure u have good voltage. 2) take the cover off the starter. 3) take a 4 ft piece of decent gauge wire and touch it to the positive battery terminal and solder connection for the yellow green wire. if relay doesnt click then its a bad starter relay. 4) if u hear the relay click but no starter kickover take the same piece of wire ( as long as its decent gauge) and touch it straight from battery + to the starter. if it doesnt turn over the starter is bad. if it does then its the wire between the starter relay and the starter. 5) at the starter relay, test the other big gauge wire that goes from the starter relay to the battery. this should read 12 v at all times. 6) peel back the black corrugated tube/ elec. tape that goes to the start button/ run switches. single out that yellow/green wire and strip a little section to get the + test probe in. turn the key on and press the button. u should get a + of 12 volts. ( there will be some voltage drop because of old wires etc. mine reads 9 v here and starter still kicks) if u get nothing or really low volts its the satrter button. 7) trace the yellow green wire from the button to the clutch lever. ( mine goes into the headlight). side note make sure your pulling the clutch lever when ur hitting the start button. LOL i know, but sillier things have happened. test the wires coming out of the clutch switch, they're still yellow green. one should read voltage when u hit the start button and one should get voltage when you hold the clutch in and push the button. if not the clutch switch is bad. shhheeeewwww!!! 8) if all that checks out and still nothing to the starter then the wire from the clutch switch to the starter relay is probably bad. try stripping a little piece of the wire that you tested at the clutch switch ( the one that has voltage when the clutch is pulled), and touch that piece of wire u still got from the stripped part to the solder connection of the yellow green wire. try to start like normal. if everything else was good this should do it and run a new wire from the clutch lever to the starter relay and be done with it. remember to tape up any exposed wire u stripped to test.

                      it is possible to run a new wire straight from the start button to the yellow green connection at the starter relay, which bypasses the clutch switch but beware!!! the bike will start while in gear and take off ( not recommended) and if u have no helping hands to pull the clutch lever for u while ur holding the test probe and ur jumper wire zip tie the lever down.
                      That was an excellent writeup (IMO).
                      Ken

                      Comment


                        #12
                        Originally posted by KRyder13 View Post
                        That was an excellent writeup (IMO).
                        Ken
                        I agree, it helped a lot in trouble shooting specific wires and components. Combined with what the others said I was able to fix or find issues.

                        Comment


                          #13
                          I was having problems with the starter solenoid on my 82 650.
                          It was clicking and causing the bike to not start at random.

                          went to Lowes and bought a lawn tractor starter solenoid for like $12, never had a problem since!
                          It literally bolted right in place.

                          I think the Pos and Negs are flipped though on that new solenoid....oh well.

                          But if you ever swap out solenoids, they got em in Lowes in the Lawn and Tractor isle, right where they keep the air filters and stuff for them.
                          (I wouldn't expect the employees to find it for you....they are clueless about them for some reason)

                          Comment


                            #14
                            I know this thread is over a year old, but it's just the information I was looking to find so no need to start a new thread.

                            I am going to use the method described above by jhicok to track down the issue with my starter.

                            However, I need to clarify a few things first:

                            This entire process is done with the battery installed, right?

                            Just how thick is a "decent" gauge wire -can I get away with using 12GA?

                            And just how would I go about using this multimeter to test for voltage?


                            Here is an excerpt from the manual, just need to verify that this is indeed the correct setting/procedure for what needs to be done here.


                            AC/DC VOLTAGE MEASUREMENT


                            WARNING
                            To avoid possible electric shock, instrument damage
                            and/or equipment damage, DO NOT attempt to measure
                            voltages ABOVE 600V AC/DC or take measurements if
                            the voltage is unknown. 600V AC/DC between the COM
                            and V jacks is the maximum voltage that this instrument
                            is designed to measure. The "COM" terminal potential
                            should not exceed 300V AC/DC measured to ground.


                            1. Plug the BLACK test lead into "COM" jack of the multimeter;
                            plug the RED test lead into the "V" jack.
                            2. Set the meter’s Function/Range Selector Switch to the
                            appropriate ACV or DCV position as desired
                            3. Place the RED test lead onto the positive (+) side of the item
                            being tested and the BLACK test lead onto the negative (-)
                            (across the source/load) side of the item.BE CAREFUL not to
                            touch any energized conductors with any part of your body.
                            4. Read the results on the display


                            So, do I need to keep the black probe grounded onto something while I use the red lead to check the voltage of the various wires?

                            I know how to check continuity but I have never learned how to use the voltmeter function.

                            Here is the link to the entire manual
                            http://equus.com/Content/Support/Manual/93-0041.pdf


                            Thanks to anyone who can help clear this up for me!

                            Comment


                              #15
                              Place the black lead on the negative terminal of the battery. Put the red lead on the terminal connected to the battery (you'll have to trace the wire). You should get 12V nominal. Once that is verified, put the black lead on the negative terminal of the battery and the red lead on the other terminal of the solenoid. Then try to start the bike. You should see 12V nominal.
                              This is easiest with a 2nd person, but if you secure the multimeter leads you can do it by yourself. Also, I use a zip tie on the clutch lever because my clutch interlock is still in place.
                              BTW, set your multimeter to the DCV, the red portion just to the right of the OFF position.
                              I used a wire gauge calculator from the web: 12 gauge would be adequate, but personally I would use 10 gauge just to allow a little margin.
                              And yes, battery installed.
                              Last edited by Guest; 10-02-2011, 04:05 PM.

                              Comment

                              Working...
                              X