Thanks in advance
Announcement
Collapse
No announcement yet.
Airbox removal tricks?
Collapse
X
-
Airbox removal tricks?
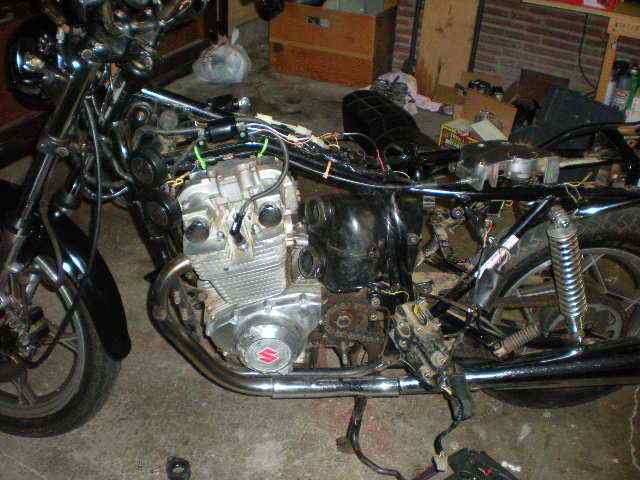
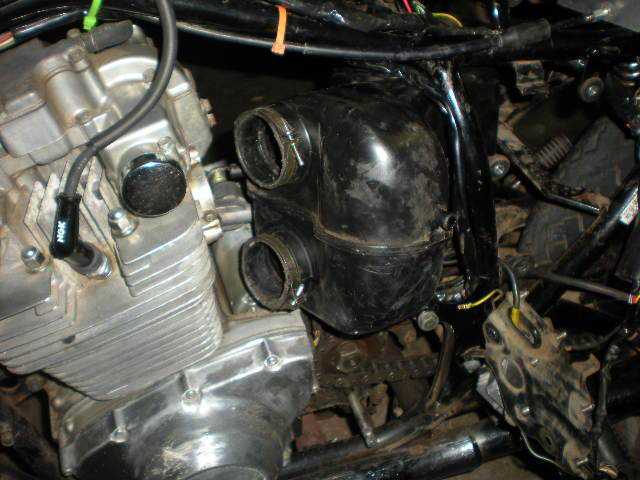
I just got some new parts in the mail and i want to take my carbs and airbox off. Last week I took the carbs off but I still couldnt get the airbox to wiggle out. I had the seat, tank, and covers all off of course but I held off from removing the rear fender. What am I doing wrong? How do I get that bugger out?
Thanks in advanceTags: None
-
First thing to do is to tell us what bike you are working on.
We have a small clue because you are in the Twins section, but there are still differences.
.sigpic
mine: 2000 Honda GoldWing GL1500SE and 1980 GS850G'K' "Junior"
hers: 1982 GS850GL - "Angel" and 1969 Suzuki T250 Scrambler
#1 son: 1986 Yamaha Venture Royale 1300 and 1982 GS650GL "Rat Bagger"
#2 son: 1980 GS1000G
Family Portrait
Siblings and Spouses
Mom's first ride
Want a copy of my valve adjust spreadsheet for your 2-valve per cylinder engine? Send me an e-mail request (not a PM)
(Click on my username in the upper-left corner for e-mail info.)
-
 Ranger
Remove fuel, plug in a dremel, take a propane torch, heat where you want to cut, cut and throw it out.
That's how I would recommend doing it. Unless of course you like the hassel
Comment
-
 Flaming Chainsaws
I did this on my 1980 Suzuki GS450L.
Yeah, I'm assuming you have a GS450 because it's in the Twins section. If you want to get it out in one piece, do this. If took me 2 hours just to get it out, though.
Remove the seat, gas tank, carbs, carb boots, front sprocket cover with clutch cable, side covers, electronics plate, battery, starter motor cover, rear inner fender, rear outer fender. Remove the bolts on the airbox and wiggle it out.
If you don't want to keep the airbox, then just cut it in half.

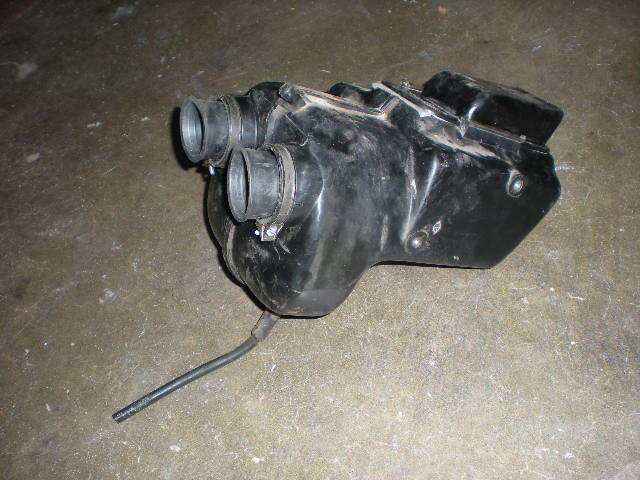
Try to flip it sideways, like this.

Out in one piece .
.

Did you get some pod filters or something?Last edited by Guest; 11-10-2010, 06:16 PM.
Comment
-
 CycloneGS
Oh yeah, I assumed everyone has a 450.
Nice pictures. Looks like I have to take out a lot more...
Im just trying to get it all apart so I can repaint and clean up the frame and whatnot.
2 hours sounds rough. Maybe I could swap the airbox for pods and rejet the carbs in the same time.
Im torn between keeping it stock and going with pods. What are the pros to pods?
Comment
-
You say you are taking it out so you can clean and repaint?
That makes it easier.
Remove the engine, the airbox will slide right out.
Advantages to pods?
That's easy, too.
- You get to spend a LOT of time working on your bike.
- You get to spend a LOT of money on jetting components, then more components when you find it's still not quite right.
- You get to experience the fun of losing power when you hit high turbulence (like when you are passing a truck)
- You might have problems if they get wet in the rain
- You add some noise to the operation of the bike
- You might get an increase in MPG (once it's all sorted out)
- You get to clean and oil TWO filters every so often, and hope you got the right amount of oil on there, or you will be chasing your jetting again
(That's if you get the good filters. If you get the cheap ones, you just get new filters, as they don't get cleaned and/or oiled.)
There might be some disadvantages, too.
.sigpic
mine: 2000 Honda GoldWing GL1500SE and 1980 GS850G'K' "Junior"
hers: 1982 GS850GL - "Angel" and 1969 Suzuki T250 Scrambler
#1 son: 1986 Yamaha Venture Royale 1300 and 1982 GS650GL "Rat Bagger"
#2 son: 1980 GS1000G
Family Portrait
Siblings and Spouses
Mom's first ride
Want a copy of my valve adjust spreadsheet for your 2-valve per cylinder engine? Send me an e-mail request (not a PM)
(Click on my username in the upper-left corner for e-mail info.)
Comment
-
 CycloneGS
Right on Steve. I have heard that the pods do nothing in terms of performance, couple this with the pain of rejetting and its not worth it to me. Its a 450 and will never be a monster.
Taking the engine out should be fun... im sure the exhaust is rusted on and none of the mounting bolts will want to come out.
Thanks again.
Comment
-
Forum LongTimerCharter Member
GSResource Superstar
Past Site Supporter- May 2002
- 44238
- Brooksville Fl.
All you have to do is take off the right side cover, remove the carbs, take the battery out and remove the battery box. The airbox drops down, then can be tilted forward at the top, the botton dropped rearwards and then rotate it
90 deg clockwise and it slides out through the opening that was covered by the right side cover. It takes me 30 mins tops, to pull everything off and have the airbox out and on the bench. 81 GS450L
EarlAll the robots copy robots.
Komorebi-The light filtering through the trees.
You are free to choose, but you are not free from the consequences of your choices.
Comment
-
 Briars
I am in process of a carburetor overhaul and today inspected my air box connectors. I think on disassembly one of the inner sleeves was over the carb and the other was just pushed back behind it. As further evidence it was not on correctly I also noticed one of the clamps was bottomed out and the other was not.
So in the last picture on post #4 do those inner tubes go onto the carburetor then the box is slid up and clamped over them?
Also is there any orientation to how they affix? I ask because when I rotated them within the box I noticed they are somewhat offset and as you rotate them they angle slightly.
I want to minimize any air leakage at those points. I was thinking about wrapping them with electrical tape or something of the sort to take up the slack and create a good seal.
Has anyone got any tricks to make sure the seal is complete?
The stock air box seems to be quite a piece of junk. But to save money and hassle I still want to use it.
All of that said, I am still considering pods. Has anyone on here re-jetted a 250 or any of the twins with stock pipes and pods only? I would be interested in what size jets you had stock, what you ended up using and if you had to shim the stock needle.
Comment
-
 DanTheMan
Yes, the orientation of the airbox boots matters. You need to take a good look at the carbs, think the left one is angled to the left and the right one to the right (my 850's outer carbs are like that).Originally posted by Briars View PostI am in process of a carburetor overhaul and today inspected my air box connectors. I think on disassembly one of the inner sleeves was over the carb and the other was just pushed back behind it. As further evidence it was not on correctly I also noticed one of the clamps was bottomed out and the other was not.
So in the last picture on post #4 do those inner tubes go onto the carburetor then the box is slid up and clamped over them?
Also is there any orientation to how they affix? I ask because when I rotated them within the box I noticed they are somewhat offset and as you rotate them they angle slightly.
I want to minimize any air leakage at those points. I was thinking about wrapping them with electrical tape or something of the sort to take up the slack and create a good seal.
Has anyone got any tricks to make sure the seal is complete?
The stock air box seems to be quite a piece of junk. But to save money and hassle I still want to use it.
All of that said, I am still considering pods. Has anyone on here re-jetted a 250 or any of the twins with stock pipes and pods only? I would be interested in what size jets you had stock, what you ended up using and if you had to shim the stock needle.
No electrical tape on fuel products, it's useless. All it'll do is get slimey and gooey from the fumes and you'll have to clean all that cr@p up to seal it properly. If the airbox boots are hardened and you doubt their sealing ability, buy new ones, they're not all that expensive.
Comment
-
 Briars
The front boots that go to the head are ok. The ones in the box are very hard I cant even figure out how to get them out. I will go to bike bandit and see if they have them as an oem item.
Edit. They "hose outlets" air available for 8.90 on part shark. Should the ones in the box just pull out from the front? I cannot see any way to remove the wire screen to get them out via the air filter cap.Last edited by Guest; 02-01-2011, 03:40 PM.
Comment
-
 DanTheMan
Those ones in the airbox are the ones you need(they're cheaper than the manifold boots too). I think bikebandit has them, if not I think I bought mine from Z-1. There may be a circular split metal flat spring inside which make them very difficult to pull out of the airbox. You'll have to use a flat bladed screw driver to compress it a little and then pop it out. The boots will still be hard to remove due to the hardened rubber, but they will come out.
Comment
-
 Briars
Thanks Dan, I will add them to my order list, which keeps getting bigger. May need to hold out for my tax refund to place the order! LOL
Comment
-
 Kitten Tooth
Iknow i sounds bad, but i honestly had to remove the engine on my GS300L to get the damn thing out. Then again, i was kind of a noob so you might have better luck then me.
Comment
.png)
Comment