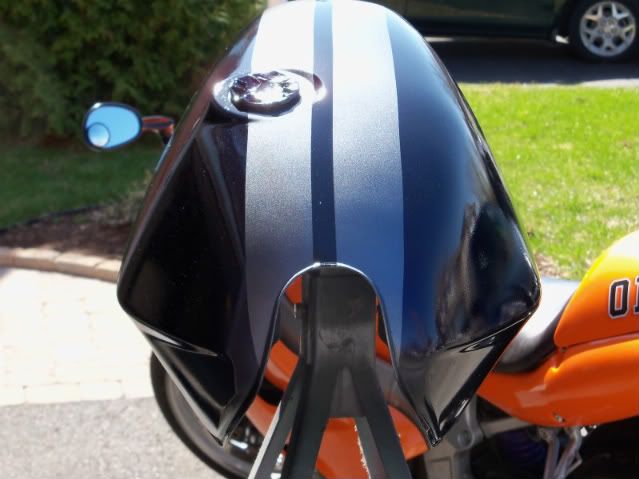
Very nice paint. My favourite colour combo. You did a really nice job with it.
I cleared mine today and lets just say it didn't come out anywhere near that nice. I took it really slow and built up the coats ( maybe 6 over 2 hours). It came out kind of pebbly in spots and not really smooth. I will try and compound it tomorrow but I'm not at all happy with it.
I don't know why this has been so difficult. I've painted and cleared 4 previous bikes and never ran into this much difficulty. I'm kind of at a loss to understand what the problem really is. Perhaps its the gun. Maybe the wrong needle?
Sorry to hijack your post.
Good work sir and thanks for sharing.
Spyug
-
 Guest replied
 -
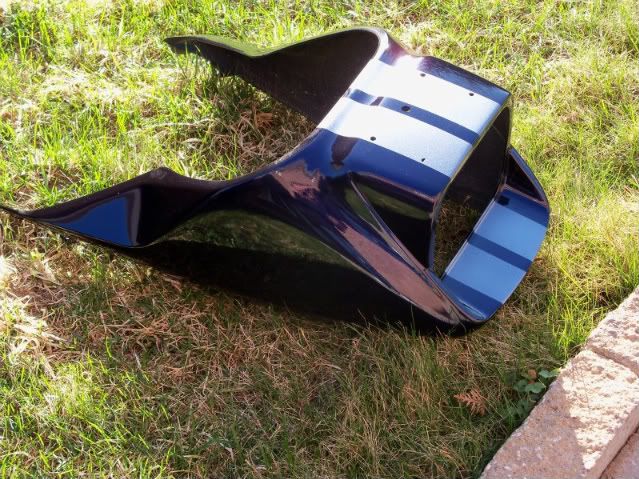
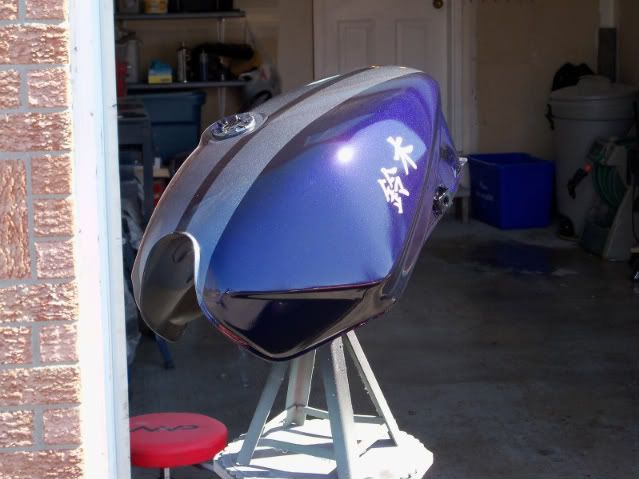
Guest repliedHere is the nose:
Leave a comment:
-
Guest repliedWell, I have not posted in this rebuild for a little bit but I am still working away at the bike. I had to take a mandatory break in March in Tampa . And then get my Triumph going for the summer.
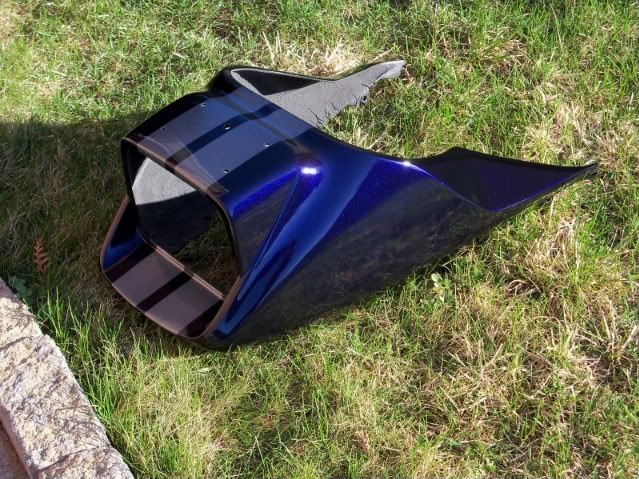
Anyways, here is the tank as it sits right now. I just cleared today. I still need to cut it as I have some orange peel going on.
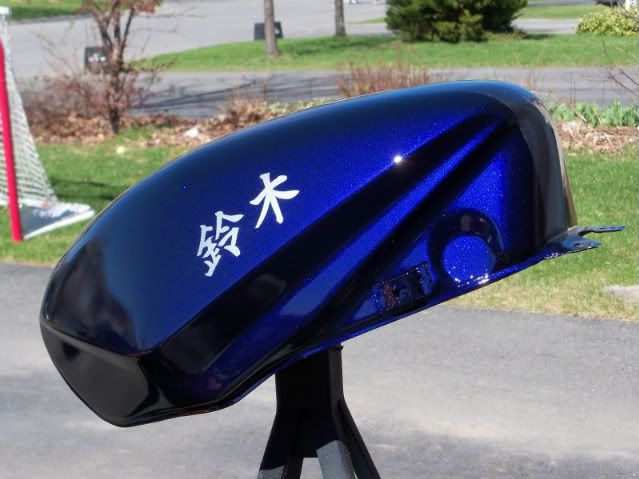
I used auto air colors which is a water base automotive paint. The base coat is black. Then spray with Gem Sapphire which is a pearl paint that shifts color from black to blue but it also shift to purple.
It is a little tricky to shoot and time consuming when compare to euro's because of drying time but there is no re-coat window which is nice. And it is fairly safe to shoot in your basement. Still wear a mask but you won't die if you forget nor will your pets.
The clear is Nason 496 and shot with a home depot 'special' gun with a 1.4 tip.
I will post the rest of the body work when they are dry.Leave a comment:
-
-
I have used this for the very bottoms (near the 4:1 collector) of the pipe, but anything higher up beyond the bottom bends will not work.
http://www.harborfreight.com/cpi/cta...emnumber=37352Leave a comment:
-
Leave a comment:
-
Guest repliedPulling the dent it is not really hard but at the same time is almost an art. I am taking a local shop course and have an intructor who showing me and another student how to use this. He is the one that did the dent in which it looks like none was there. The dent I worked on had a crease and is harder to work then one without the crease.
Here is what the tool looks like.

What I was shown was: you take your stud and weld it to the 'high point' of the dent around the outside which is just inside the bend of the metal. You hold the welding switch for a quick 1/4 second or less and it should be welded on.
Here is a picture of it done on a car.
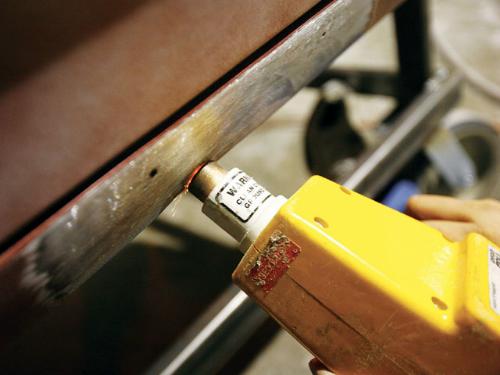

Place your slide hammer over the stud and tighten. Then slide it up with a little force. To much force can pull the stud off , tear a hole in the tank or you can cause a high point which you will have to fix.
Next you take another stud and pick a spot near the first stud but far enough away. I was about 1/2 an inch away and repent the process. Do this as your are working your way around the dent. I did not make my way all around but about 1/2 around the dent.
Then start welding in between the previous studs at the low point and repeat the process with the slide hammer. You just keep doing this until the dent is gone or swallow enough for a little filler.
Once you are happy with it. Then you can get a die grinder and grind it down a little as there will left overs from the studs.
If you do put a small hole in the tank, you can use the stud and welded it with the gun and grinder it down. Also, avoid place a stud over same spot as before if you are working the dent up. The metal is weaker at that point and you can rip a hole. I did it but my instructor mig welded the hole.
Now you can get high points if you start at the low spot of the dent or use to much force. I was lucky not to get any high point. However, my class mate did. The fix was weld a stud beside the high point place the slide hammer over it and pull up on the handle it self. Then take a body hammer (with the pick) and lightly tap the high point back down while keep tension on the slide hammer in the opposite direction.
I wish I had taken pictures of the process on my tank but I kept forgetting my camera.
I had a few small dent about the size of a dime or nickle and they came out with one stud in the center. Can't even tell they were there.
I am by no means and expert as this was my first time with this tool so if anyone else knows better chime in. I do not get insulted easily
Last edited by Guest; 02-09-2010, 04:23 PM.Leave a comment:
-
Nice work, can you describe the "stud welder" process. I know what a slide hammer is , but not sure if you are spot welding something to the outside or going through the tank. I would have thought that using a slide hammer on a single attachment point would cause a volcano type high spot or worse just a rip in the tank with the bulk of the deformity remaining.
Leave a comment:
-
Guest repliedThis is not likely to affect your build, just a little info for ya. Usually the bearings sold on ebay and other auction sites have a plastic cage inside to keep the ball bearings equidistance apart, much cheaper to manufacture. Most true automotive bearings use a metal cage inside, hence the additional cost per bearing.
Just something to keep an eye on, possible wear issues, but for that price, it's not gonna kill ya to just replace a bearing that may be a bit noisy.
I am really enjoying the build, it looks like she will be a monster when completed. Great Job!Leave a comment:
-
Guest repliedSlowly plugging away at the bike. I have the bearings in the wheels and they are ready for whatever.
I have stripped most of the paint off of the body work and fixed a few dents in the tank.
Here is the main dent I had to removed. It was take before removing the paint.

As you can see it has a crease it the dent which makes it harder to remove. Especially, if it is your first time using a stud welder and slide hammer. There was another major dent that was cover with bondo on the other which came out once the tank was stripped.
Here is the ceased dent almost pulled out.

I did do a little more work with the stud welder and put a hole through the tank. It was fix with a mig welder by a fried for free.
Here it is with the light filler applied and sanded down to 100 grade sand paper. I still have more sanding to do.

Now here is the another dent on the other side of the tank with it pulled out already.

Leave a comment:
-
Guest repliedHey spyug,
I wanted the frame bracing because the plan was to drop it a gsxr1100 or gsx1100f motor but I got the gs1100 motor instead. I am also upgrading the front and rear suspension.
This bike will also see the track from time to time.
I do not think there is anything inherently wrong with the frame. It was just a choice.
This is a good read on frame bracing:
Leave a comment:
-
Guest repliedNow my second mistake. Well, not really my mistake but....
I got the frame braced as seen in previous post. I tested fitted the tank w/o an issue. So yesterday, I decide to trail fit the CBR triple trees to figure out steering stops (frame or tree).
So, I had the triple on with one fork leg and decided to try the tank again but it hit the tree. Strange I thought...I looked into some more as this should not happen. I looked under the tank and realized that I have been 'mounting' the tank like a modern perimeter frame as most of my recent bikes have been 'newer' sport bikes. Basically, I have been dropping the tank on top on everything and not sliding it on the tank mounts on the upper tube.
So, I fitted the tank as it should and out came the issue. The tank hit the gussets for the frame. Now the welder did not follow my instructions to a "T" and I had cut out card board taped along the center of the tubing. When I picked up the frame, I did point this out but did not think it was a big issue.
I had two choices. Bring it back to get him to fix it or shape the tank.
Anyways, out came the heat gun out and some tool.

I did this for both sides.
And the results were positive. It now fits with minimal modification to the tank. There is roughly 3-5 mm space on both sides just enough room to place some sort of foam padding to prevent the metal from rubbing.
Right side:

Left side

So, the moral of this is, be there when the welder welds them in place. I was not there for the frame gussets.Leave a comment:
.png)
Leave a comment: