-
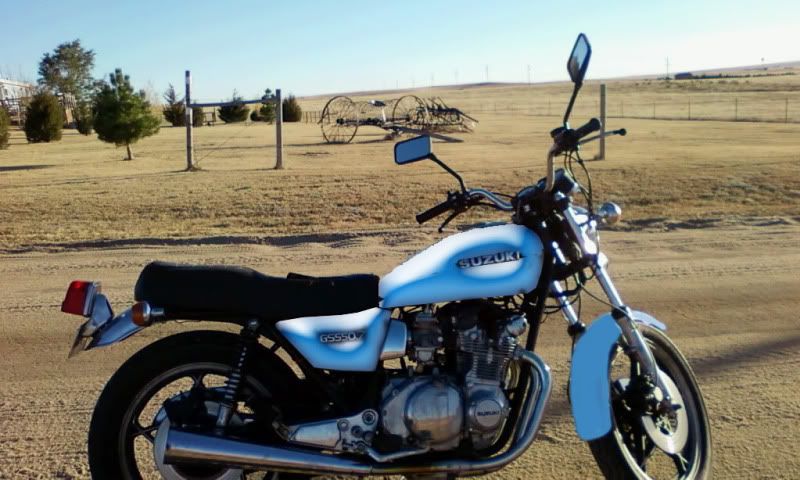
Thanks Ranger and Pete. I think my daughter has picked out my color choice already for me since she grabbed the can I'm using on the carbs (carbs will match tank and side covers). I'll have a picture of them up by this weekend. -
Nice progress Cowboy! Will be nice to see it in one piece again.
One thing doing it this way... you have more time to ponder and decide on an awesome paint scheme
Leave a comment:
-
 Guest repliedIf you have any paint ideas that you want done, just find a picture of the color and ill do it up for you with realistic shadows and lighting.
Leave a comment:
-
Guest repliedHere what I did to become tired right now to sleep. I did it fast, didnt adjust lighting to make it look in the original enviornment or any other realistic effects.
Leave a comment:
-
Well, since I ran into the tax issue I now have, I decided I'd better get my bike running again sooner rather than later. Paying 20 dollars a week in gas on the bike is a heck of a lot better than over 100 for my truck so it will free up some money. Therefore, I ordered the sprockets and chain and I'll wait on my fork springs and shocks until another payday or two as I can while also paying the taxman. Also, I sped up on my painting jobs and finished doing some things.
Here are the bowls and footpeg brackets after painting (I have to touch up a spot on each bowl that I missed):

The footpeg mounts are also done and have new rubber inserts:

The swingarm is painted and waiting for a free grease nipple sample to get here hopefully next week:

And finally I started disassembling the carbs so I can paint the tops and bodies.

I intend to get the engine covers and carbs painted now and will wait to do my tank and side covers later when I have the free money. I at least want to get back on the road again though to save a little money. I know my springs and shocks need replacing but they'll do me for now. Hopefully I can come up with the money before Brown County to get them done though.
Thanks for looking. I'll have more pictures this weekend as I finish cleaning up the fuse block area and painting. I should be able to fire up the bike by next weekend.
Leave a comment:
-
Guest repliedWay to go Cowboy nice to see your making good progress. I have been stuck with the spend time with the family block this last week. I enjoy my time with them but man I miss my time. LoL. Keep it up bro.Leave a comment:
-
Got a little bit of work done today. I put in the new valve cover bolts in that my girlfriend bought for me and installed the air box. I didn't take pics of the valve cover today nor of the new fuse block I put on since I wasn't totally ready for that but here's what I did do.
As I said earlier, I broke the mounting bracket for the air box so I bought a p-clamp (Thanks Steve) and a small mending brace to connect it that way.
Do you think it will be a problem to attach the two grounding straps to the p-clamp bolt? They were originally attached to the mounting bracket one.

Once that was done, the air box still moved way too much for me so I decided to screw it in from the battery box as well.


The battery and air filter both fit in just fine without any changes so I think it will be okay. I will try to find a way to weld on a new bracket later but at least this gets me going.
Also found a company who is sending me a 12mm grease fitting for free
 . They only sell in large groups to other companies but because they had one I should see it next week I hope. I already drilled out the hole and tapped it to a 12mm X 1.50 which is the size of the fitting they said they have.
Leave a comment:
-
Aaah I knew I'd seen a project thread of yours somewhere! Good to see you're on your way again
And yeah, I hear ya'... some days you wonder why you ever started doing stuff coz it all just goes wrong...
The good side of that is there are other days where everything works and everything you do is just so easy you wonder why you ever got frustrated before...Leave a comment:
-
The wind died down for a little while this afternoon so I thought I might try to do some work. So I go to put my painted valve cover on and realize the bolts look crappy so I didn't bolt it on yet. Then I tried to put the air box on and didn't like how it was going back together because the bracket that holds it to the bike frame was bent. Tried to fix it but ended up breaking it off. Figured I'd JB Weld a washer to what was left of it and that won't work because it's still too cold! Oh well, next week maybe.
Phone isn't cooperating right now when sending my picture to my email so I'll try to get it up later.
Here's the picture of the frame mount.

Thanks.Last edited by cowboyup3371; 02-27-2011, 11:00 PM.Leave a comment:
-
From what I am reading, neither of these two products stop the rust that was already in place from coming back again. Is that correct or am I missing something else when I read the pages. The bottoms of the swingarm and air box have some rust spots on them so, based on what I was told, I wanted to put a base coat down to protect them and then finish with what I'm using elsewhere. Is that still possible with these?Leave a comment:
-
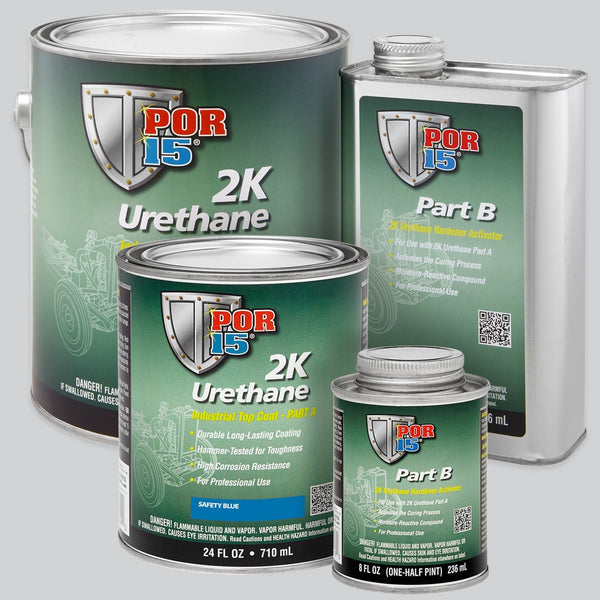
I would shy away from that stuff and instead use this. The problem is the one above is UV sensitive and will dull. So it has to be top coated which means sanding and por-15 is hard so it is a BIACH. I had sections strip off of my frame because it would not adhere to the slick surface.Originally posted by cowboyup3371 View Post
HARD NOSE is super hard and chem resistant and sprays awsome. It looks like powder coat.
For really nice finishes I even top coat it with Clear; they are compatiable paint types.
Runs can take a long time to dry(if thick) . You could use a safety razor to slice off the most of it , let it dry some more and sand. Else strip it all off again.
Most sanding should be pretty fine wet sand with say 240 grit, 400 is going to be just too fine to get a good bite with the Por-15 stuffLeave a comment:
-
Jim,
I'm looking at using this: http://www.por15.com/POR-15/productinfo/1GB/ with the Prep and Ready stuff then paint over with the same VHT Roll Bar and Chassis Paint I used today.
On the bar that runs from the swingarm to the rear brake, I had some runs where I have bulbs at the end of each run. How do I go about sanding them out? Do I dry or wet sand it and then do I have to repaint it?Leave a comment:
-
If you have some type of toaster oven, alot of guys bake the parts and it makes the rattle can paint hard. Not sure I would worry about clear coating all that stuff. Engine parts will get hot enough without baking.
It is primarily a gas tank that needs clear as it is almost assured you will get gas on it. Pictures are a little crappy but what I can tell , it all looks real good.
What Por-15 product you looking to use?Leave a comment:
-
So will i need to clearcoat everything I've done today?
I'll look at the Duplicolor for the rest of it Bill thank you. I'm using the VHT paint right now.Leave a comment:
.png "Powered by vBulletin")
Required reading for all forum users!!!
Welcome!
Register to access the full functionality of the GSResources forum. Until you register and activate your account you will not have full forum access, nor will you be able to post or reply to messages.A note to new registrants...
All new forum registrations must be activated via email before you have full access to the forum.A Special Note about Email accounts!
DO NOT USE sbcglobal.net, att.net, bellsouth.net or email.com email addresses when registering for the forum! Email that our system sends out to these email servers is treated as SPAM and you will never receive your activation email, or any other email that our system may send out. Use an email address from gmail.com or some other email server.A note to old forum members...
I receive numerous requests from people who can no longer log in because their accounts were deleted. As mentioned in the forum FAQ, user accounts are deleted if you haven't logged in for the past 6 months. If you can't log in, then create a new forum account. If you don't get an error message, then check your email account for an activation message. If you get a message stating that the email address is already in use, then your account still exists so follow the instructions in the forum FAQ for resetting your password.Have you forgotten your password or have a new email address? Then read the forum FAQ for details on how to reset it.
Any email requests for "can't log in anymore" problems or "lost my password" problems will be deleted. Read the forum FAQ and follow the instructions there - that's what we have one for...
New users should be sure to read the FAQ as well as the posts in the Announcements forum. This will answer many of the questions you may have about how this forum works.
Before posting questions in the forums be sure to use the forum search function!!! Odds are your question has already been asked and answered before. And when posting, please make sure that you post to the correct forum.
Finally, be sure to check out BassCliff's website here. He has useful information that can't be found on this site. His welcome page containing useful GS information can be found here. Be sure to check it out!
If you are a returning visitor to the forum and can't log in using your old forum name and password, chances are your account is deleted. Just create a new forum account and you should be all set.
Leave a comment: