Announcement

Collapse
No announcement yet.

GS550T Rear brake

Collapse
X
 
  • Filter
  • Time
  • Show
Clear All
new posts

    GS550T Rear brake

    Hello all,

    I needed to get some advice from fellow GS riders concerning an issue with my bike that is beginning to drive me insane.

    To start things off, I own the 81 GS550T model. being the first bike i've ever owned I didn't want to spend too much so the bike is not in exactly the shape that I would want it to be to take it out on the main roads.
    Hopefully you folks can direct me in the right way in getting her all fixed up and road worthy.

    The front brakes are working quite good but the rear brakes are missing the pads and the cover that goes on the caliper once the pads are inserted (should be easy to fix). The main problem is that the seller gave me the brake pedal separate from the bike. The pedal shaft is absolutely rock solid and does not budge no matter that I do to get it off (needs to be replaced since the teeth are pretty messed up from the previous owner going to town on them. pic included.

    I have soaked the hell out of it with PB blaster and a bunch of other penetrating oils. I've also tried to heat it up using a handled propane torch. It still does not want to turn/come out.

    I'm at a loss right now...Not sure what else is left to do to take it off.
    If anyone has any suggestions let me know.does a mechanic shop have any tools that will take it out? also, is there any specific way i should apply the heat for it to work properly?

    Thank you and hope to hear from you.


    #2
    The cover of mine is also missing but I'm not that worried about it right now. You can get new pads at your local dealer and I would highly recommend you take that caliper apart, clean it up, and replace the pistons and seals. Personally, after taking the springs off of the back of it, I would use some PB Blaster and maybe a rubber mallet to help knock it backwards. The whole assembly will pull out from the inside of the frame.

    I would also take apart the rear master cylinder and clean/rebuild that while you are at it. Make sure you replace the older rubber hose with a stainless steel one. There's a great thread in the popular technical info or something liike that (by Nessissm) about replacing them with do it yourself lines from Earls. They work fantastic.
    Cowboy Up or Quit. - Run Free Lou and Rest in Peace

    1981 GS550T - My First
    1981 GS550L - My Eldest Daughter's - Now Sold
    2007 GSF1250SA Bandit - My touring bike

    Sit tall in the saddle Hold your head up high
    Keep your eyes fixed where the trail meets the sky and live like you ain't afraid to die
    and don't be scared, just enjoy your ride - Chris Ledoux, "The Ride"

    Comment


      #3
      Thank you for the reply cowboyup.

      I plan to completely replace the caliper (probably off ebay) but only once I can take out the pedal shaft.
      I've tried the rubber mallet/hammer extensively and it actually has messed up the mallet without moving at all. I've also tried putting a block of wood on it and hammer the life out of it and still doesn't budge.

      I'm just curious if a professional shop has any special tool that could hammer it out with some superhuman force, because frankly that's what it seems is needed to get the sucker out?

      Comment


        #4
        You shouldn't need to replace the caliper itself unless it is physically damaged at all or just wanting a different brake setup altogether.

        But honestly, it is a straight shaft sitting inside the frame and there won't be a special tool to break it free. Somehow, it sounds like something rusted inside so I'd keep laying on the PB Blaster and some brute force to push it back.

        I assume you looked on the inside of that part of the frame and nothing is blocking it correct? Not to sound condescending but...
        Cowboy Up or Quit. - Run Free Lou and Rest in Peace

        1981 GS550T - My First
        1981 GS550L - My Eldest Daughter's - Now Sold
        2007 GSF1250SA Bandit - My touring bike

        Sit tall in the saddle Hold your head up high
        Keep your eyes fixed where the trail meets the sky and live like you ain't afraid to die
        and don't be scared, just enjoy your ride - Chris Ledoux, "The Ride"

        Comment


          #5
          Yes I completely took off the part that runs to the reservoir and made sure it's free to move (if it wants to that is...)
          Took a couple of more pictures that show the condition of the shaft and the surrounding frame, I guess the poor thing wasn't garaged much. I assume there is some serious rust in there.

          Guess I'll have to hit the gym some more as my muscles have proven far inferior to the binding powers of metal rust.

          on a side note, Is there a guide on changing the chain? didn't find one on bikecliff's page


          Comment


            #6
            Don't just clean out the reservoir but the entire master cylinder. An extremely tiny hole in mine caused my rear brakes to lock up a few weeks ago. Fortunately I was already stopping by the time I realized it but it could have been disastrous. Do a thorough cleaning of it!!!

            I would just seriously soak that thing for quite awhile if at all possible. Maybe get an assistant to help turn and twist it while you are also hitting it from the side? If not, maybe someone else has a better idea for you.

            As far as the chain, just loosen up your adjustment screws at the rear sides of the wheel. It will loosen up the chain enough to slip it off the sprocket and then once you take the rear wheel off go from there. Whatever you do though make sure you replace both sprockets at the same time.

            Do you have a Clymers or factory manual yet?
            Cowboy Up or Quit. - Run Free Lou and Rest in Peace

            1981 GS550T - My First
            1981 GS550L - My Eldest Daughter's - Now Sold
            2007 GSF1250SA Bandit - My touring bike

            Sit tall in the saddle Hold your head up high
            Keep your eyes fixed where the trail meets the sky and live like you ain't afraid to die
            and don't be scared, just enjoy your ride - Chris Ledoux, "The Ride"

            Comment


              #7
              I have a can of brake cleaner spray from when I replaced my car's pads, can that be used to flush out the junk out of the brake system or is there a special liquid just for that job?

              and no, the seller didn't give me a manual so I've just been going through basscliff's collection as my guide.

              Now it's starting to seem clear why the bike was so "affordable". I'm beginning to think that I might have to buy new tires and clean the carbs too, which I am dreading.

              p.s. thank you so much for the prompt replies cowboy!

              Comment


                #8
                Yes the regular can of brake cleaner will do the job but you will want to make sure you take the MC completely apart and clean EVERYTHING. Look at the piston and cup set and make sure the seals and spring are still good. Take a single wire strand off an 18 gauge wire (what I found that worked) and push it through the itty bitty port on the side of the MC. If you don't you'll experience the lock up that I said happened to me.

                If this bike is all that new to you, then you need to change out those tires, especially since your life is riding on them. Mine were almost 10 years old but looked great to me when I replaced them.

                Also, you definitely want to clean the carbs; not just spray them down but take them apart and soak each one for 24 hours. Also get yourself new orings from www.cycleorings.com (Robert Barr is a member here) and not the kits you buy from the dealer. I wish I had done that but it still worked out for me.

                Go back out to Basscliff's site and read up on the procedures for both. They are very easy and you can even hit some of my previous posts since I asked alot of those questions.

                Either way, you'll love it when you are done. I finally got my bike on the road a few weeks ago after alot of irritation and hard work. I've enjoyed it and can't wait for winter to go already so I can get some more rides in.
                Cowboy Up or Quit. - Run Free Lou and Rest in Peace

                1981 GS550T - My First
                1981 GS550L - My Eldest Daughter's - Now Sold
                2007 GSF1250SA Bandit - My touring bike

                Sit tall in the saddle Hold your head up high
                Keep your eyes fixed where the trail meets the sky and live like you ain't afraid to die
                and don't be scared, just enjoy your ride - Chris Ledoux, "The Ride"

                Comment


                  #9


                  If it were me I would file the circumference of the outer end of the shaft down (the part that is damaged from hammering it), so the brake lever can be replaced on it. I would remove the silencer to give more access. Then with the brake lever tightened up as tight as possible I would use that as leverage to try and twist the shaft and get some movement in there.

                  Once you get a little movement, with more spray and moving back and forth you will eventually get it out.

                  Keep trying, don't give up. If the worst comes to the worst then I would drill it out starting with a pilot drill and going larger until I had a 1/2" hole and get a small dremel in there and grind to the edge of the circumference of the shaft and then it would come out. But you would have to replace the part.

                  Comment


                    #10
                    As mentioned that is just a plain shaft inserted through a tube so the only thing holding it would be rust and "gunge" (love that word). Heat is the only sure way of breaking its hold. You want to be heating the frame tube and you may need to get it to "Cherry" so you'll be burning off paint.

                    I would attache vice grips to the back side of the pivot and try and turn them as the tube heats up. Torque it loose as also mentioned and pop it out with a sharp hammer blow.

                    It will come out unless it was intentionally welded in place.

                    Keep at it. When it is out, you will clean up the shaft but if its too chewed you may wish to replace it. When reassembling, don't be stingy on the lube.

                    Cheers,
                    spyug

                    Comment


                      #11
                      Originally posted by spyug View Post
                      don't be stingy on the lube.
                      Words to live by.

                      Comment


                        #12
                        I appreciate the ideas everyone!

                        should have mentioned that when I heated it, I only did it for about 1 min so I suppose there wasn't enough time/heat for the rusty bonds to break. I'll give it another try with the propane torch (this time for a good 4-5 mins) and see if that does it.

                        If not i'll file it down and attach the pedal as Don suggested and go all out with the torch blazing.

                        wish me luck

                        Comment


                          #13
                          Originally posted by mobius View Post
                          I appreciate the ideas everyone!

                          should have mentioned that when I heated it, I only did it for about 1 min so I suppose there wasn't enough time/heat for the rusty bonds to break. I'll give it another try with the propane torch (this time for a good 4-5 mins) and see if that does it.

                          If not i'll file it down and attach the pedal as Don suggested and go all out with the torch blazing.

                          wish me luck
                          Have you bent the frame by any chance, it looks like it in the photo, but is might just be the angle of the camera.

                          Comment


                            #14
                            Originally posted by Suzuki_Don View Post
                            Have you bent the frame by any chance, it looks like it in the photo, but is might just be the angle of the camera.
                            Well now that you mention it, it does seem a bit crooked. However, I compared it with a picture I had from the day I brought her home and it seems about the same to me...so I doubt the bending is due to my rubber mallet rage

                            My only ride on her was for less than a mile because I don't feel safe riding it with the ancient chain/non functional rear brakes/stuttering while moving as well as it struggling to stay on even on full choke.

                            It's starting to get a bit depressing thinking I probably bit more than i could chew; being so naive to think I could fix it up as my first bike (didn't know any experienced rider to come along for the purchase/inspection). Oh well ...at least it didn't put that big of a hole in my wallet.

                            Comment


                              #15
                              Originally posted by mobius View Post
                              It's starting to get a bit depressing thinking I probably bit more than i could chew;
                              C'mon Mobius don't be like that, we've all had problems that we thought were insurmountable and felt out of our depth. I am sure you can work through this. Remember: ONE STEP AT A TIME.


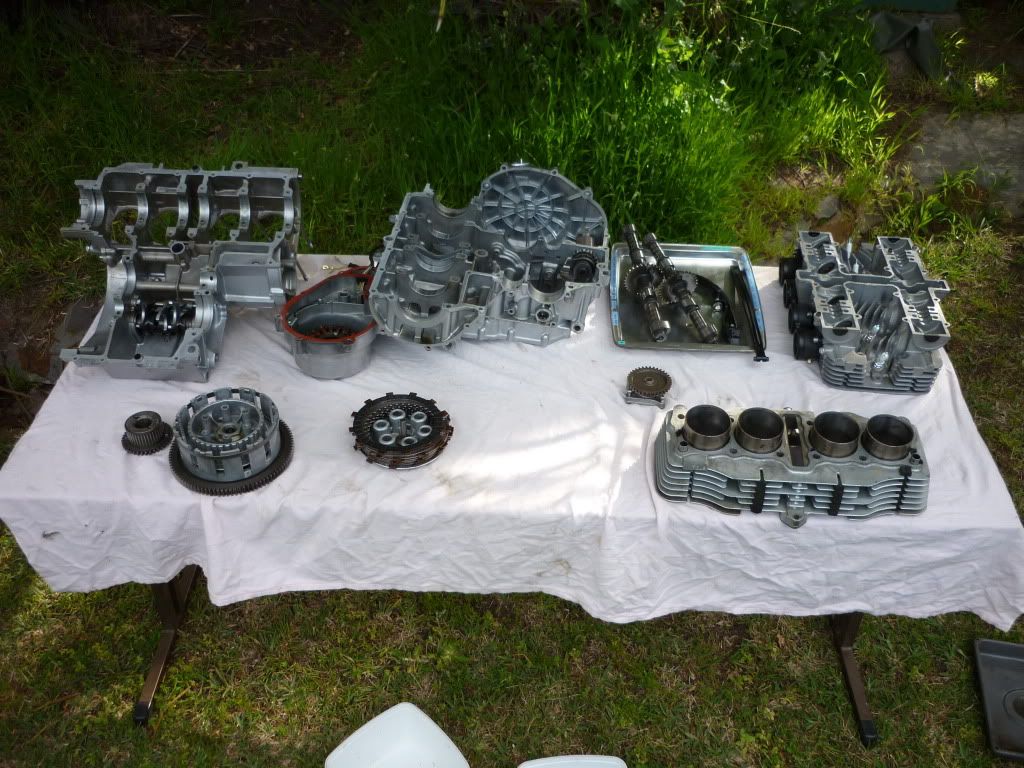
                              This was my engine three weeks ago. It's back together now and in the frame, should be on the road by the weekend. ALL THINGS ARE POSSIBLE.


                              There could be someone who lives not far from you that can give you some help.

                              There are good people on this site to help you. You just need to keep feeding us information so we can give you the help you need. And you will be learning heaps all the time and before long you will be the experienced one.

                              Head up, keep at it.
                              Last edited by Guest; 10-26-2010, 05:03 AM.

                              Comment

                              Working...
                              X