.png "Powered by vBulletin")
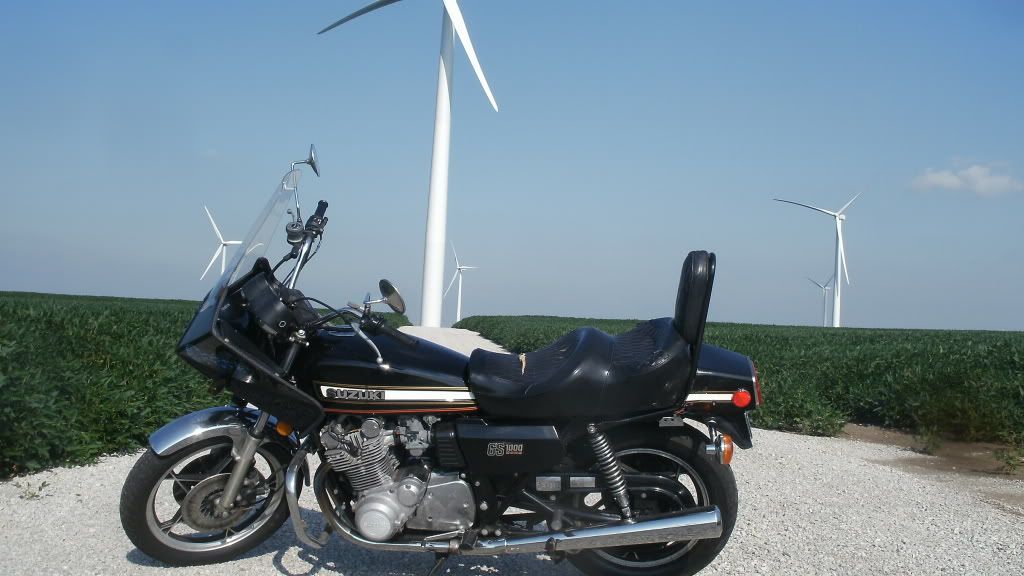
I was have look at the pictoial on m break and i have a question. My bike is a 78 gs 1000. How different is the pictoral from mine and how can i tell if i have a Cv type carb?
-
-
The CV carb bank has a rod at the front of the rack from the throttle cable which operates theottle butterflys near the boots at the head. It has a shiny dound cap on top with four screws holding it on.
The slide carb has the throttle rod near the top and there are small caps on top the same color as the rest of the carb. I would syggest that you become familliar with parts fitch at the various parts sellers.

You should have this.sigpic Too old, too many bikes, too many cars, too many things
Comment
-
If you're only cleaning, carbs are super easy. You will begin to understand them very well just by disassembling them. I don't know about the cost of tools but all that stuff will run you way under 300.Originally posted by FreshmanJoe View Post
For carbs you'll want the O Ring Kit, Intake O Rings, and Hex Head screws, which will run like 40 dollars I think. Some people have had luck boiling carbs in lemon juice and other cheap cleaning techniques, I bought 30 dollar carb dump which is also really nasty to work with.
I think I spent 80 or 90 dollars on my carbs altogether because the fuel mixture screws were broken off into the carb body, I had to buy a 3 of them, and I also painted mine and rejetted for pods, but if you're keeping the stock air filter you won't need to buy new mains or reposition anything hopefully. You can definitely do it on the cheap.
My '78 GS750 had 35k miles and I had to replace 6 of 8 shims, which did me in about 30 bucks. The tool is like 15.
As long as you have some socket and combination wrenches and a screwdriver I don't see any reason you can't do this for well under 300 dollars.Comment
-
The 78 came with VM carbs, not CV. So unless a PO changed them out, you should have VM. Just download the tutorial and compare the pictures to your carbs.Comment
-
This! Visit the BikeCliff site. It's really easy, just follow the directions.Originally posted by koolaid_kid View PostComment
-
Yea i went to bassclifs site. Thats were i got the pictorial, owners, and service manual. I was just confused if i could use the pictorial cause in one of the first slides it says it was for cv carbs on 1980 and newer. I think i'll use it as a guide not a bible. I'm studing the steoby step and service manual. I just want to understand how a carb works and whats what and why before i start. Just tring to be prepared so i don't make any newbie mistakes.
As for the $300. I want to take care of my carbs, adjust my valve clearance, check my points/ timing, install a helicoil on my oil pan so the strped out plug stops leakind, fix my turn signals, replace my front and rear pads, and replace the rear rotor for $300. Was curious if it all could be done on that budget with a guy who only knows what he's read here doing the work. I have a little help but it seems i'm doing bout everything and a year ago all i knew about bikes is how to be stupid with them. Thanks all for the help! I know i'll have a lot of questions as i do this.Comment
-
Oh and dan the man, i was think helicoil cause of bassclifs website. He has a tutorial on how to fix a striped out drain plug. I have the plug your talking about in there now and it still has a slow leak.Comment
-
You should also plan on going through and checking your electrical system , these ol girls are famous for having problems, but a little love to the connections can be the difference of burning up some components or not1984 GS1100GK newest addition to the heard
80 GS 1000gt- most favorite ride love this bike
1978 GS1000E- Known as "RoadKill" , Finished
83 gs750ed- first new purchase
85 EX500- vintage track weapon
1958Ducati 98 Tourismo
“Remember When in doubt use full throttle, It may not improve the situation ,but it will end the suspense ,
If it isn't going to make it faster or safer it isn't worth doingComment
-
You snagged the wrong tutorial. You want this one: http://members.dslextreme.com/users/...rb_rebuild.pdfComment
-
So i've read the pictorial and my service manual about a million times and i'm taking the carbs off tonight when i get off work. I feel good except one thing. How do i go about removing the airbox. Anyone know of any tricks? I've tried to do it yesterday and got so frustrated with it i ran out of time and had to go get my wife from work. Any tricks to it or do i have to wrestle with it.Comment
-
Test
Trying to figure out how to post pics
Comment
-
Yea! It worked!
A little while ago I read a post where someone posted a link on where to buy the tool needed to sync the carbs. I guess it was the one you guys recomended getting. anyone know what I'm talking about? Was going to order it today so I can sync my carbs when I'm done.
Was also going to buy the bath for the carbs today. There's a few options I found. What do you recommend. Will be running out to the parts store after I get them off the bike. Hopfully I'll have pics of my progress tonight.Last edited by Guest; 04-07-2012, 07:49 PM.Comment
-
Ah, that is known as a skunk. Very desirable by GS aficionados.
The Morgan Carb Tune is the favorite carb synch tool.
Got those carbs out yet?Comment
-
Moving slow
So I wrestled with the airbox longer than expected and came to the conclusion that I never want to mess with that pain in the a** thing again so I'm thinking pods are in my bikes future. Then I took pics studied what hooks up to what and got stuck on number 8.
8. Before you take the carbs off, loosen the bolt for the throttle shaft stopper plate. It can be very tight and more difficult to loosen when the carbs are off the bike. It’s between the #1 and #2 carb and fits in a groove in the throttle shaft to keep the shaft from moving side to side.
I can't find it/ don't know which one it is.
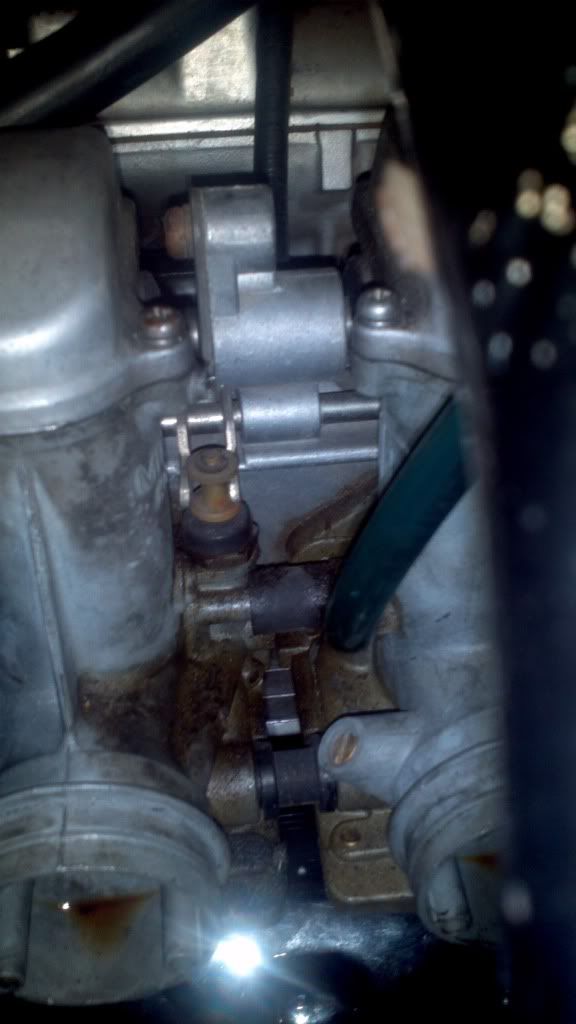
This is between 1 and 2. I don't see any sort of plate.
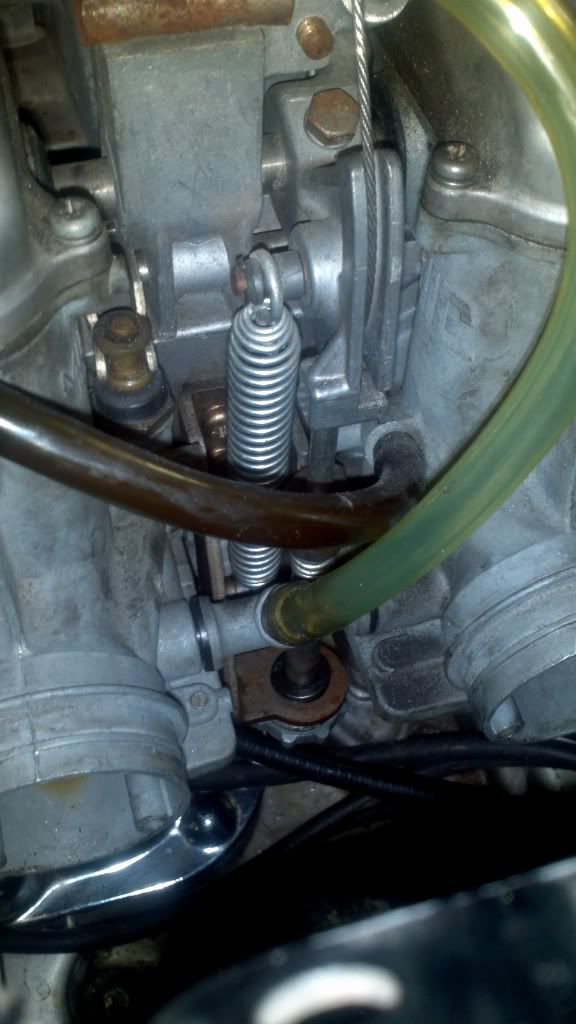
This is between 2 and 3. The throttle cable is here so isn't the throttle plate between these two. What's really getting me is I don't see a difference between what's between 1 and 2 vs 3 and 4. Anyone have a pic I can refer two?? Sorry for the trouble and thanks.Comment
-
I don't know the VM carbs, but I know this much:
There is a shaft that crosses between all 4 carbs. It keeps the slides synchronized. This plate is apparently placed there to prevent the shaft from moving side-to-side. Find where the shaft goes between carbs 1 & 2. The plate should be there.Comment
Comment