Announcement

Collapse
No announcement yet.

BanditRE's GS850

Collapse
X
 
  • Filter
  • Time
  • Show
Clear All
new posts

    #76
    Well, today was the day. Points checked and deemed pretty crappy but probably useable for its first start in 14 years. Timing checked visually, deemed good enough. Temporary gas tank hooked up. Turned on the fuel tap...........no gas spewing on the floor so the floats are ok. The Moment of Truth. Thumb the starter..........nothing. Crap. Panic, double check everything.......oh yeah, you got the pull the clutch in. Deep breath, thumb the starter, it turns, catches and dies. A few attempts, a few more tweaks, until.......


    Hopefully the video worked. The video that shows it firing up initially was too large to upload. It backfired through the carbs a few times, blew some smoke as I'd squirted oil down the carbs over the winter. After about 30 seconds of rough idle, it smoothed out and I set the idle back down to around 1100. Messed around with the air screws which were in a good place as it was. YEAH!


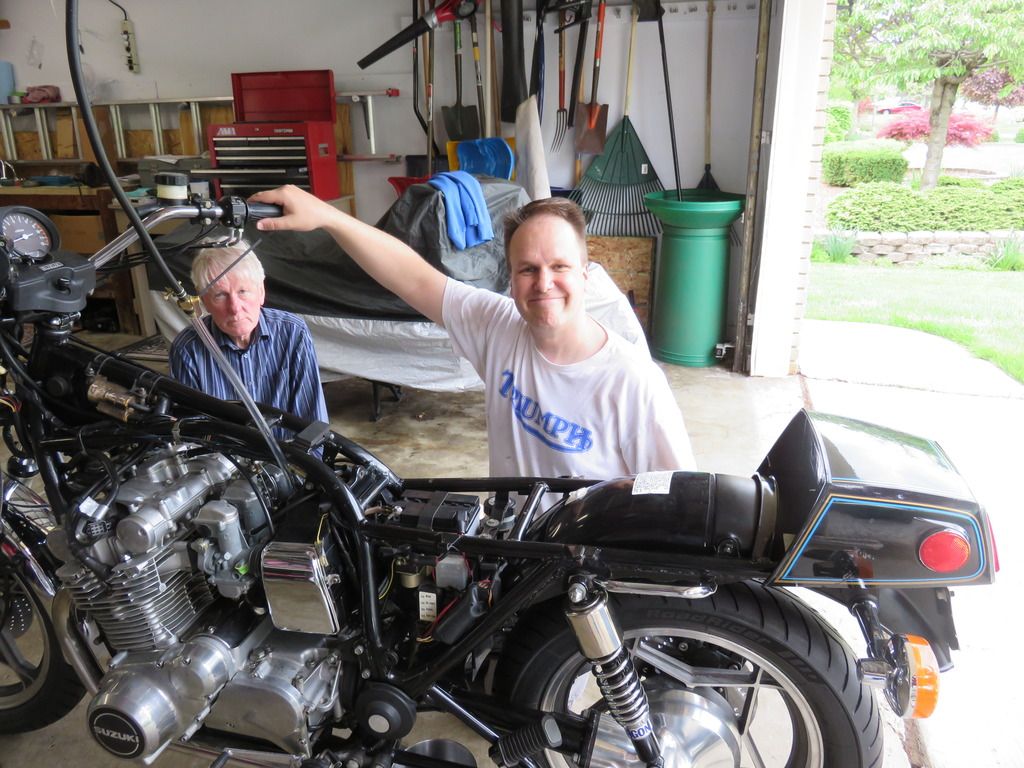
    Both of us have a moment......


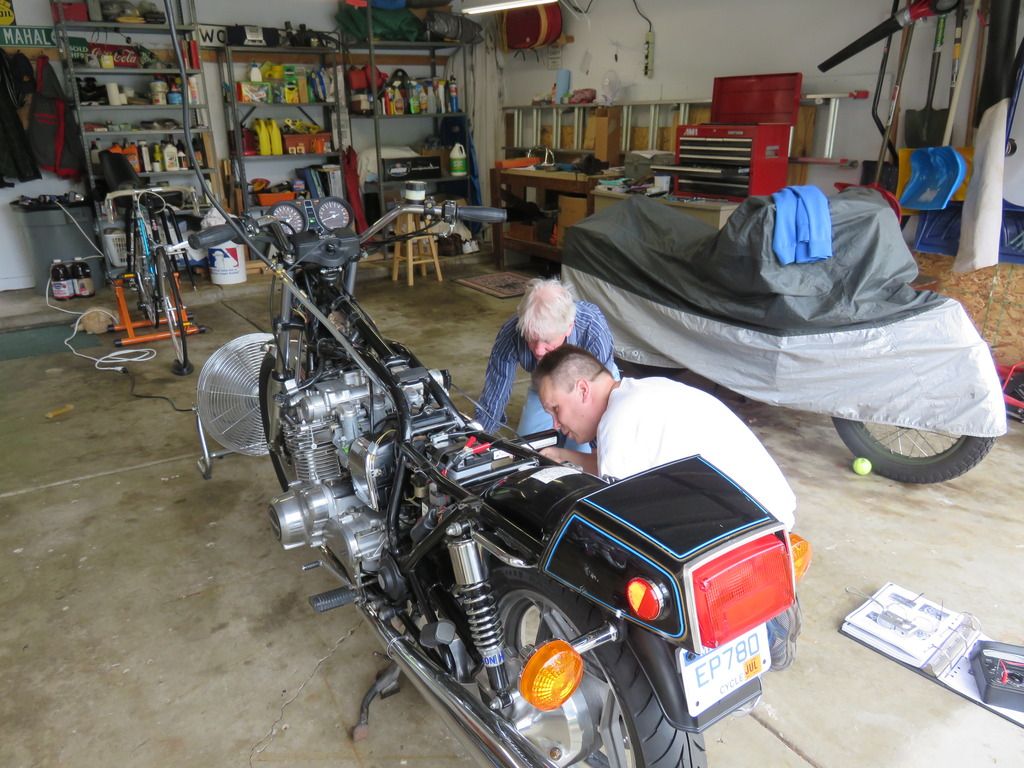
    Check the timing.....


    Feeling good about it


    I still have ignition problems, particularly with one set of points. I'm not sure the battery is charging yet, I'll recharge it and check again in the morning. We restarted it a few times after the first go and it starts right up now, and the kickstarter is unbelievably light compared to the Enfield. A good day! Thanks for everyone's help on the forum and thanks to those of you who've written up the many how-to's on CliffBike's page. Awesome.
    Last edited by Guest; 05-16-2015, 07:42 PM.

    Comment


      #77
      Too cool! I'm familiar with the "yay, it's running!" happy dance. 
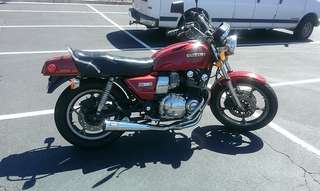
That thing is going to be a blast to ride. I was out and about this evening on my 850 just before the rain came.
      Charles
      --
      1979 Suzuki GS850G

      Read BassCliff's GSR Greeting and Mega-Welcome!

      Comment


        #78
        The dance represented quite a relief! All this time and money and the bike had never ran up until the weekend. It only ran on 2 cylinders, as on one of the coils is bad, but I planned on replacing the points with a dyna s system so adding new coils isn't so bad. The stator and rectifier appear to be doing their job so that's good news. Its getting close now! Replace the ignition and get the gas tank cleaned up and this thing should be almost done.

        I almost took the Enfield out last night but I'd been in the garage all weekend with that heavy humidity and I just wanted some time in the AC! Hope you didn't get caught in the rain.

        Comment


          #79
          Good Job!! It sure is a good feeling the first time they fire up.

          I'm at work now with my GS850L sitting in the parking lot. HUGE rain storm so looks like a wet ride home. Still any ride is a good ride.

          1980 GS1000GT (Daily rider with a 1983 1100G engine)
          1998 Honda ST1100 (Daily long distance rider)
          1982 GS850GLZ (Daily rider when the weather is crap)

          Darn, with so many daily riders it's hard to decide which one to jump on next.

          JTGS850GL aka Julius

          GS Resource Greetings

          Comment


            #80
            So I after I had it running for the first time, I ordered the ignition parts I needed. But it took a long while before the order processed and they got it shipped. Close to three weeks before I knew the parts would be here. When you're itching to get it running properly, you have OCD and three weeks to "spare", something has to give. The various engine covers on the 850 are not the best looking due to a loss of clear coat and a fair amount of oxidation. So with some time before ignition work can begin......why not try to make these look better.

            Clutch cover was the worst, but they were all past their best. I stripped the remaining clear cost with aircraft strip, and then sanded, sanded, sanded some more, used steel wool, polished, polished again etc. Until I was happy with the results. Here's the before and after for the clutch cover. Same thing was done for the alternator cover, secondary cover and points cover.


            After all that work....


            I didn't have good results with spraying clear coat over the covers. I heard about this stuff online. You use their cleaner after you're done refinishing, and then wipe on a liquid that is supposed to stop the aluminum from oxidizing again. It went on nicely, I'll try and remember to do a product write up after its been on a while. Its called Classic Trim Coat. $40 for the kit.


            When all said and done, the covers all turned out pretty good. I got it all reassembled a few days before the ignition parts arrived.


            It was incredibly boring work, but they did turn out well. On to ignition.....
            Last edited by Guest; 06-07-2015, 10:40 AM.

            Comment


              #81
              Ignition parts came in. New Coils, new plug leads and a new Dyna S electronic ignition System. Almost $300 from Z1 for all that. I had one bad coil already, and very badly pitted points. I could have kept the old ignition system, but things are much simpler with electronic, so I made the call and spent the money. The only additional tool I needed was the crimping tool that Z1 sells. I have a set of crimps but unfortunately not one that would work on 7-8mm spark plug lead fittings.

              The old coils came off along with old wires.


              And the new Dyna 3 Ohm coils went on. Fairly simple installation with the exception of getting the plug leads to fit to the new outlets from the coils. Its a tight space in there and it took a while to make it work. Cut the plug leads to length, installed, and everything fitted in, just barely.


              The installation of the ignition system was a little trickier, mostly because I'm not good with electronics or electrical work, and because i don't think the Dyna instructions are very good at all. Thankfully, Stig Poulsen wrote up a How-To on CliffBike's page about installing this, and his photos and explanation were far better than Dyna's. So, thanks for that Stig, much appreciated. I eventually figured it out, installed the new rotor, new wiring and made the new connection for a 12v supply for the ignition.


              With the kit that Dyna sent, the install was straightforward. The power supply splice was simple enough, and the new wiring from the ignition was just long enough to make it back to the original bullet connectors in the wiring harness by the battery box. It worked out and the install was pretty neat.


              That was it for Saturday's work. Sunday, I can hopefully get it running, check the static timing and synch the carbs. Then its on to cleaning out the gas tank and rebuilding the petcock. I'll let you know how that goes next.
              Last edited by Guest; 06-07-2015, 10:58 AM.

              Comment


                #82
                Nice photo! I love the front brakes.. Those is on my wish list.

                Comment


                  #83
                  Great thread. Congratulations. Inspirational to a reluctant wrench like me.
                  1983 GS 1100 Guided Laser
                  1983 GS 1100 G
                  2000 Suzuki Intruder 1500, "Piggy Sue"
                  2000 GSF 1200 Bandit (totaled in deer strike)
                  1986 Suzuki Cavalcade GV 1400 LX (SOLD)

                  I find working on my motorcycle mildly therapeutic when I'm not cursing.

                  Comment


                    #84
                    Thank you for the kind words. Its been a lot of fun working on this bike and making it run again. I wasn't sure when I started if I'd enjoy it, or if I'd have the will to finish it after the initial excitement wore off. I've had a grand time, and I'm ready to start think about what the next bike could be! If I do another one though, I've either got to sell this or sell the Enfield. Hmmm.

                    I got the time to get it running again today with new coils and ignition. It started right up, and idled pretty well. The timing was a little off, so I tweaked that so the idle timing and advance marks were per factory specs, set the idle back down and it sounds pretty darn good. I also hooked up the synch gauges, and eyeballing the adjustment during assembly after I cleaned them turned out to be far more accurate than I had thought it would be. The #1 carb needed a very small adjustment to match the other three carbs. Good stuff, I was pretty happy about that.

                    Got the cases all buttoned back up, reinstalled the crash bars, cleaned up the bike to get a years dust off it and called it quits.

                    All that's left now is to clean up the gas tank, rebuild the petcock and put the tank, seat and fairing back on. Then it should be (fingers crossed) time to ride it!
                    Last edited by Guest; 06-07-2015, 09:39 PM.

                    Comment


                      #85
                      Last weekend and during this past week, I've disassembled the gas tank, soaked it in rust remover and rebuilt the petcock.

                      The petcock was leaking as the rubber parts were in pretty bad shape and the entire petcock was filled with a combination of what I assumed to be rust and gasoline varnish.


                      The sending unit wasn't looking much better.


                      Hmmmm yummy


                      Plugged up the tank holes as best I could using the write up from Cliffbikes pages. I had to use the petcock as a plug and I used the gas cap for periods as well as the pipe plug would leak badly when the tank was inverted. It worked though.


                      I used Metal Rescue which I bought from Home Depot. Evaporust wasn't available anywhere around here. I used 2 gallons of the stuff for inside the tank and cleaning the sending unit. $25 per gallon


                      I couldn't get a good picture of inside the tank, but it removed the rust and varnish and whatever kind of sealant the PO had used to try to seal the petcock. The sending unit turned out pretty well too


                      The only problem I had with the metal rescue was that while it removed rust and crud very effectively, it also removed wire insulation from the sending unit very effectively! So I had to remove the old wire, and solder a new piece of wire in its place. I had to research wire types a little to find what would be ok to use inside a tank full of gasoline. I let PVC wire sit in a bowl of gas for a few days and it appeared to have no effect on the plastic insulation. I asked the service manager at the local Ford dealership while I was there one day and he said he thought PVC wire was fine, but gave me an old sending unit out of a Taurus with the original wire still on it, so I used that! Soldered back in place and re-installed in the tank. Before installation, I washed out the tank with a few passes of fresh gas to remove and remnants of crud and cleaner. I reassembly the petcock with new rubber parts, except the diaphragm. They're on back order from Z1 I guess. I rebuilt it with old one and there's no leaking in 3 days, so I should be ok to use the old one for a little while at least. Here's the cleaned up tank and petcock.


                      All I have to do now, is fit the tank, fuel filter, seat, side covers and fairing, and this thing is done! Hopefully today. I bought this bike home a year ago today on Fathers Day. It'd be cool to finish it today too.

                      Comment


                        #86
                        Some good results with the rust removal.

                        The end is in sight. Good luck.
                        The continuing renovation of a GS850L

                        Comment


                          #87
                          those covers look amazing!

                          Comment


                            #88
                            Thanks guys. The rust remover did waste to the rust in about 24 hours, very impressive. I only wish the covers took that long!

                            Big day today. In between Father's Day festivities, I did manage to finally reassemble the bike. Its all finally in one piece! I didn't ride it today, I just basked in the glow of finishing. I have next week off so hopefully there'll be plenty of time for riding.

                            Fairing on....


                            Tank on.....


                            The final piece of the puzzle, the last side cover...


                            One whole bike again.


                            A big thank you to all of you helped out along the way, and all those who wrote how-to's on the CliffBike page. Without those, this would have taken much longer. Thank you very much.
                            There should soon be a few pics of this old girl out on the road for the first time since 2001.
                            Last edited by Guest; 06-21-2015, 10:44 PM.

                            Comment


                              #89
                              A mostly non-eventful first ride. The clutch was a bit too tight, I had a small gas leak at the petcock I think (but I couldn't verify it when I got back home), and the speedo is acting a little weird. It gets up to speed but it takes a while to get there. I'm assuming the gauges are tight, so I'll see how it reacts over the next couple of rides, but if it doesn't get better I may have to dive into that a little. Does anyone know if there's a thread here that discusses mph to engine speed? Having never ridden this I have nothing to compare to. Once up to speed and the speedo settled, it was indicating about 3500 rpm at 50 mph. I was curious if that was about right.

                              Its good to see the sun on her....


                              Comment


                                #90
                                Originally posted by BanditRE View Post
                                A mostly non-eventful first ride.
                                They're the best kind.

                                Originally posted by BanditRE View Post
                                Does anyone know if there's a thread here that discusses mph to engine speed? Having never ridden this I have nothing to compare to. Once up to speed and the speedo settled, it was indicating about 3500 rpm at 50 mph. I was curious if that was about right.
                                That sounds about right but I'd still be interested in this too, as my speedo only goes to 85.

                                Your 850 is looking so very sweet, I doff my cap in your general direction.
                                The continuing renovation of a GS850L

                                Comment

                                Working...
                                X