Announcement

Collapse
No announcement yet.

650 vs Kat 600 (88-97) header spacing

Collapse
X
 
  • Filter
  • Time
  • Show
Clear All
new posts

    650 vs Kat 600 (88-97) header spacing

    In my use of the search feature I found at least one other user looking for this info, and since I'm doing the measurements, I thought I'd document it. I picked up a cheap and rusty V+H SS2R 4-1 from a 91 Katana 600 in the hopes that it is "close enough" for my 550/650. The suns not up and I'm only half way through my coffee so take these measurements for what they are worth.

    650 head:
    Port diameter: 42mm
    Space between 1/2, 3/4: 44mm
    1/2, 3/4 Center to center: 86mm
    Space between 2/3: 68 mm
    2/3 Center to center: 110mm
    Center to center measurements obtained by math not measurement
    Notes:
    - Ports 1 and 4 are not perpendicular to the block they are angled slightly outward.
    -Exhaust collar bolt pattern alternates; 1+3 the bolts are 2 o'clock and 8 o'clock, 2+4 are 10 o'clock and 4 o'clock

    Kat 600 header:
    Diameter: 38mm flared to 42mm at end. Actual pipe OD 36mm.
    Spacing 1/2, 3/4: 50.5mm, 48.5mm (old pipe possibly bent)
    1/2, 3/4 Center to center: 92.5mm, 90.5mm
    Spacing 2/3: 72mm
    2/3 Center to center: 114mm
    Notes:
    - pipes 2+3 slightly lower and slightly out.
    - Exhaust collar bolt patterns do NOT alternate, 1+2 2 o'clock and 8 oclock, 3+4 10 and 4.

    The Kat header is wider by 4-5mm at every port, 15mm overall. I know what you're thinking, "5mm is nothing! Muscle that suckered in", easy popeye; I did. However it took a LOT of muscle, there's no way I'd run it like that. I am optimistic with some gentle bending it will work. Seems to clear the oil pan and even the oil filter. Time will tell, I'll throw up some pics if I work it out.

    I'll also add that 36mm (OD of pipes) is the port diameter of the 550 which shares the center to center port spacing of the 650 head, someone with some welding skill could probably cut and weld some new ends on and make it work for a 550.
    Last edited by Guest; 01-16-2015, 08:46 AM.

    #2
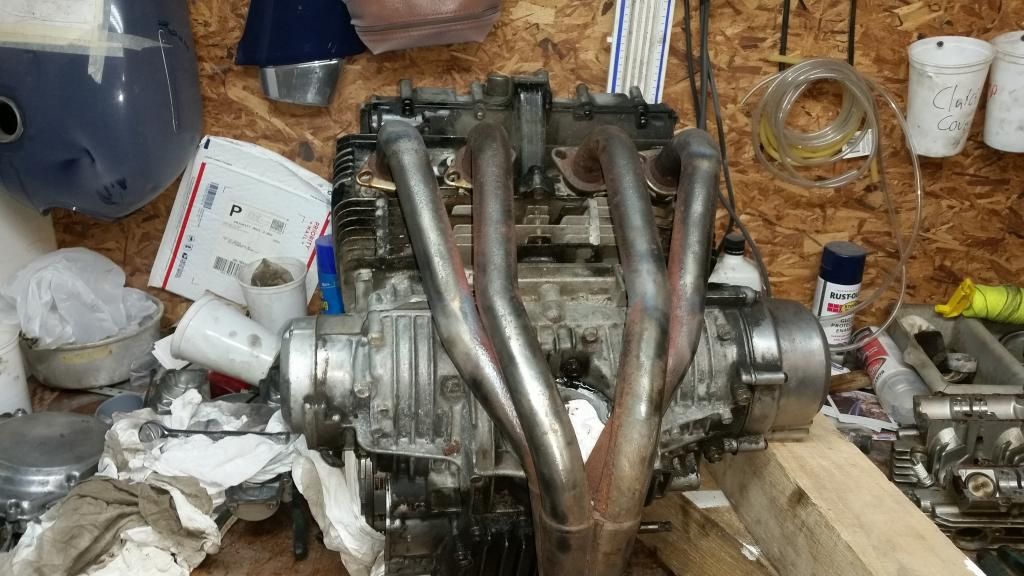
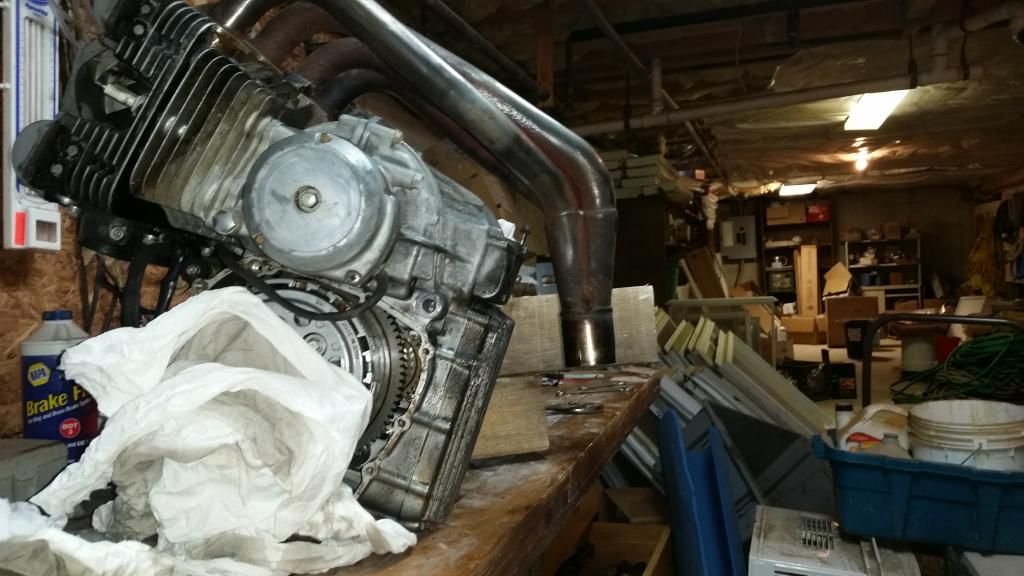
    Well after some tedious torch work it's on the engine:
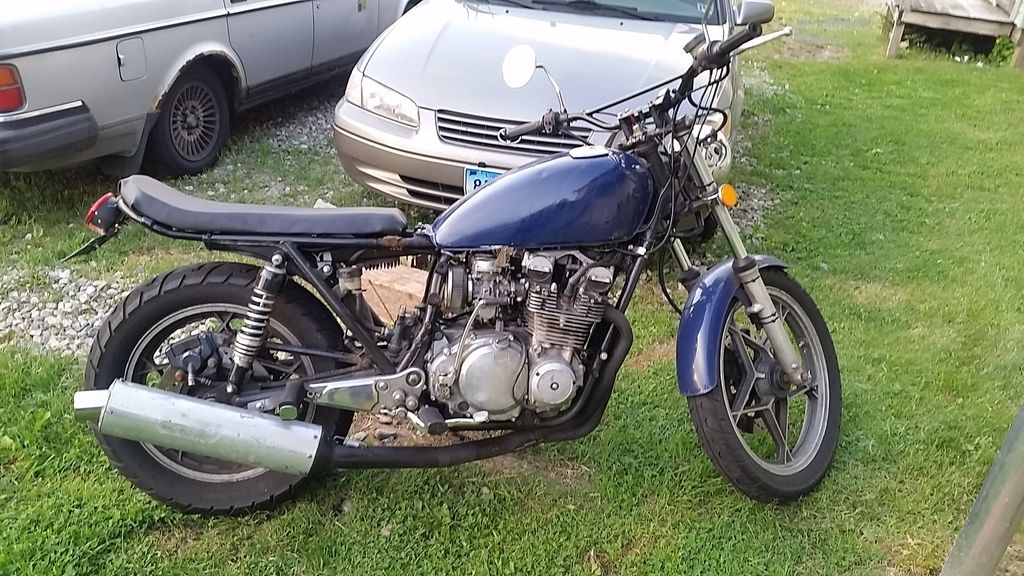
    As you can see my motor is not in the frame and I suspect I'll be doing some more tweaking before I'm done. I'm not thrilled with the way this is angled but we'll see what happens with the mid pipe in place:


    Still need to figure out the exhaust collars too hopefully that's not too much work.
    Last edited by Guest; 01-18-2015, 12:11 PM.

    Comment


      #3
      Feeling pretty confident this will work. Turns out the collars were just rusted in place, they spin freely. Initially it seemed like the bolt pattern for the collars was slightly off so I started filing them a little wider. (and had some flashbacks to the misery of degreeing the cams) When I got to pipe 3 it lined up perfectly with no filing needed. Which makes me think I just need to torch and tweak a little more. I got it bolted up today except for pipe 4 which was a little off and I didn't want to force the bolts all the way in. Seems like its all about getting the outter pipes to match that slightly outward angle on the block. Still not thrilled with how low that collector hangs or the angle its at, going to try fitting it in the frame to see how that's going to line up maybe it's not as bad as it looks out of the frame.

      Comment


        #4
        Frame Fitting

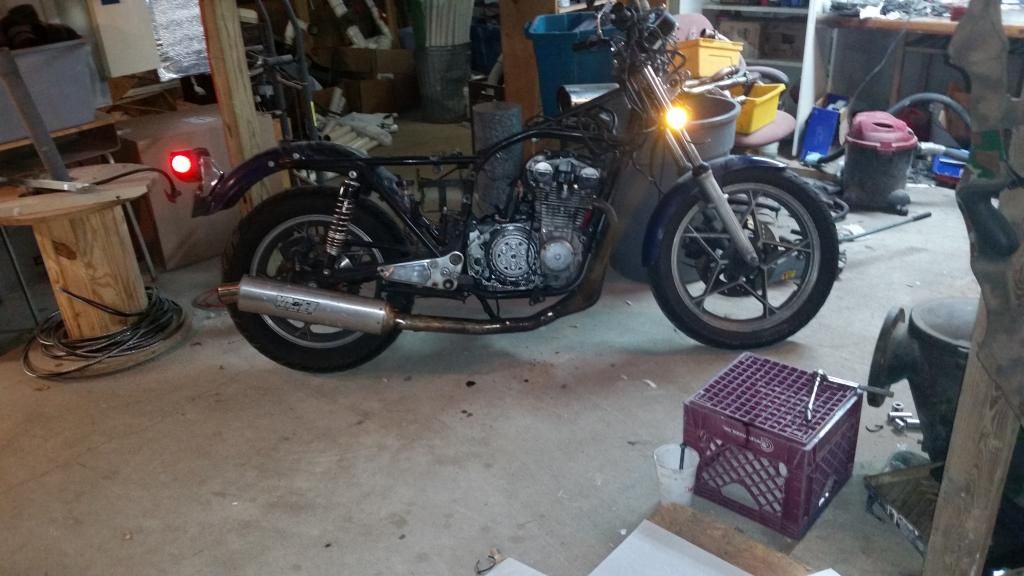
        Still chipping away at this when I find time. Got the spacing right and bolted it up. Using the very scientific method of a shop vac on the end of the pipe and some cigarette smoke, I didn't find any leaks. So I put the motor back in the frame to see what I could see:


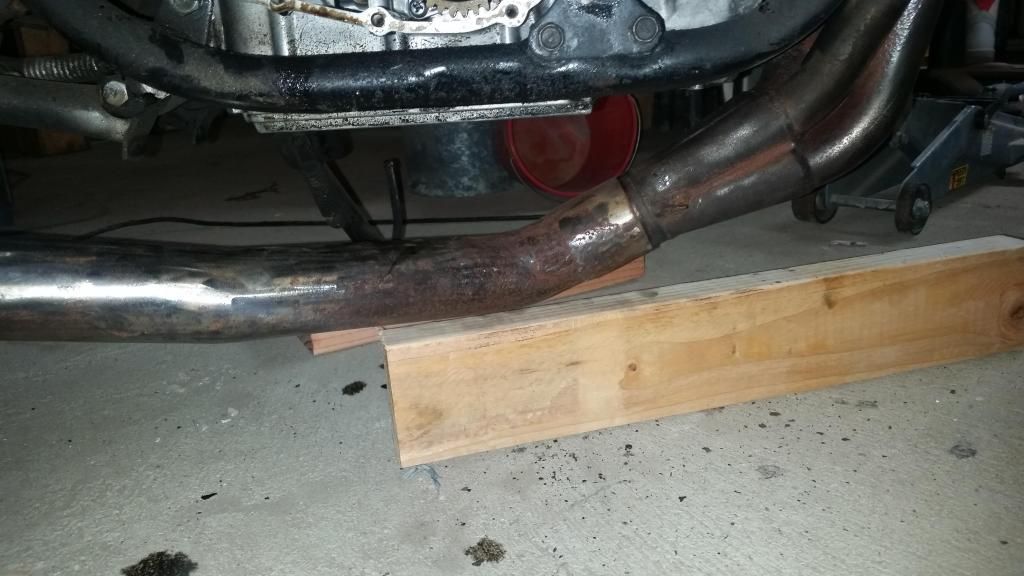
        As I suspected that angle by the collector just isn't right, the Kat 600 motor must be angled down a bit more. Bending the mid pipe to raise the can would be easy enough but that initial bend is my lowest point, probably 3 3/4", 4" max I can see a flat spot where the P.O. bottomed out:


        Frame clearance is pretty tight so I don't think I can squeeze any more out of the upper bends, it will have to be at the lower ones where they all come together. Not looking forward to this, I think I'll have a tough time getting the torch where I need it, and so far even the slightest misalignment has had pretty drastic effects. But I'm snowed in so I might as well try. The only other thing I can think to do would be to modify the motor mounts a bit and tilt the engine forward... I don't even want to think about what kind of headaches that might bring.

        But on a positive note, I had no trouble getting the oil filter in and out, and the mid pipe just misses the oil pan drain plug. For someone with more time than money this is working out nicely.

        Comment


          #5
          Mostly talking to myself in this thread but I figured I should give it some closure:


          Got it on and has been working all season. Ran into a few more roadblocks but nothing major. I was able to bend some more ground clearance, no problems and I can still get to the oil drain, I could probably drop the oil pan with it on But I haven't tried. No problem getting at the filter.

          The exhaust collars are thinner than our gs ones, they started to bend when I tried to use stock torque specs. Seemed okay as long as I stayed towards the bottom of the range, not leaking so I'm not too worried. Back section I've got about a 6" piece of flat stock going to the bracket. It wants to sit a bit higher, basically where that rear peg is; but again it's not leaking, the weather is nice, so I don't really care. Think I'd like to put an 1100 swing arm on at some point Think Ill revisit the brackets for the foot pegs at that point. One of these days I should probably get a real seat too. Spring always seems to hit right as I'm getting around to the cosmetics.

          In terms of jetting I haven't had any issues. Ended up 117.5 mains, needles on the 3rd clip(or whatever DJ recommends you start at), and one size up on the pilots. Pilots are about 2/12-3 turns out. Starts first kick,Idles like a clock, pulls strong with no flat spots, so no complaints there. The pipes pods panic thread definitely had me in the ball park, I think that 7 sizes up from the 100's I used with the stock intake/exhaust w/ no airbox lid. Might mess around with the needle height just to see what happens as I haven't messed with those at all. Feels strong now so I'm guessing there wont be any huge improvement. I was worried it would sound a bit obnoxious being from a street bike and all but its not bad, pretty quiet at idle but a nice little snarl at the upper rpms.

          So all in all I got a 4-1 for $50 and a tank of MAPP gas I think it worked out well.

          Comment


            #6
            Not sure this was successful Bro, you aint got much ground clearance, and that can is too honkin' big.
            T
            he OEM header is as perfect as the master engineering staff at Suzuki could make it.
            If you wanted to, you could have done this better and learned something about welding. Learning about welding would have been great for you.
            Hope you try a do over.
            "Only fe' collected the old way, has any value." from His Majesty O'Keefe (1954 film)
            1982 GS1100G- road bike, body, seat and suspension modded
            1990 GSX750F-(1127cc '92 GSXR engine) track bike, much re-engineered
            1987 Honda CBR600F Hurricane; hooligan bike, restored

            Comment


              #7
              If I was having a hard time tuning it and bottoming out I might agree with ya. I'm not saying it's pretty I'm saying it works. Which is more than I can say for my rusted out 550 pipes, those were good for some welding practice. not really masterful engineering when they are full of holes.

              Comment

              Working...
              X