Announcement

Collapse
No announcement yet.

Not starting after Petcock replacement - 82 650

Collapse
X
 
  • Filter
  • Time
  • Show
Clear All
new posts

    Not starting after Petcock replacement - 82 650

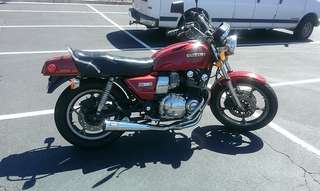
    I could use some help getting my bike to start again. I just did a top end & carb rebuild. Yes, the carbs were dipped, scrubbed, re-ringed, the whole nine yards. I got the bike to run with an auxiliary gas tank. I was still de-rusting the actual tank.
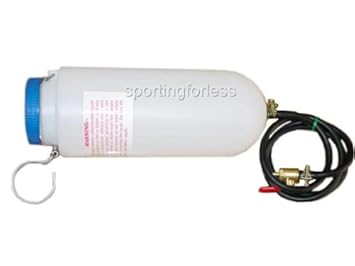

    One of these.

    Then once I finished the tank I put it on the bike and took it out for a test ride. Now I was a little too excited about going for a test ride and forgot to check the rebuilt petcock I put on the tank. I found out the next day that the petcock was still bad and pulled it from the bike. I have not been able to get her to start again sense that short test ride.

    I have replaced the bad petcock, and checked that fuel is getting into the float bowls. It does not seem that fuel is getting to the combustion chamber however. I pulled the plugs a few time and they never felt very wet. Should they be noticeably wet with fuel? I had a hard time telling if they were slightly damp or my fingers were slightly sweaty. I am using the stock air box, and have had the Mixture screws at 3 turns from bottom.

    I've pulled the carbs and plan to re-check the pilot circuit. I will also check the compression as I've had problems with that. Are there any other areas I should check on? Thanks in advance for the help.

    #2
    Three things.
    First: Check your oil and make sure that gas has not gotten into it. If it smells of fuel or your oil level is higher then expected, then dump your oil and refill with fresh oil.

    Second: Pull your plugs and crank the engine for a few seconds. That should evacuate any fuel that's pooled inside the carbs and cylinders.

    Third: Pull your air filter and make sure it's not saturated with fuel. Also check to make sure that fuel hasn't pooled in the air box. Blow out with compressed air if you suspect it.

    1980 GS1000GT (Daily rider with a 1983 1100G engine)
    1998 Honda ST1100 (Daily long distance rider)
    1982 GS850GLZ (Daily rider when the weather is crap)

    Darn, with so many daily riders it's hard to decide which one to jump on next.

    JTGS850GL aka Julius

    GS Resource Greetings

    Comment


      #3
      Originally posted by JTGS850GL View Post
      Three things.
      First: Check your oil and make sure that gas has not gotten into it. If it smells of fuel or your oil level is higher then expected, then dump your oil and refill with fresh oil.

      Second: Pull your plugs and crank the engine for a few seconds. That should evacuate any fuel that's pooled inside the carbs and cylinders.

      Third: Pull your air filter and make sure it's not saturated with fuel. Also check to make sure that fuel hasn't pooled in the air box. Blow out with compressed air if you suspect it.
      Thanks for the suggestions. One question though about the order. I'm thinking it would be best to pull the plugs and crank the engine before checking and possibly replacing the oil. That way if there is gas sitting somewhere in the engine it wouldn't then contaminate the new oil. Does that make sense?

      Comment


        #4
        Any gas in the cylinders would go straight out the spark plug holes so it wont contaminate the oil but, yes, it would be fine to do that first. I didn't post it in any particular order. Be warned though, just be careful that the spark plug wires are not near the openings when you crank her over. or you may find a spark igniting the fuel.

        1980 GS1000GT (Daily rider with a 1983 1100G engine)
        1998 Honda ST1100 (Daily long distance rider)
        1982 GS850GLZ (Daily rider when the weather is crap)

        Darn, with so many daily riders it's hard to decide which one to jump on next.

        JTGS850GL aka Julius

        GS Resource Greetings

        Comment


          #5
          I've made a bit of progress on this bike.
          • Checked the air box (no signs of pooled gas)
          • Pulled spark plugs
          • Changed the oil (had a slight hint of gas when I removed the oil cap)
          • Checked compression (All cylinders are over 130, checked with carbs off)
          • Checked pilot circuit in float bowl (Sprayed carb cleaner through float bowls)
          • Reset mixture screws to 3 full turns from bottom
          • Reinstalled carbs


          I was hoping I'd be able to try and start her up again today but it looks like rain for the next few days.

          Comment


            #6
            This thing needs the "choke " circuit to cold start. Did you blow out the choke feed line that runs up along each fuel bowl side? Did you bench sync the carbs? The throttle plates will appear just about fully closed when resting on idle stop screw - otherwise not enough vacuum tugging on the "feed" port in carb throat. Fully activate "choke" and apply NO throttle when you crank.
            1981 gs650L

            "We are all born ignorant, but you have to work hard to stay stupid" Ben Franklin

            Comment


              #7
              Originally posted by tom203 View Post
              This thing needs the "choke " circuit to cold start. Did you blow out the choke feed line that runs up along each fuel bowl side? Did you bench sync the carbs? The throttle plates will appear just about fully closed when resting on idle stop screw - otherwise not enough vacuum tugging on the "feed" port in carb throat. Fully activate "choke" and apply NO throttle when you crank.
              The carbs were thoroughly cleaned and rebuilt. And yes that included bench syncing and cleaning out all of the passages that I could with a wire carb cleaning kit, pipe cleaners, and an old toothbrush. Each passage was cleaned with the tool that best suited it size wise. Also this was all done after the carbs were soaked in carb dip.

              Comment


                #8
                Carb tuning order

                Well with the help of some starter fluid I finally got her to start again. As soon as she started the revs went to around 3,000 and hung. I backed off the throttle adjustment screw till it was down around 1,500 and let her run for about 5 mins. After shutting off the engine and letting it cool a bit I checked the exhaust pipes. 1 & 4 were noticeably hotter than 2 & 3. So the outer cylinders are running richer than the inner ones.

                I'm so glad to have this bike start again. Next order of business is to get these carbs tuned. I've been doing research on the tuning process and it seems like the recommended order is
                1. Vacuum Sync carbs
                2. Adjust Air Mixture screws - start from 3 turns from bottom
                3. Set idle speed with throttle adjustment screw


                If anyone can verify that for me it would be much appreciated.

                Comment


                  #9
                  If it has been awhile then adjust the valves before you do the sync.

                  1980 GS1000GT (Daily rider with a 1983 1100G engine)
                  1998 Honda ST1100 (Daily long distance rider)
                  1982 GS850GLZ (Daily rider when the weather is crap)

                  Darn, with so many daily riders it's hard to decide which one to jump on next.

                  JTGS850GL aka Julius

                  GS Resource Greetings

                  Comment


                    #10
                    Originally posted by JTGS850GL View Post
                    If it has been awhile then adjust the valves before you do the sync.
                    Thanks! The whole top end was just rebuilt and that includes the valves.

                    Comment


                      #11
                      Hmmm, what exactly was done to the valves?


                      Life is too short to ride an L.

                      Comment


                        #12
                        Originally posted by tkent02 View Post
                        Hmmm, what exactly was done to the valves?
                        Well I was particularly referring to the shim clearance in my last post. But that's not all that was done. The whole top end was rebuilt and the head was replaced due to snapped bolts. Valves were inspected, lapped, coated in assembly lube, re-assembled, timing, and finally shim clearance was done.

                        Comment


                          #13
                          Originally posted by MechMessiah View Post
                          Well I was particularly referring to the shim clearance in my last post. But that's not all that was done. The whole top end was rebuilt and the head was replaced due to snapped bolts. Valves were inspected, lapped, coated in assembly lube, re-assembled, timing, and finally shim clearance was done.
                          Sounds good. Now start the sync process to complete the job. Should run much better. Bench syncs can be a hit and miss thing.

                          1980 GS1000GT (Daily rider with a 1983 1100G engine)
                          1998 Honda ST1100 (Daily long distance rider)
                          1982 GS850GLZ (Daily rider when the weather is crap)

                          Darn, with so many daily riders it's hard to decide which one to jump on next.

                          JTGS850GL aka Julius

                          GS Resource Greetings

                          Comment

                          Working...
                          X