Announcement

Collapse
No announcement yet.

Valve seal replacement

Collapse
X
 
  • Filter
  • Time
  • Show
Clear All
new posts

    Valve seal replacement

    I've always wanted to try replacing valve seals without removing the head. My 78' 1000 certainly needed the seals replacing so I finally attempted it today.

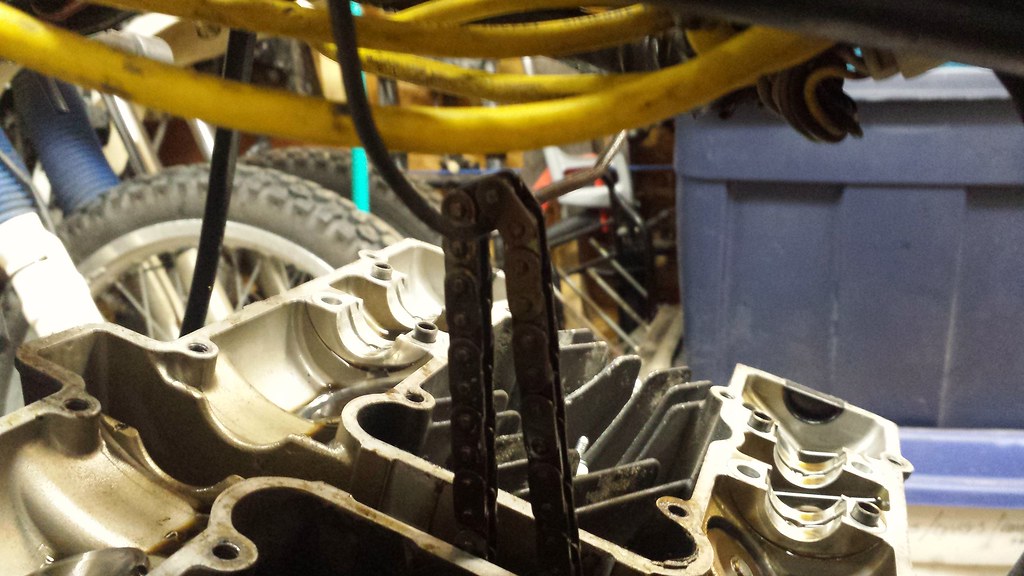
    I didn't take too many pictures of the first step of removing all the bits and pieces, the manual describes that well enough. About the only piece of info it doesn't mention is that when you are taking off the cam holders it's best to loosen each of the 4 bolts a bit at a time, criss cross from eachother, rather than one at a time. That way you avoid stripping any of the threads. Make sure you hang up the cam chain as well

    Hang cam chain by Rob Ert, on Flickr

    I actually changed it from a single wire to a couple of PVC pipes later so that when I was rotating the crank the chain would easily turn as well. You can probably see it in one of the other pictures.

    I tell you, getting the shims out once the cams are off is a lot easier

    2016-11-14_09-35-33 by Rob Ert, on Flickr

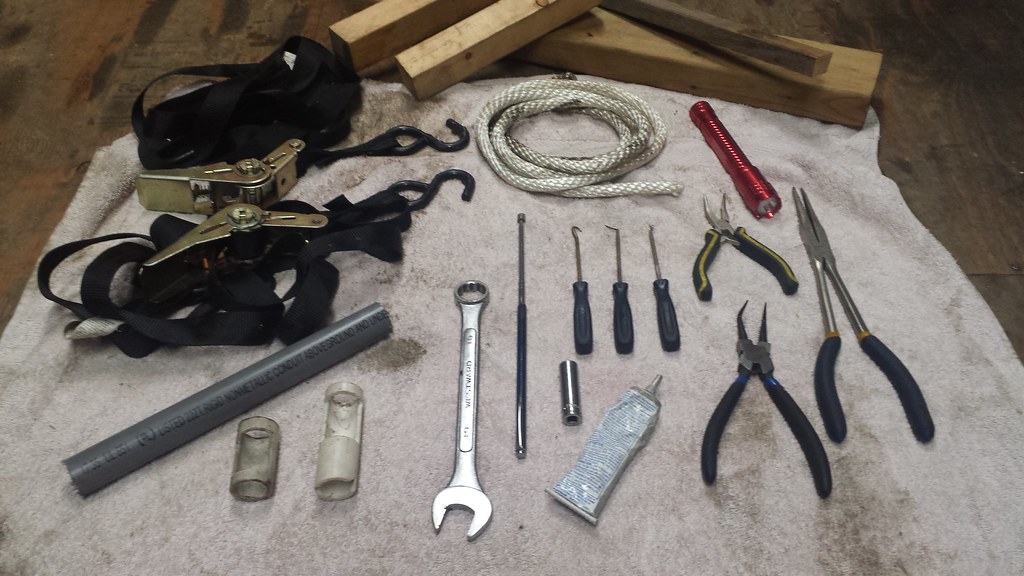
    An essential tool to this process is a retractable magnet as seen in that photo. Once all the shims and buckets are out I started trying to figure out how I was going to use a piece of wood as leverage to compress the valve springs.

    20170105_104323(0) by Rob Ert, on Flickr

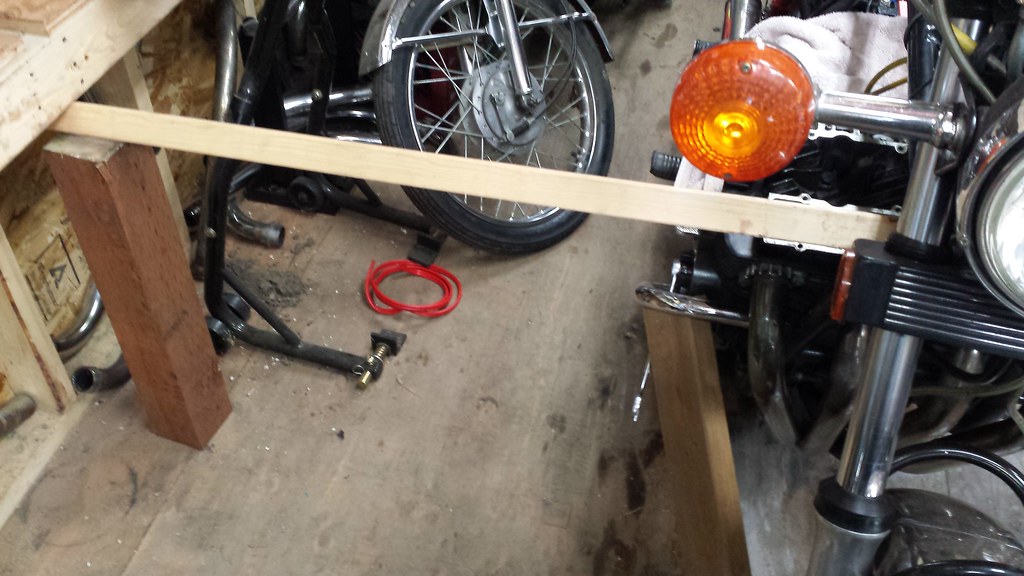
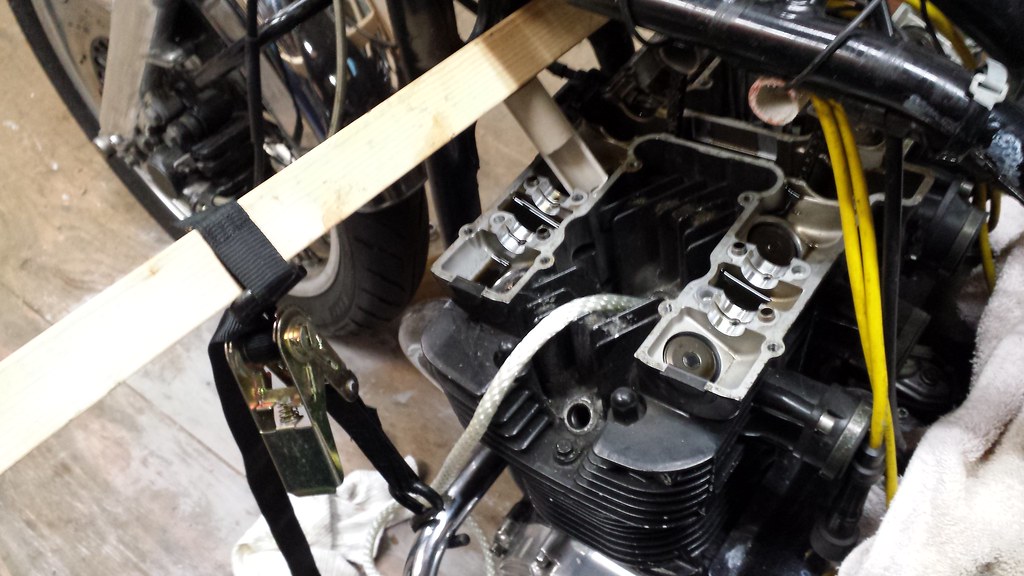
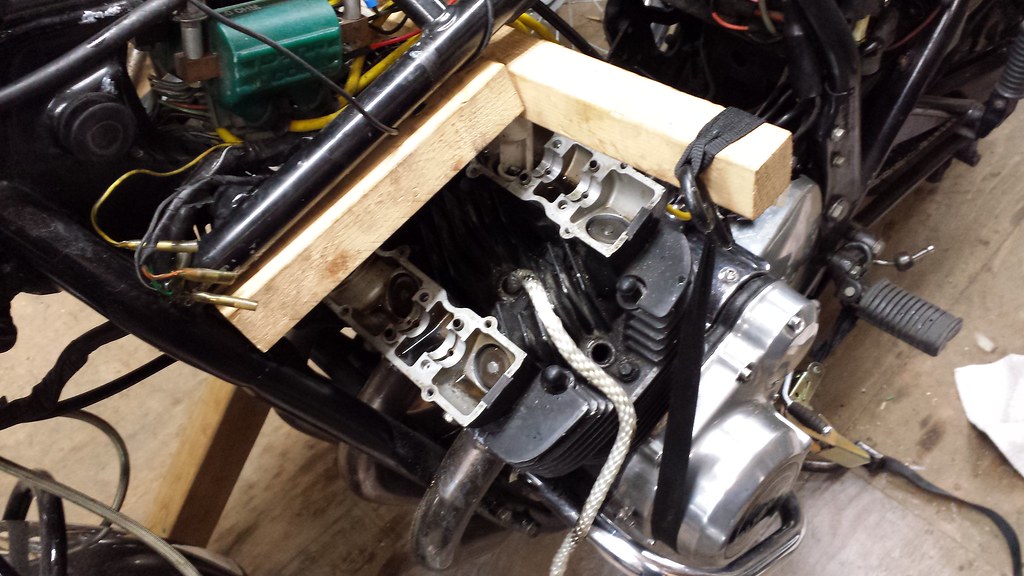
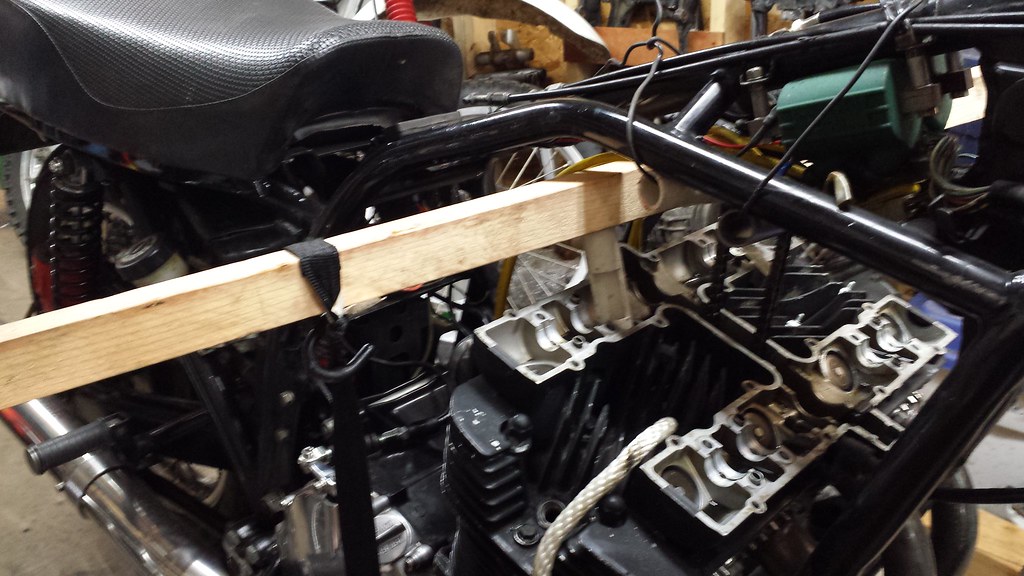
    I used the shelving to brace the 2x2 and a 4x4 to support it. I used some nylon rope down the spark plug hole, then turned the crankshaft until it would turn no further and put a 2x6 between the wrench and the case saver to stop it from turning backwards when I compressed the valve springs. I made sure the 2x2 extended well beyond the side of the engine so my ratchet strap would easily grab it. Had to make a couple of different length 'PVC valve clip removal specialty tools' (or what ever the heck it's called) for getting at the clips.

    20170105_104323(0) by Rob Ert, on Flickr

    20170105_104307 by Rob Ert, on Flickr

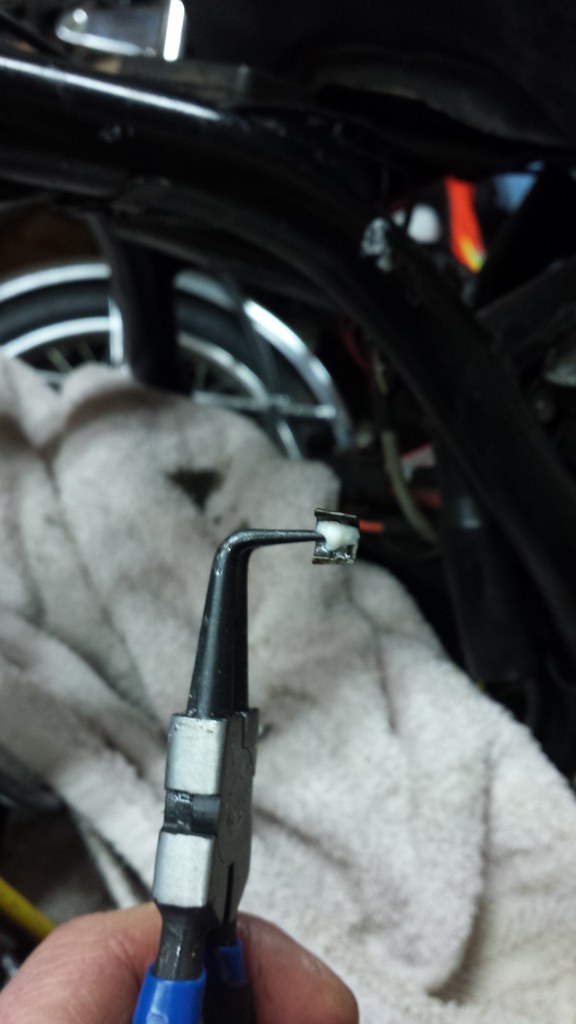
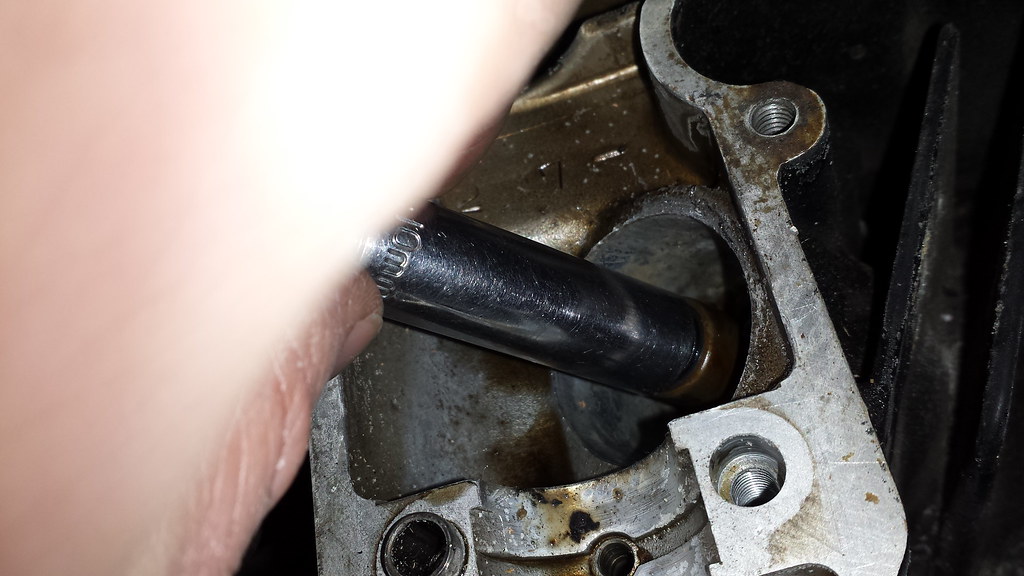
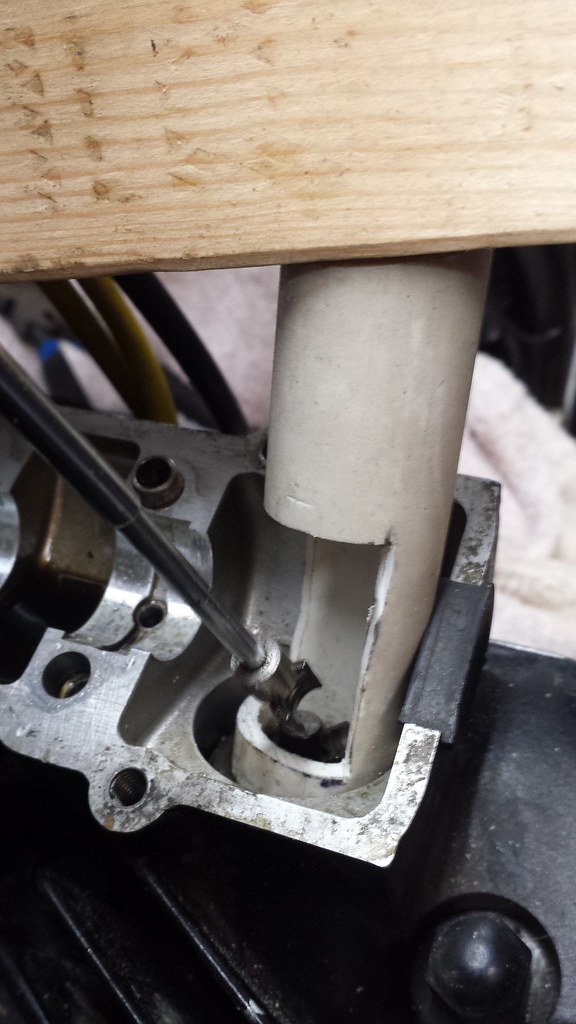
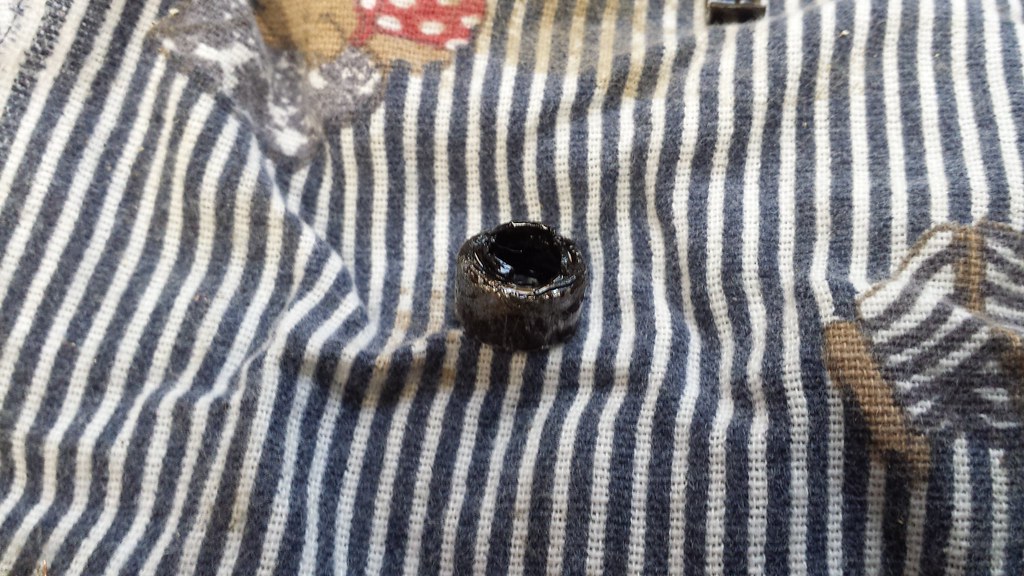
    #2 exhaust by far was the worst one to get at but as I went along I figured out which was the best tool to use to get the old valve seal out.

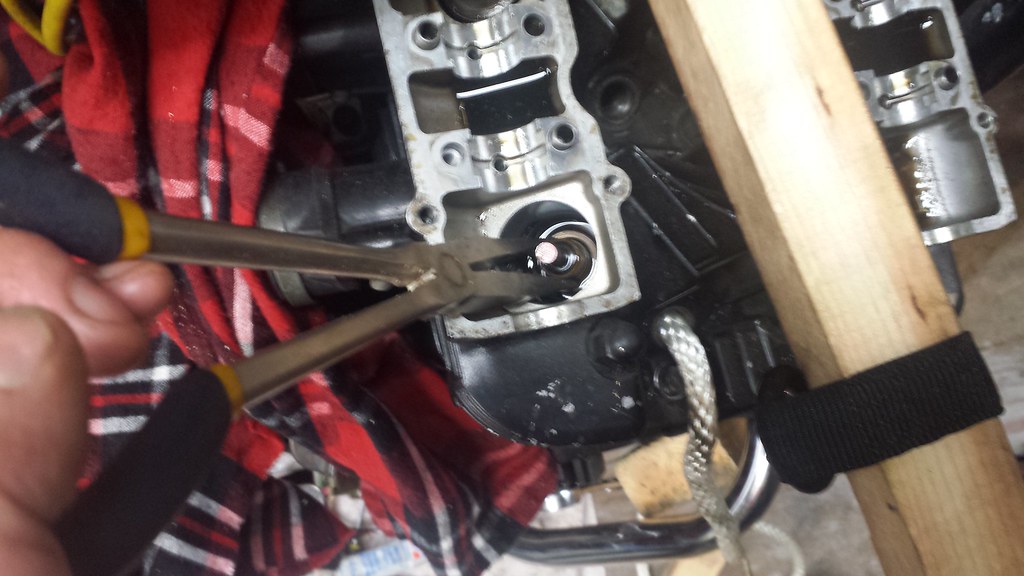
    This tool turned out to be great for getting the old valve seals out, and for putting the clips back in

    20170105_151734 by Rob Ert, on Flickr

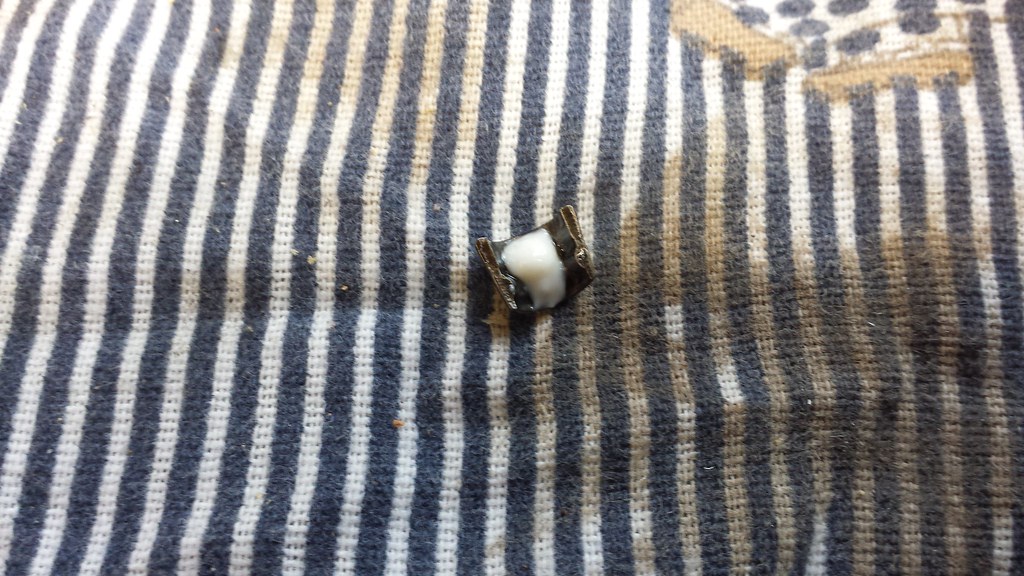
    A 1/4 inch 10mm deep socket was perfect for lightly seating the new valve seals

    20170105_112611 by Rob Ert, on Flickr

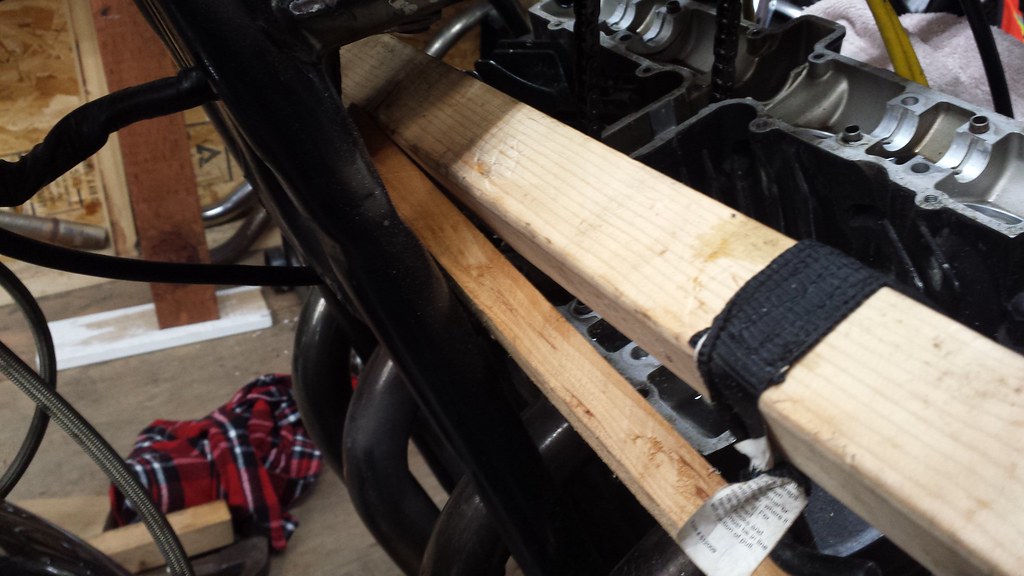
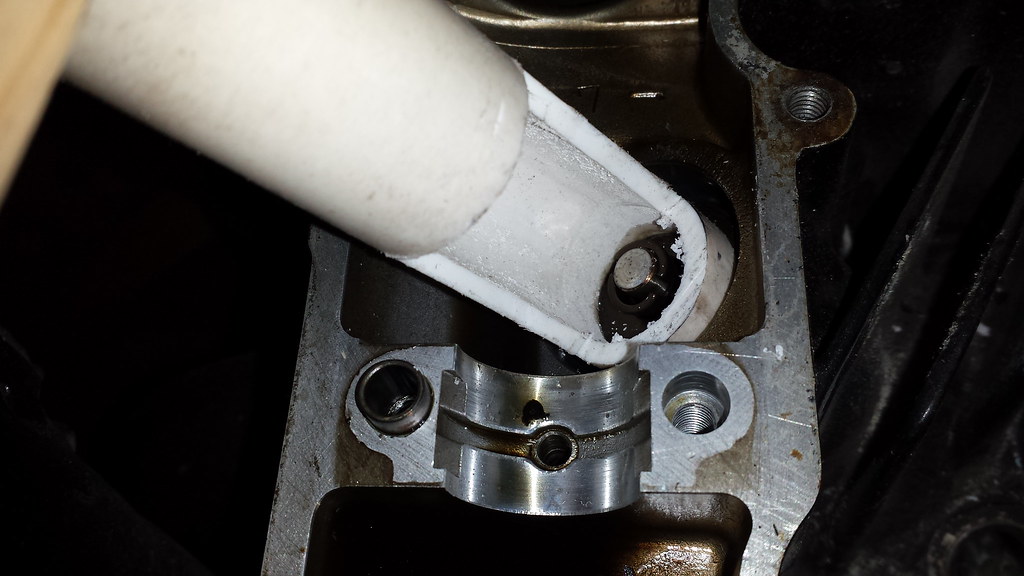
    Once you have the rope in and the valve remains up while compressing the springs do both the intake and exhaust for the cylinder, better to do both than have to put the rope in twice. I came up with many different scenarios with the ratchet strap to make this all work.

    20170105_154607 by Rob Ert, on Flickr

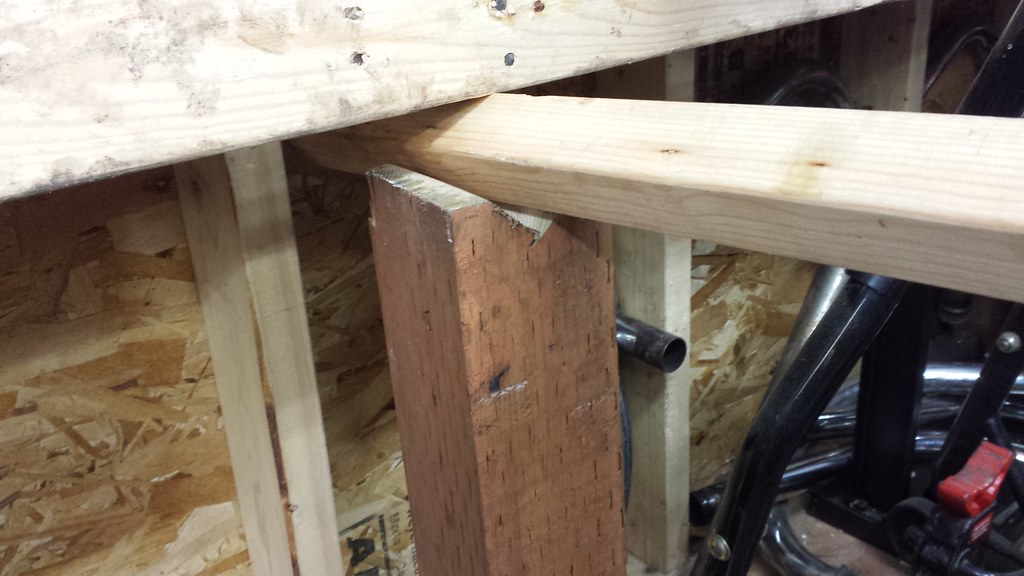
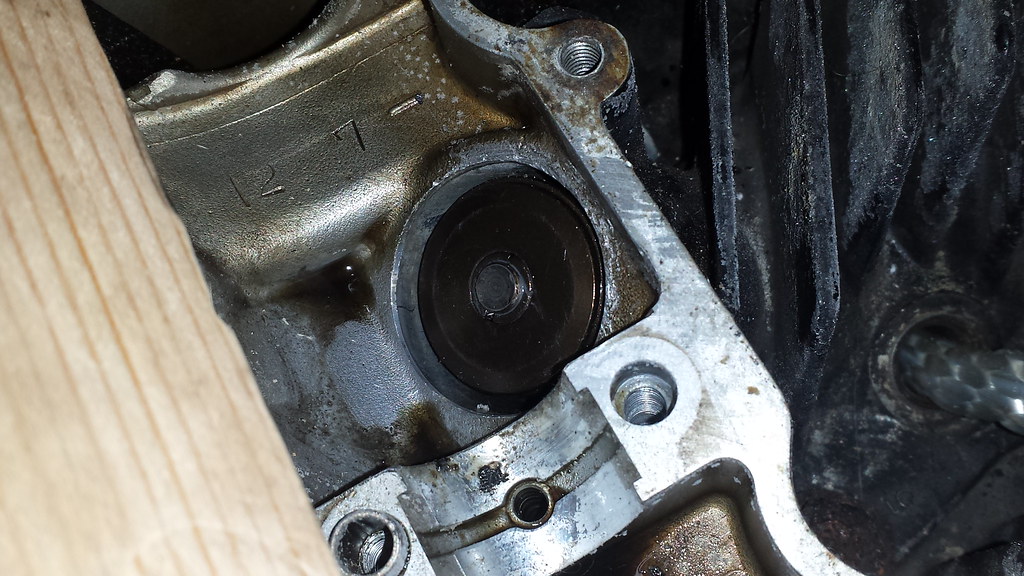
    I had to use some wedges as well to stop the 2x2 from moving too much while pulling it down so the PVC would stay in place.

    20170105_121355 by Rob Ert, on Flickr
    Last edited by azr; 01-06-2017, 01:25 AM.
    Rob
    1983 1100ES, 98' ST1100, 02' DR-Z400E and a few other 'bits and pieces'
    Are you on the GSR Google Earth Map yet? http://www.thegsresources.com/_forum...d.php?t=170533

    #2
    I also tried notching the 4x4 to see if that would stabilize things better, sometime yes, other times no.

    20170105_121403 by Rob Ert, on Flickr

    Very handy tool

    20170105_145802 by Rob Ert, on Flickr

    A dab of grease to help keep the keepers in place...

    20170105_151631 by Rob Ert, on Flickr

    Fancy doo hicky tool..

    20170105_104259 by Rob Ert, on Flickr

    A great satisfaction indeed

    20170105_121750 by Rob Ert, on Flickr

    Coming around the other side

    20170105_161104 by Rob Ert, on Flickr

    It took a lot of MacGyvering to say the least and it took me the better half of a day to get the seals all replace but I manage to do it and I didn't have to pull the head saving myself several hundred dollars in OEM parts, never mind the swearing that's involved in removing the old base gasket material , so in the end I'm one happy camper.
    Rob
    1983 1100ES, 98' ST1100, 02' DR-Z400E and a few other 'bits and pieces'
    Are you on the GSR Google Earth Map yet? http://www.thegsresources.com/_forum...d.php?t=170533

    Comment


      #3
      This is the old seal from #2 exhaust, she was a bi#@h to say the least....

      20170105_112109 by Rob Ert, on Flickr
      Rob
      1983 1100ES, 98' ST1100, 02' DR-Z400E and a few other 'bits and pieces'
      Are you on the GSR Google Earth Map yet? http://www.thegsresources.com/_forum...d.php?t=170533

      Comment


        #4
        Nice write up. Glad everything went well.

        1980 GS1000GT (Daily rider with a 1983 1100G engine)
        1998 Honda ST1100 (Daily long distance rider)
        1982 GS850GLZ (Daily rider when the weather is crap)

        Darn, with so many daily riders it's hard to decide which one to jump on next.

        JTGS850GL aka Julius

        GS Resource Greetings

        Comment


          #5
          That's a different take on AgeMax's design for an in situ valve depressor

          Be careful with magnets. I do not have personal negative experience, but have often seen cautions that it is possible to magnetize the shim, making it prone to picking up bits of metal.
          '83 GS650G
          '83 GS550es (didn't like the colours in the 80's, but they've grown on me)

          Comment


            #6
            Originally posted by azr View Post
            This is the old seal from #2 exhaust, she was a bi#@h to say the least....

            20170105_112109 by Rob Ert, on Flickr
            Getting those old valves seals off can be a real pain in the butt even with the head off. Can't imagine how hard it is with the frame in the way on the center cylinders. The exhaust seals always seem to be the hardest to get off. My guess is that they harden more from the heat.

            1980 GS1000GT (Daily rider with a 1983 1100G engine)
            1998 Honda ST1100 (Daily long distance rider)
            1982 GS850GLZ (Daily rider when the weather is crap)

            Darn, with so many daily riders it's hard to decide which one to jump on next.

            JTGS850GL aka Julius

            GS Resource Greetings

            Comment


              #7
              Once I found a better tool for taking them out, the clip pliers, they all came out relatively easy. And I know what you're saying, I've had the head off and swearing at them to come out, but again, I didn't have the right tool.
              Rob
              1983 1100ES, 98' ST1100, 02' DR-Z400E and a few other 'bits and pieces'
              Are you on the GSR Google Earth Map yet? http://www.thegsresources.com/_forum...d.php?t=170533

              Comment


                #8
                So, when using the clip pliers you hook the pliers fingers under the valve seal and pull up?

                1980 GS1000GT (Daily rider with a 1983 1100G engine)
                1998 Honda ST1100 (Daily long distance rider)
                1982 GS850GLZ (Daily rider when the weather is crap)

                Darn, with so many daily riders it's hard to decide which one to jump on next.

                JTGS850GL aka Julius

                GS Resource Greetings

                Comment


                  #9
                  Very Nice write-up, Azr! I am saving the whole as a pdf! big pictures and Handy Tips for the day I end up on this project!

                  Comment


                    #10
                    Originally posted by JTGS850GL View Post
                    So, when using the clip pliers you hook the pliers fingers under the valve seal and pull up?
                    Sort of, I would just grab it and put it in place, the grease would help it to 'grab on' sort of, then I would use a dental pic to get it into place. It's a precarious part of the job to get the clips on and then release the pressure on the 2x2 to allow the springs and retainer to come up over the clips, if you don't get it exactly the clips pop up and out. I would lay over the 2x2 as I released the ratchet strap as to be able to control the pressure coming off, and at the same time I could direct the springs/retainer as they came up allowing them to pass over the clips better. It sounds confusing when I write it but it all makes sense once someone is doing it. Oh and another VERY IMPORTANT procedural note, once you have the cams off, cover the cam chain channels with a rag so that nothing can accidentally fall down there.
                    Rob
                    1983 1100ES, 98' ST1100, 02' DR-Z400E and a few other 'bits and pieces'
                    Are you on the GSR Google Earth Map yet? http://www.thegsresources.com/_forum...d.php?t=170533

                    Comment


                      #11
                      A couple more notes and pictures. Once the springs were out I gently used a long needle nose pliers to get the old valve seal spinning. Once it was able to spin around the valve stem I would get the clip pliers in position, pull up on them and at the same time wiggle them back and forth, this would slowly bring the old valve seal up and off, worked really well actually, I'll be doing this in the future head on or off as I've cursed at many an old valve seal before.

                      20170106_153141 by Rob Ert, on Flickr

                      Here's most of the tools and bits and pieces I used. About the only thing not in the picture is the 2x2 and a few other pieces of wood I needed.

                      20170106_155513 by Rob Ert, on Flickr
                      Rob
                      1983 1100ES, 98' ST1100, 02' DR-Z400E and a few other 'bits and pieces'
                      Are you on the GSR Google Earth Map yet? http://www.thegsresources.com/_forum...d.php?t=170533

                      Comment


                        #12
                        Good job, Rob. An old drag racer trick for changing broken valve springs between rounds is to bring the cylinder you are working on to TDC and hook your compression gauge hose to the air compressor after screwing it in the spark plug hole. The air pressure keeps the valves closed. You should get a 16V bike, way easier to get to everything and no shims. Plus it's faster
                        sigpic
                        09 Kaw C14 Rocket powered Barcalounger
                        1983 GS1100e
                        82\83 1100e Frankenbike
                        1980 GS1260
                        Previous 65 Suzuki 80 Scrambler, 76 KZ900, 02 GSF1200S, 81 GS1100e, 80 GS850G

                        Comment


                          #13
                          Originally posted by azr View Post
                          A couple more notes and pictures. Once the springs were out I gently used a long needle nose pliers to get the old valve seal spinning. Once it was able to spin around the valve stem I would get the clip pliers in position, pull up on them and at the same time wiggle them back and forth, this would slowly bring the old valve seal up and off, worked really well actually, I'll be doing this in the future head on or off as I've cursed at many an old valve seal before.

                          20170106_153141 by Rob Ert, on Flickr

                          Here's most of the tools and bits and pieces I used. About the only thing not in the picture is the 2x2 and a few other pieces of wood I needed.

                          20170106_155513 by Rob Ert, on Flickr
                          Why two different size valve compression tools? The custom ones you made from PVC pipe.

                          1980 GS1000GT (Daily rider with a 1983 1100G engine)
                          1998 Honda ST1100 (Daily long distance rider)
                          1982 GS850GLZ (Daily rider when the weather is crap)

                          Darn, with so many daily riders it's hard to decide which one to jump on next.

                          JTGS850GL aka Julius

                          GS Resource Greetings

                          Comment


                            #14
                            As I moved around from cylinder to cylinder I needed a couple of different sized valve compression tools just to make things easier. Oh another important technical note, valve springs have a top and a bottom, the tighter wound springs go to the bottom, worth mentioning.
                            Rob
                            1983 1100ES, 98' ST1100, 02' DR-Z400E and a few other 'bits and pieces'
                            Are you on the GSR Google Earth Map yet? http://www.thegsresources.com/_forum...d.php?t=170533

                            Comment


                              #15
                              I have found when removing valve seals its a good idea to heat them with a small butane torch to soften /burn them making it easier to pull off with long nose pliers.

                              Comment

                              Working...
                              X