-
-
I used regular engine paint on my other bike's tank, and it proved to be fine with gas.
I used base and clear on my 750 and when I got a little gas on the tank last week it clouded up where it landed. It seams that the base under it is fine, but the clear didn't hold up very well.
I'm going to buff it out and apply some wax and see what happens this summer.Comment
-
Seat Progress, The Hard Part is Done
So, This weekend, was gorgeous here, and I was so bummed that I wasn't able to ride, so I took my convertible out instead :-D.

The nice weather did inspire me to start busting on this project though, and I got somewhere today. Front Brake calipers are torn apart, ready to go to work with me tonight, and get cleaned up. I'll hit them with caliper paint this time, and replace my crush washers. Maybe, just maybe I won't have to repaint them again next year.
I also got the (insert drumroll, please) seatpan fabbed up. WOOT. Worked out pretty good. The wife and I went out and sat on the bike. When she was seated, I got off the bike, and used a paint marker to mark how far the seat would have to extend. Next, I used cardboard and painters tape, and made a psuedomold for the fiberglass to form around.

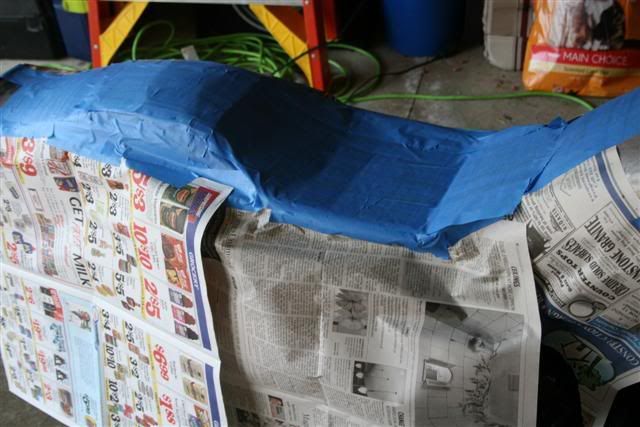
The cardboard is under the tape. I used tape to prevent the resin from sticking to the cardboard, but nothing prevented the resin from sticking to the tape. I think next time, I'll try wax paper.Comment
-
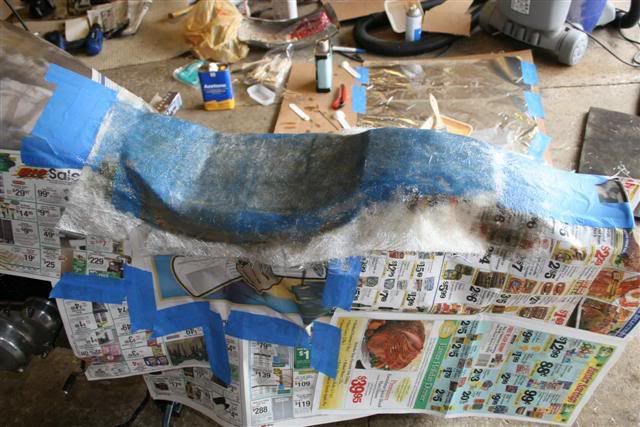
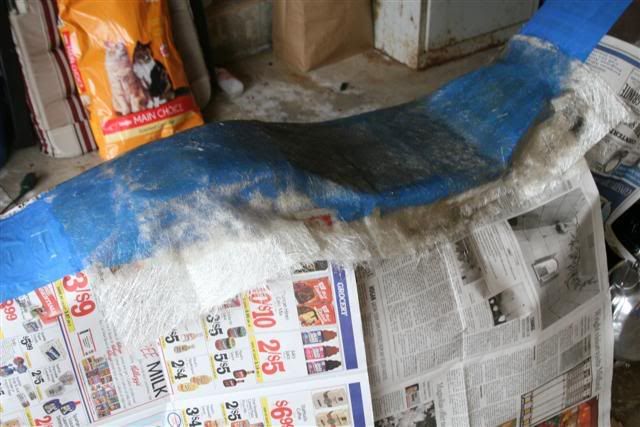
Next, I cut the glass matting to size, and mixed up some resin...this part was a PITA. I kept having to mix more. It takes a lot more resin than you think it should. Oh yeah, something else I learned...Pay attention to the mix ratios. I had a couple batches "kick" before I had used half the resin. Toss the mix, and start over. Anyway, I got it all layed out. Two layers over the sheetmetal, and four over the framerails, where my 190lbs butt will sit.
With that done, I went for another ride in the convertible, and waited for the resin to set up.
I'm left with this...
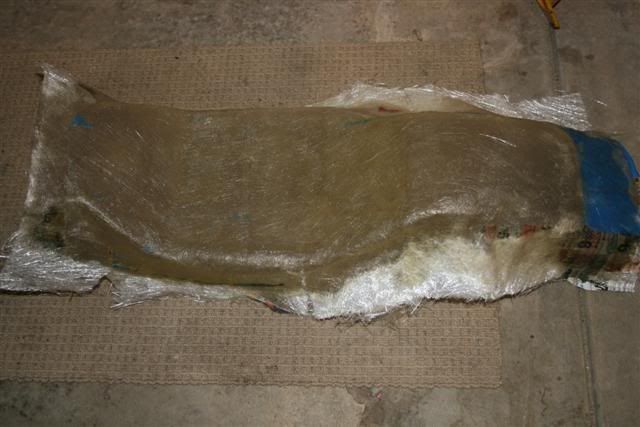
Seems pretty stiff right now. I'm going to wait 24 hours for it to fully cure, then reevaluate. I might add a couple more layers of mat to the top, just to be safe.
I also got some closed cell foam from a local rubber supply house. My dad has used it for hunting stands for years, and told me about it. Its about an inch thick, so I think I'm going to use 1 layer of foam, topped with some tempurpedic material to smooth everything out. Pretty excited about the seat pan though. First time I have ever done any fiberglass work, and it seems to have turned out pretty good.
LaterComment
-
man that is looking really good.I cant wait to see how it turns out.future owner of some year and displacement GS bike,as yet unclaimed and unowned.Comment
-
Looks good so far.
Once you get used to working with it you'll start seeing all sorts of things that you can use fiberglass for.Comment
-
Great effort, and to think i went with aluminium.Comment
-
You have no idea how helpful your listing has been for me. I have been searching for the perfect rear fender and knowing a dynaglide fits no prob is so damn helpful. I have an 883 sportster seat the problem is the front where it meets the tank on the GS is too narrow...wonder if the dyna seat would be wider up front? Thanks for your project it reminds me how I'm not as bad off as I thought. Now if I can just keep the battery charged life will be all that much betterComment
-
oh yeah meant to ask is the fender from a regular dynaglide or dyna wide glide?Comment
-
Update
Sorry its taken so long for an update here. My work schedule has exploded recently, and I'm putting in far too many hours (70+) Anyway, I have found some time to work on the bike. I have the front calipers repainted, but they turned out ****ty, so I will probably have to take them back to the sandblaster, and respray them, so no pics.
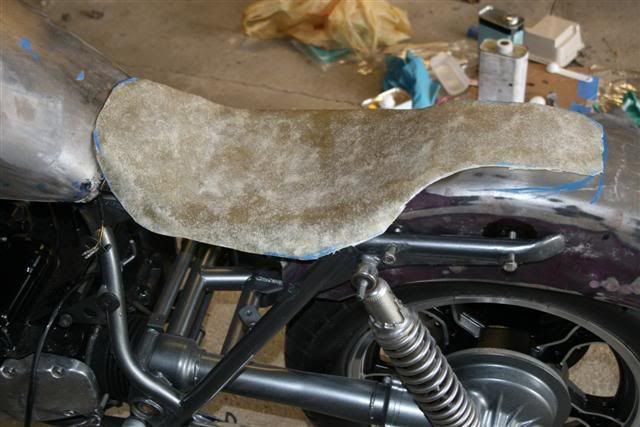
The big news is that I have figured out how to mount the seat, and its pretty clever, if I do say so myself...and of course, I do . Here are some pics
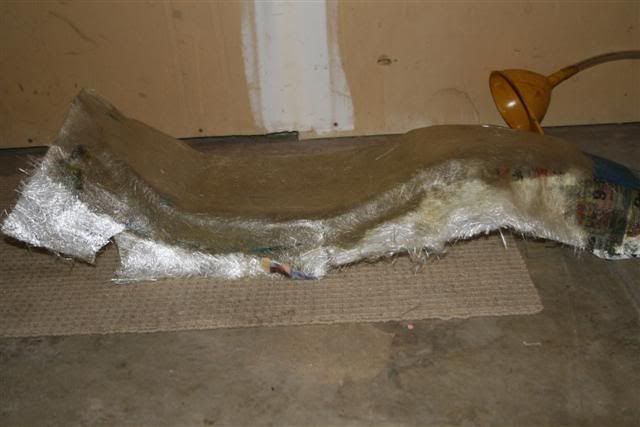
First, a pic of the pan, all trimmed up, and ready for foam and covers.
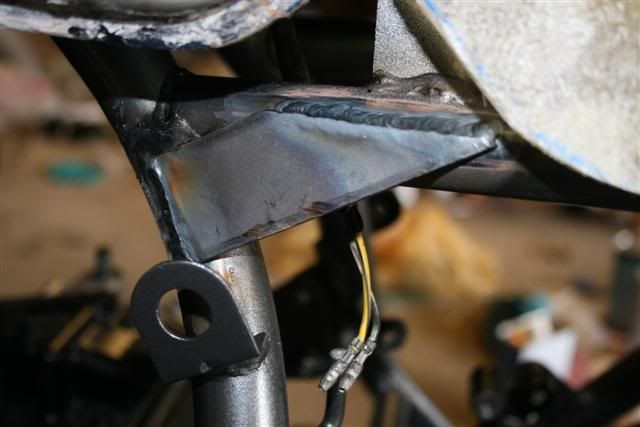
I am going to use 1/4 turn fasteners (trade name of Dzus) to mount the seat. I have welded in a support for the front two mounts... (wish I could take credit for these welds, but alas, I suck at welding. Thanks Dad!)
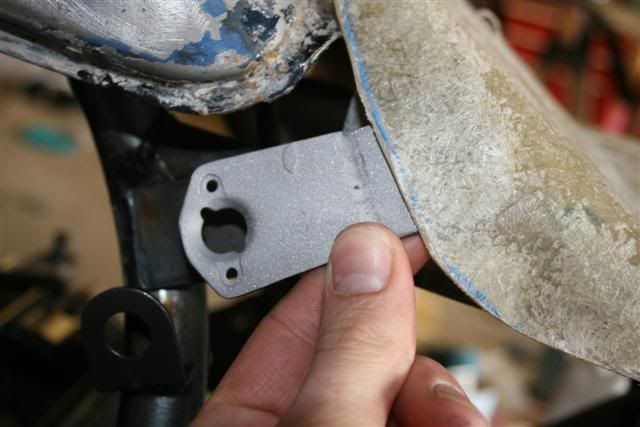
And then I made a bracket to hold the fastener to the seat. This bracket will be riveted to the pan, once the cover is on.
Continued in next post...Comment
-
Here is a pic of the Dzus fastener

The back side of it grabs a spring wire, and holds everything in place. The head pictured here is captive to the bracket, so no missing parts. Should work out very well, I have two of these at the front of the seat, and will use one at the back.Comment
-
Looking at your rails, It seems as though you've got about 1/2 inch from the end of the rail to the mounting hole, not alot. If I make a set of plugs out of aluminum, with longer shoulders, you could then easily drill the plugs after the install to match your existing holes. The only issue then would be what style you would prefer for the show end. oh and the rails have an inside weld that you'll have to file or grind.
By the way, I used the foam from my old seat as I had plenty of it. After bandsawing the shape to a rough contour, i used a cheese grate planer to smooth the edges and round the corners. Then I pulled the leather around to the back, put a few stiches in it and then superglued the rest in place This works great if you glue the leather to itself. Nice and tight. The corners fold like a christmas package.Comment
-
Good Eyes, I didn't even think about that. My brian kinda turns off when I see cool stuff that I "gotta" have. I guess I'm stuck with the current method I have, I welded bushings through the frame rails to help support the seat and fender, so a 1/2 inch is all I got. Doesn't look bad, it's just not perfectly even, and not nearly as slick as yours. Hell, I'll probably be the only one who even knows the discrepency is there...Comment
-
Just do a good job on the seat and no-one will notice the railsComment

Comment