.png "Powered by vBulletin")
Unrelated answer, good eye. When I first tore down the basement find and refurbed it, I must have switched them on reinstall. Well I haven't killed myself in 8 years, now I have something to do over the winter, not like we run out of to do list items. Thank you, nothing like a couple extra thousand eyes. lmao, really.
-
-
sigpic
mine: 2000 Honda GoldWing GL1500SE and 1980 GS850G'K' "Junior"
hers: 1982 GS850GL - "Angel" and 1969 Suzuki T250 Scrambler
#1 son: 1986 Yamaha Venture Royale 1300 and 1982 GS650GL "Rat Bagger"
#2 son: 1980 GS1000G
Family Portrait
Siblings and Spouses
Mom's first ride
Want a copy of my valve adjust spreadsheet for your 2-valve per cylinder engine? Send me an e-mail request (not a PM)
(Click on my username in the upper-left corner for e-mail info.)Comment
-
Thanks again, stiksave. Can you give just a tad more detail on the 2nd step, the polishing step? Did you perform the operation twice--once with the white compound in the HF polish wheel kit and once with the 3M fine cut polish? In that order? Did you just apply the compounds with your fingers or a soft cloth with minimal pressure before removing with buffer wheel? Did you allow the compound to dry or buff while still moist?Originally posted by stiksave View Post
...Believe in truth. To abandon fact is to abandon freedom.
Nature bats last.
80 GS850G / 2010 Yamaha Majesty / 81 GS850GComment
-
nice looking pipes, good refurb job!1983 GS 1100 ESD
Comment
-
Be very careful using a power buffer on a black exhaust or you can burn though the black colored material. Most all the cleaning possible can be done with regular ol chrome cleaner and a cotton rag. I did a couple of 1100 exhausts last year and you can get them looking pretty good by hand. An orbital buffer would be safer than a rotary.Ed
To measure is to know.
Mikuni O-ring Kits For Sale...https://www.thegsresources.com/_foru...ts#post1703182
Top Newbie Mistakes thread...http://www.thegsresources.com/_forum...d.php?t=171846
Carb rebuild tutorial...https://gsarchive.bwringer.com/mtsac...d_Tutorial.pdf
KZ750E Rebuild Thread...http://www.thegsresources.com/_forum...0-ResurrectionComment
-
I put the polishing wheel in my cordless drill. I ran the edge of the wheel on the white bar. As you tilt the bar you can see the coverage of the polish on the wheel.Test yourself first on the engine side of the header, that's where most of the damage(pitting) was on mine. Work it a bit and towel it off, then look at the result. The polish residue will hide the new finish. A terry towel wipes it away in seconds. The 3M liquid I applied with my fingers and let it set a few minutes, then buffed. I worked in small areas going easy. Time is your friend. The white bar is jewelers rouge, no noticeable grit to it. I talked with a car restoration shop and was told that if you can feel any abrasive in the compound don't use it. I've been using the 3M fine cut polish about twenty years on my paint jobs, enamel, laquer, and two part epoxy. Good product.Originally posted by dpep View Post
My half moon sleeves, for 2 and 3 cylinder came in today, so I may switch exhaust this weekend. Take your time and good luck. Did you complete step one? If so, how did it go?Comment
-
Update. Putting the stock exhaust on is like a monkey f'ing a football. The Japanese must still be ****ed over the war when they engineered it. Anyway, it's on. Needed to get new flange bolts as the aftermarket exhaust used shorter bolts. Fired it up, must have been a mouse living in it. It was full of duck or chicken down, pretty funny, and messy. The garage needed to be swept anyway. I'll post a pic soon.
 Last edited by Guest; 07-21-2013, 01:18 PM.
Comment
-
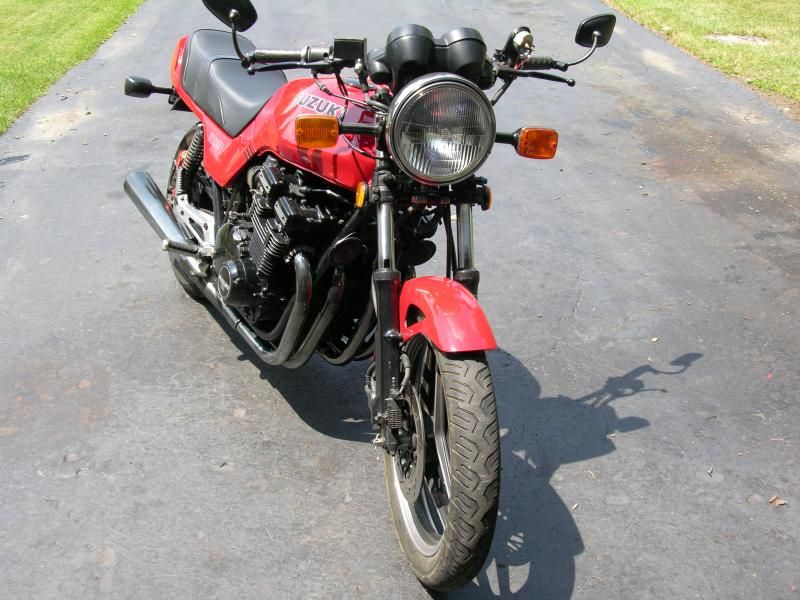
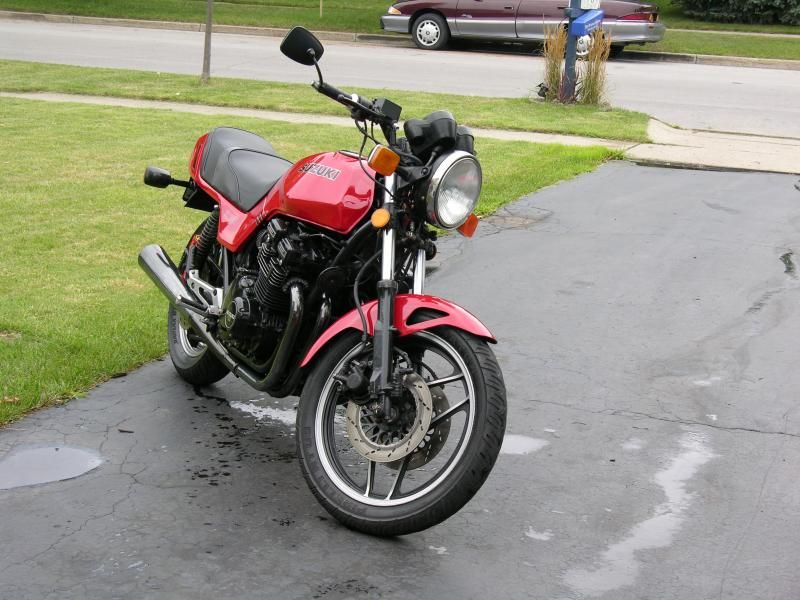
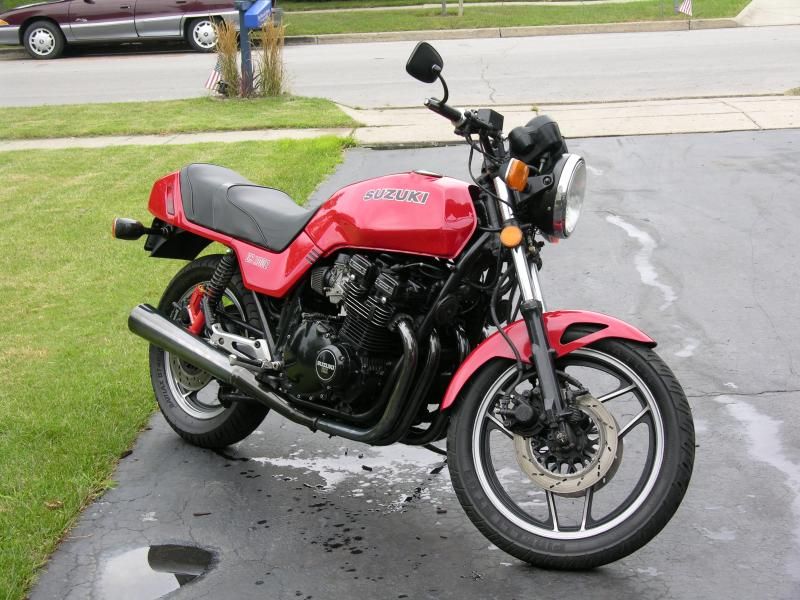
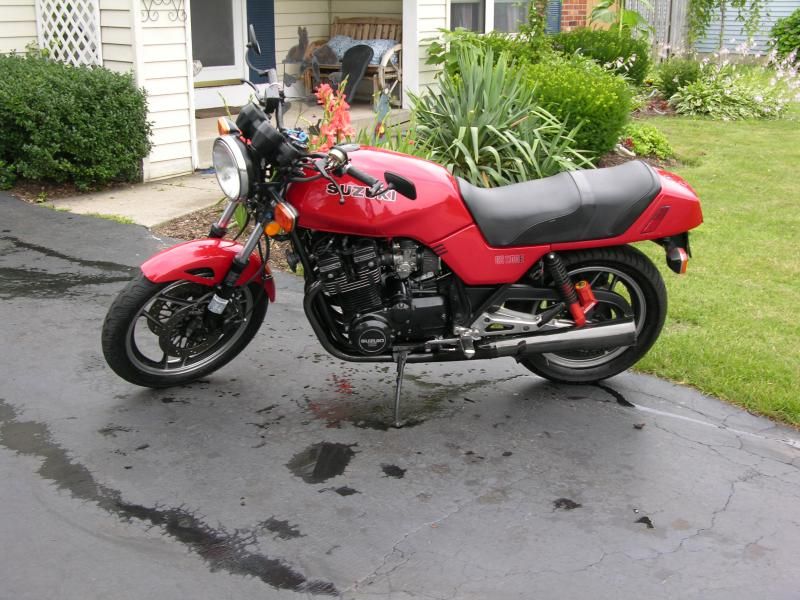
Refurb and install completed. I have to get used to them on the bike, sound, exhaust on both sides, and the look. I already miss being able to put it on the center stand from the seat, hot pipe. Washed the fingerprints off and brake dust. Just a stinky old red gs1100, but I like it.
 Last edited by Guest; 07-22-2013, 08:19 PM.
Comment
-
This is a great line...Originally posted by stiksave View Post'85 GS550L - SOLD
'85 GS550E - SOLD
'82 GS650GL - SOLD
'81 GS750L - SOLD
'82 GS850GL - trusty steed
'80 GS1100L - son's project bike
'82 GS1100G - SOLD
'81 GS1100E - Big Red (daily rider)Comment
-
I left the system loose because of having it apart for the refurb. So, catch 2 and 3, 1 and 4 fall over. then keeping the half moon shims in place, argh. I used black allen head cap screw to mount it to the head (8mm x 1.5"). I took the proper allen wrench and cut the short end off, placed it the coresponding 1/4" socket in order to use a ratchet to alternate tightening of bolts.Then of coarse the muffler mounts didn't line up correctly. Back off bolts at the head, remove and dremel the muffler mounts, catch and retighten exhaust bolts. Awkward but done. That's why the quote line.Comment
-
dpep, Did you get the refurb done, and how did it go for you?Comment
-
looks awesome!
I will be following this very handy guide when I do mine.
I was thinking a little bit of grease might help hold those retainers in place, you know until you grow another arm or two out of the center of your chest.
Comment
-
Good luck with the restore. I was pretty much in the dark with the job. I asked a lot questions at restoration shops I visited. It worked out better than I thought seeing what I brought home. It's held up very well afterward. A little polish, a little carnuba wax, love it.Originally posted by Weapon View PostComment


Comment