Announcement

Collapse
No announcement yet.

Earl's Brake Line Thread

Collapse
X
 
  • Filter
  • Time
  • Show
Clear All
new posts

    Earl's Brake Line Thread

    The old thread on making brake lines was outdated so this update is offered instead.

    Earl's parts are made in USA. No Chinese junk here. The pull off force for the bolt together lines is higher than machine crimp lines too so don't worry about failure (as long as you assemble correctly).

    You can see a video of the assembly process here.


    To make brake lines we need Speed-Seal -3 hose and 3/8 / 10mm hose ends.

    There are two basic types of hose ends: adjustable and non-adjustable. Adjustable allow easier angular clocking once the hose ends are attached to the hose but the non-adjustable type are nothing to fear in that regard and they save some $. If you go adjustable you only need one end adjustable per section, not both.

    Before ordering parts you first need to decide if you want a three piece set for the front (like OEM) or two piece. Two piece saves labor and money for the parts.

    For most GS applications the following hose ends will work:

    Straight adjustable hose end (banjo) is P/N 600403
    Straight non adjustable hose end is P/N 600703
    Angled adjustable hose end is P/N 600503
    Angled non adjustable hose end is P/N 600803

    Be sure to order enough hose. It takes about 8' to make a 3-piece front set + rear line.

    You can reuse your stock GS banjo bolts but be sure to get new crush washers.


    The following set of lines cost $89 + tax for the parts.

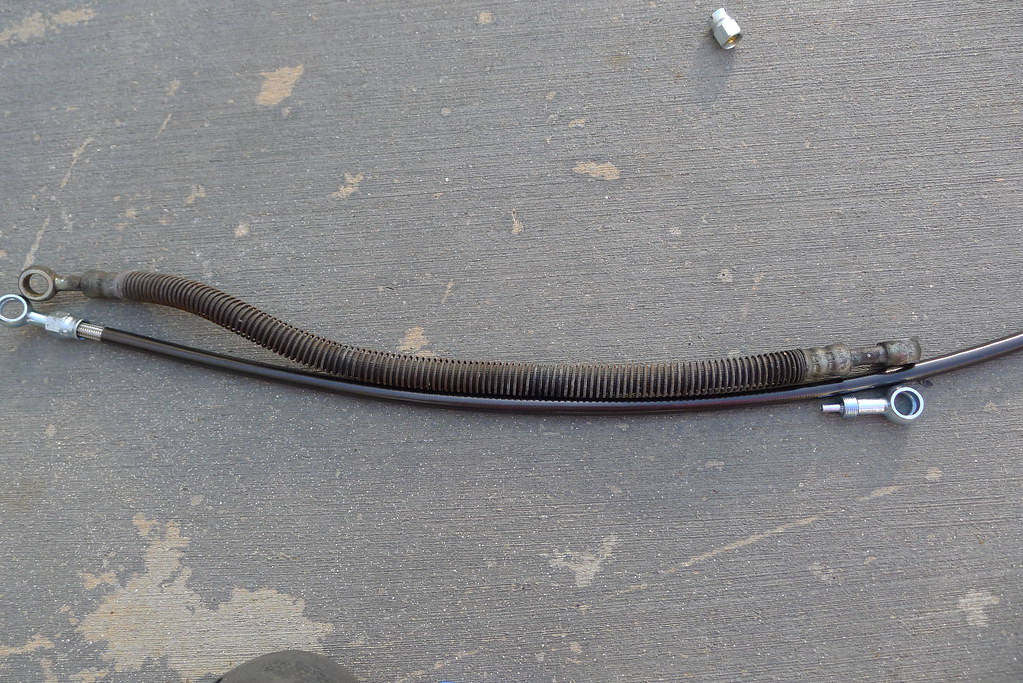
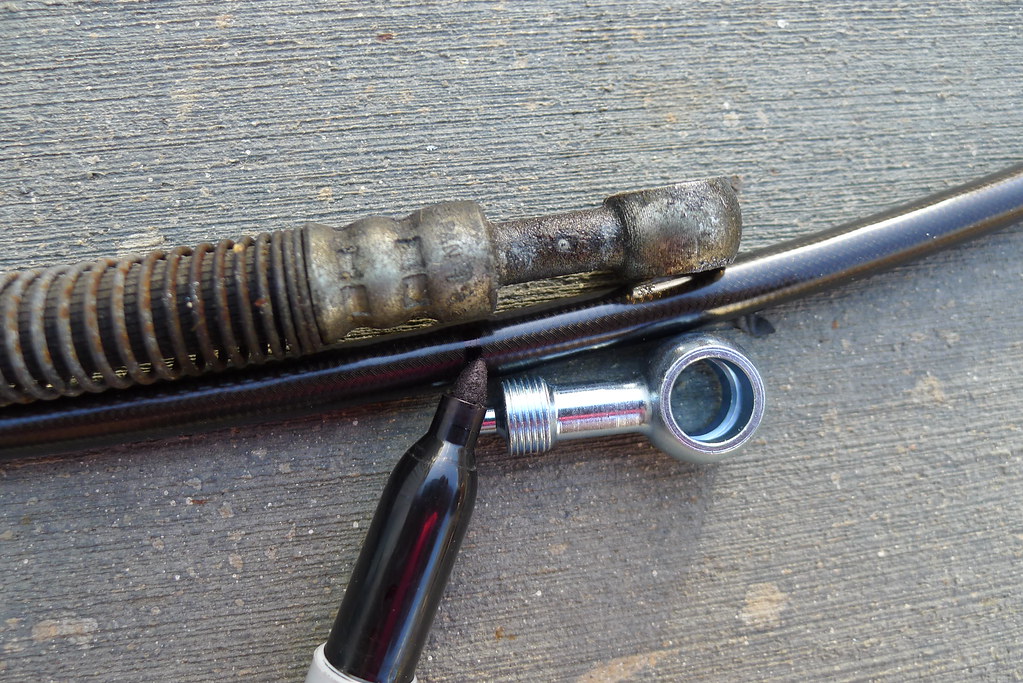
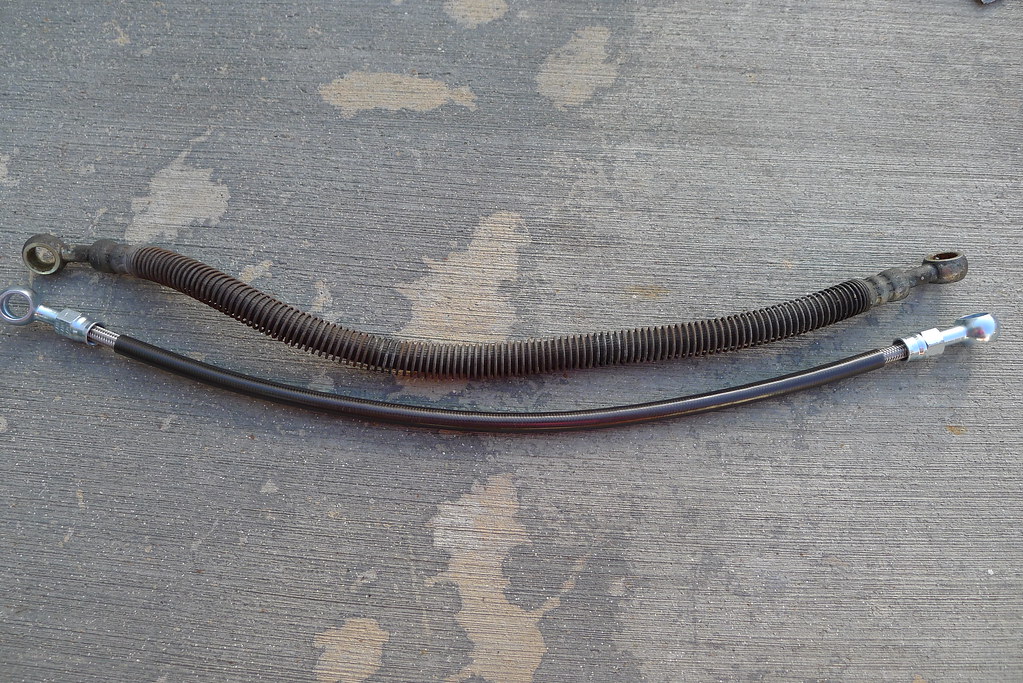
    Check out the crud inside the old lines!
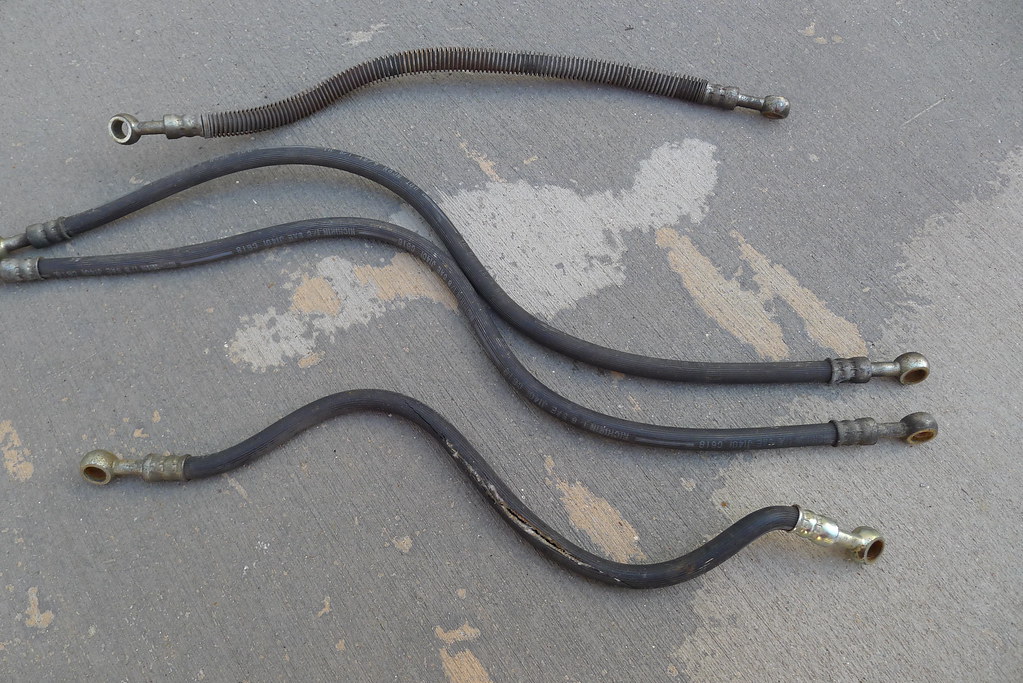
    P1010650 by nessism, on Flickr

    P1010652 by nessism, on Flickr

    New Earl's parts...

    P1010654 by nessism, on Flickr

    P1010657 by nessism, on Flickr

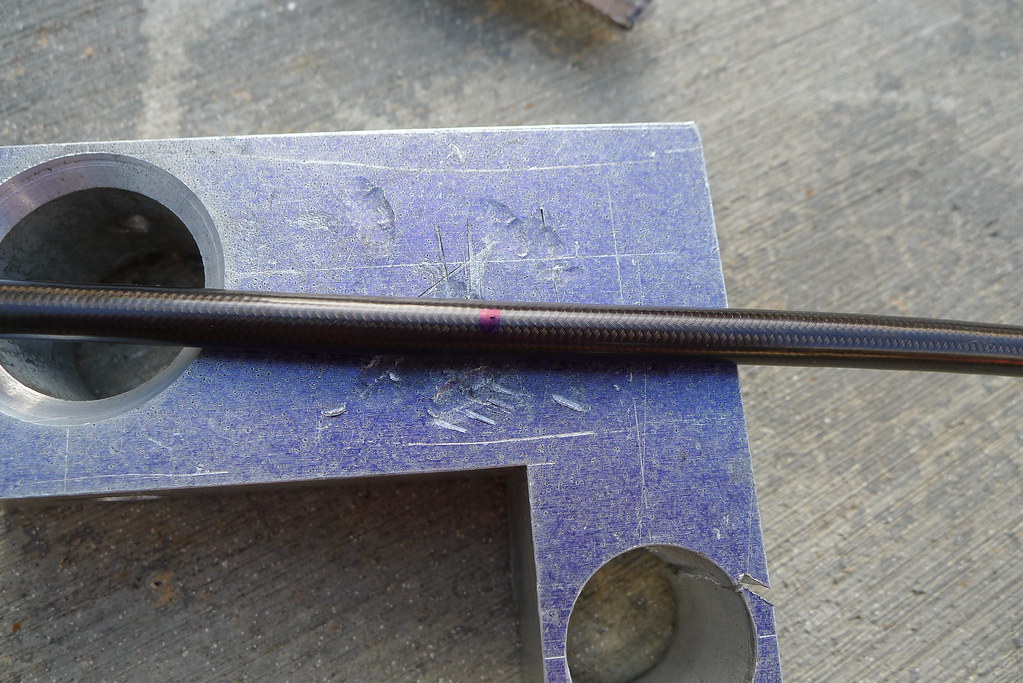
    Tools...

    P1010656 by nessism, on Flickr
    Last edited by Nessism; 05-08-2025, 12:59 PM.
    Ed

    To measure is to know.

    Mikuni O-ring Kits For Sale...https://www.thegsresources.com/_foru...ts#post1703182

    Top Newbie Mistakes thread...http://www.thegsresources.com/_forum...d.php?t=171846

    Carb rebuild tutorial...https://gsarchive.bwringer.com/mtsac...d_Tutorial.pdf

    KZ750E Rebuild Thread...http://www.thegsresources.com/_forum...0-Resurrection

    #2
    P1010660 by nessism, on Flickr

    P1010663 by nessism, on Flickr

    P1010664 by nessism, on Flickr

    P1010666 by nessism, on Flickr

    P1010667 by nessism, on Flickr
    P1010695 by nessism, on Flickr

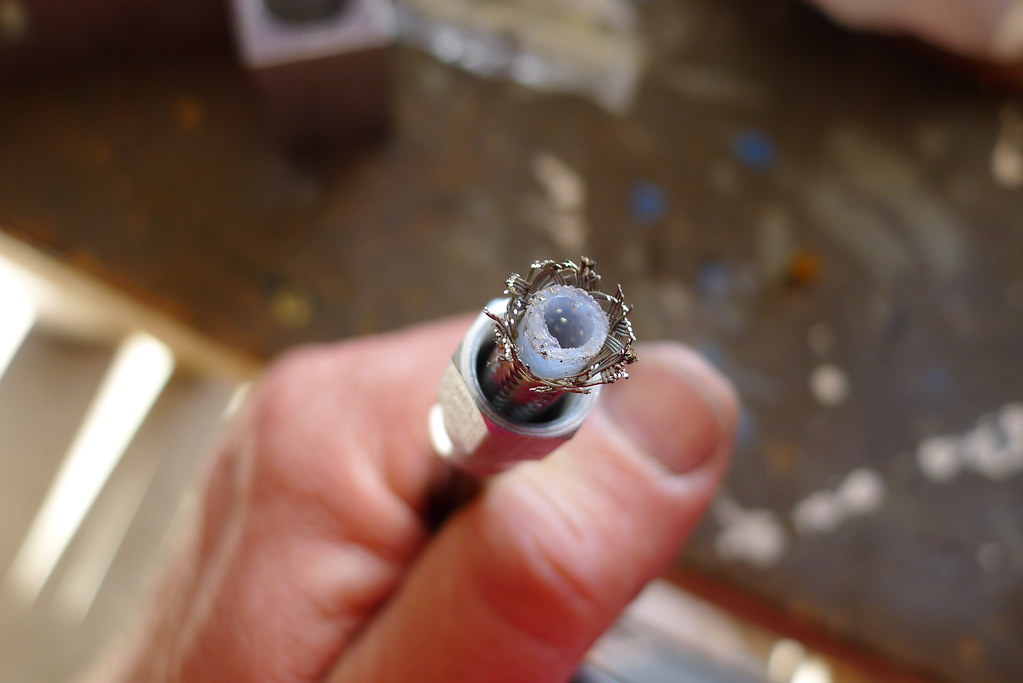
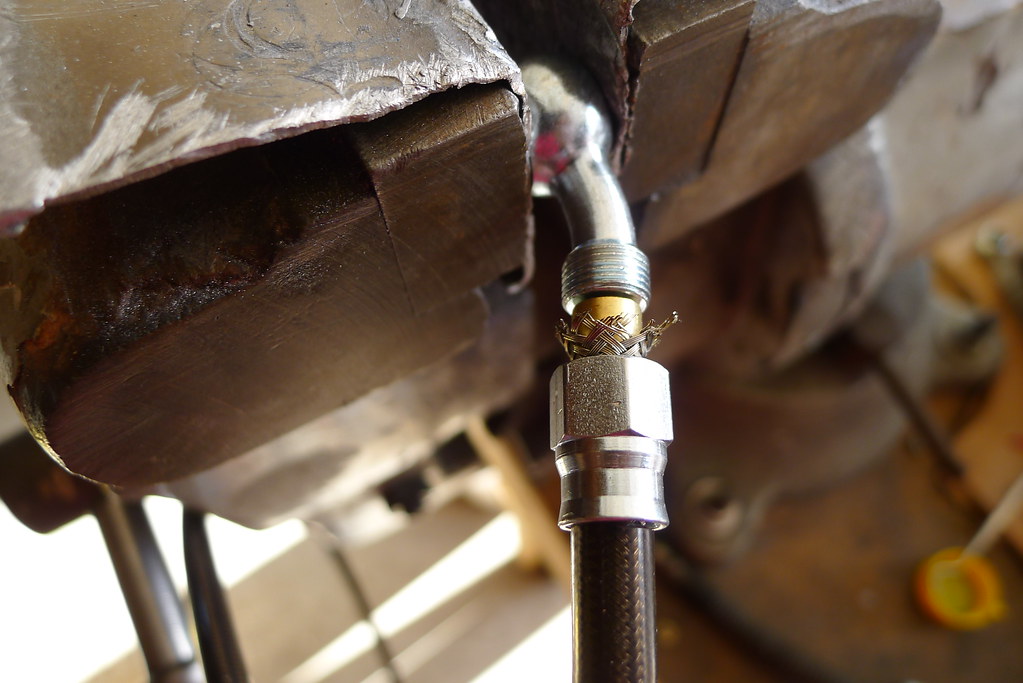
    Look down inside the ferrule and make sure the inner teflon liner is fully seated down to the step inside the ferrule.

    P1010698 by nessism, on Flickr
    Ed

    To measure is to know.

    Mikuni O-ring Kits For Sale...https://www.thegsresources.com/_foru...ts#post1703182

    Top Newbie Mistakes thread...http://www.thegsresources.com/_forum...d.php?t=171846

    Carb rebuild tutorial...https://gsarchive.bwringer.com/mtsac...d_Tutorial.pdf

    KZ750E Rebuild Thread...http://www.thegsresources.com/_forum...0-Resurrection

    Comment


      #3
      P1010672 by nessism, on Flickr

      P1010674 by nessism, on Flickr

      P1010675 by nessism, on Flickr

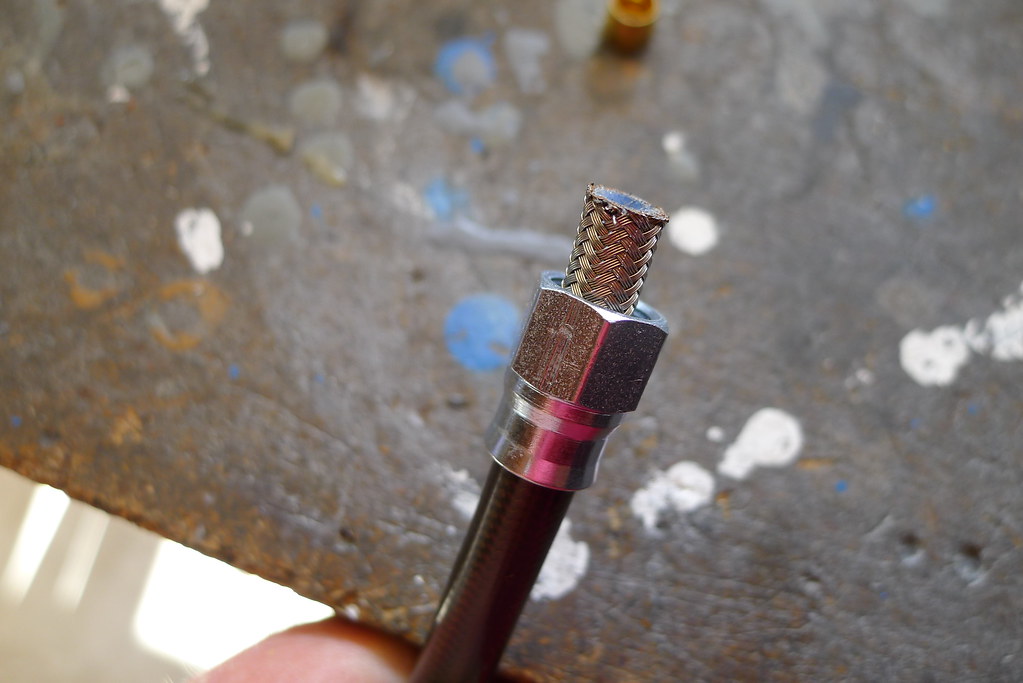
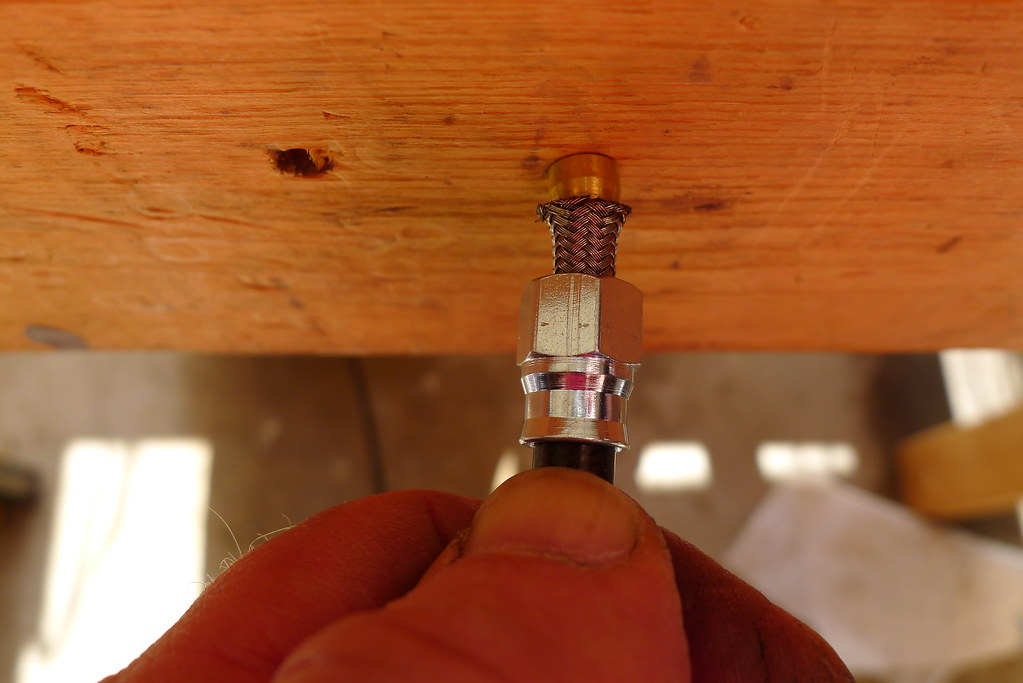
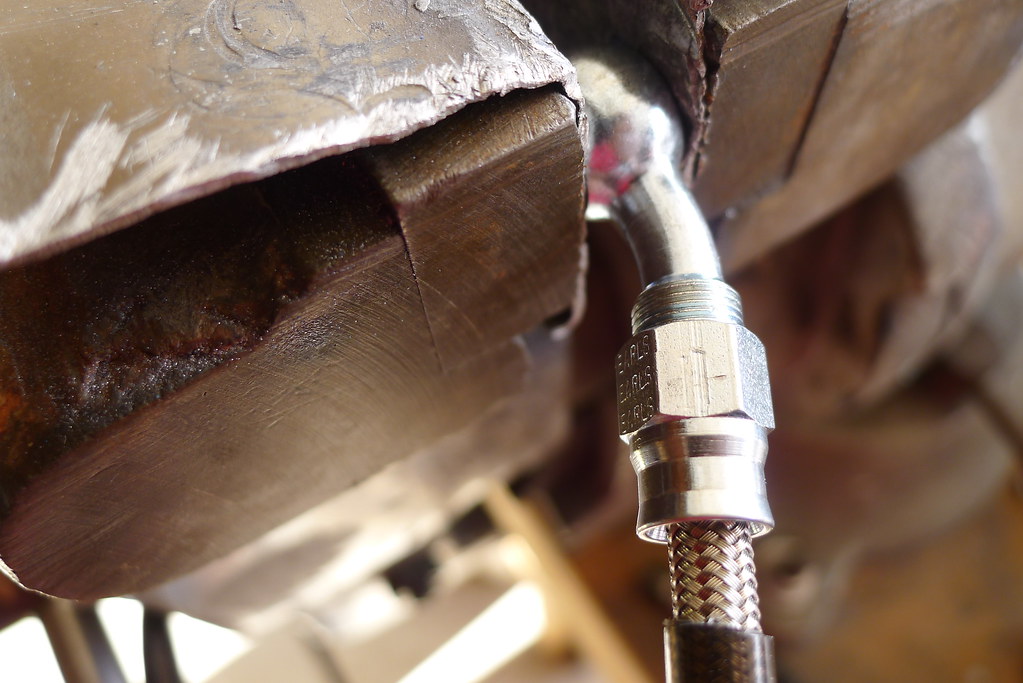
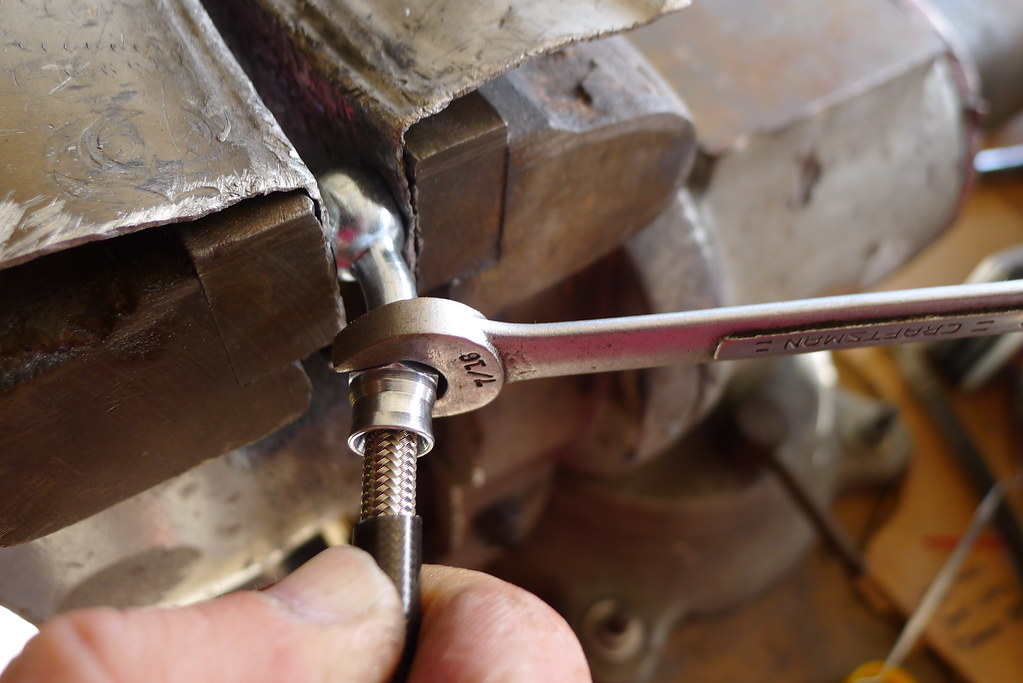
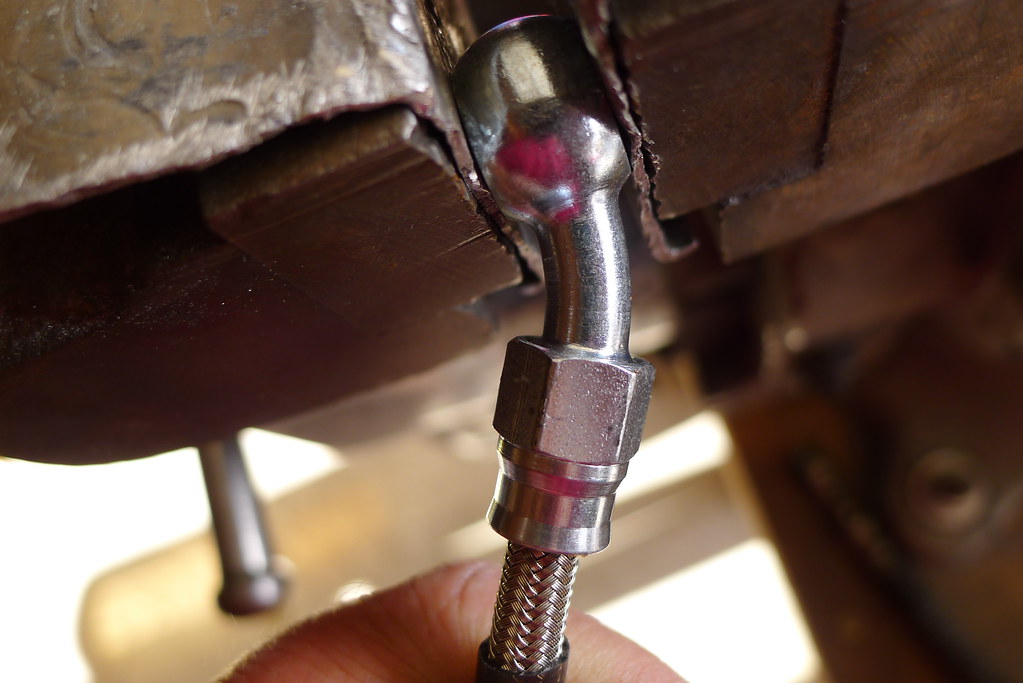
      Shove the hose on firmly while tightening the nut. Tighten almost all the way, but stop just short so the hose end can be clocked with the other.

      P1010676 by nessism, on Flickr

      P1010677 by nessism, on Flickr
      Ed

      To measure is to know.

      Mikuni O-ring Kits For Sale...https://www.thegsresources.com/_foru...ts#post1703182

      Top Newbie Mistakes thread...http://www.thegsresources.com/_forum...d.php?t=171846

      Carb rebuild tutorial...https://gsarchive.bwringer.com/mtsac...d_Tutorial.pdf

      KZ750E Rebuild Thread...http://www.thegsresources.com/_forum...0-Resurrection

      Comment


        #4
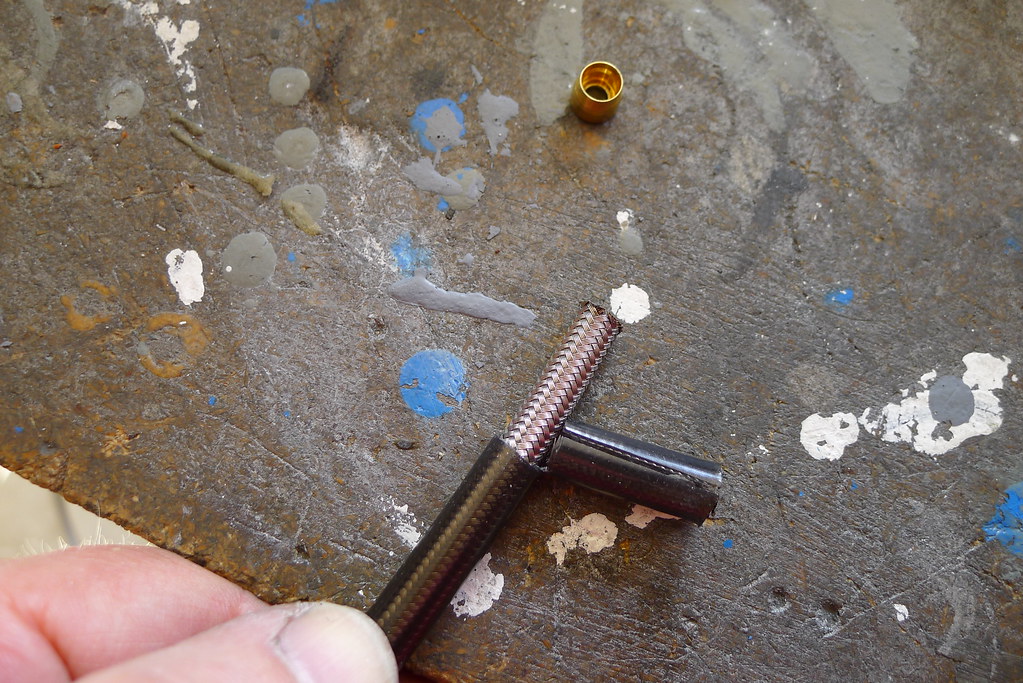
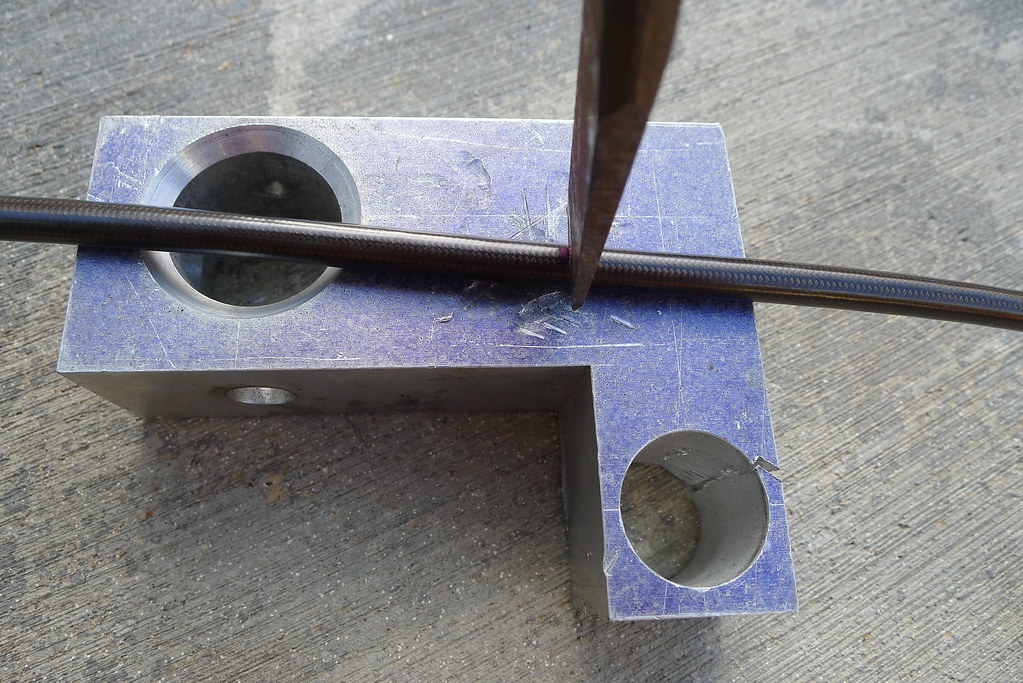
        Whack the chisel with the mini sledge...

        P1010678 by nessism, on Flickr

        P1010679 by nessism, on Flickr

        P1010701 by nessism, on Flickr

        P1010702 by nessism, on Flickr

        P1010704 by nessism, on Flickr


        Install the other hose end and pay attention closely to the clocking position. I used non adjustable hose ends but they work out fine. You just need to be careful to stop a little short of fully tight so you can get the clocking right.

        P1010688 by nessism, on Flickr

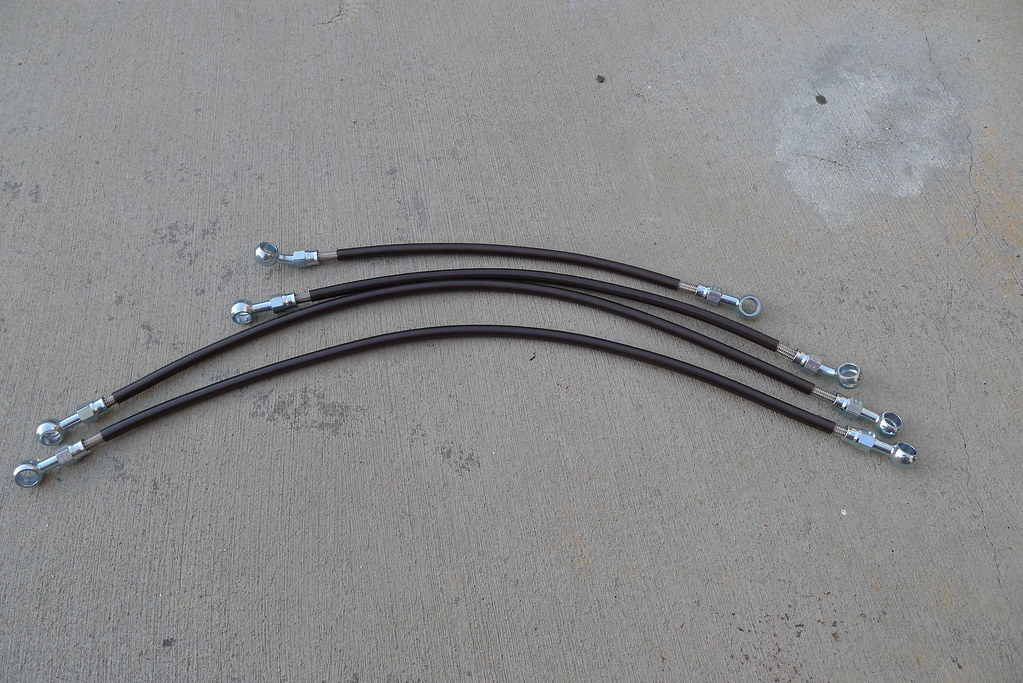
        Repeat everything three more times and...
        Some heat shrink tubing can be used to cover up where the vinyl coating was removed. Next time...

        P1010705 by nessism, on Flickr

        P1010706 by nessism, on Flickr
        Ed

        To measure is to know.

        Mikuni O-ring Kits For Sale...https://www.thegsresources.com/_foru...ts#post1703182

        Top Newbie Mistakes thread...http://www.thegsresources.com/_forum...d.php?t=171846

        Carb rebuild tutorial...https://gsarchive.bwringer.com/mtsac...d_Tutorial.pdf

        KZ750E Rebuild Thread...http://www.thegsresources.com/_forum...0-Resurrection

        Comment


          #5
          And before anyone posts a comment about Rennsport lines, please don't. This thread is about Earl's lines and how to make them.
          Last edited by Nessism; 11-21-2017, 11:17 PM.
          Ed

          To measure is to know.

          Mikuni O-ring Kits For Sale...https://www.thegsresources.com/_foru...ts#post1703182

          Top Newbie Mistakes thread...http://www.thegsresources.com/_forum...d.php?t=171846

          Carb rebuild tutorial...https://gsarchive.bwringer.com/mtsac...d_Tutorial.pdf

          KZ750E Rebuild Thread...http://www.thegsresources.com/_forum...0-Resurrection

          Comment


            #6
            Nice job. About how much did it cost?

            I think it would have been a nice touch to refurbish and reuse the wear spring on the new rear hose to keep the stock look.
            :cool:GSRick
            No God, no peace. Know God, know peace.

            Eric Bang RIP 9/5/2018
            Have some bikes ready for us when we meet up.

            Comment


              #7
              Originally posted by gsrick View Post
              Nice job. About how much did it cost?

              I think it would have been a nice touch to refurbish and reuse the wear spring on the new rear hose to keep the stock look.
              The set shown was a little less than $100 for the four line set including tax.
              Ed

              To measure is to know.

              Mikuni O-ring Kits For Sale...https://www.thegsresources.com/_foru...ts#post1703182

              Top Newbie Mistakes thread...http://www.thegsresources.com/_forum...d.php?t=171846

              Carb rebuild tutorial...https://gsarchive.bwringer.com/mtsac...d_Tutorial.pdf

              KZ750E Rebuild Thread...http://www.thegsresources.com/_forum...0-Resurrection

              Comment


                #8
                Great tutorial Ed. FYI in the last year I installed 2 sets of off the shelf brake line kits and while the quality and price were pretty good the fit of the lines from the master cylinder to the splitter have to be pretty exact because they are really stiff and the ends don't move creating quite a pain to reroute anything and get things bolted up. If you make your own you won't run into this problem. Next time I'll be building them myself.
                '84 GS750EF (Oct 2015 BOM) '79 GS1000N (June 2007 BOM)

                Comment


                  #9
                  I can attest to Earls lines having made a couple (with help from Ed). It's really pretty easy and they come out looking/working great.


                  Last edited by sam000lee; 11-22-2017, 12:20 PM.
                  1980/1981 GS450 - GS500 Cylinder + Piston Swap - "De-L'ed", custom seat, CB350 bits, 18" rear, etc.
                  1977 GS550
                  1977 GS750 - Cross country trip thread

                  Comment


                    #10
                    Originally posted by Nessism View Post
                    And before anyone posts a comment about Rennsport lines, please don't. This thread is about Earl's lines and how to make them.
                    Thanks for putting this together, I think I'll go this route next time. I'd like to see you "sell" it a bit more. Some aren't going to fully understand how the "value" is with Earls.
                    sigpic
                    83 GS1100g
                    2006 Triumph Sprint ST 1050

                    Ohhhh!........Torque sweet Temptress.........always whispering.... a murmuring Siren

                    Comment


                      #11
                      Value:

                      - You can pick whatever hose end angles you desire. This is particularly valuable when using non stock handlebars and/or a master with the fluid port in a different position than stock.
                      - Length is up to you. Again, this is particularly important when moving to different handlebars.
                      - All parts made in USA
                      - Pull off force for screw together lines is higher than crimp lines (per the owner of AN Plumbing).
                      - Price is good. 4 piece line kit can be made for about $100.
                      - Fancy colored anodized aluminum and uber durable stainless steel hose ends are available if you desire such things.
                      - Making your own lines is FUN!
                      Ed

                      To measure is to know.

                      Mikuni O-ring Kits For Sale...https://www.thegsresources.com/_foru...ts#post1703182

                      Top Newbie Mistakes thread...http://www.thegsresources.com/_forum...d.php?t=171846

                      Carb rebuild tutorial...https://gsarchive.bwringer.com/mtsac...d_Tutorial.pdf

                      KZ750E Rebuild Thread...http://www.thegsresources.com/_forum...0-Resurrection

                      Comment


                        #12
                        Thanks Ed for the instructions and pictures. I think I'll go this route next time also. The ones I bought at that other place I wont mention. The "clock" was off about 15 minutes (90°) on the line from front master cylinder to the coupling block. It still worked, but the line did not lay like it should have. You see in the attached picture how the line makes a funky bend...
                        Attached Files
                        Last edited by storm 64; 11-22-2017, 12:38 PM.
                        My Motorcycles:
                        22 Kawasaki Z900 RS (Candy Tone Blue)
                        22 BMW K1600GT (Probably been to a town near you)
                        82 1100e Drag Bike (needs race engine)
                        81 1100e Street Bike (with race engine)
                        79 1000e (all original)
                        82 850g (all original)
                        80 KZ 650F (needs restored)

                        Comment


                          #13
                          Originally posted by storm 64 View Post
                          Thanks Ed for the instructions and pictures. I think I'll go this route next time also. The ones I bought at that other place I wont mention. The "clock" was off about 15 minutes (90°) on the line from front master cylinder to the coupling block. It still worked, but the line did not lay like it should have.
                          Getting the clocking just right is desirable for sure.

                          In case the above is not fully clear...

                          Install the hose-end nut on the hose end and spin it until it stops and then use a sharpy to mark the full tight spot on the hose end and one of the nut flats. When installing the hose end, stop 1/2 turn short of fully tight. Don't worry, at this point the ferrule and teflon liner is fully seated inside. Now install the second hose end, after likewise marking, and watch your clocking as you come up to full tight. Between the two ends you can get the clocking perfect even when using non adjustable hose ends. Or get one adjustable hose end per assembly and disregard everything I just said. Either way works!
                          Last edited by Nessism; 11-22-2017, 01:05 PM.
                          Ed

                          To measure is to know.

                          Mikuni O-ring Kits For Sale...https://www.thegsresources.com/_foru...ts#post1703182

                          Top Newbie Mistakes thread...http://www.thegsresources.com/_forum...d.php?t=171846

                          Carb rebuild tutorial...https://gsarchive.bwringer.com/mtsac...d_Tutorial.pdf

                          KZ750E Rebuild Thread...http://www.thegsresources.com/_forum...0-Resurrection

                          Comment


                            #14
                            Question ED. Does the vinyl outer sheathing float or is it more or less fixed in position, as in can you slide it to one end and then just shrink tube the other end instead of both?
                            '84 GS750EF (Oct 2015 BOM) '79 GS1000N (June 2007 BOM)

                            Comment


                              #15
                              The coating doesn't slide Sandy. If you are careful you can minimize how much you cut off though. It just gets more fiddly with getting the olive/ferrule installed inside and seated.
                              Ed

                              To measure is to know.

                              Mikuni O-ring Kits For Sale...https://www.thegsresources.com/_foru...ts#post1703182

                              Top Newbie Mistakes thread...http://www.thegsresources.com/_forum...d.php?t=171846

                              Carb rebuild tutorial...https://gsarchive.bwringer.com/mtsac...d_Tutorial.pdf

                              KZ750E Rebuild Thread...http://www.thegsresources.com/_forum...0-Resurrection

                              Comment

                              Working...
                              X