Announcement

Collapse
No announcement yet.

Project 1100 Bandit/Gsxr conv

Collapse
X
 
  • Filter
  • Time
  • Show
Clear All
new posts

    #31
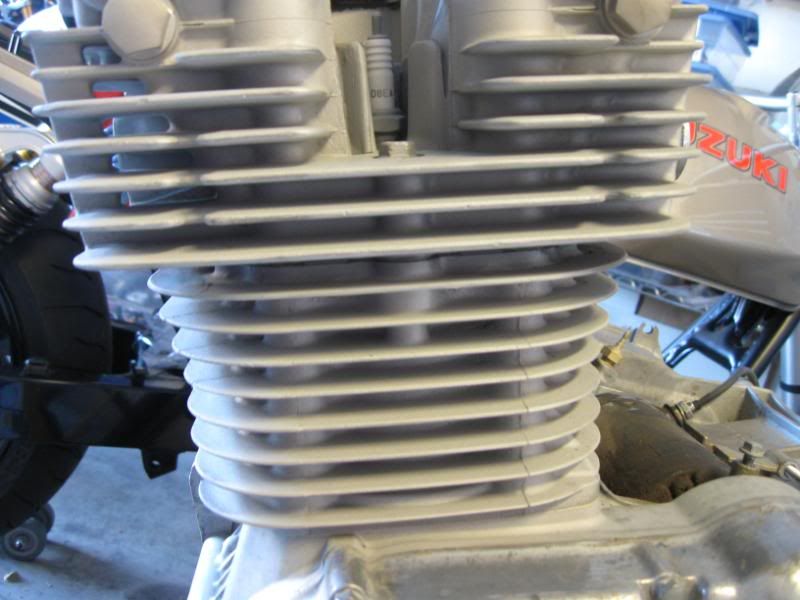
    Had the engine media blasted.....paint up next


    Comment


      #32
      WHAT !!!! NO Polish.... LOL

      Comment


        #33
        Originally posted by Rkt-Rch View Post
        WHAT !!!! NO Polish.... LOL
        Yeah I know, its killing me to see her this way...

        Comment


          #34
          Looking good Joe.

          Media blasted engines scare me. What did they blast it with? That grit gets inside everything, even if you seemingly have good plugs.
          Ed

          To measure is to know.

          Mikuni O-ring Kits For Sale...https://www.thegsresources.com/_foru...ts#post1703182

          Top Newbie Mistakes thread...http://www.thegsresources.com/_forum...d.php?t=171846

          Carb rebuild tutorial...https://gsarchive.bwringer.com/mtsac...d_Tutorial.pdf

          KZ750E Rebuild Thread...http://www.thegsresources.com/_forum...0-Resurrection

          Comment


            #35
            Boy you better prime the crap out of that Joe...that media blasted Alu is gonna be thirsty!

            Comment


              #36
              Originally posted by Nessism View Post
              Looking good Joe.

              Media blasted engines scare me. What did they blast it with? That grit gets inside everything, even if you seemingly have good plugs.
              Yeah I had some concerns, plugged off the carb and exhaust ports with wadded latex gloves and told him to be kind in those areas. Overall it cleaned up pretty well. Kinda buggered up one of the side covers but it should polish out.

              Comment


                #37
                Originally posted by TheCafeKid View Post
                Boy you better prime the crap out of that Joe...that media blasted Alu is gonna be thirsty!
                Kinda wondering about that....the stock paint did not appear to be primered.

                Comment


                  #38
                  Originally posted by jwhelan65 View Post
                  Kinda wondering about that....the stock paint did not appear to be primered.
                  Well, Im not an expert by far, and Ed, or Jim would probably know more accurately what was used and what is available TODAY, but I would assume Suzuki pre-painted and seasoned their parts before assembly. And I'd also assume, for them to retain their colour for so long after so many heat cycles, they probably used some sort of industrial grade paint/primer combo? Or perhaps they used a sealing agent on the alu prior to paint. Since, as Im assuming you're not breaking the motor down to paint, you dont have these luxuries, you'll probably want to prime/seal the surfaces pretty well before painting, or its going to use lots of paint before it looks good. And, if you use something like PJ1, Duplicolour or the like, it needs a few heat cycles to cure. Running the motor will do the trick, but prior to curing it will be soft, porous, and the metal may drink a bit of it up causing blotchy spots.. But I will leave this to the guys who know better. I personally have never blasted a bike motor before paint, because as most painters will tell you, old decent paint is a better primer than new primer...

                  Comment


                    #39
                    Originally posted by TheCafeKid View Post
                    Well, Im not an expert by far, and Ed, or Jim would probably know more accurately what was used and what is available TODAY, but I would assume Suzuki pre-painted and seasoned their parts before assembly. And I'd also assume, for them to retain their colour for so long after so many heat cycles, they probably used some sort of industrial grade paint/primer combo? Or perhaps they used a sealing agent on the alu prior to paint. Since, as Im assuming you're not breaking the motor down to paint, you dont have these luxuries, you'll probably want to prime/seal the surfaces pretty well before painting, or its going to use lots of paint before it looks good. And, if you use something like PJ1, Duplicolour or the like, it needs a few heat cycles to cure. Running the motor will do the trick, but prior to curing it will be soft, porous, and the metal may drink a bit of it up causing blotchy spots.. But I will leave this to the guys who know better. I personally have never blasted a bike motor before paint, because as most painters will tell you, old decent paint is a better primer than new primer...
                    Good advice Josh, there was no painting over the old paint it was peeling everywhere, it needed to be removed or it would have looked like crap. I agree some for of primer will have to be used just need to figure what.

                    Comment


                      #40
                      Stripped off the covers for polishing and removed the valve cover. Next up adjust the valves and figure out the oil leak...


                      I think these are the o-ring leaks that Jim and Ray referred to...?? dunno for sure

                      Last edited by Guest; 05-07-2010, 11:19 PM.

                      Comment


                        #41
                        This forum contains old posts which may have information which may be useful. It is a closed forum in that you can not post here any longer. Please post your questions in the other technical forums.

                        Comment


                          #42
                          Is it under the valve cover?

                          Comment


                            #43
                            Originally posted by jwhelan65 View Post
                            Is it under the valve cover?
                            Those o-rings seal those 2 chrome "post" fasteners on their OD against the hole walls. When you remove them you'll see them. You get to them from under the valve cover.
                            '85 GS550L - SOLD
                            '85 GS550E - SOLD
                            '82 GS650GL - SOLD
                            '81 GS750L - SOLD
                            '82 GS850GL - trusty steed
                            '80 GS1100L - son's project bike
                            '82 GS1100G - SOLD
                            '81 GS1100E - Big Red (daily rider)

                            Comment


                              #44
                              Originally posted by hikermikem View Post
                              Those o-rings seal those 2 chrome "post" fasteners on their OD against the hole walls. When you remove them you'll see them. You get to them from under the valve cover.
                              Valve cover is off, is it the two in the photo?

                              Comment


                                #45
                                these are the ones

                                Errhum......

                                Only do one at a time and retoque to spec (25-29 ft-lbs)

                                And put a rang down the chain tunnel in case you drop something


                                An oh by the way do a rag check (all accounted for) before buttening it all up.


                                And change the oil in that beast
                                Last edited by posplayr; 05-08-2010, 11:33 PM.

                                Comment

                                Working...
                                X