Announcement

Collapse
No announcement yet.

Jennifer's Makeover

Collapse
X
 
  • Filter
  • Time
  • Show
Clear All
new posts

  • Flyboy
    Guest replied
    Right so today murphy conspired against me and hid my filler away, so after hunting high and low, I called no joy and had to give the prep work on the tail piece a miss.
    However, i did manage to get the garage and wrk bench cleaned up, eventually.
    And I put some time into deciding what to do with fairing?????
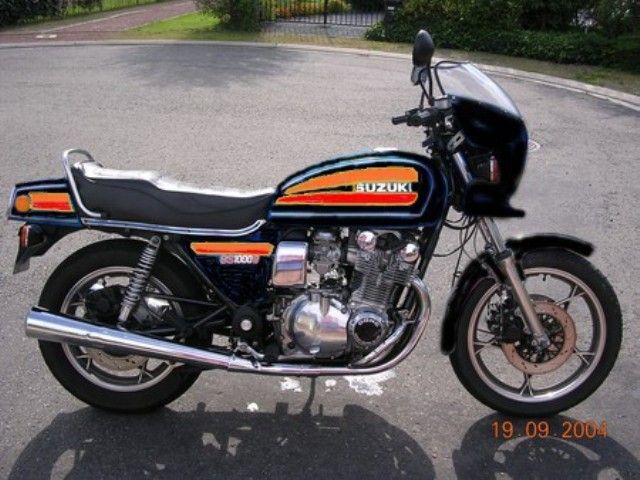
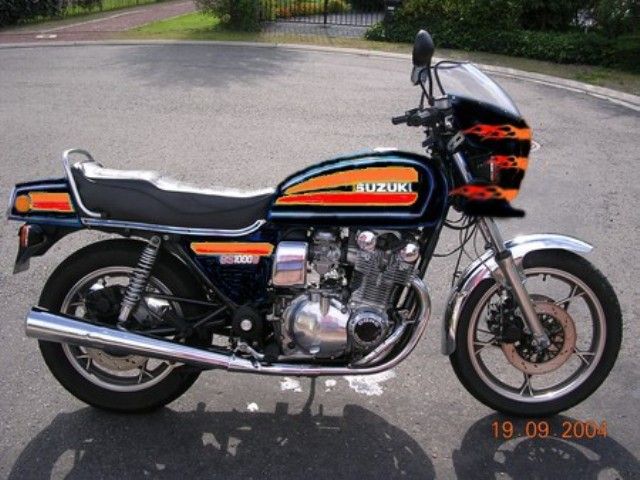
    Obviously the OEM decal set for the 1000G does not include anything for the "S" style fairing, which jennifer will be wearing, so what to do????
    I opened up the Gimp and reproduced a quick and nasty mock up of what Jennifer will look like in her new clothes, you can see the problem straight away.


    So I thought I will call upon the GSR's collective artistic flair to come up with something, so get those photo editin programs open and help me come up with something, hey its freezing out there anyway, not like you have anything better to do.
    Was thinking of some old school flames, but the fairing is not long enough and does not lend itself to them well.


    So what yoy got???

    Leave a comment:


  • Flyboy
    Guest replied
    Ok, not much to write about, was hoping to get the tail piece done, lay down colour and decals and first coats of clear, but it was not to be.
    You have read , probably every where a million times, that laying paint is only 10% of the kob, the preperation is 90% of the job, I will say it again,

    YOU CAN NOT COVER POOR PREPARATION WITH PAINT!!!!!

    Because paint is expensive and I am cheap, and it burns my ass to take off good paint to redo a job, I have developed a little habit that works well for me before I start laying down the actual job.
    I live by the motto, "if you can feel it you will see it", so I am always running my fingertips lightly over the part to be painted feeling for tell tale signs of blemishes or imperfections that will jump out to haunt me as soon as the colour goes on.
    I have also gone one step further and lay down a thin "police" coat of cheap rattle can gloss black.
    Not to be confused with the guide coat used while sanding amd filling high and low spots during prep, but laid down once all the prep is done, not just a mist, but full coverage, the slightest imperfection will show straight away, and can be delt with.
    Why gloss black? Because it shows up imperfections like no other paint.
    Once I am happy with the "police" coat, I wet sand it off with 600 grit, and start laying the primer, that way I know for sure that there are no bogeymen waiting to jump out.

    Short story, the tail piece, which I thought was ready for paint, is far from it, as evidenced by the tell tale "police coat" so more prep lies ahead, will try and get some pics up tomorrow.

    Leave a comment:


  • pete
    replied
    Stan I'm still proud of how the 450 turned out, I just know how I can make it better for the next one now

    Naturally a lot of that is thanks to Dale, Larry, and others who chipped in with their awesome advice

    The biggest issue with my paint is that I didn't go far enough with the wet sanding with high grit paper at the end so there is still a bit of orange peel... I exercised far too much self control with that!!!

    Leave a comment:


  • Flyboy
    Guest replied
    Thanks Doc, coming form you I will take that as a huge compliment, I know how OCD you are when it comes to attention to detail, so if I can do half the job you do, I am all good.

    Leave a comment:


  • rustybronco
    replied
    So how was that gun to setup and how far away did you have the nozzle away from the panel(s) you were spraying?


    Looks very nice!

    Leave a comment:


  • Flyboy
    Guest replied
    Thanks Andre, yeah, that is indeed silly cheap, good to have a GF in the motor parts business who gets staff discount on everything, I think the set retails for around +- R600, shows you the mark up these thieves charge.
    I think her staff price is cost + 5%, oh and here is the kicker, they got them from Alert Engine parts.......robbers dogs.

    Leave a comment:


  • Matchless
    Guest replied
    Suzuki???? NO, Hastings, made in the good old US of A, for the princely sum of R210 or $20USD.
    Thanks for the heads up Andre, I owe you a few cold ones.
    Hi Stan,
    Glad to have helped! At that price a quick suicide may be prevented if you happen to mangle the oil scraper when refitting the cylinders!

    Good going so far!

    Leave a comment:


  • Flyboy
    Guest replied
    Thanks Pete, nothing wrong with the way your bike came out, I would be proud to ride it.
    Seeing that it is my one and only decal set and in light of the stff up with the pin striping lifting and crinkling under the clear the last time, I am not ashamed to say that there were many moments where I started feeling faint and had to remind myself to breath. I was sh1ttin' bricks.
    And still got tail piece and tank to go.
    Taking the 1500 grit to that high gloss shine this morning was an exercise in self control like you have no idea....hahahaha.

    Leave a comment:


  • pete
    replied
    Good score on the rings Stan and those side covers are awesome!

    Even after curing and polishing none of my stuff came out that good... next paint job I do should be an improvement though I hope now that I've got one under my belt

    Leave a comment:


  • Flyboy
    Guest replied
    Thanks Daniel, I am happy with how they have come out so far, can't wait to sand and polish.

    Leave a comment:


  • Highway_Glider
    replied
    Nice.

    Bike porn.

    Daniel

    Leave a comment:


  • Flyboy
    Guest replied
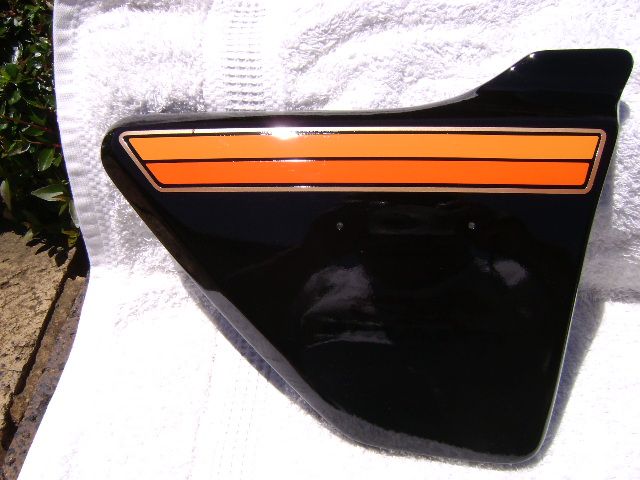
    Some more slow progress made.
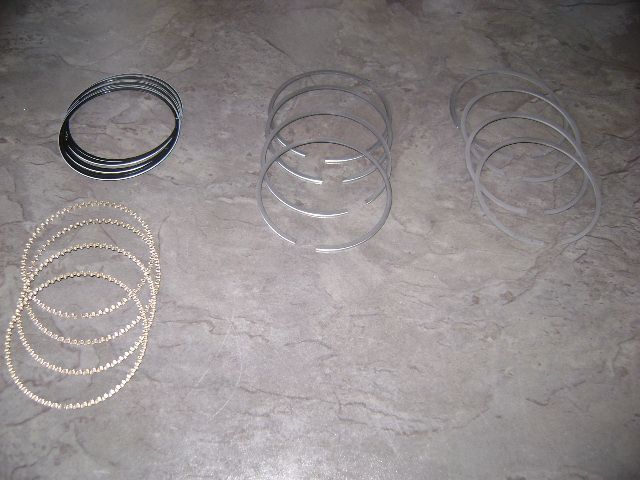
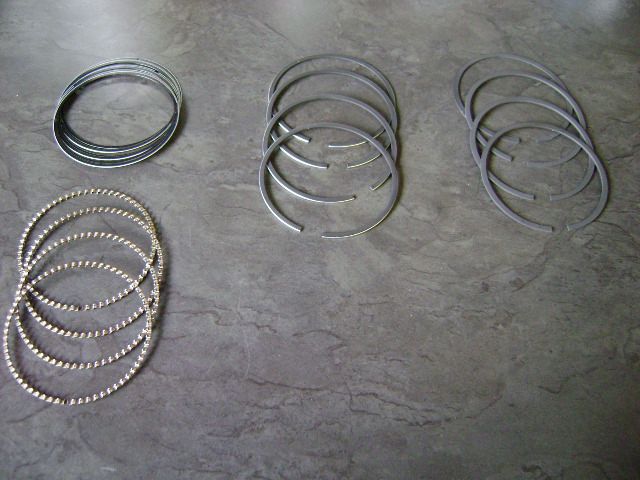
    Friday I picked up the rings for Jennifer.


    Suzuki???? NO, Hastings, made in the good old US of A, for the princely sum of R210 or $20USD.
    Thanks for the heads up Andre, I owe you a few cold ones.


    Went Saturday to the bike shop to pick up some new small end circlips, hoping to hang the pistons back onto the con rods, and with a bit of luck, get the barrels and the head on as well.
    Unfortunately on getting home and comparing the circlips to the ones that came out, the wire thickness is too thin, the original ones have a thicker wire diameter.....damn, so i will take them back to the bike shop and get them to order the correct ones, another week gone, although I been at it so long I guess a week is nothing.

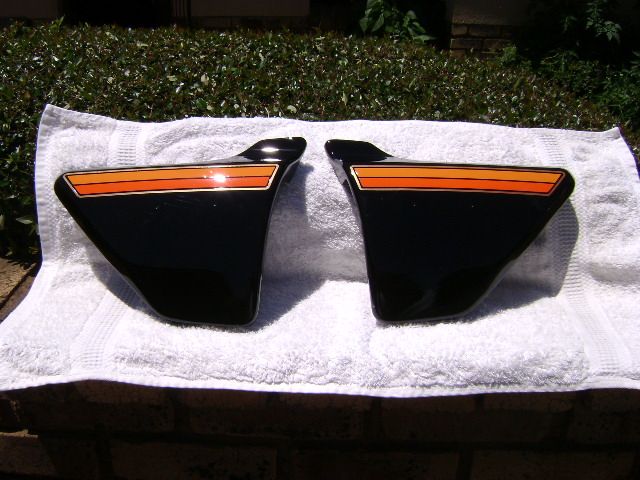
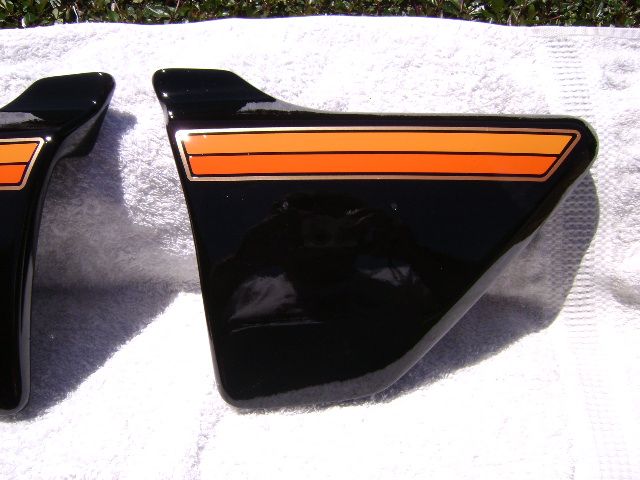
    However all was not lost, I did get to play with paint.


    Laid colour, laid decals, laid 3 coats clear, left over night, gave them a light going over with 1500 grit and shot two more coats of clear this morning.
    Will leave them to fully cure for about two weeks, then wet sand and polish to bring out the mirror shine.
    As you see them, is straight off the nozzle, no sanding or polishing yet.
    Last edited by Guest; 12-16-2013, 01:00 PM.

    Leave a comment:


  • rustybronco
    replied
    Originally posted by Flyboy View Post
    The only major thing in my path then is the wiring harness.
    And that is sitting here in a box along with your turn signals and seat pan.

    Leave a comment:


  • 2BRacing
    replied
    Hey Stan

    Sorry to hear about your vision going south. I know a few people who have had very successful operations to restore vision.

    Good luck with CCC - great logo! I am sure there are many such older bikes in your area that could benefit from your workmanship and attention to detail.

    Keep on sending updates on your progress on Jennifer - I, as many others, am eagerly awaiting the rebirth!

    Leave a comment:


  • Charlie G
    replied
    I like the logo.


    cg

    Leave a comment:

Working...
X