-
Are you speaking of one you did, or the one I did? If it's one you did, what's up with seat pans and paint damage? -
 Guest repliedGarth, I could not do a half decent rattle can job until Doc and Larry put me on the right path, I have no doubt it will be stunning.
I could tell you about a certain seat pan that was done but unfortunately a fly paid a visit to it and left 3 little foot prints on it...............but that is a story for another time.
Leave a comment:
-
-
Just out of curiosity, are you planning on painting the bodywork yourself Dale ? Sure was impressed with what Stan did......Leave a comment:
-
Thanks Stan, I figured you'd chime in on the subject.
If it wasn't a big deal to weld it with TIG then I guess I'll run some practice stringers on a piece of scrap then have at the real thing.Leave a comment:
-
Guest repliedWelded plenty stainless dairy tubing in the past, but only with a TIG welder, there was no special technique to it, sorry Doc, that's all I got.
Leave a comment:
-
Come to find out the new rivets appear to be made from stainless steel. Looks like 309L-16'ish is the rod to use to join stainless to mild steel.
I don't recall ever having welded stainless before.
Anyone have any tips on welding stainless that you can pass along?
***EDIT*** Sent a note off to big Jay inquiring about the HD backing plates metal composition. If it's mid steel we're all set to rock.Last edited by rustybronco; 05-22-2014, 10:52 AM.Leave a comment:
-
If I was using a TIG where I could add filler as I went along, I'll give you that.
Not using TIG and this isn't a trailer.
Everything hangs in the 'BALANCE' as it were.Leave a comment:
-
Guest repliedhahahaha, says he who could not be dragged away from the Lincon stand at Oshkosh.
Leave a comment:
-
Ed, I was planning for a tough time when I get around to installing those springs.
That's the easy part. What worries me the most is when 'I' go to weld it.
Last edited by rustybronco; 05-21-2014, 10:09 AM.Leave a comment:
-
Hey Dale, please don't cuss me for passing off that back plate on you while you go through the install. There is definitely a technique necessary to getting the springs compressed and the back plate seated, but I can't tell you what it is. I struggled when doing the "insert a washer" mod with a stock backplate and springs, and those HD parts may be worse yet. GOOD LUCK.
Leave a comment:
-
Today's project is to remove the old clutch backing plate and install the new H.D. backing plate nessism gave me.Leave a comment:
-
Guest replied -
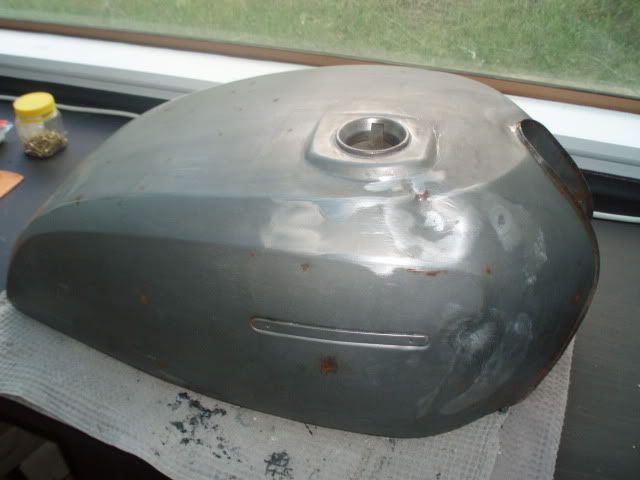
Ivor, I'd be calling in some favors and borrowing a stud gun to use on that tank. That or drilling a hole on the underside and pounding out those dents with a rod.Leave a comment:
-
Guest repliedGood to see some progress, Dale.Called it good enough instead.
For comparison, see what some of us had to work with and I'm sure you'll be pretty happy with your tank!
Leave a comment:


Leave a comment: