-
-
It's a place about 15 minutes from my house called Brockie Manufacturing. A guy at my local metal shop recommended them to me. They do pretty much anything, so I might have them TIG weld the tubes so they look good. Here's their website: http://www.brockiefab.com/
Pretty much any fabrication shop should be able to do it. I'm told that a lot of muffler shops bend tube too.Comment
-
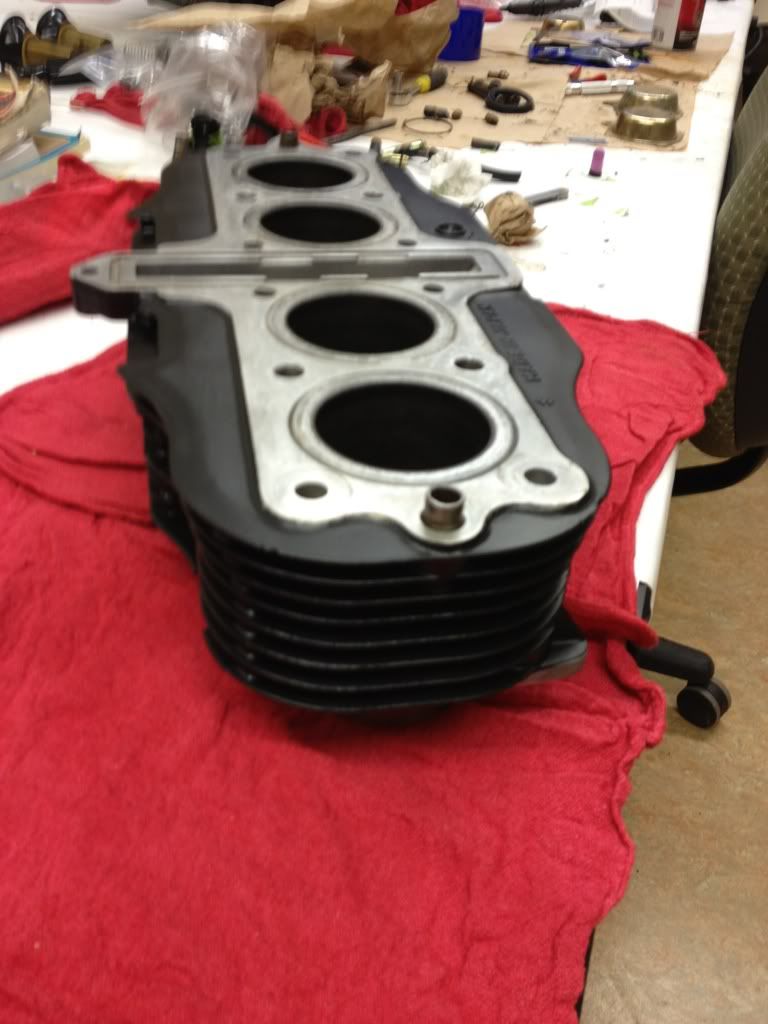
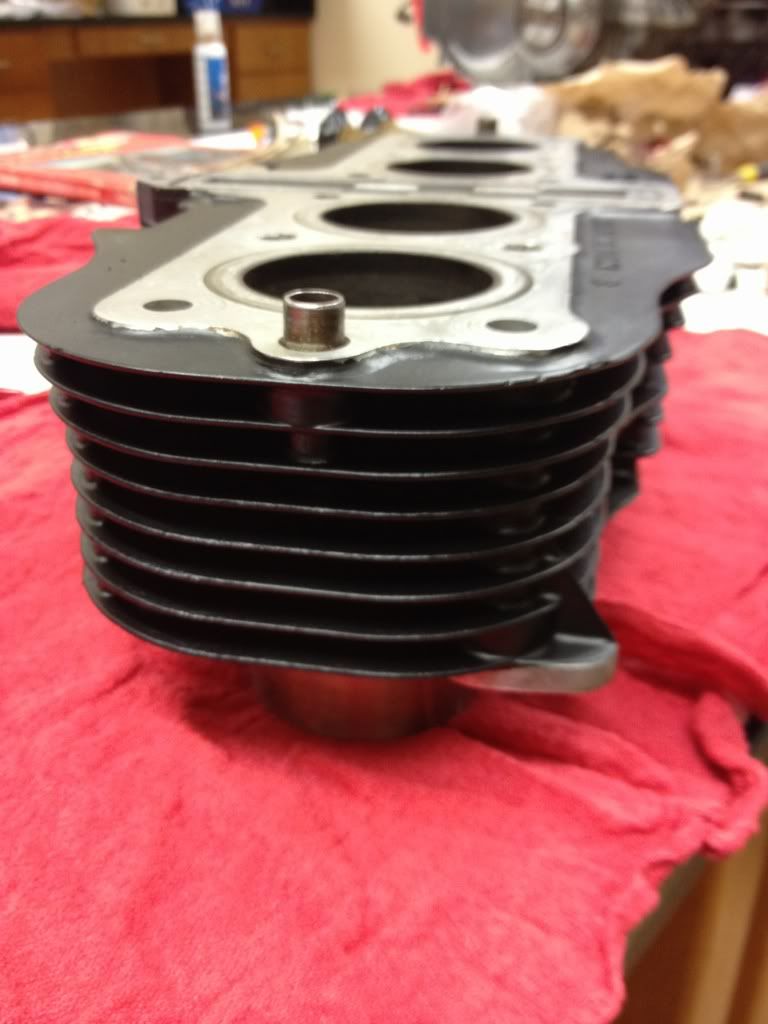
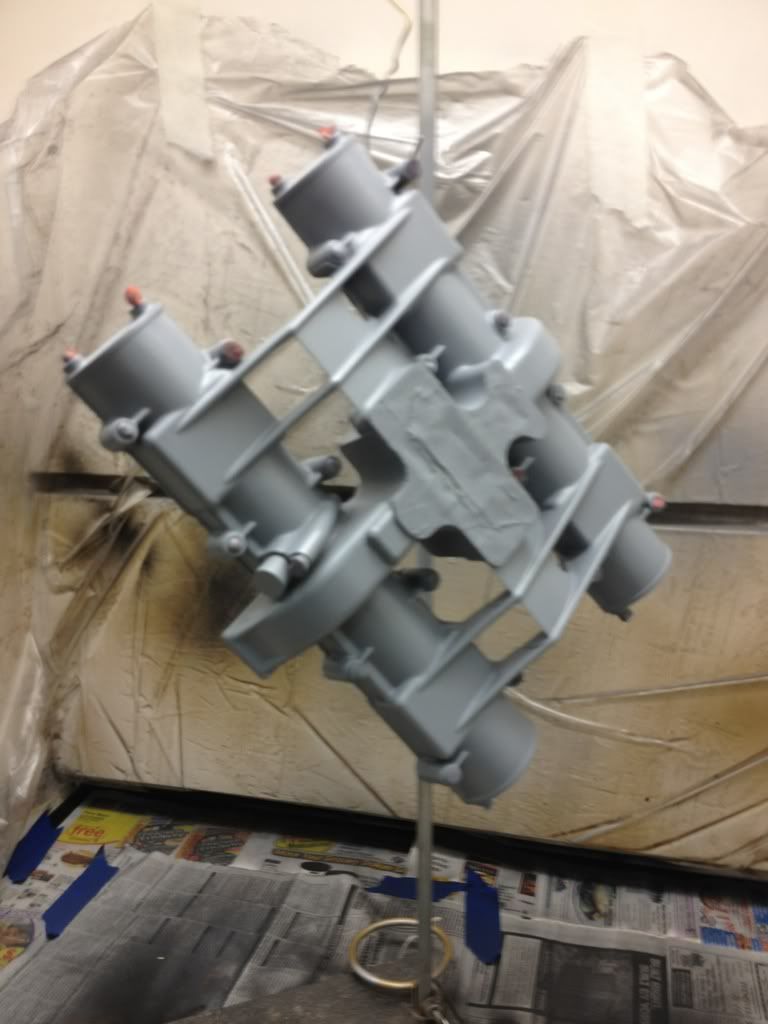
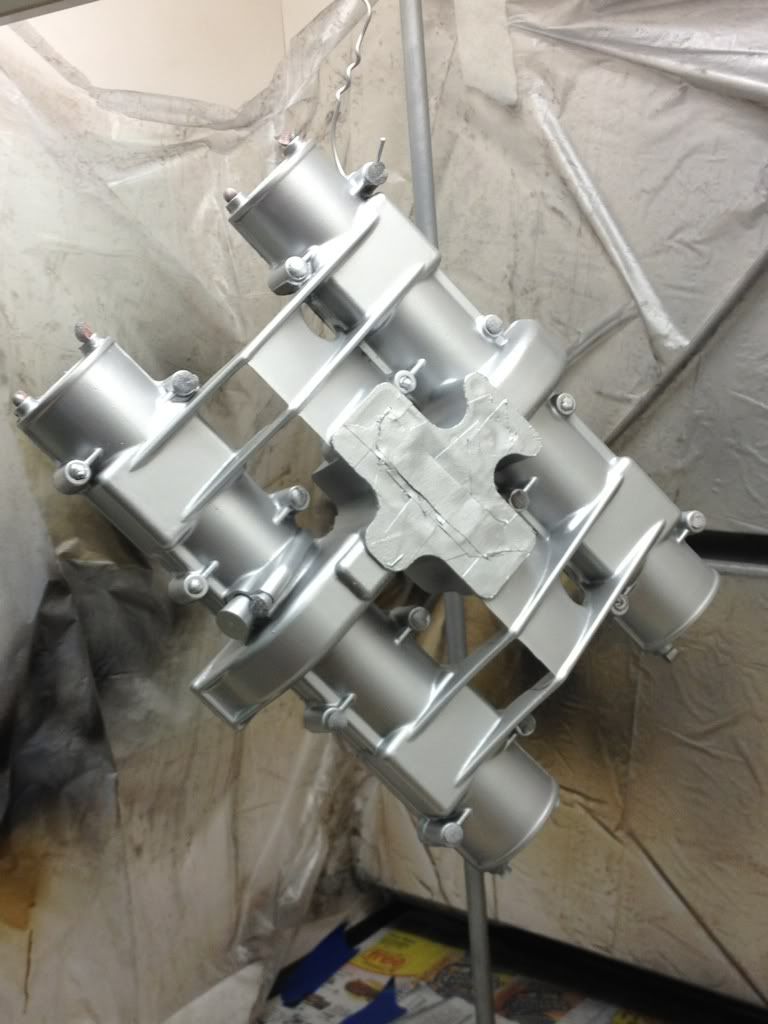
FINALLY, I have a little engine paint to show you.
Just the cylinders though. Work has been nuts lately.
The prep was as follows (in some cases there were repeated cycles of these steps):
Washed part in soap/water
Masked off and soda blasted
Neutralized part in weak vinegar/water solution (twice)
Dried with compressor between cleanings
Scrubed and dunked with HOT, de-ionized water (multiple times) and re-dried
Scrubbed with bottle brush and parts cleaner to get everything clean in the fins
Cleaned EVERYTHING carefully with acetone and cotton swabs of various sizes until the swabs came out white-as-snow.
Masked off delicate parts
Sprayed with VHT engine primer (2 light coats)
Sprayed with VHT black engine oxide paint (2 light coats and 1 medium coat + touch-up)
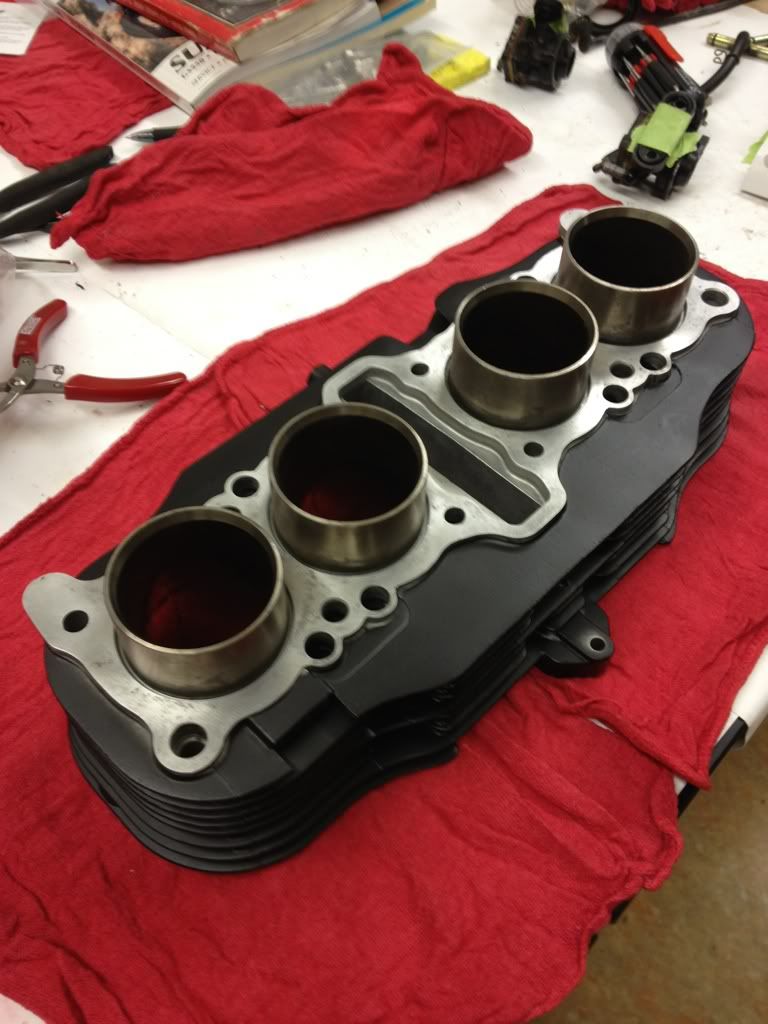
Whew! I accidentally masked off too much on the bottom, so some of the bare aluminum sticks out. I?ll wait a full week for the paint to dry and then re-mask, prime+paint the missing spots. I didn?t sand much, so there are a few nicks and bumps here and there from the years of use (and abuse).
I?m VERY happy with how it came out. The paint is a duller, sort of cast-iron black. It looks retro and fits the bike well. It also hides the flaws nicely and goes on easily. In a few tests, it seemed to ?stick? well. With curing it?s supposed to be very gas-resistant too.
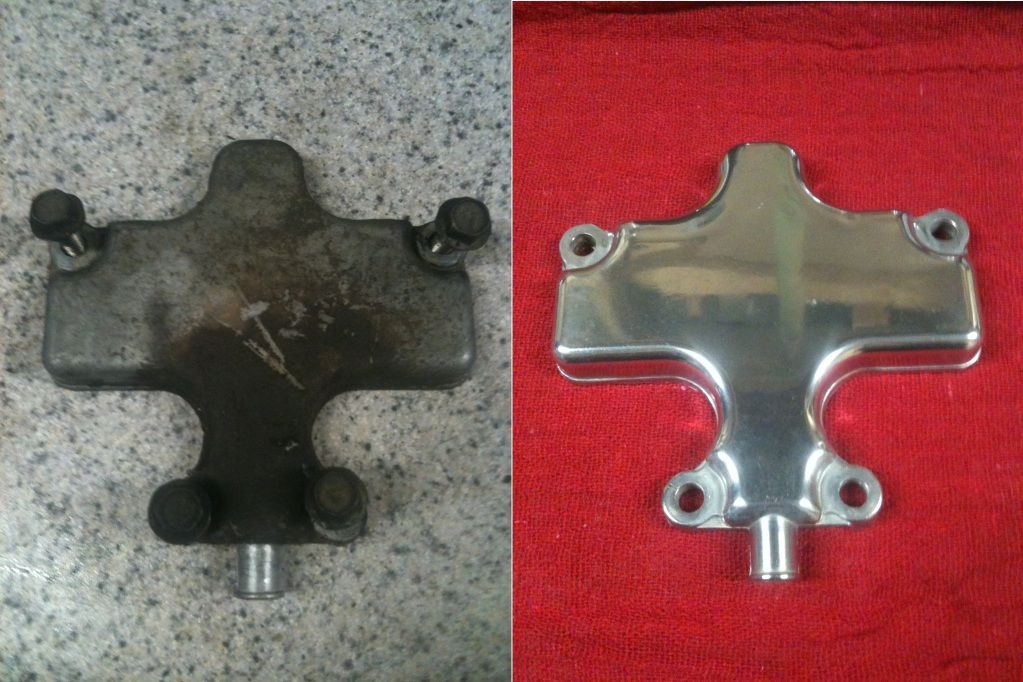
Polished the breather cover too.
Before??yuck!
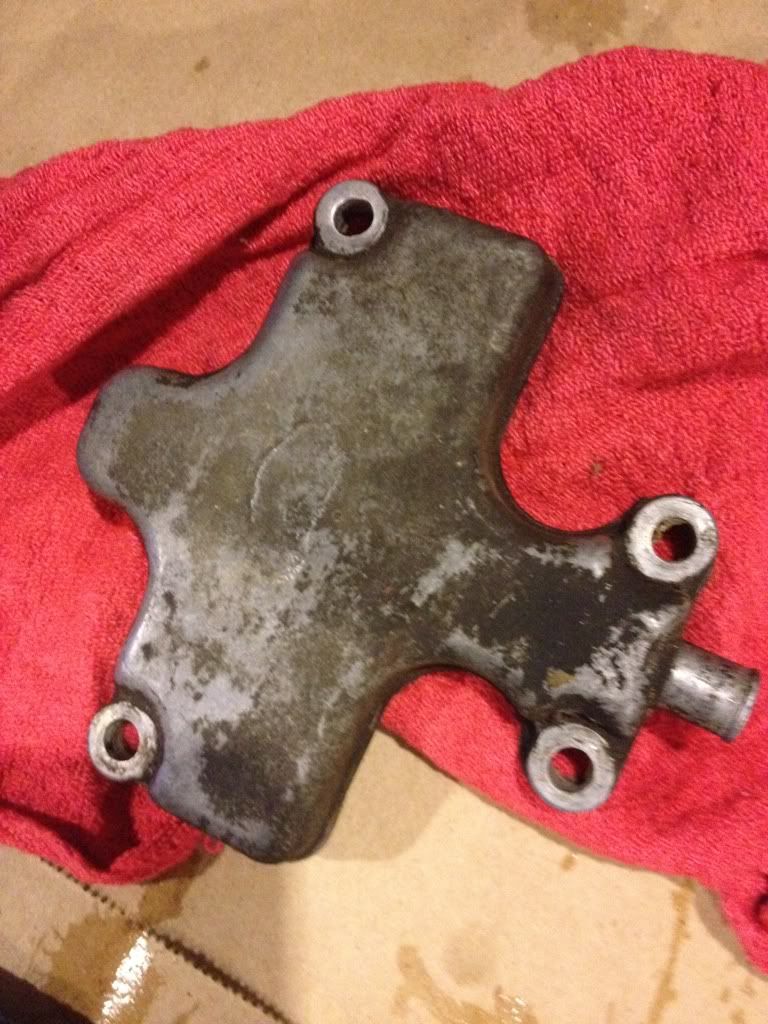
After!
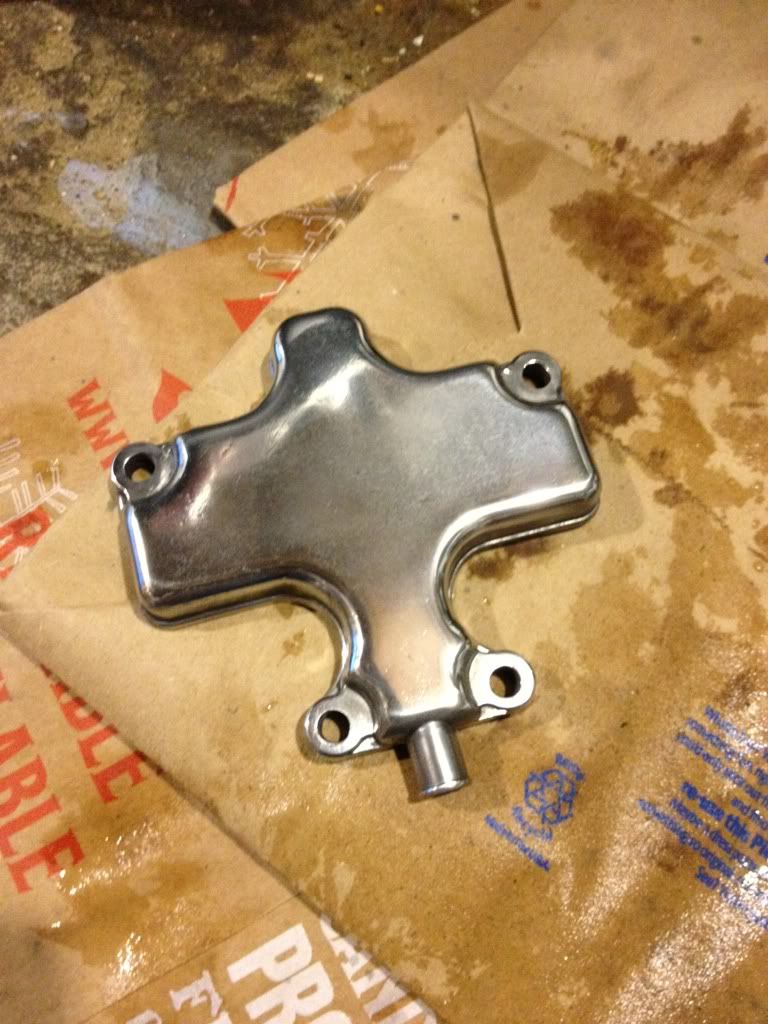
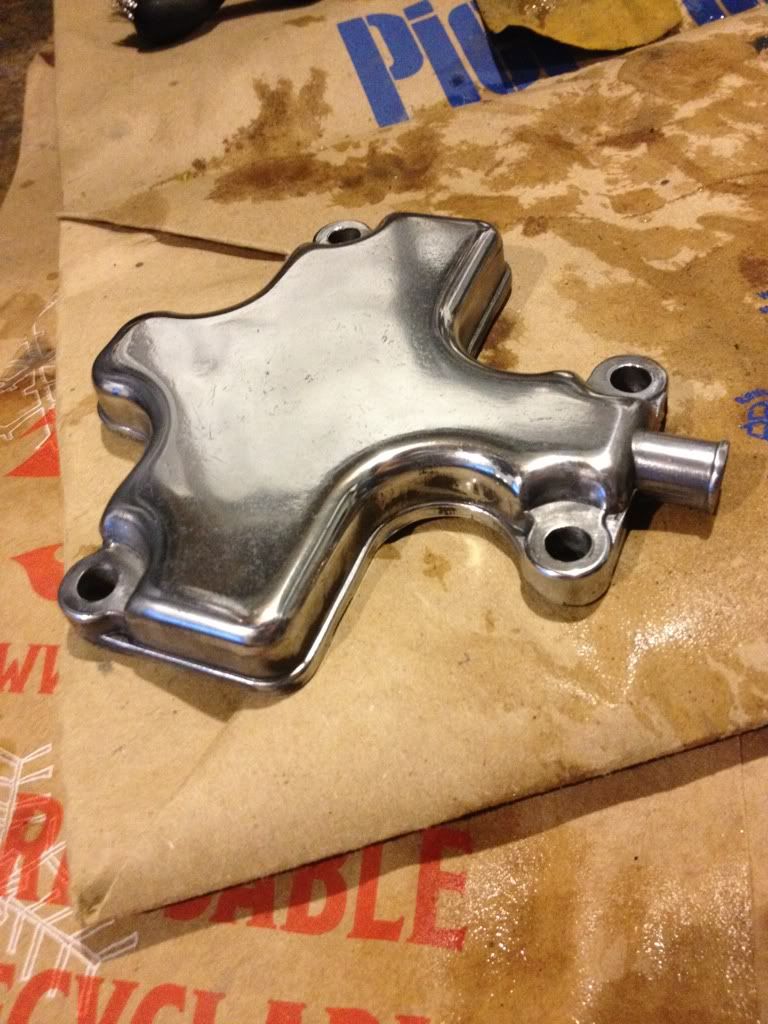
I?ve gotten a LOT better at this since I did the side covers. I?ll have to re-do those someday since they look dull in comparison to the carbs/breather. Oh well, I guess I?m climbing the learning curve.
**Now for my dilemma*** I am certain that I am painting the bottom-end black and keeping the side covers polished. Cylinders are black.
I recently decided to shy away from blacking out the top of the engine and was leaning toward painting the head and valve cover ?universal aluminum silver? instead (I have the paint). I think it looks a little ?top heavy? this way, but others I?ve shown mock-ups to thought it was great. Silver-color would also be more forgiving against chips and scrapes (since the layers and aluminum underneath are pretty much the same color). That said, I started thinking today about going back to my earlier plan and going all black on top too, except for the breather cover (polished), various fasteners, side covers, and the chrome cam covers parts on the ends. The chrome bits would really ?pop? that way I think.
Decisions?..decisions? Thoughts?Comment
-
Do some looking around. Silver and black look really good together IMO on an engine. In some cases the head is black and the cylinders silver and others vice versa. I like the look personally.Comment
-
Just my thoughts...
First I love the black on the jugs. Nice!
I think I would go with polished cases and black out the rest of the motor. Seems like the silver head and cover would take away from the cases. It might be a little out of balance as I picture it in my head.
BUT it all depends on what you are thinking with the rest of the color scheme on the bike. The aluminum paint might be balanced out by something else. What are you thinking covering the rest of the Redneck Rocket with?Comment
-
Nice job. The breather cover looks very close to mine.
Comment
-
Here are the two engine paint/polish schemes I'm considering (one was the Dec '07 GS "bike of the month" and the other is from a thread on another forum).
Option 1: Silver/black/polish (my black paint is not this shiny, but otherwise it would be identical)
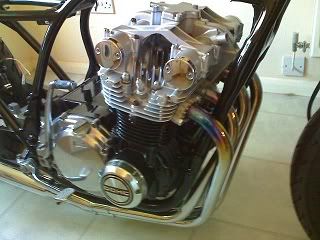
Option 2: Black/polish (this engine is basically identical to mine even though the bike frame/tank/seat are different).

While I think Option 1 looks better with the engine sitting on the bench, the chrome cam caps, polished covers, polished carbs, and chrome exhaust will give me lots of bright "accents" to make it visually interesting when it's in the bike. So I think Option 2 might be a little nicer in the bike.
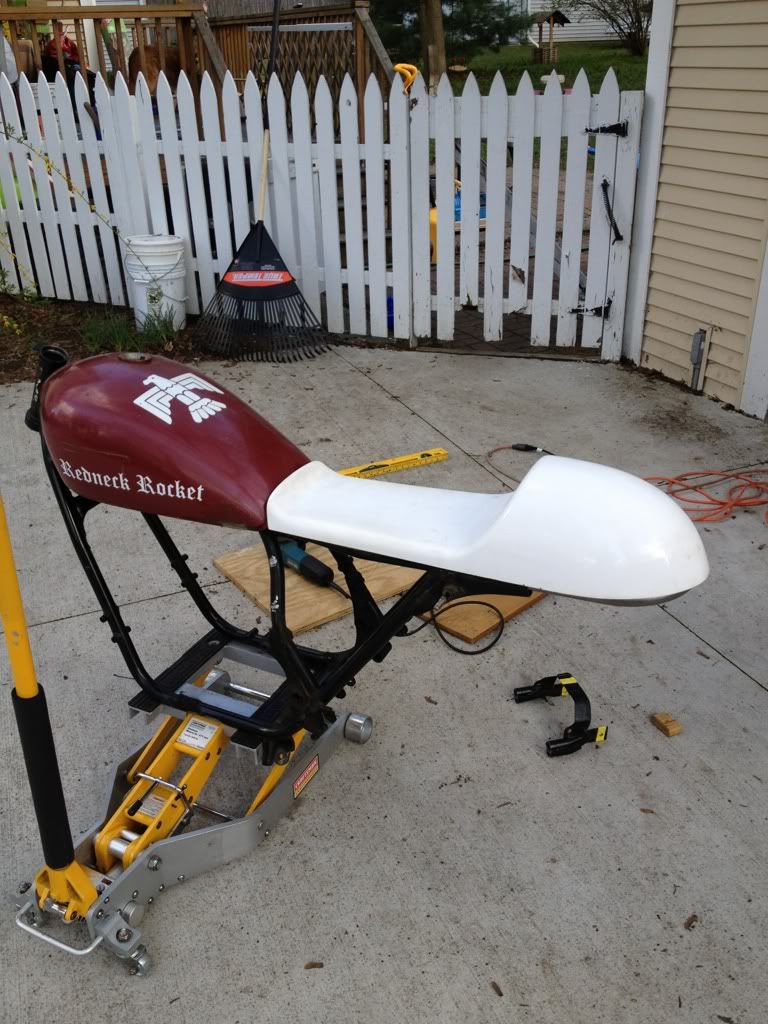
The tank and seat cowling are going to be black. I'm thinking of using gold pin-striping on them, which will pick up the gold of the calipers and rear shock. Headlight will be powder-coated black. I'm leaving the upper triple tree "natural" and the fork tubes are polished.
I'm going to take a few days to think about it. Keep those ideas (and votes!) coming.Last edited by Guest; 03-30-2012, 09:36 PM.Comment
-
I did mine as well... once it's mounted... you can't really see the top, just the lip... So focus more on the outside and it'll be time well spent .
.
Comment
-
Awesome thread, so detailed I wish I had seen this before I undertook my 78 550. I also wish I could sand/polish as good as you can on these parts. I opted to just sand/paint most of the ones and your polished parts look much better.
Keep it up.Comment
-
Inspiring.
Subscribed.Comment
-
Busy week with non-bike stuff, but there have been a few developments?.
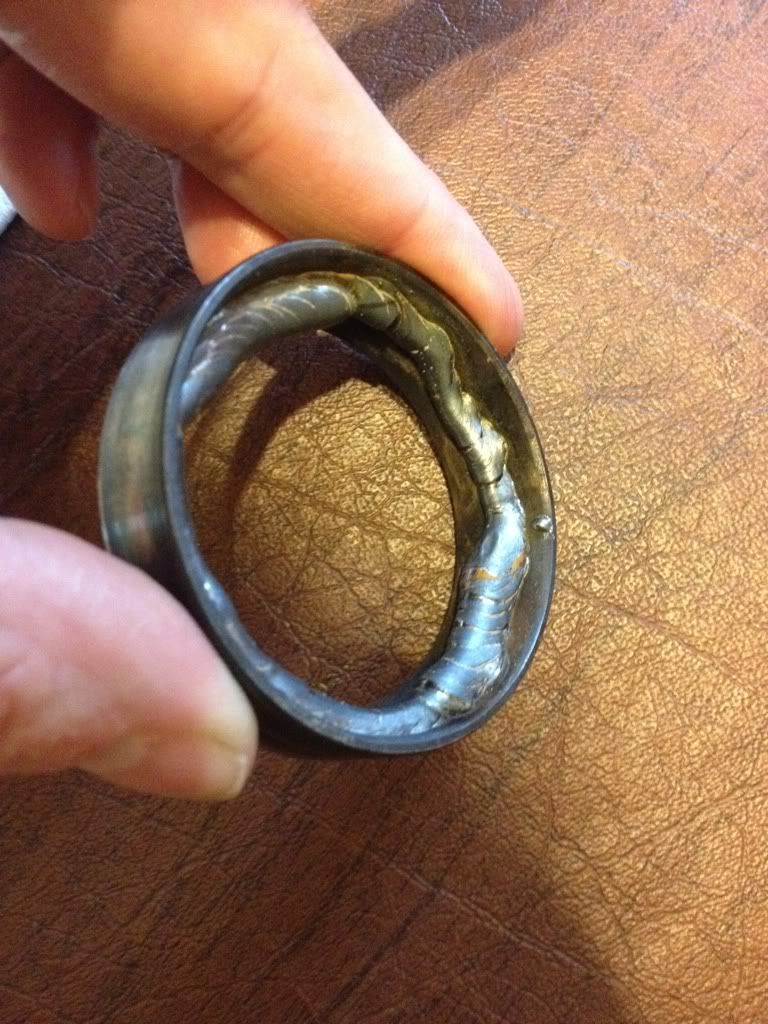
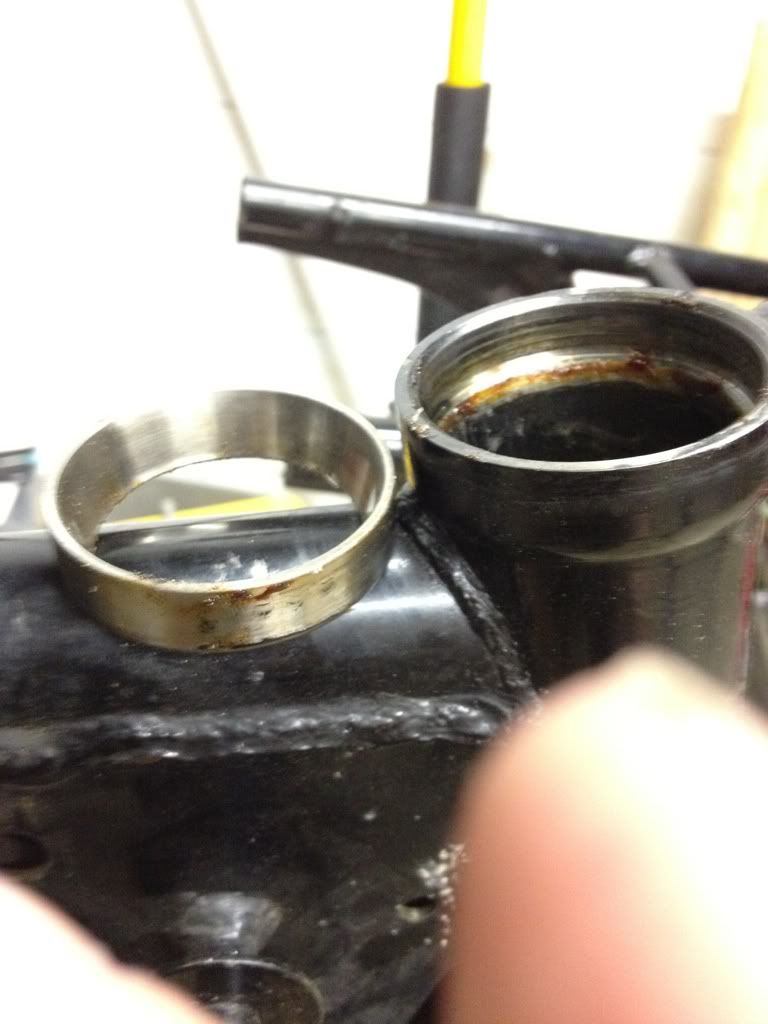
You might recall that I was having trouble removing the lower race from the steering head (it?s buried in a tapered portion of the head and not easily accessible from above). After making a few custom tools to try and drive it out from above, I was still stuck. I decided to resort to another tactic, so I borrowed a MIG welder, and carefully ran a bead around the inside of the race. As I?d read on here and elsewhere, it loosened up the race immediately. I then welded a couple of tabs onto the sides so that the welds stuck out enough so I could finish removing the race by tapping it out from above.
Here it is. Free at last!
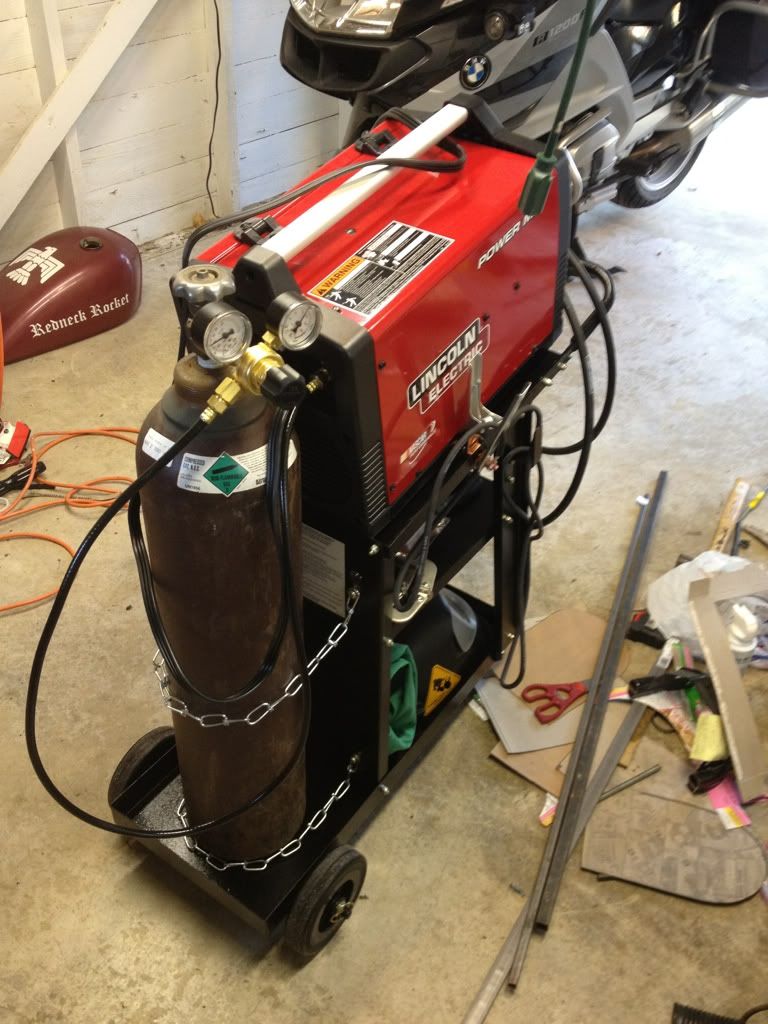
I was so impressed with the welding tip, and facing a lot of small welding projects in my future (seat spacers and mounts, battery box, seat hoop, dash controls, etc. etc.), I broke down and bought myself a welder today! It?s a little 110v Lincoln model 140c that I?ve set up for MIG. I?ve been taking a welding course at a community college, and while I?d prefer a bigger unit or a TIG setup, I think this unit will work fine for sheet metal work/brackets/spacers, and to tack more important stuff together for TIG work (e.g., exposed frame pieces). I went back and forth between this welder and a Hobart model that was about $100 cheaper. I?m sure either would have worked well, but I prefer this Lincoln because I can fine-tune the voltage setting (Hobart has 4 ?tapped? settings). Lincoln has a $75 rebate on it too, which will help a lot. I also got a good-sized tank (80cf) since it costs about the same price to fill as a smaller one, and it wasn?t much more to purchase than a tank half that size.
I?m pretty excited about it. I got everything assembled and hooked up. Unfortunately, I can?t seem to find my welding gloves, so I?ll have to pick up a new pair tomorrow. I?m hoping to get a little welding done this weekend.
I?ve FINALLY decided on an engine paint scheme. I won?t ruin the suspense (ha!) by posting it here, but my plan is to do a little more painting tomorrow.Comment
-
Nice little setup D-Mac. I'm jealous. I've wanted a welding rig for some time now but just not sure how well a small unit is going to work. Please let us know how it works out for you over time. And good job on the race. These GSer's know all the little tricks no?Comment
-
This was my biggest concern too. I was contemplating holding out for a bigger unit, but I can say now that I'm glad I didn't bother. This afternoon I tried a few practice welds on some of the frame components I cut off a while back and on some sheet metal (14-gauge). I'm VERY impressed with how much heat this little thing puts out. It'll easily weld any sheet metal and tubing. I did a 1/4" plate butt weld too, and it worked fine (I beveled the pieces, spaced them about 1/16" apart, welded a bead at the bottom, and covered it with a small weave bead - just like what I would have done with a larger unit). I'm using the 0.025" wire that came with the welder, which is kinda small but it gives good penetration. I bought a big roll of 0.030" today, which I will use when my current spool runs out.
Unless you're building a frame from scratch (which you'd probably want to TIG anyway), this thing will do anything I can think of on my bike. It'll also be good for various projects around the house.
I'll post some pics when I get a few things done.Comment
-
It?s been nearly 10 days since my last update. I do have a little progress to report. Lots of pics, so this will be done in three posts.
First, the paint scheme. I took the valve cover, cleaned it, scraped off the gasket, removed the paint, cleaned it 1000 more times, and then painted it?.silver.
Yup. I?m going with a black and silver paint scheme for the engine. Black bottom with polished side covers, black cylinders, silver head, and silver valve cover. In the end, I decided that the two-tone scheme looks a little more ?refined? and custom. The silver head will also tie in the chrome exhaust and polished carb bodies a little better.
Masked?.
Masked some more?.
Primed?..
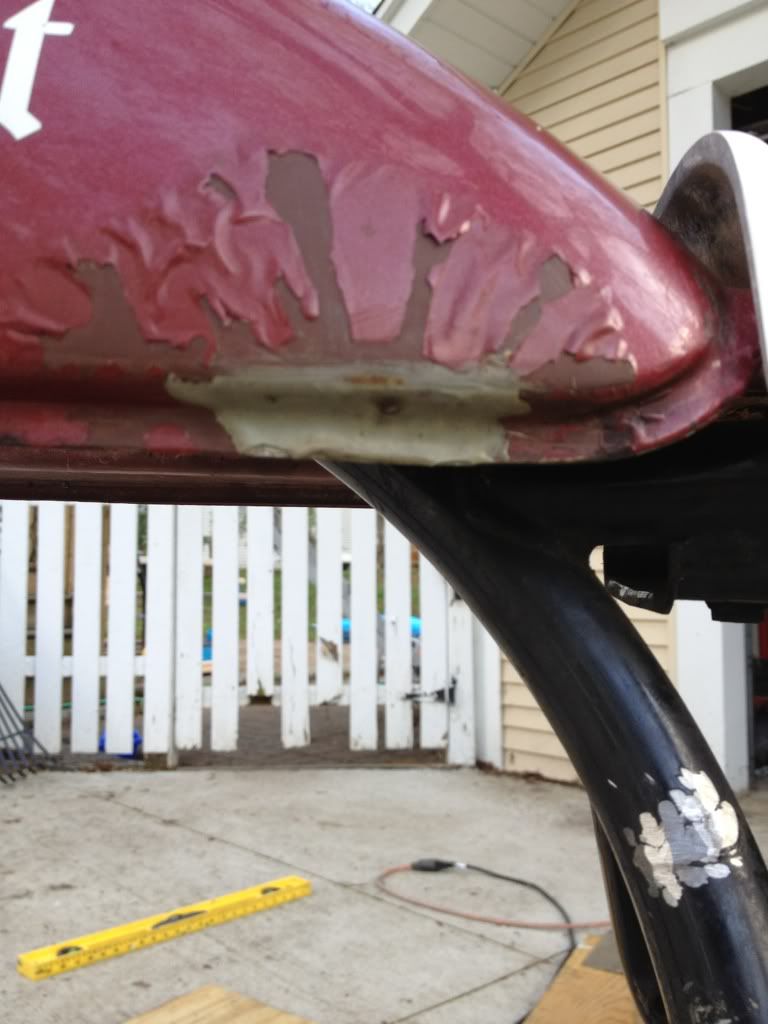
Top coat! ? VHT Universal Aluminum. It?s a little brighter than stock. Unfortunately, I moved it a little early after taking this photo and smudged a large part of the top! I?m going to re-sand and paint that portion again.
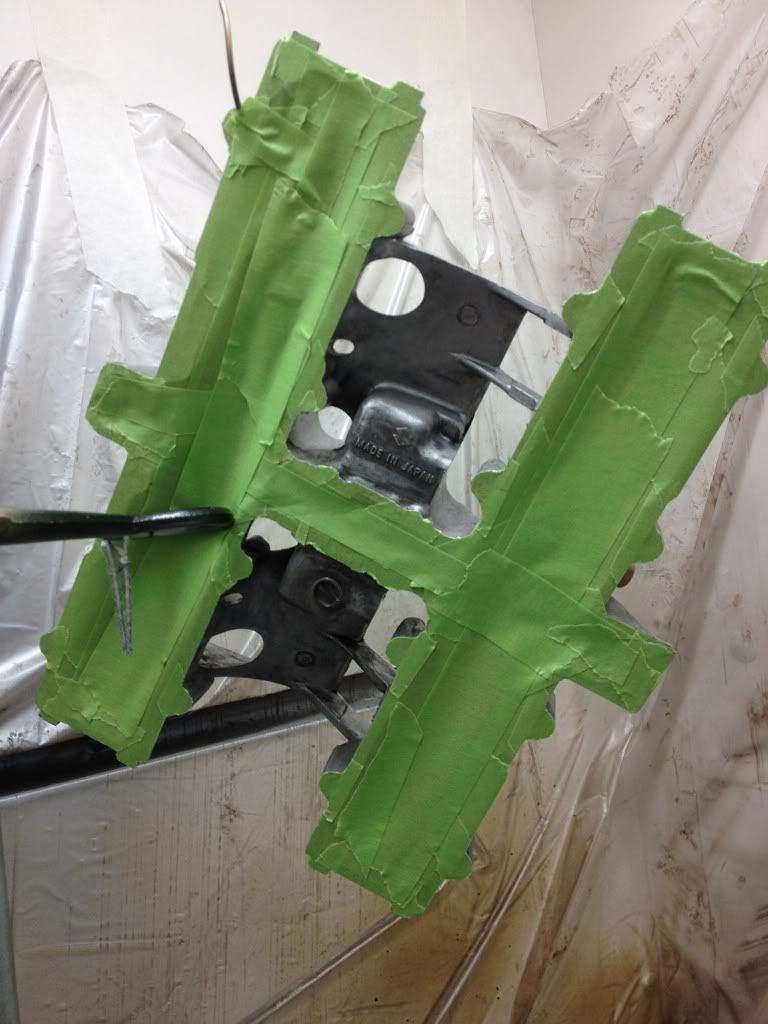
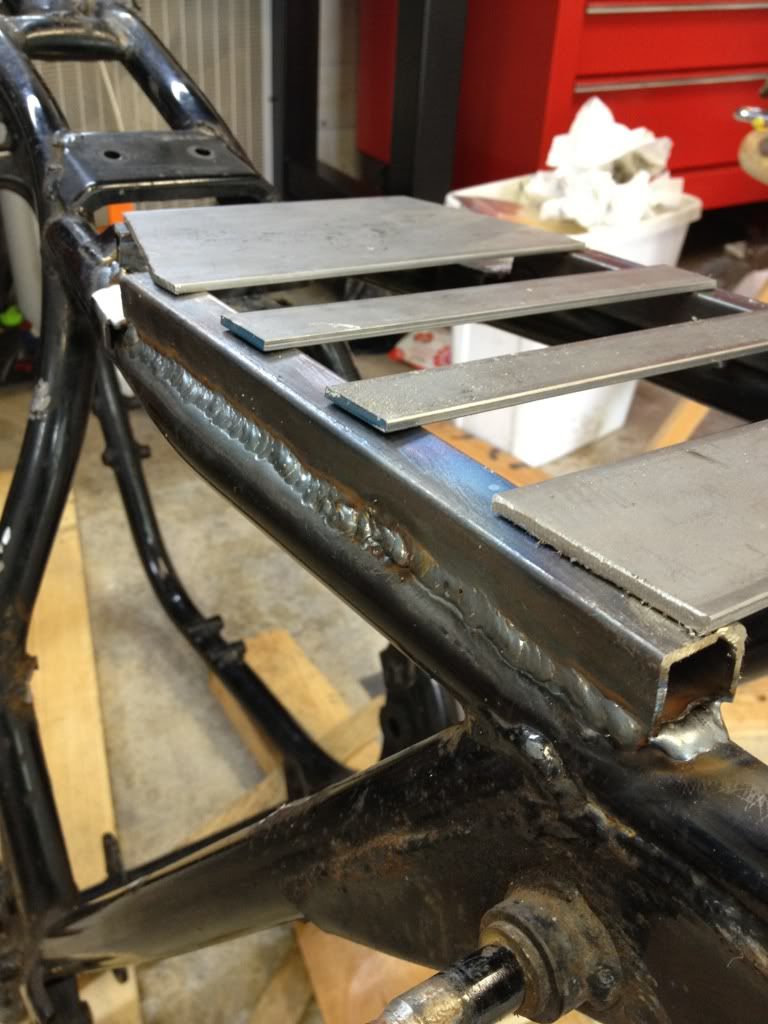
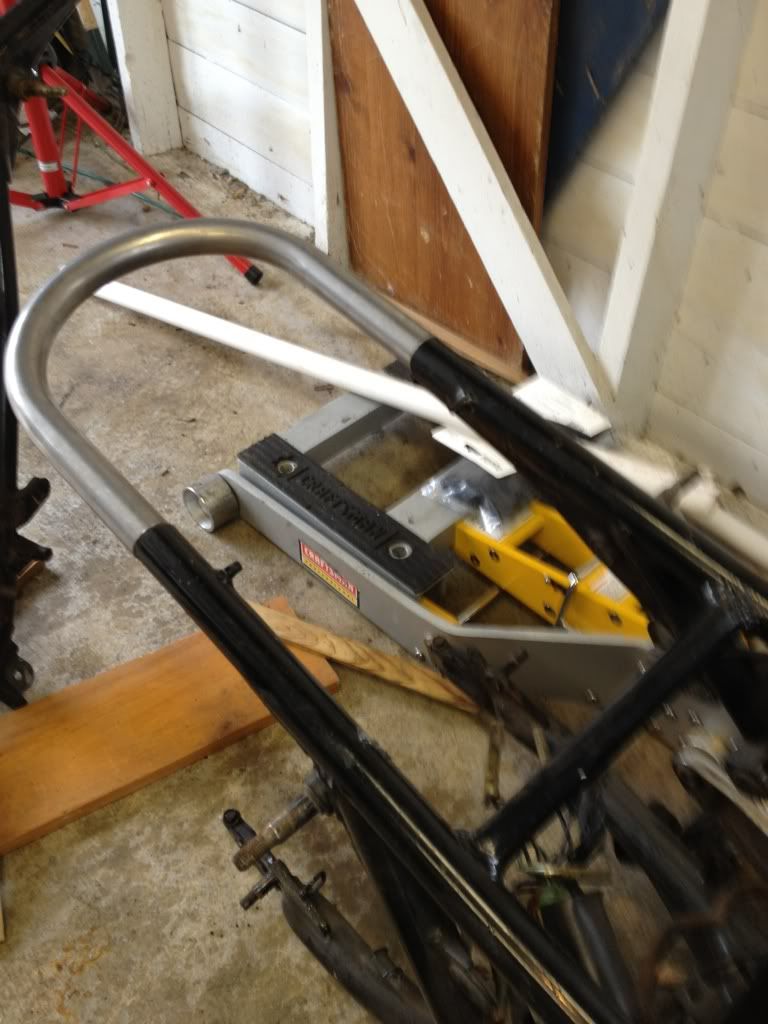
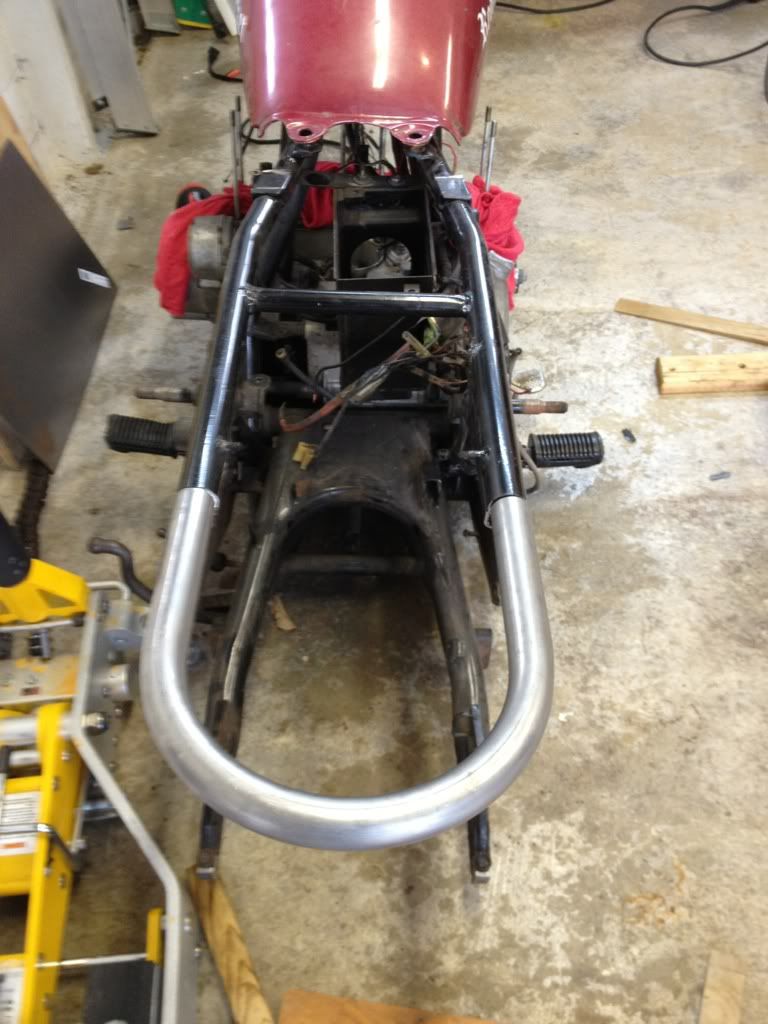
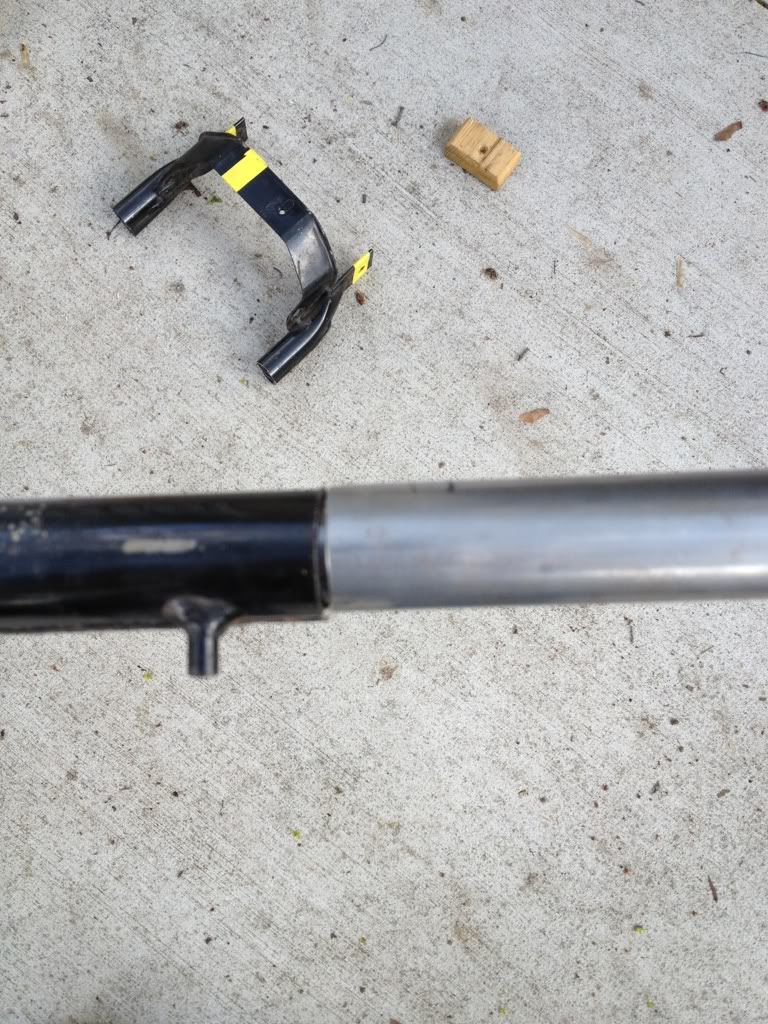
On to the next issue. Since I now have a welder, I tackled the rear seat hoop. I placed a long piece of tube inside the frame/rear hoop and drilled holes through the outside tubes about 1.5? on each side of the seam (you can see the drilled holes here with the tube lined up).
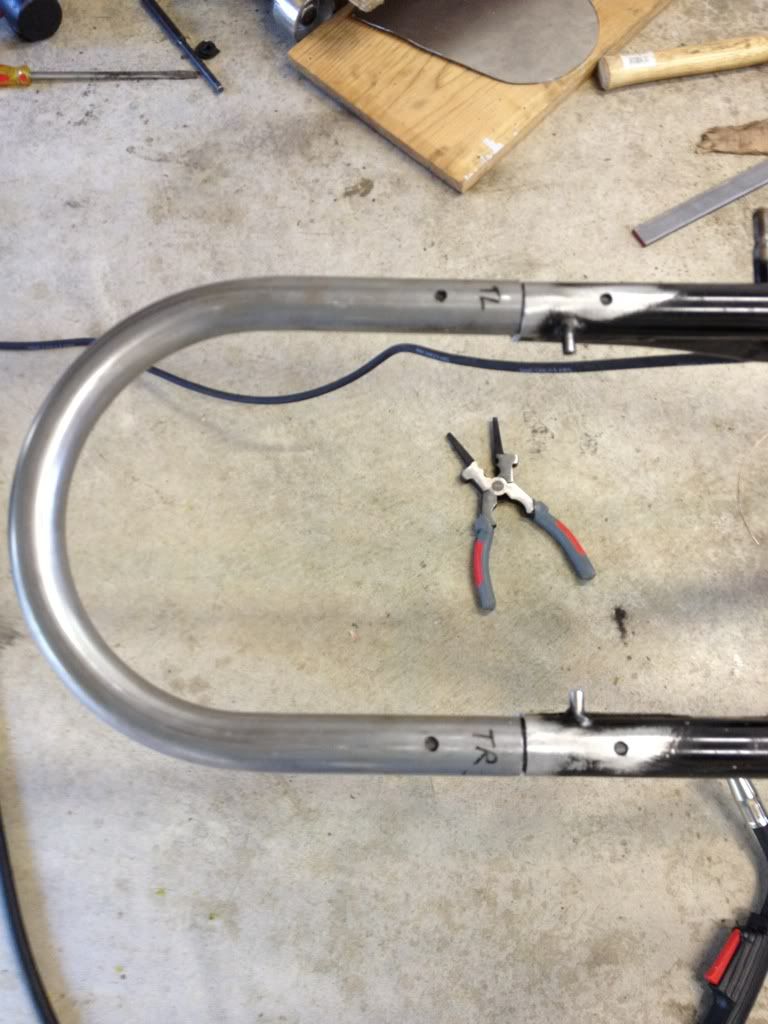
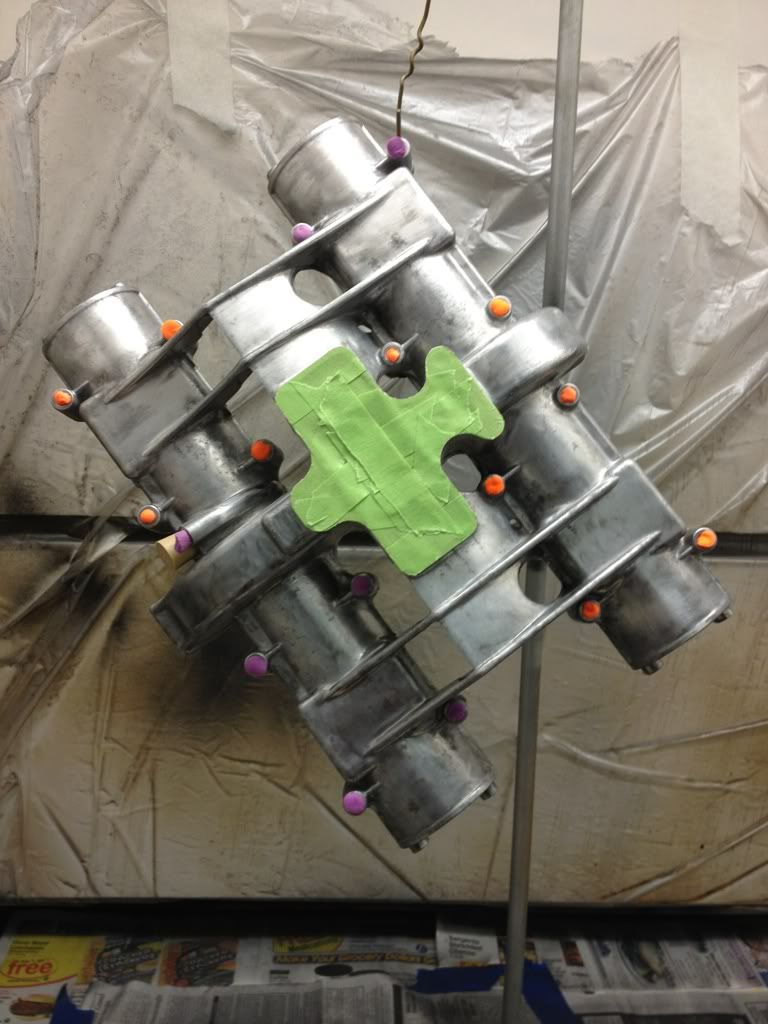
Then I welded the plugs and welded the two outer tubes together. It doesn?t look pretty, but when ground down and powder-coated, it?ll look fine I think. It matches well and my practice welds on this material had excellent penetration.
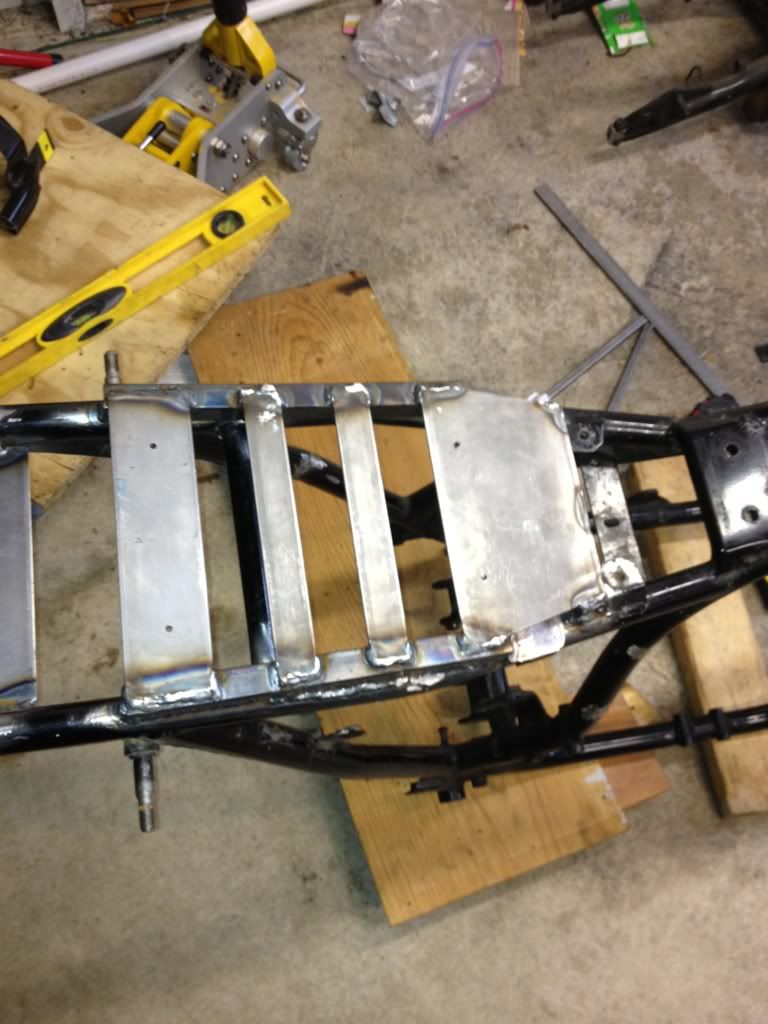
Finished hoop.
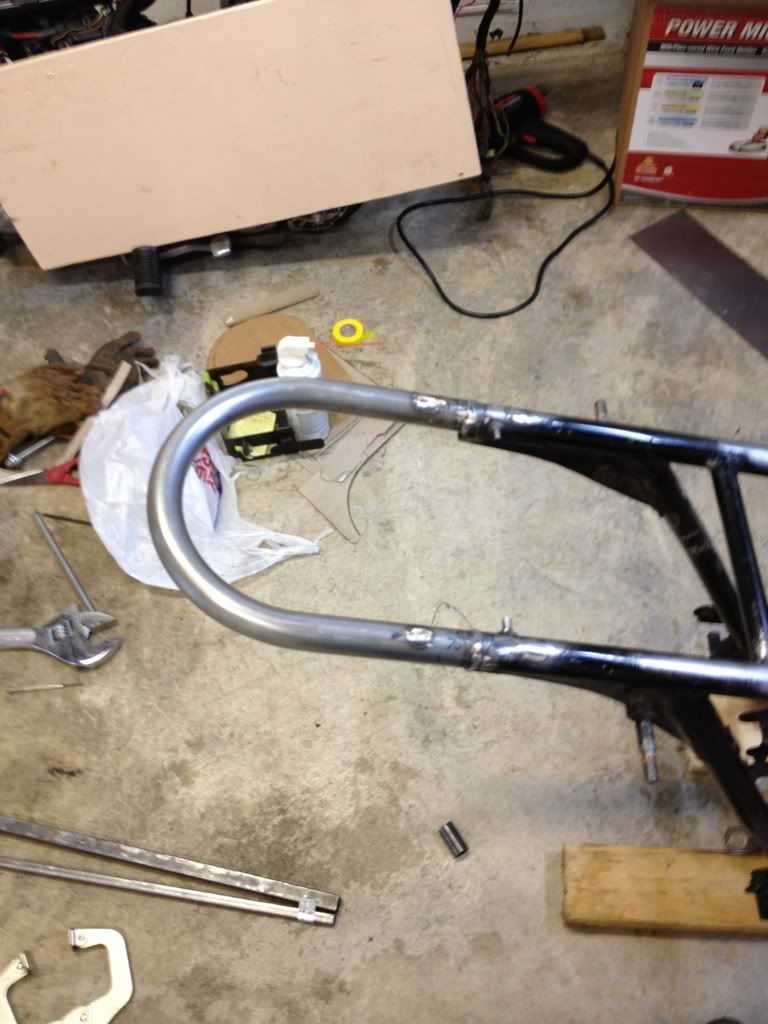
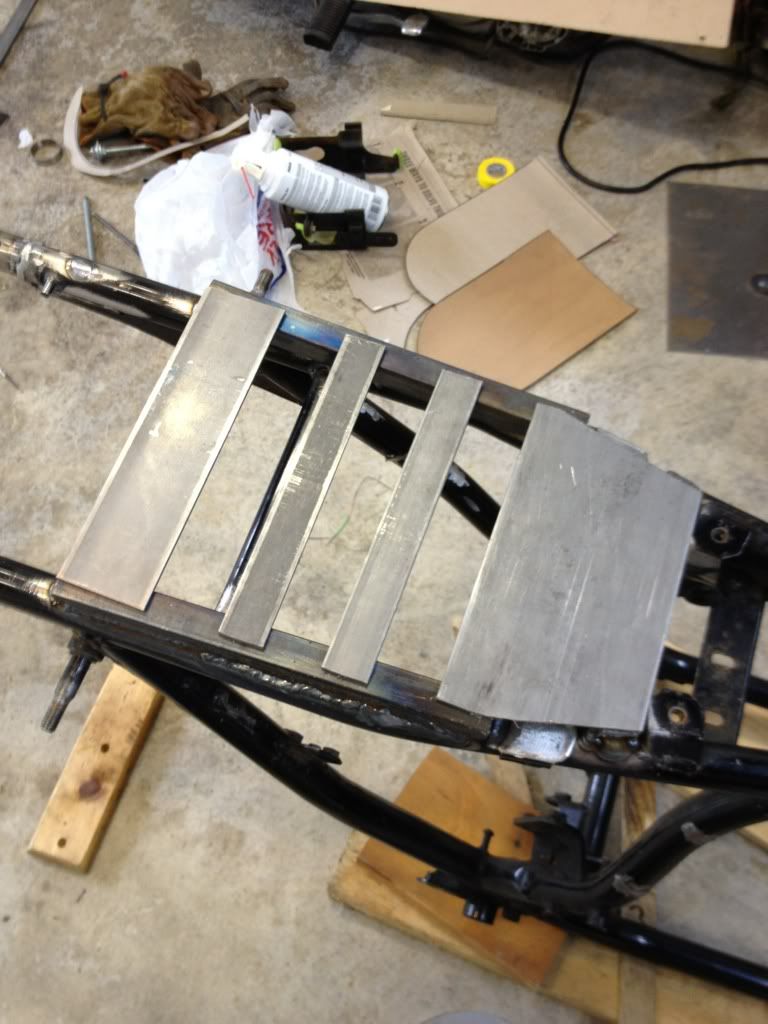
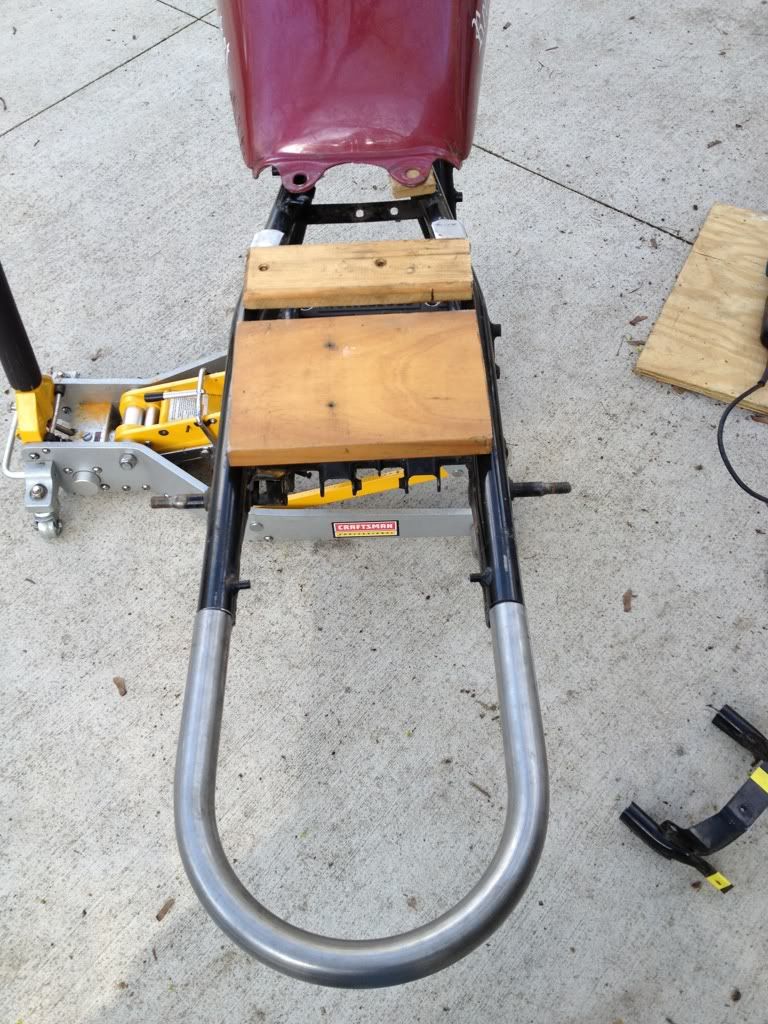
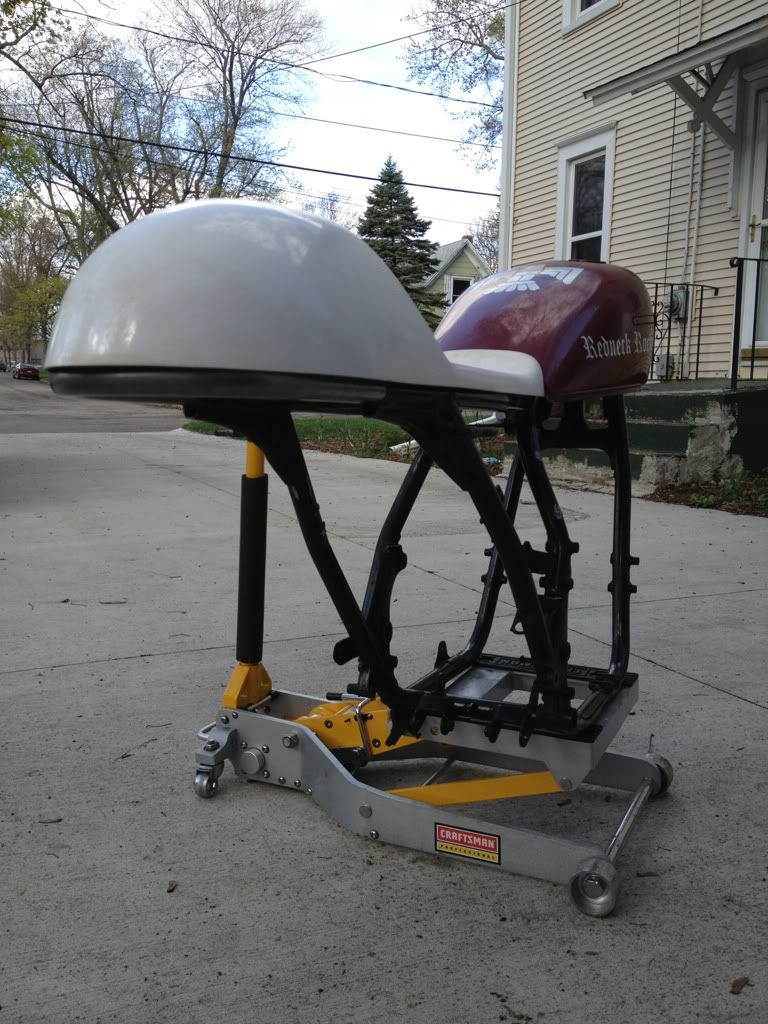
After that I sorted out mounting the seat. I want to show off the frame a little and leave as much room for the battery as possible, so I opted to raise the seat about 7/8" off the frame (I tested it with wood shims a few posts back). I started by welding some ?? square tube to the top of the frame. Not all of the welds look great, and I went a little nuts with the welding, but it?s done.
Then I welded some cross pieces of 1/8? steel across the "new" upper frame. This new ?pan" extends all the way along the bottom of the seat from the front to the hump and leaves a little around the sides in case I decide to cover the seat completely later.
More in next post.....Comment
Comment