Thanks Larry, not sure how keen I am to do much work on the Boise Beauty but knowing how picky I can be I probably can not help myself.
I will move a few parts around and see how things look once I'm done.
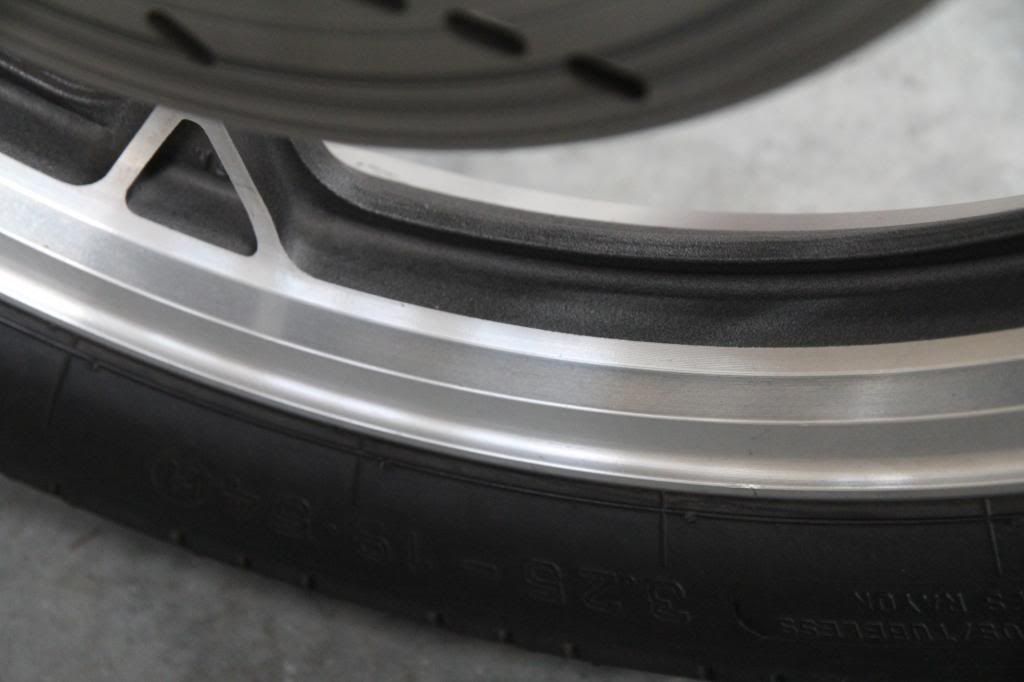
Those wheels sure are a lot of work to clean up, I spent about 4 hrs (maybe it was only 2-3 hrs but it felt like more) on each of them to get to that condition.
I used either 280 or 320 wet & dry and finished with a burgundy scotch brite pad, not sure what the equivalent grit that is. Also 50/50 Simple Green and Water to help with cleaning up the grime. That was about all my arms could handle.
-
Those wheels will clean up with a little sanding and polishing, I'm sure you know that, but I'm thinking you're getting to the point where that task will be delegated to a "winter project" . Both bikes look great, you should be proud.
Leave a comment:
-
Now that I've got the bike running and the electrical systems seem to be OK, it's time to figure out which parts will go on the Canadian Cooley.
I have some very nice wheels from the Boise Beauty, check these out.
Here are the original wheels from the Canadian Cooley and I've cleaned these up a lot, and they look a lot better than when I got the bike, but still very pitted and damaged from tire changing.


And here is one of the the wheels from the Boise Beauty, which will go onto the Canadian Cooley. Very nice indeed.
Leave a comment:
-
Thank you, with the help from the forum I did get the sync sorted out this afternoon.
I had to take a break from it last night as it was going from bad to worse.
After our Sunday morning coffee group ride this morning, my mind was a lot clearer to tackle it this.
I figured out I was pressing down on the carb adjuster tool too much which increased the revs and gave me false readings, live and learn.
Anyways I got it pretty close and I'm happy with the settings, just need to see if that results in the engine running smoothly and if the popping during warm-up has gone.
BTW I did have at least one pin hole leak on this tank so that's why I chose the Caswells product. I may thin it a bit with thinners as that helps with slowing down the setup time and helps thin it out a bit.
Thanks for all the help on this part of the rebuild.Last edited by Kiwi Canuck; 08-25-2013, 04:46 PM.Leave a comment:
-
Oh, and thin that Caswell's sealer to the maximum allowable amount. I think they allow acetone to thin it. You need to thin that stuff because it's thick as honey and don't flow for crap.Leave a comment:
-
-
-
You're right Ed I was just thinking of the gauge itself. SorryLeave a comment:
-
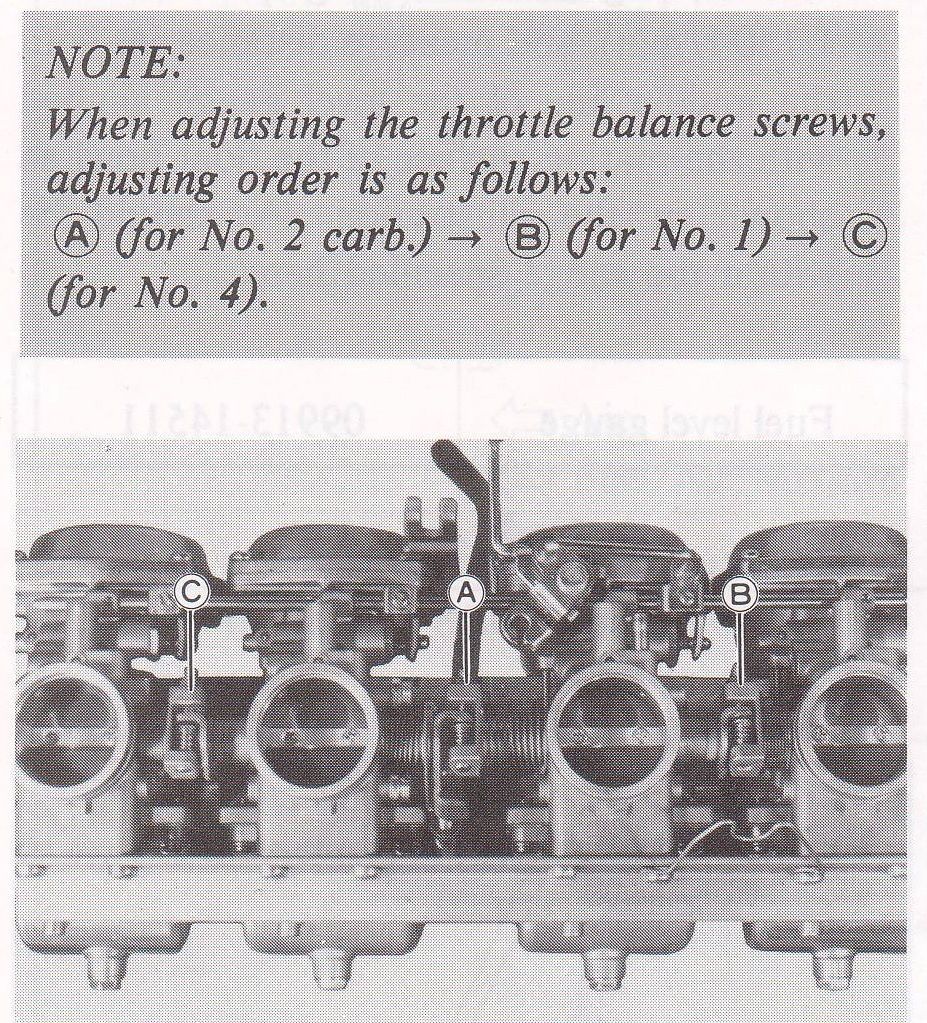
In other words, tweak adjuster A until the two middle cylinders are equal, then do the outters (B and C) to level with the inners. I think you want the outters to have a slightly higher level than the inners too, but check your manual to make sure.
As for the sealer, make sure you use some phosphate to etch the surface before doing the sealer work. That Caswell's stuff is uber thick, so I strongly suggest mixing up the entire batch and just throw away the stuff you pour back out after the coating job is complete (there won't be that much). Tilt and stand up the tank in various positions and let the material flow. Reposition the tank every three mins. or so and keep working the coating. The hardest part of the tank to get covered is the frame backbone hump area so keep this in mind. Oh, and all that sealer adds several pounds to the weight of your tank. Personally, I think Caswell's is good stuff if your tank has weak metal or holes, but for normal lining jobs I prefer Por-15 (not that you asked - sorry).
Good luck and keep going. The bike looks fantastic!!!! Last edited by Nessism; 08-25-2013, 11:37 AM.
Leave a comment:
-
 Guest replied
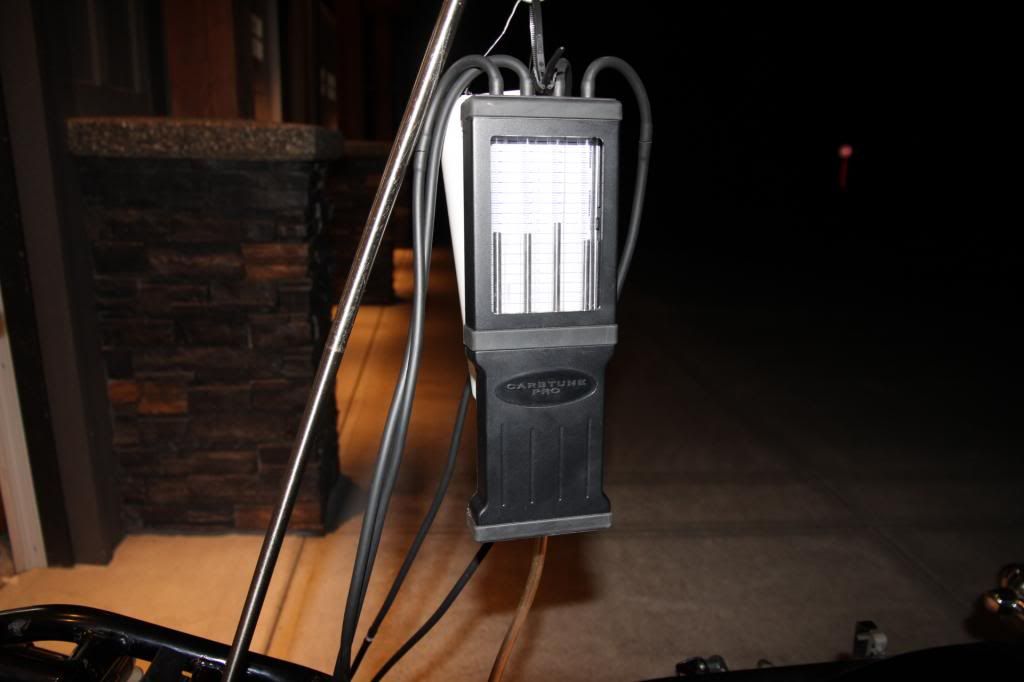
Do you have one of these? Makes syncing the carbs WAY easier.Leave a comment:
-
Guest repliedFantastic work sir!Leave a comment:
-
Yes. Adjust two until it evens out with 3; then go to 1 until it evens out with 3 - you may find you'll have to readjust two but it shouldn't be by much.
Make sure your idle stays at the recommended RPM (IIRC 2000RPM) during the process.Leave a comment:
-
Thanks, Cowboy, Yes I did bench sync them, but it was probably not very good.
Now that I've had some actual hands on experience trying it, I will re-read the instructions again and hopefully see were I was going wrong and get it better next time.
The instructions I'm attempting to follow, are from page 41 of the 1980 GS1000T Supplement on BaseCliff's site.
Is this what your saying about #3 being the master?
Leave a comment:
-
Remember that number 3 is the master so everything is set to it. Did you bench sync them before putting them on?Leave a comment:
-
Carb Stinking
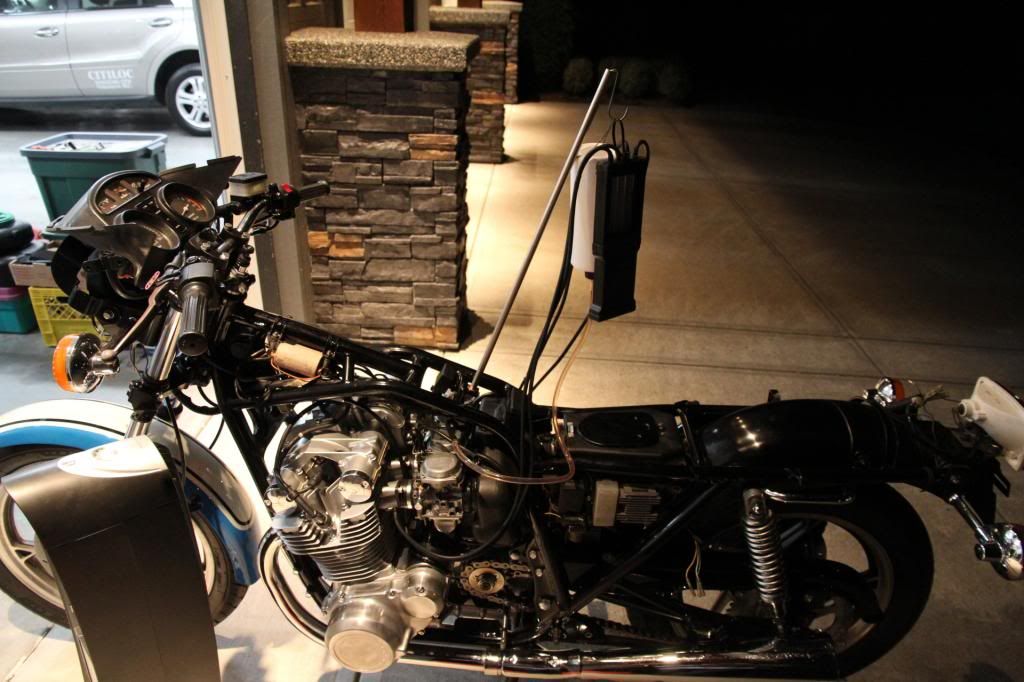
Man, carb syncing is hard work. I spent almost half the day getting ready to sync the carbs, making a fuel reservoir, and a stand to hold it and mucking around without making much progress. I was trying to get it done before we needed to leave for our BCCMC First Annual BBQ.
I didn't get it done so tonight after I got back I had ago at syncing the carbs with the borrowed Carbtune Pro and my home made fuel reservoir.
Well I spent the best part of 30 minutes trying to get the carbs to balance and finally got it close, then I realized I didn't have the fuel vent hose plugged, so I plugged it and then tried again.
I couldn't get it even close with the vent plugged, so I have given up for now and will wait for the bike to cool down before I have another go.
Very frustrated as the adjustments don't make sense and seem random, not sure what I'm doing but trying to follow the manual. Hopefully once I've cooled down a bit it makes more sense.
I see why the motion pro auxiliary tanks are 2 litres, the one I have is about 500ml and it's is only enough for about 15-20 mins, these bikes are thirsty.
Here's a picture of my setup and a picture showing the gauges, the closest I got when the vent hose was not plugged.
Leave a comment:


Leave a comment: