Progress!!! 1978 GS1000E Restoration/Performance Rebuild
Collapse
X
-
Last edited by philosopheriam; 01-10-2016, 05:51 PM.Cogito ergo sum - "I think, therefore I am"
Ren? Descartes -
Comment
-
Folks,
Just a teaser - pictures will be posted this weekend.
1. All brake lines should be installed
2. Building of brand new wiring harness should be complete
3. Dyna 2000 ignition system should arriveCogito ergo sum - "I think, therefore I am"
Ren? DescartesComment
-
 80GS850GBob
S/S lines?...oem connectors with new wire....guess we'll just have to wait and see...Comment
-
Unfortunately, only 1/2 of my brake lines and fittings arrived - I will be using Goodridge stainless lines, banjo bolts, and banjo fittings. Also, a coil of wire I need to finish the harness was supposed to arrive today (Saturday) but got delayed in transit by 3 days. Bugger...
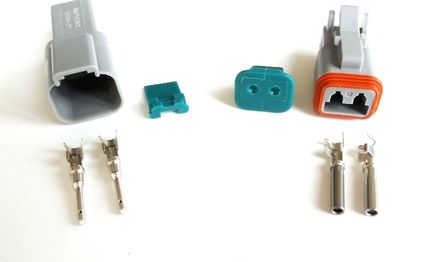
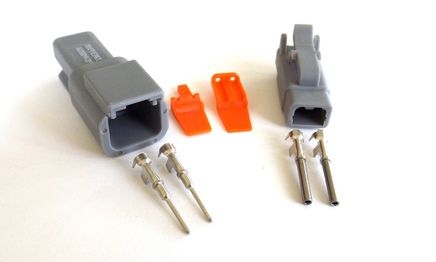
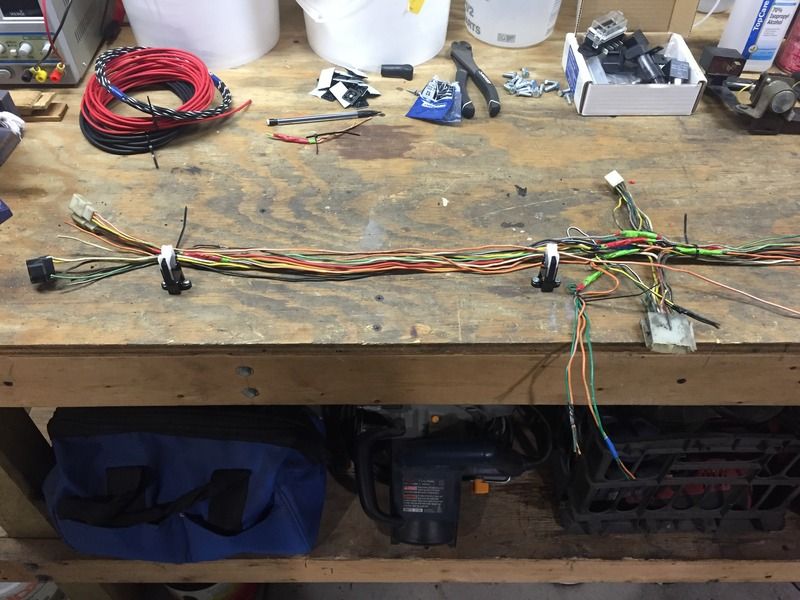
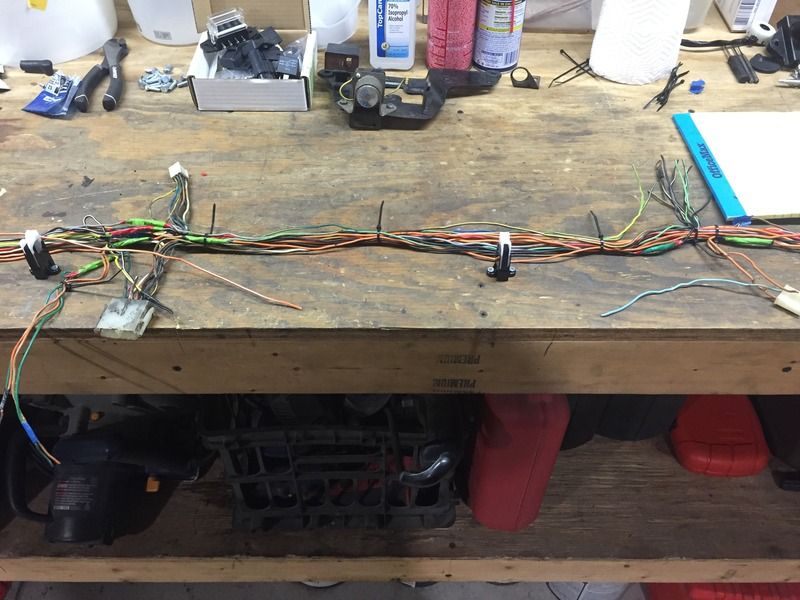
I any case, I did make some decent progress today - when I tore into the old harness, my intention was to repair it and add some circuits. After examining it and seeing a bunch of stuff that I didn't like (splices covered in tape, nicked wires, circuits that were designed stupidly, etc), I decided to fabricate an entirely new harness. All of the wiring is 18ga TXL with the exception of the main power feed which is 12ga TXL. All connectors will be Amphenol ATM connectors (these are Deutsch DTM copycats), with the exception of the x2 8-pin connectors where the fuse panel plugs into the main harness - these connectors will be standard Deutsch DT (they have a higher amperage rating and are larger - size is less of a concern near the fuse panel).
Deutsch AT/DT vs. ATM/DTM
AT/DT (larger)
ATM/DTM (significantly smaller)
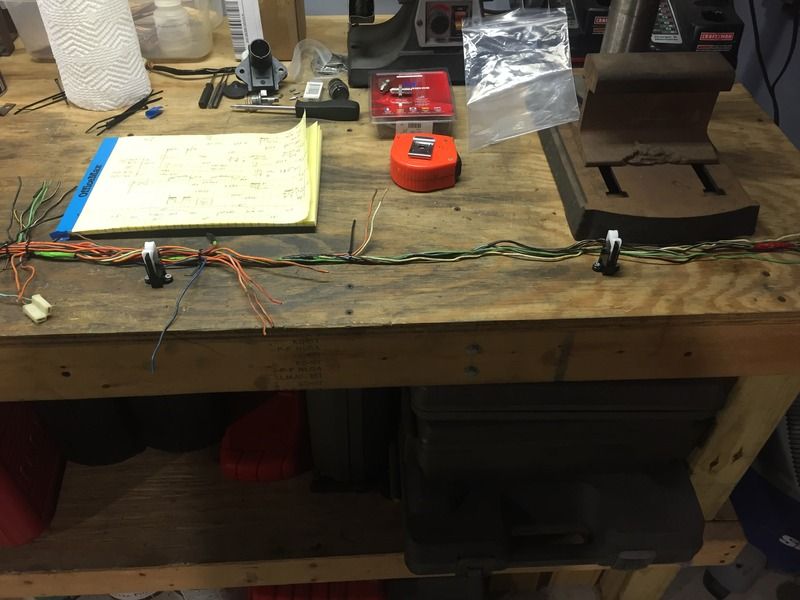
Old harness - I used some elastic wire retainers from Panduit and some nails to represent the locations of bends, etc.
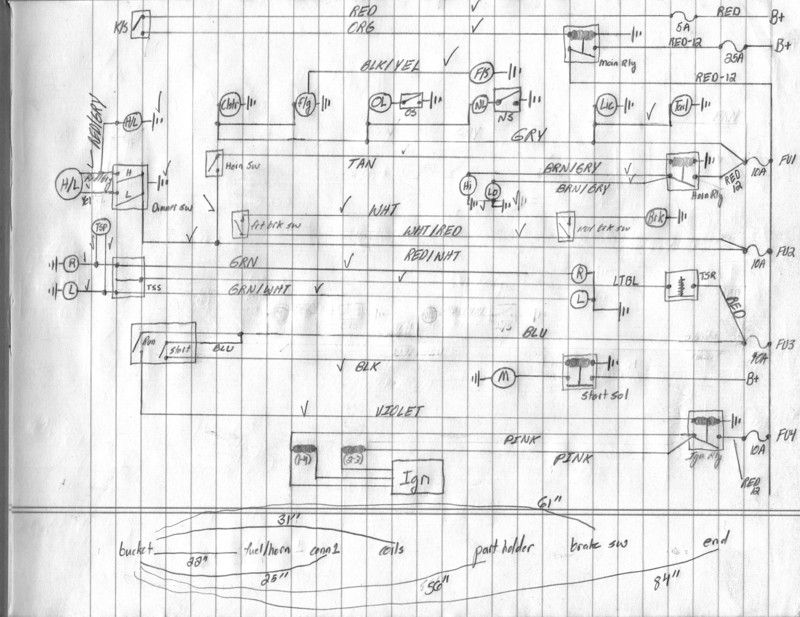
Before I embarked on assembling the new harness, I drew a new schematic - keep in mind that this schematic isn't completely finished, as I have not delineated the specific ground paths and the locations of connectors, etc. I added x3 relays and x3 additional fuses. The functionality of the "park" position has been eliminated from the keyswitch circuit. The connector for the killswitch has been moved to the same location where the instrument cluster plugs into the main harness (in front of the coils near the tank).
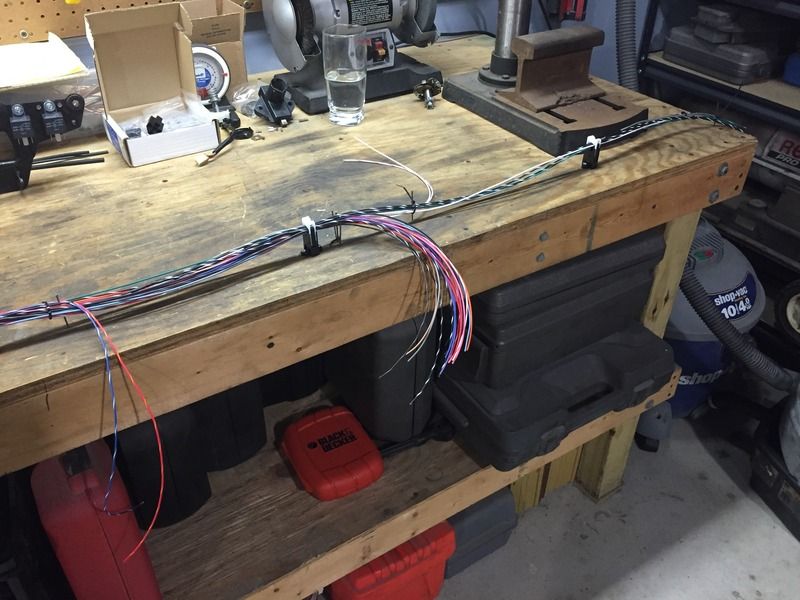
New harness

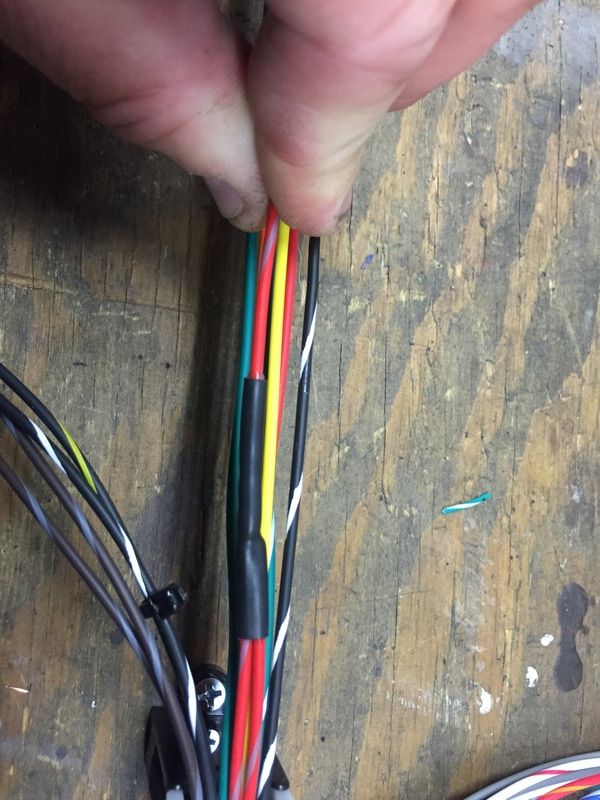
Splices properly soldered and covered with adhesive heatshrink
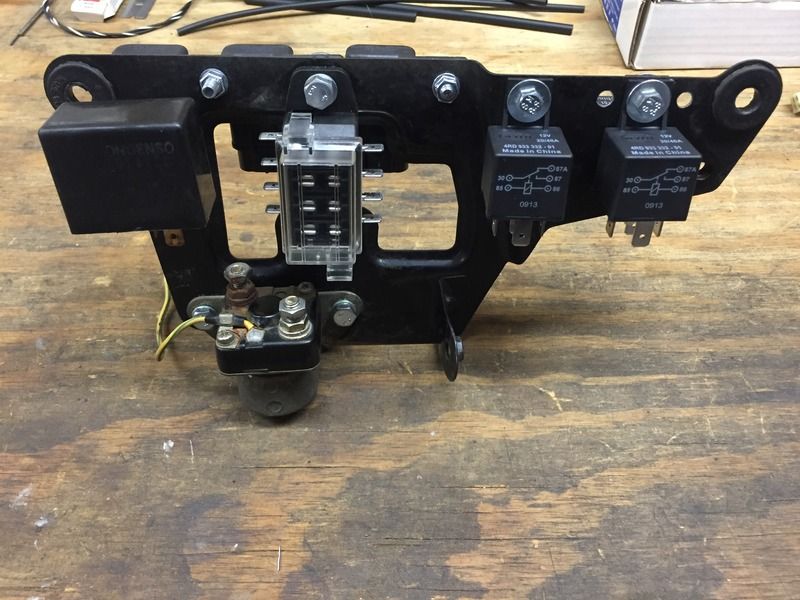
Mock-up of fuse panel
 Last edited by philosopheriam; 02-06-2016, 06:15 PM.Cogito ergo sum - "I think, therefore I am"
Ren? DescartesComment
-
Mock-up of fuse panel (cont)

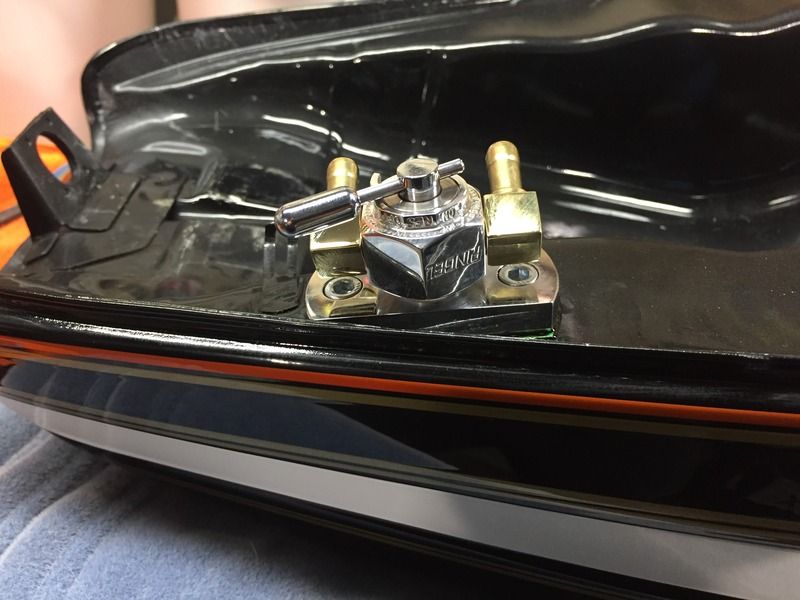
Fuel sender install - removed the cover of the sender to make sure the pickup was touching the rheostat throughout the range of motion. Reinstalled into the tank with new rubber gaskets and SS hardware. I re-plated the cover.

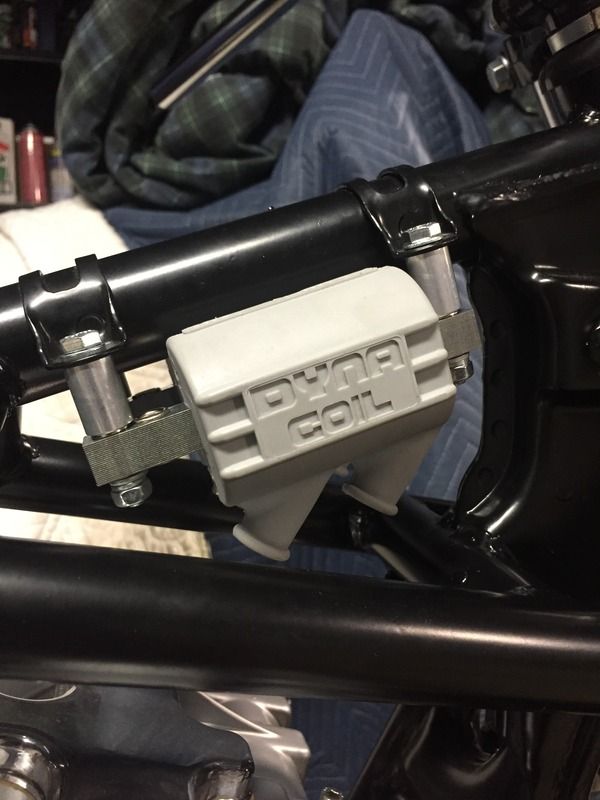
2.2ohm Dyna coils installed - I used 19mm long aluminum spacers to obtain the proper clearance.
Pickup plate and rotor to the Dyna 2000 ignition

Brake lines and remaining wire should be here Tuesday. Will post photos of the brake lines temporarily installed.Cogito ergo sum - "I think, therefore I am"
Ren? DescartesComment
-
 one_civic
 -
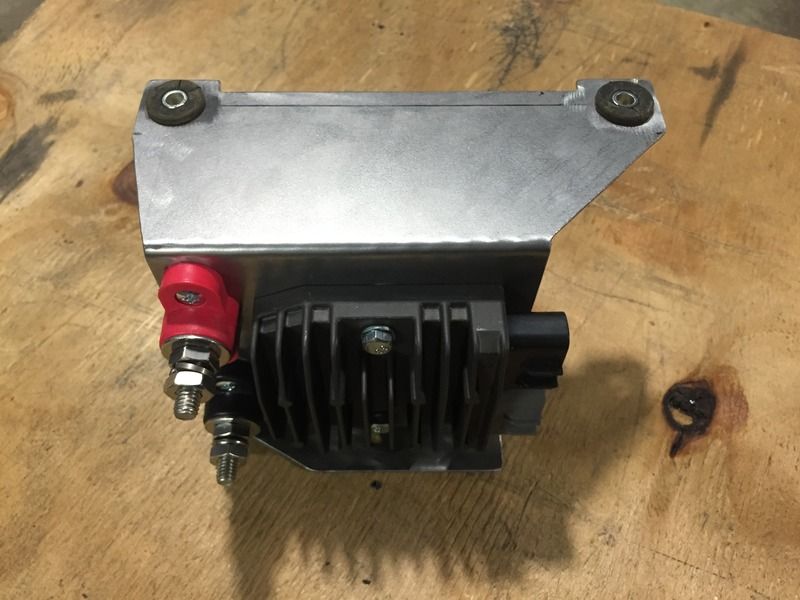
Today's project - building a mounting bracket for the ignition and R/R. The most difficult part was coming up with a design that would look good but also be functional.
I did all of my measuring/fitting with a cardboard template and then transferred the layout onto a sheet of 16ga steel. The bends were made in my bench vise. The top of the plate uses existing tabs on the frame for mounting - these were for mounting the original airbox. The lower mounting holes uses the rear battery box mounting bolts.




 Cogito ergo sum - "I think, therefore I am"
Ren? DescartesComment
-
very clean looking install, especially that SH-775.
If you are working on the power and grounding still this schematic might help.
Comment
-
Thanks posplayr - I'm a step ahead of you, though :-). I built a completely new harness and it's almost done - I just have to add a couple wires, test fit it in my frame, and then install the connectors.very clean looking install, especially that SH-775.
If you are working on the power and grounding still this schematic might help.
http://www.thegsresources.com/_forum...ght=550+bobberCogito ergo sum - "I think, therefore I am"
Ren? DescartesComment
-
Maybe a day, you posted this yesterday.
Before I embarked on assembling the new harness, I drew a new schematic - keep in mind that this schematic isn't completely finished, as I have not delineated the specific ground paths and the locations of connectors, etc..Comment
-
 Guest
Guest
I stumbled on this thread earlier tonight, and went back to the first post and spent the rest of the night reading the entire thread.
Incredible!Comment
-
I should have explained myself better - I have the grounds laid out in the harness the way I want them, I just didn't update my schematic. I.E, I ran separate grounds for my headlight and horns, yet the turn signal grounds are spliced into one wire, same with the brake/tail/lic/cluster etc.Cogito ergo sum - "I think, therefore I am"
Ren? DescartesComment




.png)
Comment