Announcement

Collapse
No announcement yet.

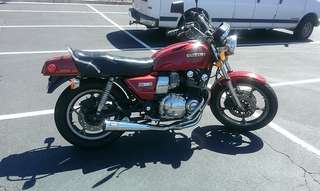
Progress!!! 1978 GS1000E Restoration/Performance Rebuild

Collapse
X
 
  • Filter
  • Time
  • Show
Clear All
new posts

    PROGRESS PHOTOS FROM YESTERDAY, 4/12 :-)

    IMG_1224 by Anthony Monteleone, on Flickr

    IMG_1225 by Anthony Monteleone, on Flickr

    IMG_1226 by Anthony Monteleone, on Flickr

    IMG_1227 by Anthony Monteleone, on Flickr

    IMG_1228 by Anthony Monteleone, on Flickr

    IMG_1229 by Anthony Monteleone, on Flickr
    Last edited by philosopheriam; 07-30-2017, 10:46 AM.
    Cogito ergo sum - "I think, therefore I am"
    René Descartes

    Comment


      More! More! More!

      IMG_1230 by Anthony Monteleone, on Flickr

      IMG_1231 by Anthony Monteleone, on Flickr

      IMG_1232 by Anthony Monteleone, on Flickr

      IMG_1233 by Anthony Monteleone, on Flickr

      IMG_1234 by Anthony Monteleone, on Flickr

      IMG_1235 by Anthony Monteleone, on Flickr

      IMG_1237 by Anthony Monteleone, on Flickr

      IMG_1236 by Anthony Monteleone, on Flickr
      Last edited by philosopheriam; 07-30-2017, 10:50 AM.
      Cogito ergo sum - "I think, therefore I am"
      René Descartes

      Comment


        Very nice build Anthony. Was surprised to see you didn't install the left side transmission shaft seals before bolting the case halves together. Never done it this way.......Billy

        Comment


          Originally posted by BadBillyB View Post
          Very nice build Anthony. Was surprised to see you didn't install the left side transmission shaft seals before bolting the case halves together. Never done it this way.......Billy
          Billy - you HAD to bring this up :-/ We opted not to install the seals first because we were concerned about the case halves "pinching" the sides of the seal where the cases mate. Unfortunately, we buggered all three seals (crank seal, rubber plug, mainshaft seal) attempting to install them. So, because we have no intention of splitting the cases again, we have to figure out a way to install these seals - the edge of the case keeps digging into the rubber on the seal and destroying it.

          So, we are going to have to bevel the edge of each seal installation surface - we did deburr and put a small bevel on the front of each seal surface, but apparently it wasn't enough. So, on attempt #2, the plan is as follows: Put a larger bevel on the front of each seal surface, smooth the bevel with a 3m/scotch pad, put the seal in the freezer/icewater to shrink it down a smidge, coat the edge of the seal with grease, and use a perfectly-sized seal driver to install each seal.

          If you have a better idea, I'm all ears!!!!! If these seals fail during the couyrse of normal operation, there HAS to be a way to replace them without splitting the engine cases!
          Cogito ergo sum - "I think, therefore I am"
          René Descartes

          Comment


            Anthony, it is good to put a face with the name & voice! The factory puts EVERY case half together with the seals already in place. Save yourself a LOT of heartache & split the cases to install the seals correctly so they don't leak. Also, PLEASE tell me you used Antiseize on the stainless bolts you installed?!!!!
            Ray.

            Comment


              Originally posted by rapidray View Post
              Anthony, it is good to put a face with the name & voice! The factory puts EVERY case half together with the seals already in place. Save yourself a LOT of heartache & split the cases to install the seals correctly so they don't leak. Also, PLEASE tell me you used Antiseize on the stainless bolts you installed?!!!!
              Ray.
              Arrgh... I was hoping you weren't going to say that? What do people do when they need to replace a seal with the engine in the bike?
              Cogito ergo sum - "I think, therefore I am"
              René Descartes

              Comment


                in a pinch on a used bike...not a high dollar project people shave the seals... add sealer and nock them in and cross there fingers.

                Comment


                  Parts off to the re-chrome shop
                  IMG_1240 by Anthony Monteleone, on Flickr

                  Remaining small parts to be powdercoated
                  IMG_1247 by Anthony Monteleone, on Flickr

                  Will post photos when done :-)
                  Last edited by philosopheriam; 07-30-2017, 10:55 AM.
                  Cogito ergo sum - "I think, therefore I am"
                  René Descartes

                  Comment


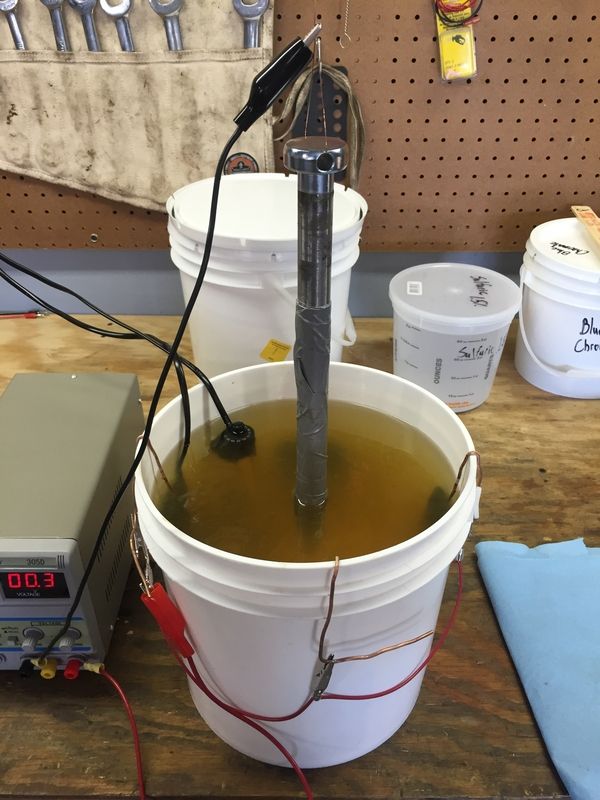
                    FOLKS - I am absolutely ***thrilled*** to report that my Caswell zinc plating setup is up and running. To make a long story short, I bought the chemicals from Caswell, yet I purchased the buckets, zinc anodes, heater, agitation pump, power supply, etc separately.

                    In essence, I read the Caswell plating manual, followed the directions carefully, and prepped the parts diligently.

                    The plating setup consists of the following:
                    Chemicals from Caswell
                    Zinc anodes from Rotometals with integral copper wire hanger
                    Various buckets from Mcmaster-Carr (plating, plating rinse, chromate, degreaser)
                    Constant current power supply from Ebay
                    Mini-aquarium heater from Ebay
                    Mini-agitation pump from Ebay
                    Spray bottle
                    Distilled water
                    Copper wire & tubing (laying around the house)

                    MOST IMPORTANT THINGS I REALIZED WHILE DOING THIS TODAY:
                    1. Good electrical contact is essential
                    2. Prepping small parts with a wire wheel vs. bead blasting is MUCH faster and gives a smoother finish


                    Here are some photos from today's test run:

                    Plating a dummy - 1/2" copper pipe, brightener added to solution, dipped in blue chromate for 20sec
                    IMG_1261 by Anthony Monteleone, on Flickr
                    IMG_1260 by Anthony Monteleone, on Flickr
                    IMG_1269 by Anthony Monteleone, on Flickr
                    (you can see where I did a scratch-test on the surface)

                    Plating of an actual nut and bolt
                    IMG_1262 by Anthony Monteleone, on Flickr
                    IMG_1264 by Anthony Monteleone, on Flickr
                    IMG_1266 by Anthony Monteleone, on Flickr
                    (there is still some rinse water dripping from the parts)
                    Last edited by philosopheriam; 07-30-2017, 10:59 AM.
                    Cogito ergo sum - "I think, therefore I am"
                    René Descartes

                    Comment


                      Sweet!! Looks like that could be my next addition.

                      1980 GS1000GT (Daily rider with a 1983 1100G engine)
                      1998 Honda ST1100 (Daily long distance rider)
                      1982 GS850GLZ (Daily rider when the weather is crap)

                      Darn, with so many daily riders it's hard to decide which one to jump on next.

                      JTGS850GL aka Julius

                      GS Resource Greetings

                      Comment


                        Oh, and before I forget, about a year ago, Nessism gave me some pointers on setting up a system - this made selecting components much easier. Thanks dude!
                        Cogito ergo sum - "I think, therefore I am"
                        René Descartes

                        Comment


                          These arrived yesterday 4/30
                          IMG_1280 by Anthony Monteleone, on Flickr

                          IMG_1281 by Anthony Monteleone, on Flickr


                          And here is some more plating progress - FYI if anyone on the forum is interested in setting-up a zinc plating process, PM me and I would be happy to talk to you on the phone to give you some helpful pointers. I've learned A LOT in the past couple plating sessions about how to tweak the process to achieve a great finish.
                          8cacde4b-cb57-4e10-96c0-28397ea330da by Anthony Monteleone, on Flickr

                          IMG_1284 by Anthony Monteleone, on Flickr

                          IMG_1282 by Anthony Monteleone, on Flickr

                          IMG_1275 by Anthony Monteleone, on Flickr
                          Last edited by philosopheriam; 07-30-2017, 11:04 AM.
                          Cogito ergo sum - "I think, therefore I am"
                          René Descartes

                          Comment


                            How long is it take to do that last bunch? If you're doing a few bolts at a time I'm thinking it will get a bit long in the tooth after awhile?
                            Rob
                            1983 1100ES, 98' ST1100, 02' DR-Z400E and a few other 'bits and pieces'
                            Are you on the GSR Google Earth Map yet? http://www.thegsresources.com/_forum...d.php?t=170533

                            Comment


                              Originally posted by philosopheriam View Post
                              These arrived yesterday 4/30


                              And here is some more plating progress - FYI if anyone on the forum is interested in setting-up a zinc plating process, PM me and I would be happy to talk to you on the phone to give you some helpful pointers. I've learned A LOT in the past couple plating sessions about how to tweak the process to achieve a great finish.


                              Nice looking work!

                              Comment


                                I must say your attention to detail brings a tear to my eye! I'm impressed.
                                De-stinking Penelope http://thegsresources.com/_forum/sho...d.php?t=179245

                                http://www.thegsresources.com/_forum...35#post1625535

                                Comment

                                Working...
                                X