Announcement

Collapse
No announcement yet.

1981 gsx400l project/complete rebuild

Collapse
X
 
  • Filter
  • Time
  • Show
Clear All
new posts

    1981 gsx400l project/complete rebuild

    FIRST OF ALL
    Thanks for taking the time to check out this build page, hopefully I'm putting this in the correct forum. I'm still trying to upload pictures properly, I'm hoping it works this time.


    ABOUT ME
    My name is Chris, I recently posted in the "GS OWNERS" explaining that I know nothing about bikes, let alone a Suzuki from the early 80's but I bought one anyways. If you're still reading, please take the extra minute to leave a comment about my bike or give me some advice as you all know far more than me!

    ABOUT THE BIKE
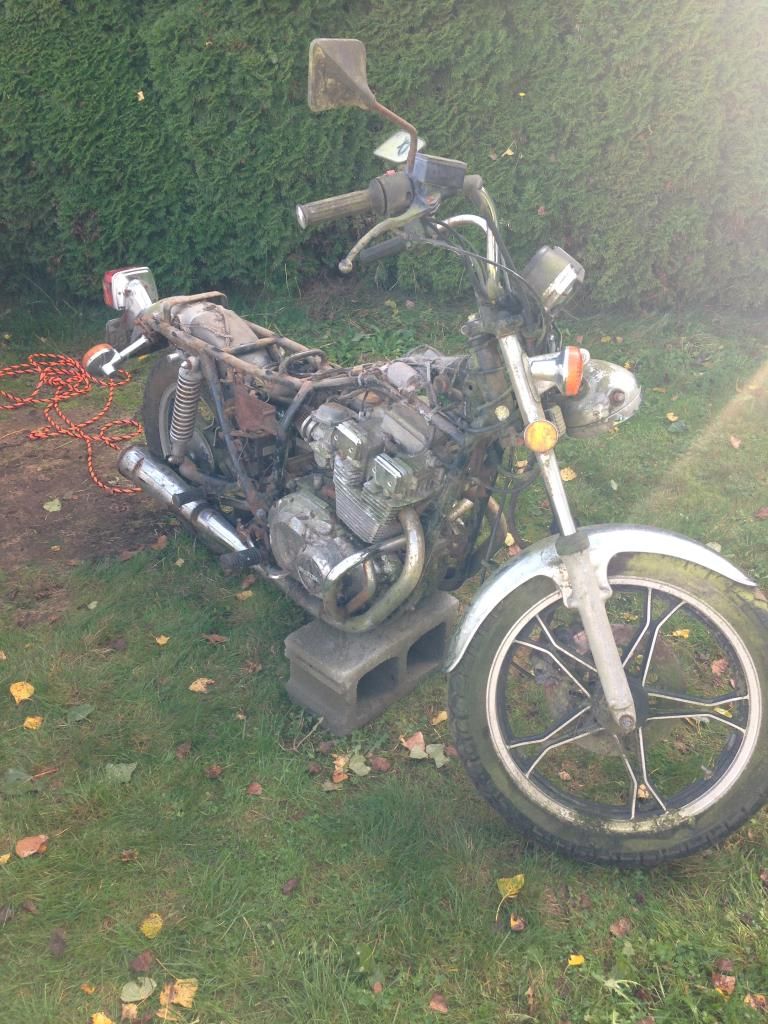
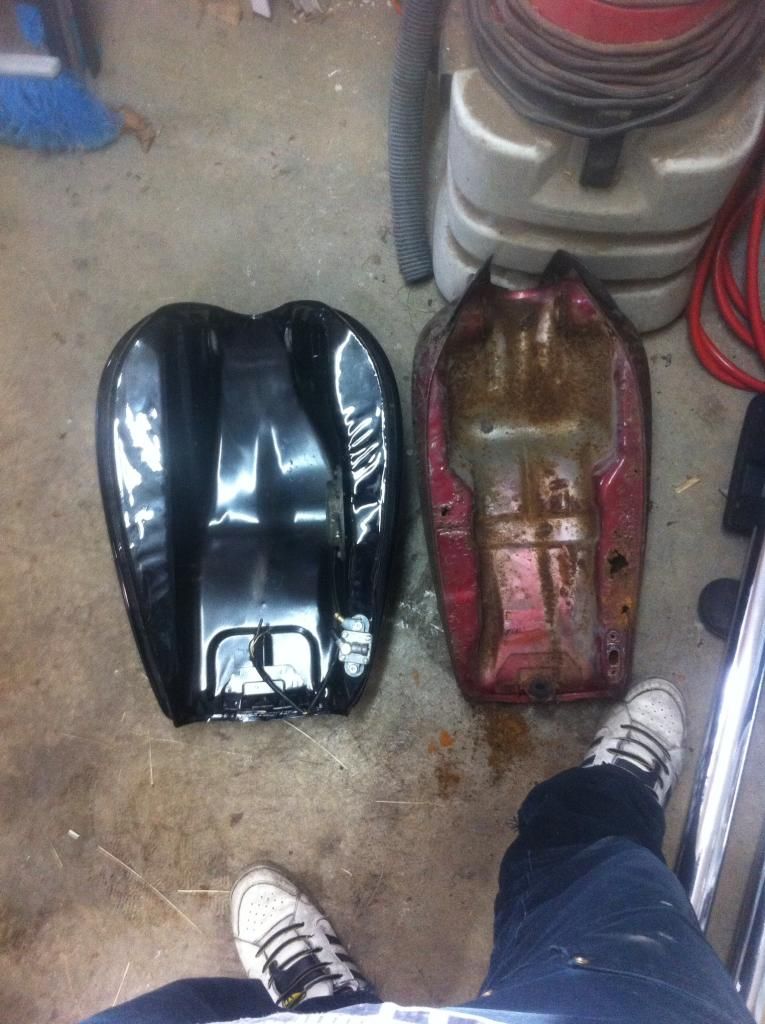
    I bought this bike sight unseen on a auction site, paid $200 for and waited for it to be dropped off. The pictures on the add must have been at least from a couple years back as the bike seems a lot dirtier than the pictures. I was told that the bike does NOT run, it has surface rust all around and the carbs need to be done. The bike was running up until the day it was parked, 6 years ago, outside, "under cover" beside a fence, where it saw no light, but what appears to be tons of rain. Once the bike showed up I realised the tank does have a "little bit of rust, youtube how to get it out", but infact I can probably put my hand thru the bottom sections. mufflers are toast, brakes are seized, clutch petal doesn't move....its going to need EVERYTHING redone. I only paid $200 for the thing, so how can I go wrong...right? .....right?


    MY QUESTIONS FOR YOU GUYS
    This is a GS400L, that's what it is insured as, being from Canada I was then told I had the 4 valve per cylinder model that was not available to the USA. So now I have myself a GSX400L? correct? but then while looking at the bike today I notice I only have 2 exhaust pipes coming out of the head. Can I still have 2 exhaust valves per cylinder but both go into just 1 exhaust pipe?

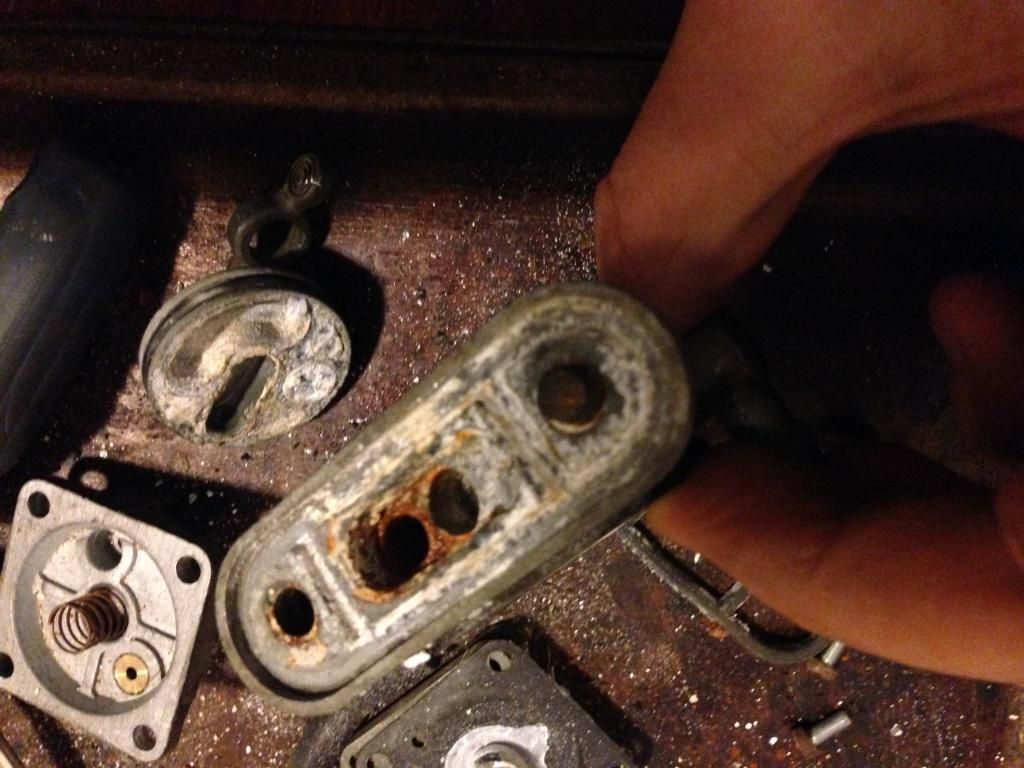
    The petcock is totally jammed up with white powder, what I can only imagine is 6 year old gas and water. I managed to get it all apart, is it a good idea to get a kit and rebuild it as it worked before? can I order a kit online, just soak it in carb cleaner all night and reassemble and then reinstall? if so, is this the kit I should get, all the parts look like the ones I have in front of me.
    Find many great new & used options and get the best deals for KR Benzinhahn reparatur satz SUZUKI GSX 400 L 80-83 ... Fuel petcock repair at the best online prices at eBay! Free shipping for many products!


    WHAT I GOT DONE TODAY
    Today I went out to start ripping it apart and see what I'm dealing with.

    this is a picture of the bike after taking the seat and the tank off.


    this is how my petcock looks


    if my pictures don't work, of if you have a better method of getting them to pop up on the screen, please let me know. take a look through the photo bucket pictures, I will be adding some there and trying to label them.

    #2
    Dude, you have a major project on your hands!

    Not trying to discourage you but I hope you have access to a bead blasting cabinet as you have lots of corrosion removal ahead of you.

    the white powder in your petcock is corrosion. Try soaking it in white vinegar for a few days. If the petcock is that bad you better check the inside of the fuel tank, it is probably pretty bad with rust.

    Someone will be along shortly and send you to Bikecliffs website.

    keep your chin up and hang out on GSresources, lots of good knowledgeable folks here!

    Cheers
    1978 Gs1085 compliments of Popy Yosh, Bandit 1200 wheels and front end, VM33 Smoothbores, Yosh exhaust, braced frame, ported polished head
    1983 Gs1100ESD, rebuild finished! Body paintwork happening winter 2017

    I would rather trust my bike to a technician that reads the service manual than some backyardigan that THINKS HE KNOWS how to fix things.

    Comment


      #3
      Hi Chris, just bought the same bike a few weeks back in the Montreal area. Mine seems in much better shape, but still, it is not running. Electrical problem according to the previous owner, who got fed up trying to figure out what was the problem, and sold it for peanuts.

      My plan is to first try to sort out and reconnect all the wires, test all the electrical components to identify who is the guilty one, fix it or replace it, and then try to fire the "beast".
      Once I know the bike is running fine, I'll strip it naked to make some sort of a scrambler/dirt tracker.

      My knowledge in mechanic is very limited (close to zero actually) so please share your experience with your rebuild.

      Good luck!
      Greg

      Comment


        #4
        Originally posted by Gregou View Post
        ....Once I know the bike is running fine, I'll strip it naked to make some sort of a scrambler/dirt tracker.....

        My knowledge in mechanic is very limited (close to zero actually) so please share your experience with your rebuild.
        You would be best off getting the bike running and riding it around for 6 months before you strip it to bits. It is very easy to get in over your head and end up with the bike in the garage in 12 boxes which end up as a CL ad 12 months down the track.

        Not trying to put you off, just been there and done that.
        Current:
        Z1300A5 Locomotive (swapped my Intruder for it), GS450 Cafe Project (might never finish it....), XT500 Commuter (I know - it's a Yamaha )

        Past:
        VL1500 Intruder (swapped for Z1300), ZX9R Streetfighter (lets face it - too fast....), 1984 GSX750EF, 1984 GSX1100EF (AKA GS1150)
        And a bunch of other crap Yamahas....

        Comment


          #5
          Originally posted by hillsy View Post
          You would be best off getting the bike running and riding it around for 6 months before you strip it to bits. It is very easy to get in over your head and end up with the bike in the garage in 12 boxes which end up as a CL ad 12 months down the track.

          Not trying to put you off, just been there and done that.
          Yes, you're right. When I say "strip naked", I mean taking all the unnecessary and heavy parts of, like blinkers, lights, fenders, rack, big seat… not actually having the bike disassembled in boxes…

          I completely disassembled my Suzuki DR350 last winter, and thank God I had a friend who could help me put it back together, if not it would probably still be in a couple of boxes in my garage…

          But thanks for the tip anyway!

          Comment


            #6


            and have a look here

            Greetings and Salutations,

            Every once in a while I will miss a new member or two and they may not receive their proper greeting. If you are here you probably have a 30 year old motorcycle that needs about 20 years worth of maintenance. In the links below you'll find maintenance lists, documentation, wiring diagrams, "how to" guides, vendor links, tips, tricks, and a whole lot of GS goodness. This is your "mega-welcome". Let's get started.

            Let me dump a TON of information on you and share some GS lovin'.

            I just stopped by to welcome you to the forum in my own, special way.

            If there's anything you'd like to know about the Suzuki GS model bikes, and most others actually, you've come to the right place. There's a lot of knowledge and experience here in the community. Come on in and let me say "HOoooowwwDY!"....

            Here is your very own magical, mystical, mythical, mind-expanding "mega-welcome". Please take notice of the "Top 10 Common Issues", "Top 15 Tips For GS Happiness", the Carb Cleanup Series, and the Stator Papers. All of these tasks must be addressed in order to have a safe, reliable machine. This is what NOT to do: Top 10 Newbie Mistakes. Now let me roll out the welcome mat for you...


            Please Click Here For Your Mega-Welcome, chock full of tips, suggestions, links to vendors, and other information. Then feel free to visit my little BikeCliff website where I've been collecting the wisdom of this generous community. Don't forget, we like pictures! Not you, your bike!

            More links to helpful threads in the forum:
            Help! Your Bike Won't Start
            DON'T DO THESE THINGS
            Help! Your Bike Won't Run Well
            Oh God! Pods!


            Thanks for joining us. Keep us informed.

            Thank you for your indulgence,

            BassCliff
            and how to post pictures


            have fun....

            Comment


              #7
              Ok, its been a while without an update, just poured myself a cup of coffee so lets try and upload some pictures!

              The more I stared at my tank the more it scared me, I would be into it for too much $$ to make it look like new. I came across a bigger tank than that of a Gs400, I went ahead and bought it from Scott (might be a member?) and had it shipped up from Florida. Not sure what bike this was off of but it is really big! But I'm kind of into that style so it works out perfectly. I think I'm into the gas tank, cap and petcock for $150 after shipping and packaging. Well worth it IMO.


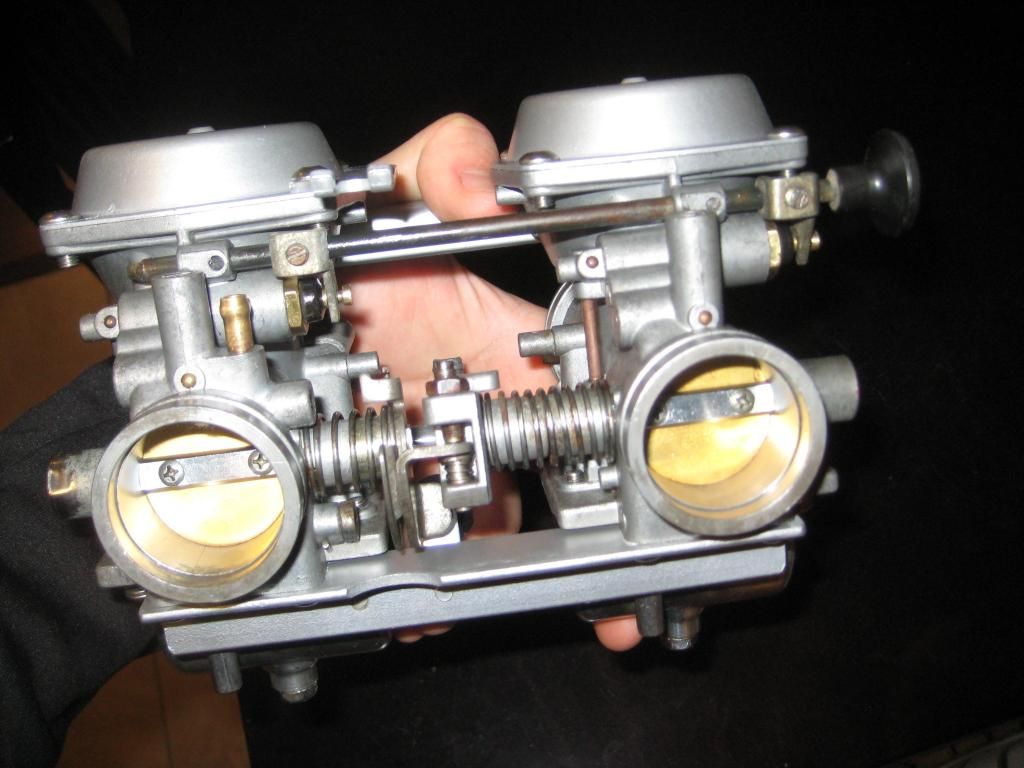
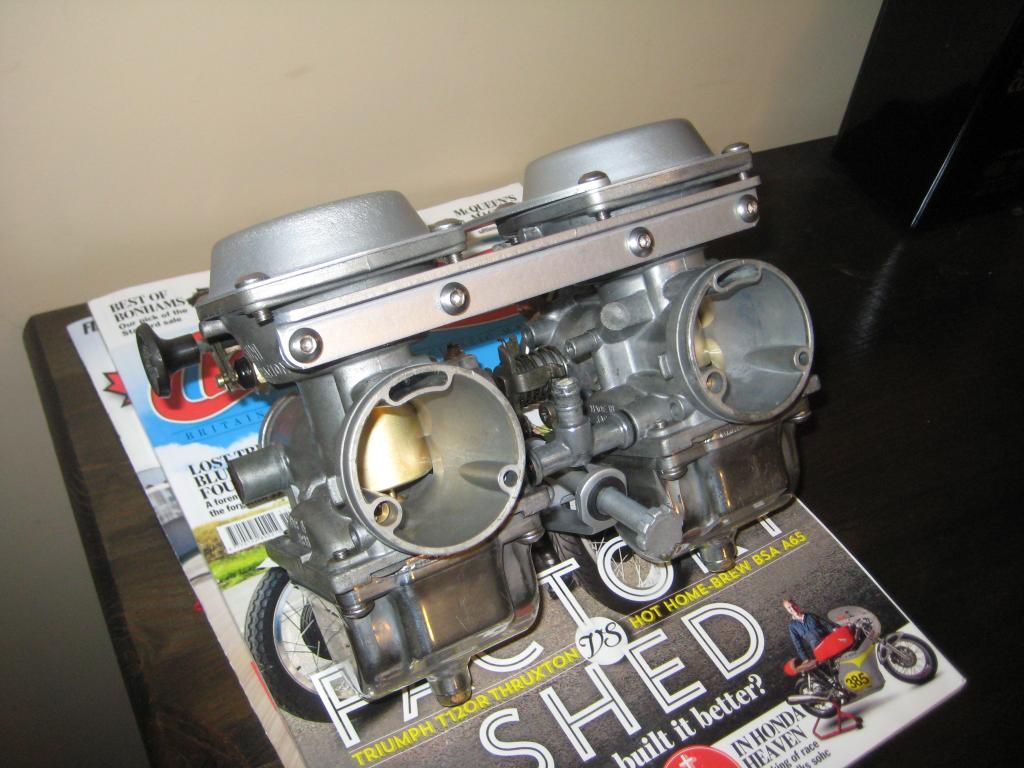
              I've striped the bike down some more, taken the wiring harness off and cleaned some connections and sand blasted some parts. The carbs have come off and I was fortunate enough to have a GsResources member help me rebuild them (kiwicanuck). They are still apart but should be back together in a week or two. Just waiting on a couple more O-rings from Robert Barr. Here's a link to my intro page where kiwicanuck has posted about the carb rebuild.


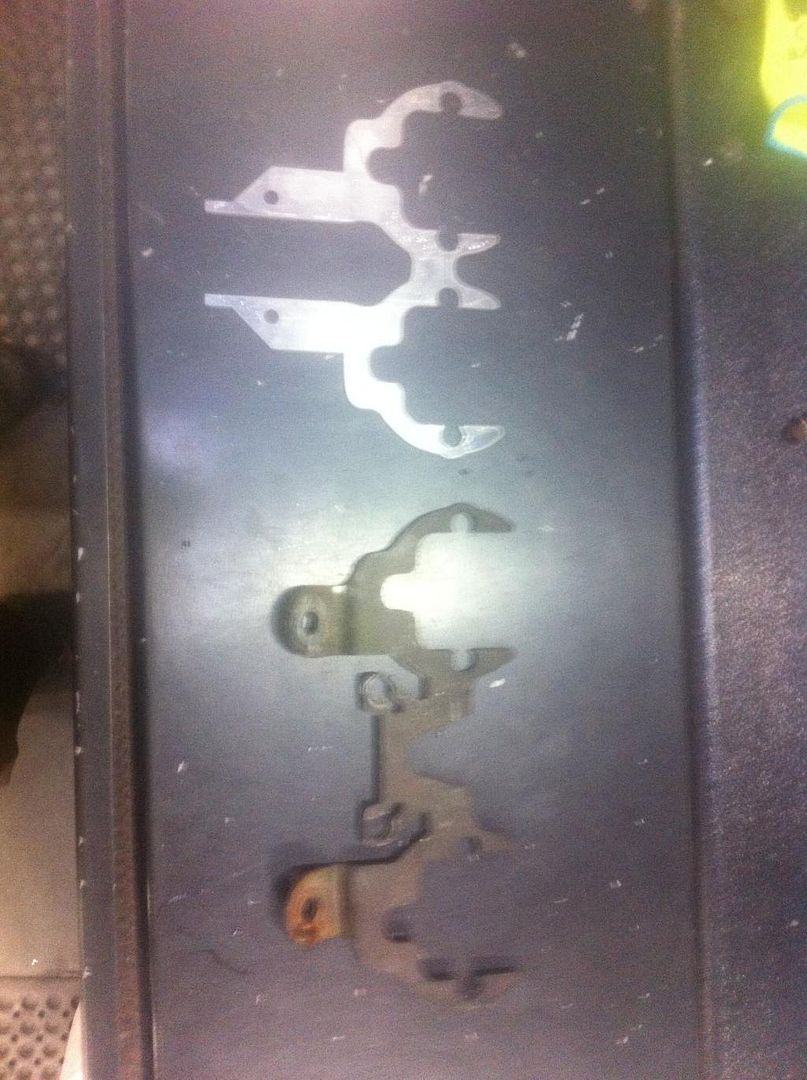
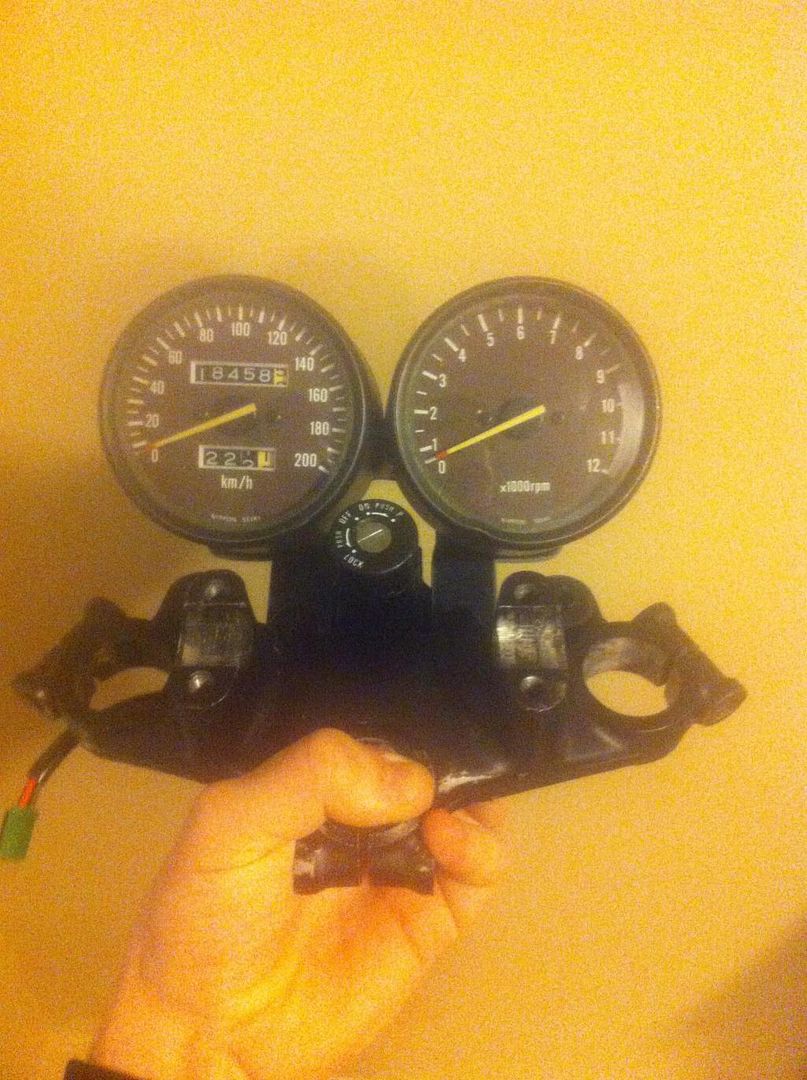
              I've also worked on the gauges a bit. This bike seems a little too far gone to restore back to stock, so having said that, I think I'll try the look of clip-ons and an LED display where the old bars went. This is an "L" so I'm aloud to chop it all up right?!? I build myself a bracket using my water jet at work, it looks like this


              And with the gauges back on without the instrument cluster part between my speedo and tachometer


              I've now got the gauges bolted into the same holes as the ignition, that frees up the original bolt position. I'm thinking I may make some sort of headlight bracket there so I don't have to buy new headlight brackets since I'm wanting clip-ons.

              This is how it sits right now without the gauges back on. My next plan is to figure or the front brakes (all seizes up) and rebuild the forks.

              Comment


                #8
                The O-rings I was missing to rebuild the carbs (6mm drain plug and choke plunger) came in this weekend. During the week I sandblasted the carb diaphragm caps, they were too corroded to polish out. They will get painted and hopefully the carbs should be back together within 2 weeks.
                I was able to finally get my rear wheel off today, not sure why it was such a bugger! it seems the wheel bearings were caught up on a little rust or something. Should I replace all the wheel bearings or can I get away with re-greasing them? I was thinking about cleaning up the axle, tossing it on the lathe and hitting it with a 1000 grit to make sure it spins nice and smooth. Good or bad decision?
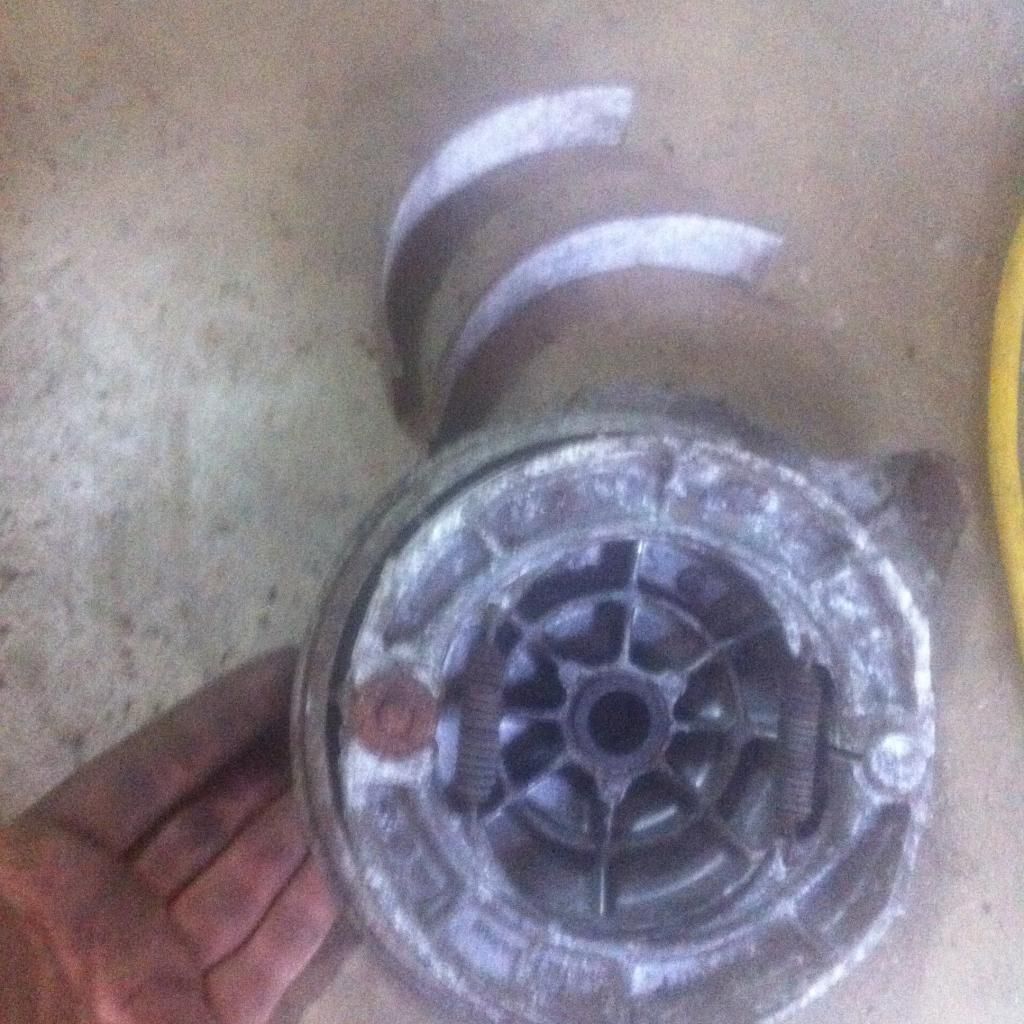
                The rear brakes are another can of worms on their own. It looks pretty bad, I was going to sandblast it all, and get new shoes and hope that works out. Any input would be great.


                sorry about the picture quality, need to go back to using my old camera

                Comment


                  #9
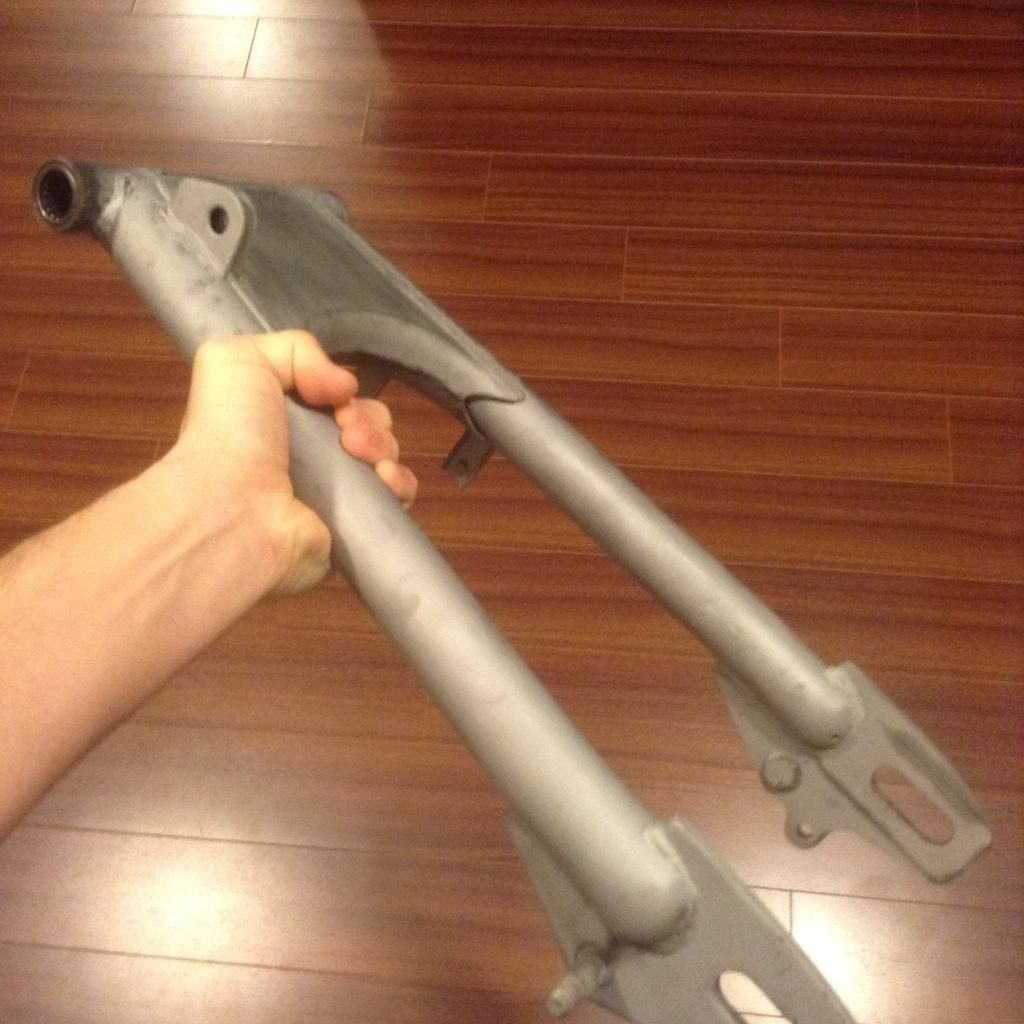
                  "rear swinging arm"

                  Was able to get most of the "rear swinging arm" sandblasted yesterday. The two bearings that were still in there got a bit of sand in them when the caps fell off during the sandblasting process. They still seem to turn alright, I was thinking I could just leave them in, clean them with a rag and then hit them with a good molly axle grease? I found some online for a Gs450L for roughly $20 each (suzukipartshouse.com) I'd prefer to use these ones though if you guys think they'd still function ok.

                  link to the parts fishe with the bearings:
                  Shop online for OEM Rear Swinging Arm parts that fit your 1982 Suzuki GS450L, search all our OEM Parts or call at (231)737-4542


                  Comment


                    #10
                    You are going to want to replace all old bearings that you come across. Wheel bearings, swingarm bearings, etc. You don't want one to lock up at 55mph. Especially a wheel bearing.

                    Comment


                      #11
                      if it's just sandblast material in the swing arm bearings, and they are not worn out, then wash them out really well, I used varsol on mine, air to blow out any crap, and a good repacking of grease, when the bolt goes through check for any excessive play, if it's tight, bolt spins freely, does not feel gritty, your good to go, there is not a lot of movement on the swing arm.....

                      as for the wheel bearings, replace them all, cheap investment, compared to a lot of hurt if they do seize up....

                      .

                      Comment


                        #12
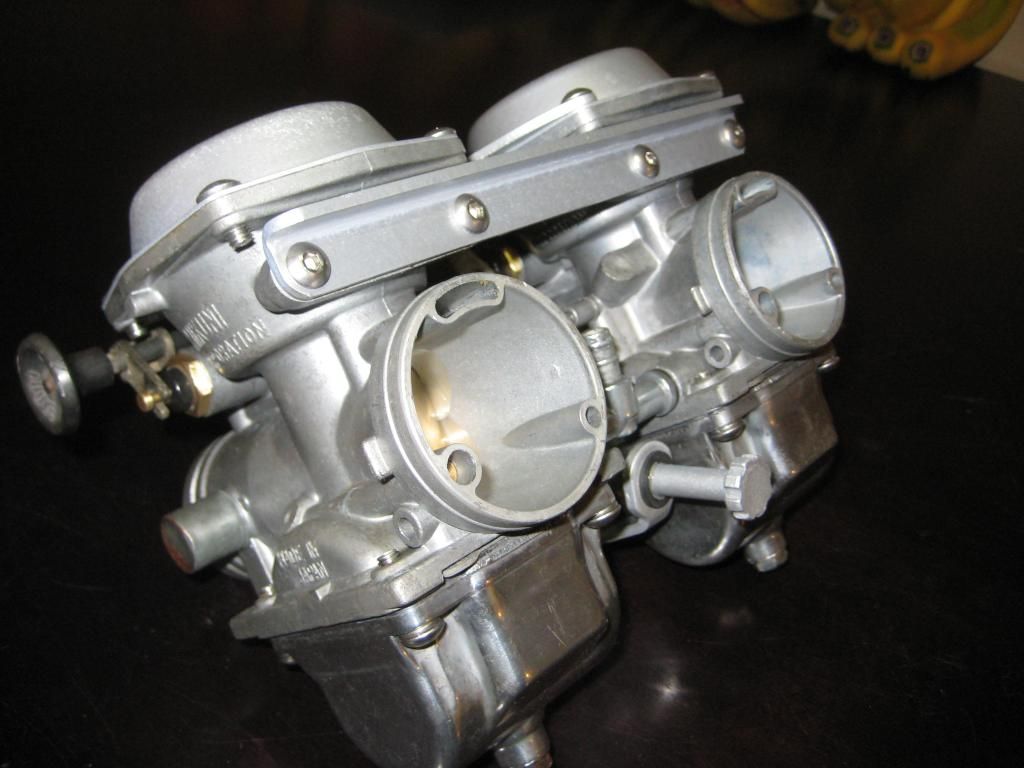
                        This afternoon kiwiCanuck and I put the carbs all back together. I had ordered some new button head screws from Albanycountryfasteners.com. This is a list of screw I needed for my Bs34 carbs:
                        (6) 5mmX0.8X8mm
                        (2) 5mmX0.8X10mm
                        (4) 5mmX.08X12mm
                        (8) 5mmX0.8X16mm
                        (4) 6mmX1.0X12mm

                        I do recommend the site if your JIS screws are all corroded like mine were and you're not doing a OEM restoration. (These are allen button head screws). The screws arrived within 2 days and without any troubles.

                        A heads up for anyone out there with a GsX400L looking to buy the o-ring kit from Robert Barr, it doesn't appear that his "half kit for the 80-82 Gs450" matches up like I thought it might. You'll have to email him directly and let him know what you need. I was able to match up a diagram for my carbs to a different bike. My carbs seem to have a 6mm drain bolt that makes it distinct. http://www.cmsnl.com/suzuki-gsx400-1982-ez_model13618/partslist/FIG-12.html#results <-- that's a diagram of my carbs, a little different from a 450cc.
                        My intake seals also appear to be 34mm, instead of what came in the o-ring kit, Ill email Robert within a few days and see what he's got for me.
                        When I got the bike, it was said to be running ( I know, never trust the PO). It had pods and upgraded main jets.

                        _______________MY BIKE_____ STOCK
                        MAIN AIR JET _____ 130________ 117.5
                        PILOT JET__________42.5 _______ 42.5
                        PILOT AIR JET _____ 125 _______ 125

                        I Have found an air box locally that someone is willing to sell me dirt cheap along with side covers for a 400cc, I will try eventually see how the bike runs with the 130 mains, might have to go back down to 117.5 to get it running nicely though? Side note; exhaust cones are pooched, the "header" or "down pipe" seem rusty but salvageable, might put a different end piece if I cant find anything OEM.


                        Once again I'd just like to give a shout out to KiwiCanuck for helping me out tremendously with these carbs.
                        Last edited by Guest; 01-25-2015, 04:09 AM.

                        Comment


                          #13
                          Small update, after cleaning and going through the wiring harness I finally put it back on the bike, the turn signals work as well as the backlights on the tach and speedo, gear indicator light lights up in gear "1". The horn does not seem to work, as well as head light. I hooked the horn up directly to the battery, no sound, is it toast? ...I guess I still have some poking around to.

                          I am unable to get my bike to switch gears as it seems the pin is too rusted up to move up or down. I've taken off the 5 screws holding down the cover but it seems to be still on there tight. What am I missing here? I had the same issue with the rear brakes, just cleaned up the pin and now it moves freely, hoping its a similar story with this clutch issue.

                          Comment


                            #14
                            Over the Easter weekend I was able to remove that clutch lever cover, to find that the chain was all tangled. managed to remove the chain and now the bike goes through all the gears freely, my gear indicator works and my neutral light comes on when in neutral. Finally a step forwards
                            The moment that all worked out I found myself with an electrical gremlin, no power at all. I thought I killed my battery by leaving it in the ON position. Grabbed the charger, plugged it in and it read my battery was sitting at 12.4V. Took me 15 minutes of pulling my hair out to figure out that it was my fuse was blown where I could see. At first glace the fuse looked good, it wasn't until I took a test light to both ends that I realised it was the culprit. Figuring that out made me feel pretty smart.
                            I was then able to get the bike in neutral, bypass my broken clutch lever safety switch and jimmy my kill switch and crank button and BOOM! she made a noise, it cranked over. I've still got the plugs out, carbs off, exhaust off and such but that's a start. It turned over one or two times, enough to see a cloud shoot out the exhaust ports but not long enough to cause damage? I knew the pistons weren't stuck because I took a 19mm and was able to turn the engine over a couple times last month.
                            Now I'd like to know what I need to do before trying to start the bike, so far ill need to; put a teaspoon of oil into the cylinders to oil up the rings and let it sit for a day or two, put the carbs back on, new spark plugs and see if they're getting sparks while I crank it, and do I NEED to put the rotted out exhaust back on, or could I get it running poorly with no intake/exhaust?

                            Comment


                              #15
                              Hi there, cool project and good on you for not being afraid to just dive in and get your hands dirty. It looks like you work at a machine shop of some kind- this will save you piles of money, it looks like it has already.

                              So far, I agree with every piece of advice you've been given so far from a mechanical standpoint- a credit to this forum.. I'm new here, and relatively new to bikes, but I'm an import mechanic by trade. Speaking of which, if you gave your horn 12v and nothing happened, yes it's dead. As for getting ready to start the bike: if you don't know when it ran last? Squirt some ~30w oil into the cylinders via the spark plug holes, turn the motor over by hand a couple dozen times. leave the carbs off for now. Use the starter and spin it for ~10 seconds at a time, maybe two or three times. this should help get compression up to whatever it's running value with oil pressure and nice oily wet rings ought to be. Don't worry so much about letting it sit, it wont really make any difference. Spinning it over via the starter will help it spit out excess oil, but once you oil and spin it, if you've gotten too much you may have to roll each cylinder up to it's tdc on the compression stroke and use compressed air to blow out excess oil to keep it from fouling your plugs when you're ready to actually start it.

                              Put the carbs on, install new plugs. I dunno if old bikes care as much as most cars do these days, but for the love of god don't put any Champion or Autolite crap in there. NGK is the one and only brand I put in all my cars/bikes, maybe Bosch if there's no other quality option. Now that that's out of the way, you can try to start the engine without exhaust on it if you really want, but it won't like to idle, and honestly I wouldn't do it for fear of burning a valve- again, I dunno if bike engines are as sensitive, but steel is steel and valves are valves (unless they're titanium or sodium filled, but...) and I sure as heck wouldn't start a car engine and let it run for more than 10 seconds without any exhaust on it, and only then just to confirm that things are happy. Could it run for longer? yes, but is it worth it? Not to me.

                              As for your cover, well that picture is...bad. but probably it's just an ancient gasket holding it tight, have you tried bonking it with a rubber mallet from various angles yet? Aluminum doesn't like to flex so trying to pry it off could be sketchy if there's something you're missing, but often a good shock will make lightly stuck things let go.

                              Did you get the drum brake sorted out? I didn't see any comments after your post asking about it. If not, yes, bead blast it, clean it, lube the parts that should move freely, but not so much that grease can get out into the friction surface itself. I recently did most of what you're currently doing on an old ts125, and while the brakes weren't seized, they looked about the same as the drum in your pics, and some high pressure sand and proper lube were all they needed. You can also get a neat little tool from your local motorsports shop that helps lube cables brilliantly- it looks like a little barrel with a slot down one side and a rubber dingus inside, with a hole drilled along the slot at one end. you simply slide it onto any cable you like where it disappears into it's guide sleeve, use the set screw to tighten it, stick the little red straw that comes with your spray lube of choice into the drilled hole, and spray while working the cable. do this from both ends when possible, work the hell out of it, and repeat until it glides like butter in a hot pan. If it refuses, buy new cables.

                              Also, those carbs looks fantastic, good job!

                              Comment

                              Working...
                              X