Announcement

Collapse
No announcement yet.

78 GS 750 Rebuild

Collapse
X
 
  • Filter
  • Time
  • Show
Clear All
new posts

  • Sam 78 GS750
    replied
    Still at it...

    So it's been awhile since I posted in this thread... Still at it. Progress is slow, but I've been getting there a little bit at a time.
    Since my last post some things I've done (in no particular order):

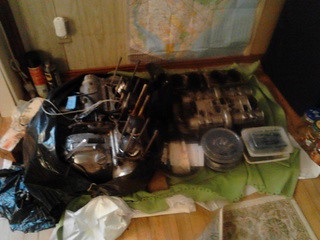
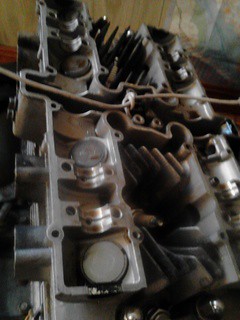
    • Finished disassembly. Everything completely apart in boxes and ziploc bags, all meticulously labeled for sanity's sake in the reassembly
    • had the welds in the frame cleaned up, and a minor crack repaired
    • frame swingarm and some other bits powder coated
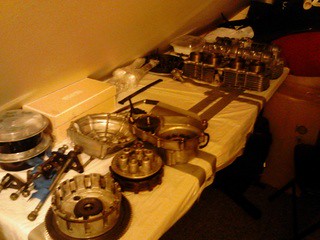
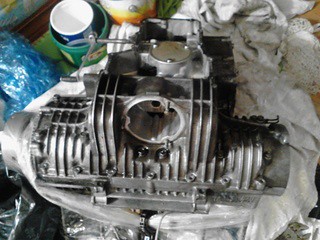
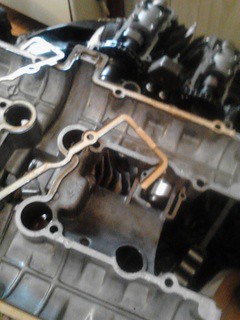
    • polished engine cases
    • Got a zinc plating setup from Caswell (just bought their chemicals. sourced power supply, etc. from ebay) Philosopheriam's write up was priceless in getting set up. He also got on the phone with me for a good hour walking me through his process and giving me some tips that saved me a lot of time in trial and error. I'm about 80% through replating all the hardware.
    • Painted engine. Soda blasted cases, cylinders and head, then sprayed with VHT Engine Primer and Universal Aluminum and baked in the wife's oven.
    • Wheels cleaned, hand polished (couldn't get the polishing wheel in there) and painted
    • New swingarm bearings and bushings
    • Reassembled crank halves with all new seals, etc.
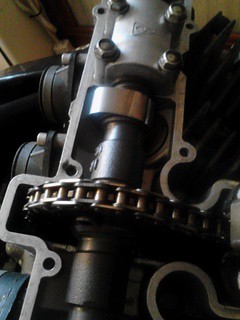
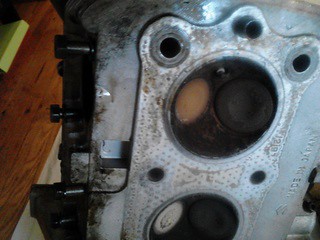
    • Head decked, valve seats cut
    • Valves reinstalled with new seals
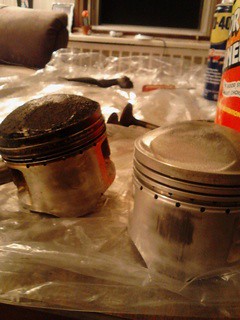
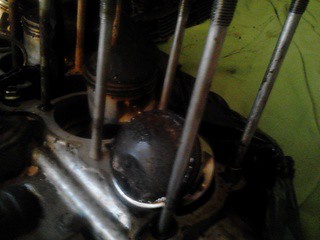
    • cylinders deglazed/cross hatched
    • dozens of other odds and ends that I can't recall right now.


    This thread got hit with the photobucket fiasco like a bunch of others on the forum. I may go back and switch out the links... not too many photos to replace. Maybe I won't wait another year to post an update this time...

    Leave a comment:


  • Dub-K113
    Guest replied
    Glad to see you back at it. How about an update. Where are you at and what are your plans?

    Leave a comment:


  • Sam 78 GS750
    replied
    Back at it after a loooooooong break. Between work and night classes I didn't have much time to begin with. Then we bought a house in need of some serious repairs, so that took up all of my time. Kind of hard to justify working on the bike when I was gutting and rebuilding our home... But you know what they say about excuses...

    Good news is, the house has a garage so no more working in my hobbit hole!

    More to come....

    Leave a comment:


  • Sam 78 GS750
    replied
    Originally posted by eil View Post
    I gotta say, I often feel cramped for space in my 2-car garage but I got nothing on some people like yourself who can rebuild a motorcycle in a modest living space. I seem to recall one fellow here rebuilding a GS500 in what looked like a walk-in closet in his house.

    Don't keep any flammable or toxic chemicals stored inside the house. And if I may offer a bit of advice, you definitely want to show your girl some genuine appreciation once the bike is put back together. Doesn't have to cost much or anything at all, just find a sincere and thoughtful way to say, "thank you for letting me decorate our house in greasy smelly motorcycle parts for a while." Trust me on this, it's important.
    I'm definitely missing my garage on this one, but you do what you can with what you have... I got tired of putting this off, so I just got to work. And you're right, I need to think of a really great way to thank her for putting up with this with a smile on her face.

    Leave a comment:


  • Sam 78 GS750
    replied
    Ran into a slight snag splitting the cases... http://www.thegsresources.com/_forum...44#post2186344

    Finally figured it out and got them apart...

    Now I'm just cleaning up the crank and gears and putting them aside for reassembly. Soon I'll be ready to prep and paint the engine parts.
    Fun stuff. I feel like I'm making real progress here. The real fun will be once everything's all cleaned up and I start putting it all back together.

    Leave a comment:


  • eil
    replied
    I gotta say, I often feel cramped for space in my 2-car garage but I got nothing on some people like yourself who can rebuild a motorcycle in a modest living space. I seem to recall one fellow here rebuilding a GS500 in what looked like a walk-in closet in his house.

    Don't keep any flammable or toxic chemicals stored inside the house. And if I may offer a bit of advice, you definitely want to show your girl some genuine appreciation once the bike is put back together. Doesn't have to cost much or anything at all, just find a sincere and thoughtful way to say, "thank you for letting me decorate our house in greasy smelly motorcycle parts for a while." Trust me on this, it's important.

    Leave a comment:


  • Sam 78 GS750
    replied
    More details on my "workshop"

    I started with this as my work area. (corner of my living room)
    work area 2 by samL9, on Flickr

    But as the disassembly progressed, the parts started to spread out...

    ...so I went through my little hobbit hole
    hobbit hole door by samL9, on Flickr


    And set this up.
    hobbit hole 2 by samL9, on Flickr
    hobbit hole by samL9, on Flickr

    Now, as parts come off the engine they get a quick scrub down then I duck down and squeeze through the tiny door and lay them out on this table. Far from ideal, but I'm working with what I've got.

    This is how she sits right now.
    lower case no oilpan by samL9, on Flickr

    The pics make it look a lot cleaner that it actually is... I've got my work cut out for me when it comes to cleaning this thing up and getting ready for paint! Speaking of which, if any paint gurus in the central Jersey area want to lend their guidance, it would be much appreciated. More on that over here: http://www.thegsresources.com/_forum...85#post2182685

    I left off with the top case bolts removed, and all the bottom case bolts cracked loose except for the last one. That stripped out. Of course the very last bolt I need to remove to split the cases would be the one to strip... Actually, I'm just grateful it was only 1 bolt that stripped in the entire disassembly... not too big of a deal, I can think of worse nuts or bolts that could have stripped. I'll cut a slot and try my impact driver... If that doesn't work, I'll just drill it, tap it, buy a new bolt and move on.
    Last edited by Sam 78 GS750; 12-24-2017, 07:55 AM.

    Leave a comment:


  • Sam 78 GS750
    replied
    Originally posted by azr View Post
    Where exactly are you doing all your parts cleaning???? good luck with the rebuild, looks like you're not shy from wrenching which is great.
    I don't have a garage or anywhere proper to work on things, so I'm doing it in my living room... Lay down a lot of plastic, open all the windows, and set up a giant fan in one window as an exhaust fan. I set up a table in a storage room I have off my living room, so as pieces come off the motor, they get a cleaning and go on the table. When I'm done working for the day, take down all the plastic, and put everything away. Far from ideal, but it works. My girl is tolerating it for now. She says "as long as you get your bike fixed that's all that matters." I'm trying to finish up before that turns into "When are you going to get that *%$^^#@ engine out of our living room!"
    Definitely not shy from wrenching, but I don't always know what I'm doing lol. This site is a huge help!
    Originally posted by eil View Post
    Thanks for keeping us up to date. I like reading rebuild threads. Looks like fun.
    It's been fun so far. I love reading rebuild threads too. I'm following a few on the forums here, and they give me inspiration, guidance, and sometimes a kick in the butt to get moving when I need it...

    Leave a comment:


  • eil
    replied
    Thanks for keeping us up to date. I like reading rebuild threads. Looks like fun.

    Leave a comment:


  • azr
    replied
    Where exactly are you doing all your parts cleaning???? good luck with the rebuild, looks like you're not shy from wrenching which is great.

    Leave a comment:


  • Sam 78 GS750
    replied
    Still not too much happening. Between work and night classes, this is gonna be a slow rebuild. As long as I keep making progress a little at a time though.
    I've been cleaning up bits from the top end here and there before I dig in to the bottom.
    A before and after shot of the pistons:

    Piston B4 and After by samL9, on Flickr

    That was a lot of scrubbing with a wire brush and a long dip in some Berryman's later... More soon to follow.
    Last edited by Sam 78 GS750; 12-24-2017, 07:51 AM.

    Leave a comment:


  • Sam 78 GS750
    replied
    Nothing much to report... Disconnected the pistons, and took the valves out of the head. Also cleaned the head and cylinders up a bit with some simple green and dawn.

    Leave a comment:


  • Sam 78 GS750
    replied
    Originally posted by Sand_fiend View Post
    the bottom end in my opinion is easier then the top end. take your time and follow the book. it's really not that hard. you can also drop the bottom pan and flush the motor out from the top side.
    That's definitely reassuring. Part of me thinks while I'm in there do it all, do it right, do it once, and the other part says if it ain't broke don't fix it. There's nothing wrong with the bottom end, and nothing's leaking for me to want to take it apart. Plus I've heard some horror stories of guys splitting the cases just because while they were doing a top end rebuild and ending up with oil leaks they never had before. On the other hand, who knows how long I have before a 40 year old seal fails...it would be a shame to have to do the same work twice.

    Originally posted by cowboyup3371 View Post
    You can get allen headed screws at Ace Hardware or through Z1 for example
    I'll check them out...I'll have to check the size/pitch of the screws in the parts fiche. I saw some kits on ebay, but I'm thinking just knowing the sizes I need and picking from an assortment would probably be cheaper...

    Anyway, some pics from yesterday... (the blue tint is from the lighting I think...my phone is old and the camera doesn't have a flash)

    Valve cover gasket by samL9, on Flickr
    Valve cover gasket almost came off in one piece.


    camchain by samL9, on Flickr
    Still pretty clean in there from when I had the cams out a few years back...

    cams out by samL9, on Flickr
    Cams out

    head 2 by samL9, on Flickr
    Head off...the valves look pretty nasty. A lot of carbon and a bit of rust too. I guess a head gasket leak lets water in, not just oil out, huh?

    studs by samL9, on Flickr
    This is how she sits right now.

    studs 3 by samL9, on Flickr
    Piston a bit closer


    studs 6 by samL9, on Flickr
    Not too bad below the rings.

    Work Area engine apart by samL9, on Flickr
    The workshop. (yes, that's the corner of my living room... my girl's awesome!)
    Last edited by Sam 78 GS750; 12-24-2017, 07:50 AM.

    Leave a comment:


  • mikerophone
    replied
    Nice - Looks like you are off to a great start.

    All of your photos have a strange blue cast to them - a filter on your phone perhaps? Kinda strange, makes it look all the more dirty

    Leave a comment:


  • Sand_fiend
    Guest replied
    the bottom end in my opinion is easier then the top end. take your time and follow the book. it's really not that hard. you can also drop the bottom pan and flush the motor out from the top side.

    Leave a comment:

Working...
X