-
Your tank was in pretty good shape before you started on it. A skim coat after addressing the small dents is to fill the shallow areas like on top and the rear mount area. If it all sands down to bare metal except for those low spots, that's a good thing. It shows you it doesn't need any filler. The less filler the better. The tank "tells you " what it needs and when it's done just by how the filler comes off. It takes awhile to learn the language, so to speak, and you're doing fine.Last edited by nvr2old; 08-14-2018, 12:25 AM. -
I was definitely sawing away for what seemed like a lifetime. I did hit it initially with the RO sander to knock down the big lumps and lines, but then I started to hit metal in some spots while spots next to it were still super thick so I stopped. The spots on the left were definitely solid circles and not feathered, so I did take too much off I guess. The hardest part to sand/shape seems to be the rounded areas at the front of the tank. Again, I'm hitting metal in the middle of the tank, but the edges are still super thick. I'm trying to smooth out the surface of the metal, not reshape it completely, but it seems like that's what I'm unintentionally doing.
I realized one of my big mistakes. I watched a bunch of videos on youtube before starting. In one video, the guy just dumped the entire pool of filler in the middle of a door panel, and spread it all around the door from there. While that might work for a large relatively flat surface like a door, I think it was the wrong approach for a bike tank. Even though I worked in smaller sections this time around, I still dumped each whole batch of filler on and tried to spread it around. Since I also added too much hardener, it was setting up before I could really work it how I wanted to. That's how I ended up with it on there so thick.
I think I also finally got the "long broad strokes with a light touch" through my head. Probably why it's still super thick in some spots and barely there in others.Leave a comment:
-
And an RO electric sander does wonders till it hand sanding timeLeave a comment:
-
Convincing people to begin with coarse sandpaper is always hard. Starting with 36 grit is truly the way to go in the beginning. 80 just won't cut the filler quickly. I'll bet you found yourself sawing away at it for what felt like a lifetime. 80 grit is basically just for smoothing out the 36 grit scratches a bit. The 36 is what shapes it, and shapes it quickly and cleanly. Your hard rubber block is the correct tool, also. The sides of you tank are pretty flat as well as the top, so a hard block works nicely. The more flexible ones will work for block sanding the primer, but to shape the filler, you were using the right one. Overall your tank looks good for what I can tell in your pics.
The only area I can see that might need a bit more filler are the 2 small spots on the left side in front of the emblem mounts. W/o being able to run my hands over them, they appear to still bit a tiny bit low. If they look like a solid circle instead of being more feathered out, chances are you might have taken a little bit too much off, which is easy to do, but will show up as a ring when it's primed. Otherwise, carry on..it's looking good.
Leave a comment:
-
I did cut back on the hardener a bit, but it seems not enough. I read in one of your old paint threads that you would start sanding while it was still soft, but by the time I did the last section/batch the first section was already rock solid. It has been pretty warm, but I have an AC unit in the garage and I keep it set to 76. Not enough to stay cool, but enough so that it's bearable to work without killing the electric bill. All part of the learning curve I guess, but now I know to use a lot less hardener than I have been, especially when it's hot out.
As far as the sanding, I've been using 80 grit. I tried 36, but it was a bit difficult to work with. I was probably using too much pressure though. As far as the block itself, I have one of the 3M hard rubber ones, but I feel like it's not flexible enough to hug the contours of the tank. Am I right in thinking that? I've been using stiff sponges instead, and when they've lost their grit just wrapping paper around them... Not sure if that's going to effect the results.
Also, I'm not sure how to know when I'm done sanding. Sounds like a weird statement to make, but am I going for mostly metal with spots of filler or the other way around?Leave a comment:
-
Glad to see you're jumping in with both feet, Sam. You created a lot of work putting that much filler on, but hey, ya gotta learn somehow. Seems your first problem may have been the amount of cream hardener. Temperature rules the amount needed. Must have been pretty warm for it to have kicked off before you even had it all applied. "Sculpting" really works if you can start cutting the filler back before it totally kicks off, when it's still rather soft. It's easy that way with long gentle strokes. Are you using 36 grit on a block to cut it back with..? If not, that's the ticket. All techniques that come with experience. I commend you for your effort. You'll be glad you did it when it's all said and done.Leave a comment:
-
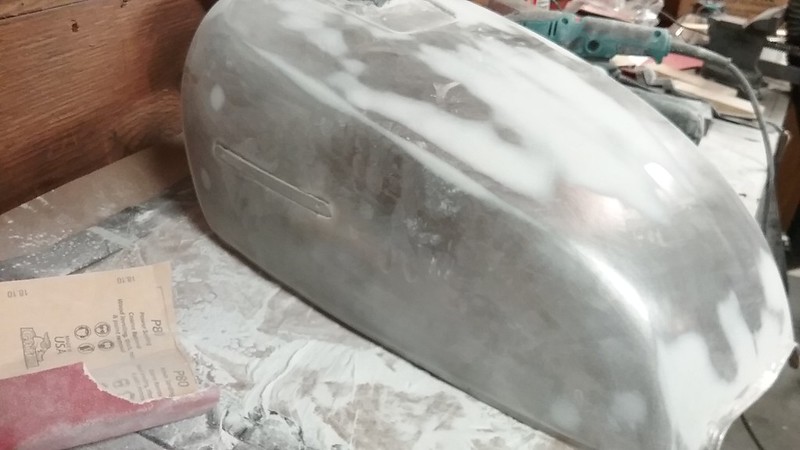
Ok, I'll post a photo. Here's what it looked like on the last attempt. Got a lot of this knocked down, but man are my sanding muscles sore...
 20180811_200308 by samL9, on Flickr
Leave a comment:
-
I'm not even going to post a picture of how horrible this last attempt turned out. I got the whole thing covered, but it was not a pretty sight. I've been sanding for a while, and I'm starting to get it looking like a motorcycle tank again.
So I've come to the conclusion that I should not try to be a sculptor. This reminds me of spackle. I do great with nails holes and small cracks etc., but when I try to skim coat a whole wall it's kind of a mess and I have to sand a lot.
Also, I've learned that I kind of suck at block sanding. I'm down to the metal in some spots, and it's still thick and really uneven in other spots. Could be more my uneven application of filler than my sanding technique though...
In other words, I'm having a blast and this is going great.
Leave a comment:
-
OK, so I took the tank back to the radiator shop last week to redo. There was some gunk in the coating, and there were a few spots where the coating was missing and already starting to rust. They reblasted, recoated, and it's in much better shape now.
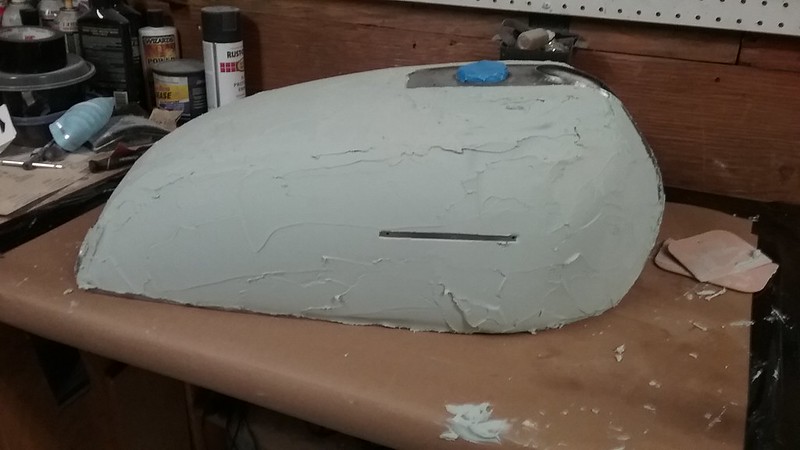
On to the paint prep. I sanded with 80 grit, and started the body work. I thought that I had to move quickly with the case sealer when assembling the bottom end of the engine, but this body filler has almost zero working time. On my first attempt, it started to set and was unworkable before I could even spread it around where it needed to go! I quickly wiped it all back to bare metal with acetone before it could set completely.
2nd attempt, I worked with smaller batches and did a spot at a time. It was a bit better, but I still wasn't able to cover the tank completely. I had also planned on putting it on, and then scraping most of it off just leaving a thin coat. Didn't happen. It started to set up while it was still on super thick. Oh well, a LOT of sanding later and I have it to where it's mostly bare metal with just the dents and dings with filler in them.
I'm about to try my 3rd attempt with this stuff. The plan is to do a skim coat, and hopefully I can pull it off. I'm going to try using a bit less hardener, and see if that give me a bit more working time.
1st coat
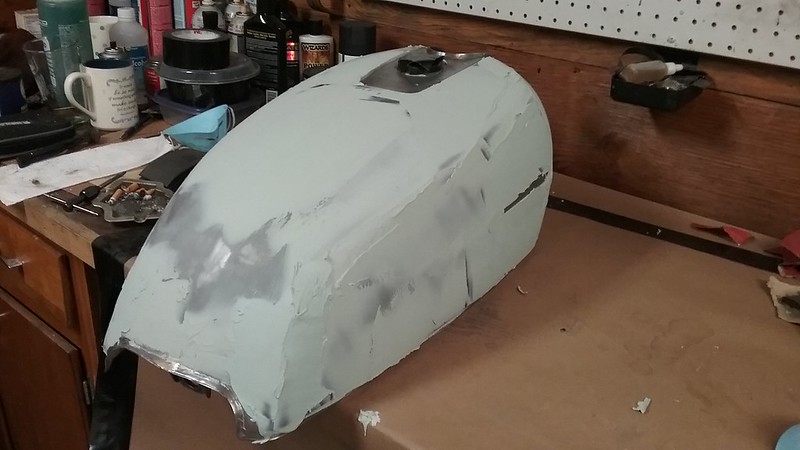 20180810_130159 by samL9, on Flickr
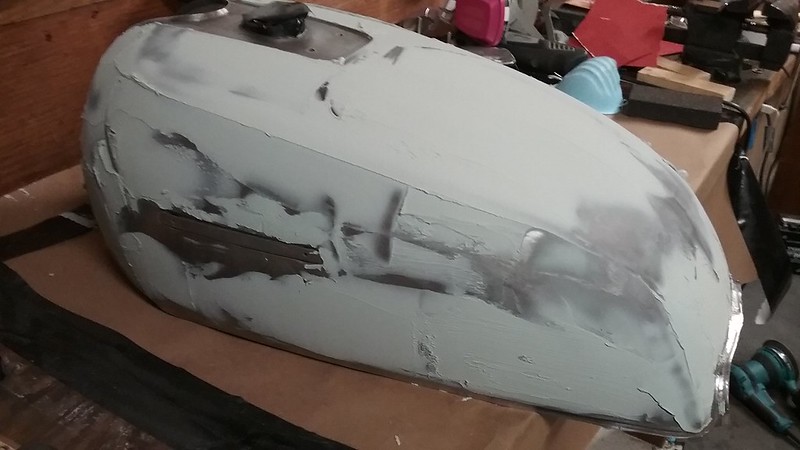 20180810_130213 by samL9, on Flickr
...and after a ton of sanding.


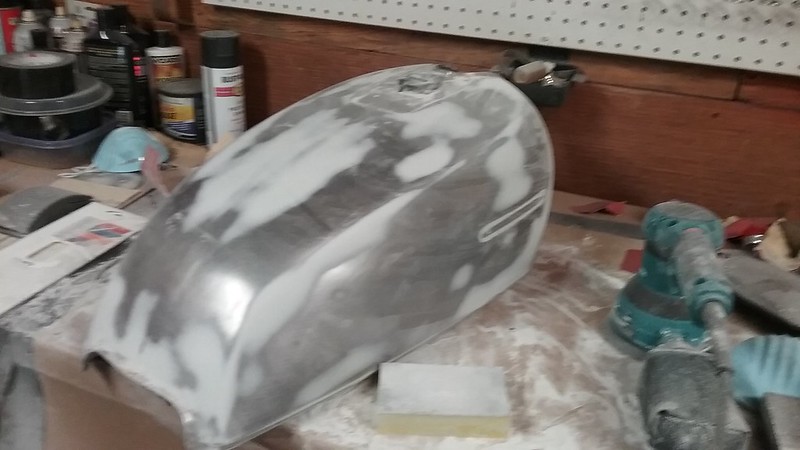 20180810_162928 by samL9, on Flickr
 20180810_162942 by samL9, on Flickr
Did a bit more sanding after this point, and it's in pretty good shape for a skim coat now. Like I said, hopefully I can pull it off. My respirator is definitely getting a good workout this weekend with all the body filler dust flying around.Leave a comment:
-
Yes. Epoxy primer to seal the bare metal. You can do your body work right on top of it. If you spray it with the epoxy primer and it sits for more then 24 hrs. you'll need to scuff it up again before applying filler. 180 grit will work for that. No etch primer needed if you prepare the bare metal surface with 80 grit before spraying the epoxy. Once you get the body work done, go straight to a urethane high-build primer.Originally posted by Sam 78 GS750 View PostLeave a comment:
-
but basically, I'm good with the condition of the top side and I am being overly cautious.Leave a comment:
-
ohhhhh.... I just re-read this. I missed the spray can part. So you're saying either move quick with the body filler on bare metal, or get a spray can of epoxy primer, since most of it will be sanded off when I do the body work any way... do I have that right?Originally posted by nvr2old View PostLeave a comment:
-
It does seem like I'm fighting a losing battle here with rust. I don't get it all, so it sits overnight. In the morning there's more flash rust...
The rep at the paint store recommended an etch primer, which would have to go over the body filler. So it would be filler on bare metal, etch primer, primer surfacer, base coat, clear coat. Those were the products and sequence he recommended since I said I would be starting with bare metal...
Is filler on top of etch primer advisable, or should I take the etch primer back and get an epoxy primer in the same product line?Leave a comment:
-
You've got the tank surface in good shape. Maybe go over it with a wire wheel in a drill. Follow that up with hand sanding it with some dry 80 grit to give it some tooth. Clean the whole tank with some acetone, and you're ready to go. That will give you a great base and starting point for the filler. If it's going to sit awhile before starting the body work, spray the whole tank with some epoxy primer that you can get in a spray can at your local auto paint store. The longer it sits bare, the more opportunity it has to continue to flash rust. Epoxy primer will seal it.Last edited by nvr2old; 08-04-2018, 12:23 PM.Leave a comment:
-
...oh yeah, and just because. Maybe I should just clear coat it and call it a day. Actually looks pretty good bare metal.
As you can see, I sorted out my tachometer bezel fiasco. Bought a non-working assembly off ebay for super cheap, knocked off the cobwebs (literally) and carefully removed the bezel and put it on my tach.
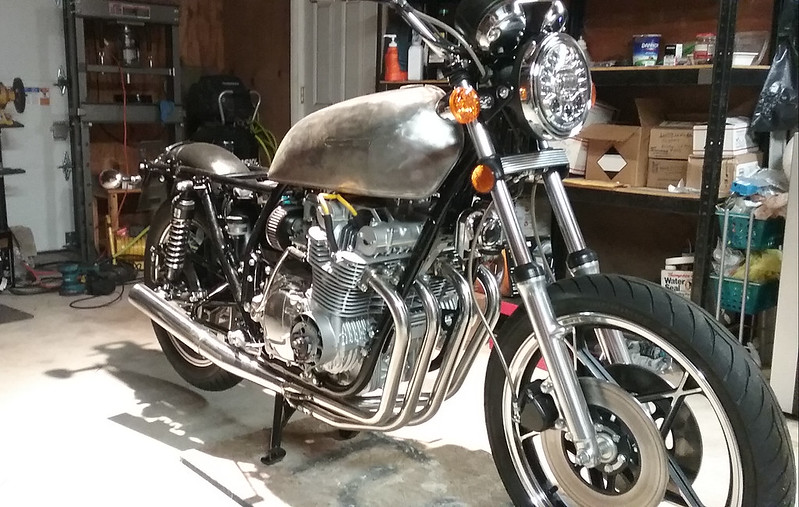 20180802_202611 by samL9, on Flickr
Leave a comment:
.png "Powered by vBulletin")
Required reading for all forum users!!!
Welcome!
Register to access the full functionality of the GSResources forum. Until you register and activate your account you will not have full forum access, nor will you be able to post or reply to messages.A note to new registrants...
All new forum registrations must be activated via email before you have full access to the forum.A Special Note about Email accounts!
DO NOT USE sbcglobal.net, att.net, bellsouth.net or email.com email addresses when registering for the forum! Email that our system sends out to these email servers is treated as SPAM and you will never receive your activation email, or any other email that our system may send out. Use an email address from gmail.com or some other email server.A note to old forum members...
I receive numerous requests from people who can no longer log in because their accounts were deleted. As mentioned in the forum FAQ, user accounts are deleted if you haven't logged in for the past 6 months. If you can't log in, then create a new forum account. If you don't get an error message, then check your email account for an activation message. If you get a message stating that the email address is already in use, then your account still exists so follow the instructions in the forum FAQ for resetting your password.Have you forgotten your password or have a new email address? Then read the forum FAQ for details on how to reset it.
Any email requests for "can't log in anymore" problems or "lost my password" problems will be deleted. Read the forum FAQ and follow the instructions there - that's what we have one for...
New users should be sure to read the FAQ as well as the posts in the Announcements forum. This will answer many of the questions you may have about how this forum works.
Before posting questions in the forums be sure to use the forum search function!!! Odds are your question has already been asked and answered before. And when posting, please make sure that you post to the correct forum.
Finally, be sure to check out BassCliff's website here. He has useful information that can't be found on this site. His welcome page containing useful GS information can be found here. Be sure to check it out!
If you are a returning visitor to the forum and can't log in using your old forum name and password, chances are your account is deleted. Just create a new forum account and you should be all set.
Leave a comment: