Announcement
Collapse
No announcement yet.
1981 gs750 (gs750e) Retro Racer project
Collapse
X
-
Made some progress on the brakes. Or not...
First I sanded and polished the logo on the calipers (they were gold before, and I've previously painted them black):

I'll give them a coat of Eastwood Diamond Clear gloss later.
When I started to mount the brake lines I found out that the GS uses finer threads on the banjo-bolts than the Gixxer:

Also the banjos on the new lines are thinner, so theres no way to use the old bolts with the new lines (except from stacking crush-washers, but I don't that's a very good idea):

And lastly, the lines are very close to long enough, without getting there:

They will work when the fork is compressed by the bikes weight (and mine), but if the fork fully extends over a speedbump or something there will be a risk of damaging the master cylinder. At a cost of 340 dollars, I'm not risking that.
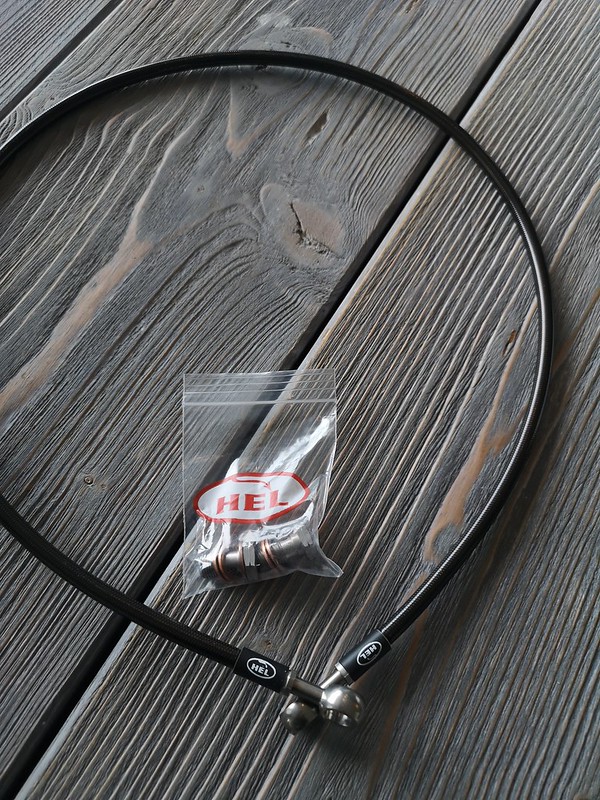
It's off to ebay to order a set of HEL lines for the front. It comes complete with all bolts and washers, so then everything is sorted. I'll still go with the "over fender"-option, as the Accossatos need a brake light switch in the banjo bolt and I already have that one. I also think over the fender routing looks both more stock, and better,
:
Comment
-
Switched out the old rear brake-line with the new HEL-line. Also switched out the master cylinder. The master cylinder was not a great fit at all.. The input line should be perpendicular to the cylinder to avoid the line blocking other components. I will have to find another solution:

I also need to find some rubber sleves or something to make the hose fit the tabs og swingarm.

Comment
-
An electrical stockist may have some Hellerman cable rubber sleeves, or alternatively just cut a slice from a bicycle inner tube.Originally posted by LarsKroghStea View Post---- Dave
79 GS850N - Might be a trike soon.
80 GS850T Single HIF38 S.U. SH775, Tow bar, Pantera II. Gnarly workhorse & daily driver.
79 XS650SE - Pragmatic Ratter - goes better than a manky old twin should.
92 XJ900F - Fairly Stock, for now.

Only a dog knows why a motorcyclist sticks his head out of a car window
Comment
-
Great tipOriginally posted by Grimly View Post
An electrical stockist may have some Hellerman cable rubber sleeves, or alternatively just cut a slice from a bicycle inner tube. I googled Hellermann (looks like they're called HellermannTyton now), and they have this product:

I will try to find a local vendor that lets me buy a couple of samples. They will slide over the banjos and shrink to the size of the brakeline. It doesn't look like the centertubing thickness will build enough material, so I'll probably use both your advices and put a piece of rubber tubing in between the line ande the locating bushes.
- Likes 1
Comment
-
The bushes are cheap, it's the price of the tool to fit them that makes you blink.Originally posted by LarsKroghStea View Post
Great tip I googled Hellermann (looks like they're called HellermannTyton now), and they have this product:

I will try to find a local vendor that lets me buy a couple of samples. They will slide over the banjos and shrink to the size of the brakeline. It doesn't look like the centertubing thickness will build enough material, so I'll probably use both your advices and put a piece of rubber tubing in between the line ande the locating bushes.---- Dave
79 GS850N - Might be a trike soon.
80 GS850T Single HIF38 S.U. SH775, Tow bar, Pantera II. Gnarly workhorse & daily driver.
79 XS650SE - Pragmatic Ratter - goes better than a manky old twin should.
92 XJ900F - Fairly Stock, for now.

Only a dog knows why a motorcyclist sticks his head out of a car window
Comment
-
You've really done a fantastic job on this bike. That front end is wild, the whole bike just looks so mean. Job well done. As to the rear hugger fender, you might have to fabricate brackets for that, which would be easy with your skills, and extremely good for the motorcycle. It will keep the back upper inside of the bike nice and clean.
Comment
-
Thank you! And yes, you're right; it would be much better for the bike. I've been searching the web for solutions that would look good on my bike, and I think something like this (but in black, and a little longer) would look good:Originally posted by Suzukian View PostYou've really done a fantastic job on this bike. That front end is wild, the whole bike just looks so mean. Job well done. As to the rear hugger fender, you might have to fabricate brackets for that, which would be easy with your skills, and extremely good for the motorcycle. It will keep the back upper inside of the bike nice and clean.


- Likes 1
Comment
-
I mounted the turn signals today, to see how they fit. Turns out they have the same threads as the headlight, so I'll use them there. Will drill and tap for a set screw just behind the blinkers, to set the angle for the headlight. That way I don't need to torque them too much. They're almost unnoticeble


- Likes 1
Comment
-
Not sure where I put the parts for the left pushrod, but I found this turnbuckle. It's for a sailboat, and will not corrode. I think it looks cool too
Just need to cut, straighten and drill a hole in the old gear lever.

I will also need to tap the holes for adjusting the rearset: As you can see on the next picture, the gear pedal has 12 holes with 30 degress separation, and the short transfer lever has 8 holes with 45 degrees of separation. They are connected with four bolts at the 12, 3, 6 and 9 o'clock position, and by alternating whitch holes are used one can adjust the angle in 15 degree increments.

Comment
-
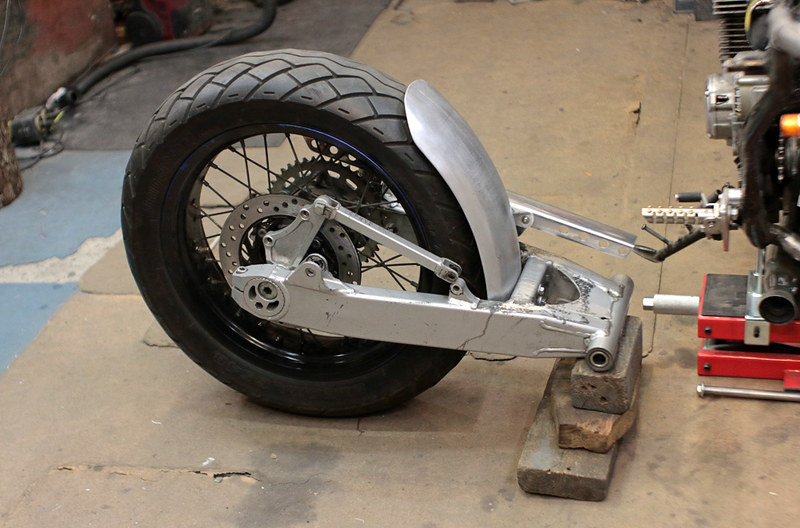
Don't know if you can see it on this picture, but the tabs that I've used to mount the rearset, are not at the correct angle.

This means the footpegs are not perpendicular to the frame. My bike (1981 model) came with pressed metal brackets for the rear footpegs, and they are not suited for modification. I don't know if there were different trim levels, or if it relates to difference between years, but most 1982 GSX750E's I've seen has cast aluminum brackets. If I can get a cheap pair of those (they are cheap, I just need to find some locally as it costs too much to ship them from the US), I will use them as a base for new brackets for the rearsets. That will make it easier to get the alignment and angle right.
Comment
-
Well.. I haven't looked at these for years. These are the original footpeg-brackets, with bolts in them to show how the tabs I use for my pegs are placed. I've bent the pegs a little, but thats just a temporary solution. The brackets are also much more angled outwards at the rear than I could remember:


I bought these (actually another set, but similar) on ebay, although the shippong is as much as the parts.


When I get them I will cut them behind the middle hole, and drill and tap new holes for the rearsets. Maybe it's best to fill in the backside with "liquid metal" (don't know what you call it in the US. It's a 2K non shrink, highly adhesive, filler we use to fix boat propellers if we run them against something so they chip). I want the rearsets a little bit lower and more forward than they are now.
Last edited by LarsKroghStea; 07-27-2023, 01:04 AM.
Comment
.png)


Comment