Announcement

Collapse
No announcement yet.

GS550T to 740 build (aka the shaniqua project)

Collapse
X
 
  • Filter
  • Time
  • Show
Clear All
new posts

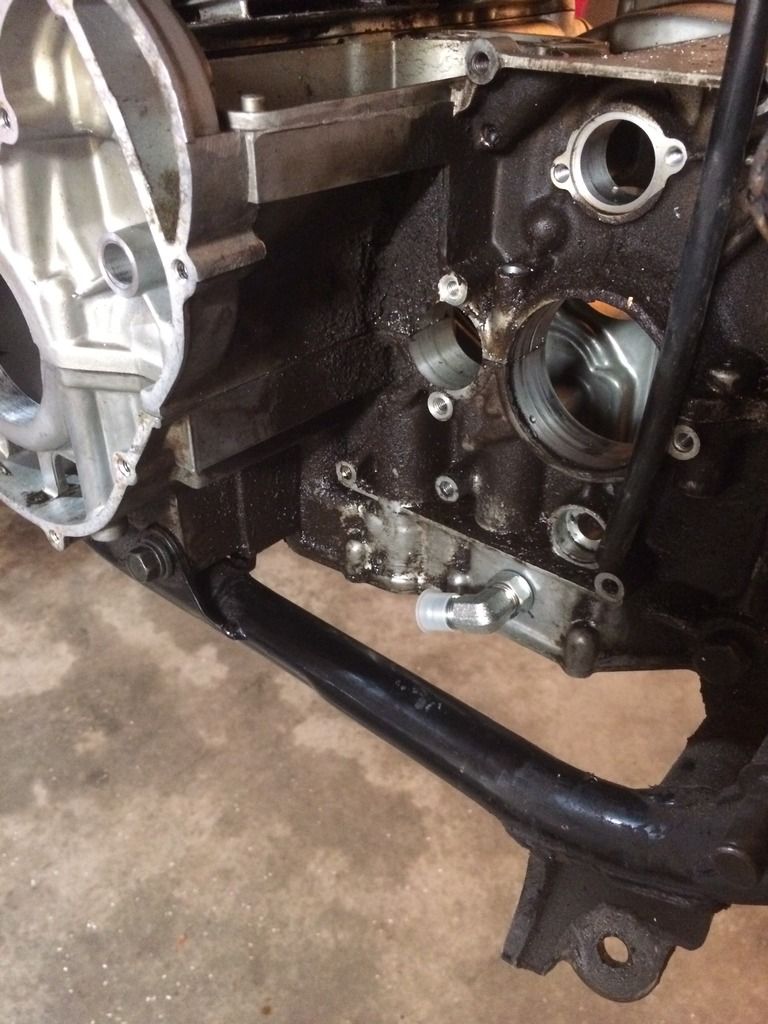
    GS550T to 740 build (aka the shaniqua project)

    Hey Guys,

    I currently own a 1981 GS550T (aka Shaniqua). I bought it almost 4 years ago and it has been an awesome bike up until 2 years ago. I started having a lot of troubles with it running rough and not wanting to start, so I decided a year ago that I am going to do a complete overhaul on the bike. I started doing research on how to overhaul one of these bikes, and that is how I stumbled across this forum. The further I dug into this forum the more excited I got about doing the overhaul, because I got to read about the different upgrades people have made to their GS bike. One day I came across a thread called “GS550 bored 740 finally done”. It was started by a gentleman named Ryan, in Kansas City, which so happened to be near where I grew up. I read the thread probably 20 times and decided that is what I am going to do to my bike. I emailed him a couple times to get information about the build. I found out that he had turned his GS550 back to stock, because he was having trouble with the engine overheating. To make a long story short, I got the chance to meet him and he sold me the cylinders and head that he used on his 740 build. Now I am going to take a crack at it.

    Here is a list of things I am planning on doing to the bike:
    1. Bore the engine from 550cc’s to 740cc’s
    2. Change out all the seals in the engine
    3. Buy a gas tank that has a sending unit in it
    4. Completely redo the wiring system and add a micro controller
    5. Create a new dashboard with an OLED screen
    6. Upgrade the Rectifier to a Compu-fire
    7. Upgrade the stator
    8. Create a variable oil cooling system
    9. Upgrade the front brake to the Salty dual disc setup
    10. Upgrade the suspension (not sure how to do this yet)
    11. 3-d print a new air box system
    12. 3-d print a new storage compartment for under the seat

    I have been working on the bike for about 4 months now and here is what I have done so far:
    1. Bought the 650 big bore kit from wisco
    2. Strip the bike down completely
    3. Split the transmission cases and ground out the cylinder holes so the 650 cylinders can fit in the cases
    4. Put the transmission cases back together and put all new seals in them
    5. 3-d printed a few prototype parts
    6. Figured out how I am going to do the variable oil cooling system
    7. Bought new (to me) gs650 front forks for the brake upgrade

    By the end of this build I want the bike to look as stock as possible, and have a little more kick as well. Like I said earlier I am new to rebuilding bikes, so I will be asking a lot of questions. Once I get home tonight, I plan on posting pictures of what I have done so far. I hope you guys enjoy my thread.

    Thanks,

    Andy

    #2
    Sounds like an awesome project! I am working on a GS400>557cc high CR project and I'm going to use an oil thermostat and a ducati oil cooler to keep it cool, using AN fittings to direct oil to the head instead of past the cylinder studs.
    My project is going real slow atm btw, but that will soon change I hope.

    BTW....PICS or it didn't happen!

    Comment


      #3
      That sounds awesome! Could you give me a little more information on how to dump the oil directly into the head and the oil cooler you are going to use? That sounds like it could help out with some overheating problems

      Comment


        #4
        What are you looking to gain with a variable oil cooler
        1984 GS550ES
        Rebuild in progress....

        1983 GS750ES
        4700 miles

        1978 GS1000E...Resto-mod to come

        Comment


          #5
          Well the I am thinking is that on cooler days the oil is not going to need to be cooled. It will allow the oil and engine to heat up to the proper temperature, but it will now allow it to over heat.

          The way I am planning on doing it is by an electric scavenging pump. I will have it circulate oil when ever it gets over a certain temperature, but have it shut off when the oil does not need to be cooled. The pump will be operated by an arduino or raspberry pi micro-controller. I know alot of people have just used the pump on the bike to circulate the oil through a cooler, but that does not give me the ability to not circulate the oil, and I don't want to create any pressure drop in the oiling system. other than those two things I don't have a good reason besides wanting to test my programming skills. ha ha ha

          Does anyone know the volumetric flow-rate of the mechanical oil pump in a GS550?

          Comment


            #6

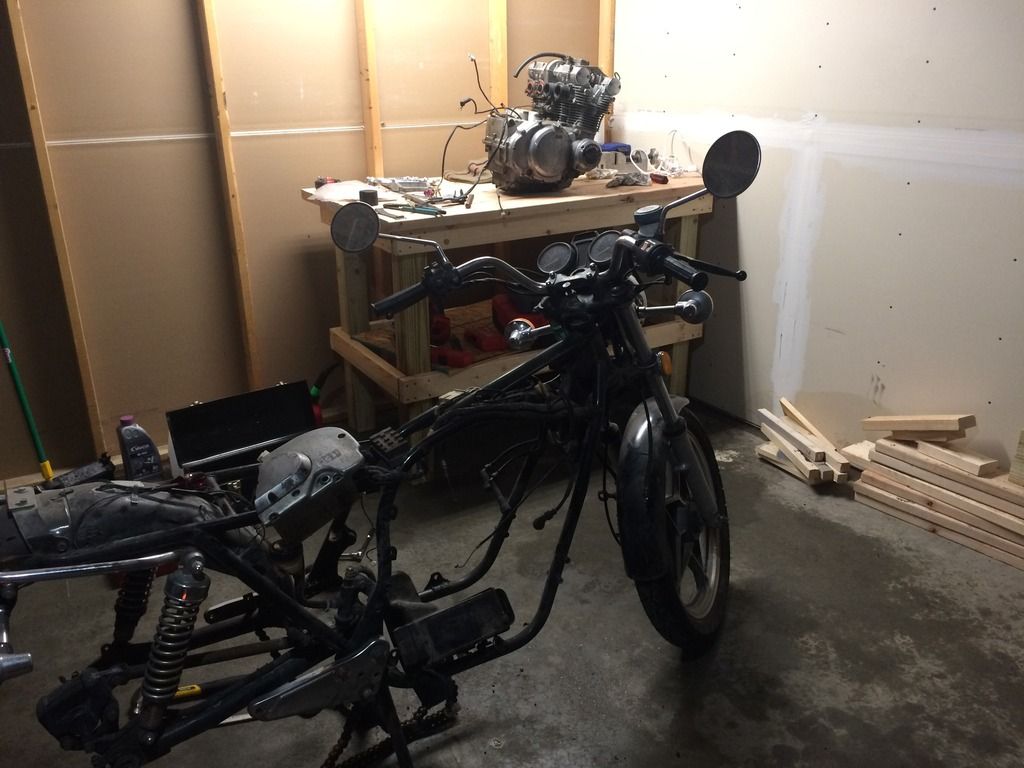
            Here is a picture of the bike before I tore it down


            After I got the engine out of it and stripped most of the bike down


            tearing down the engine


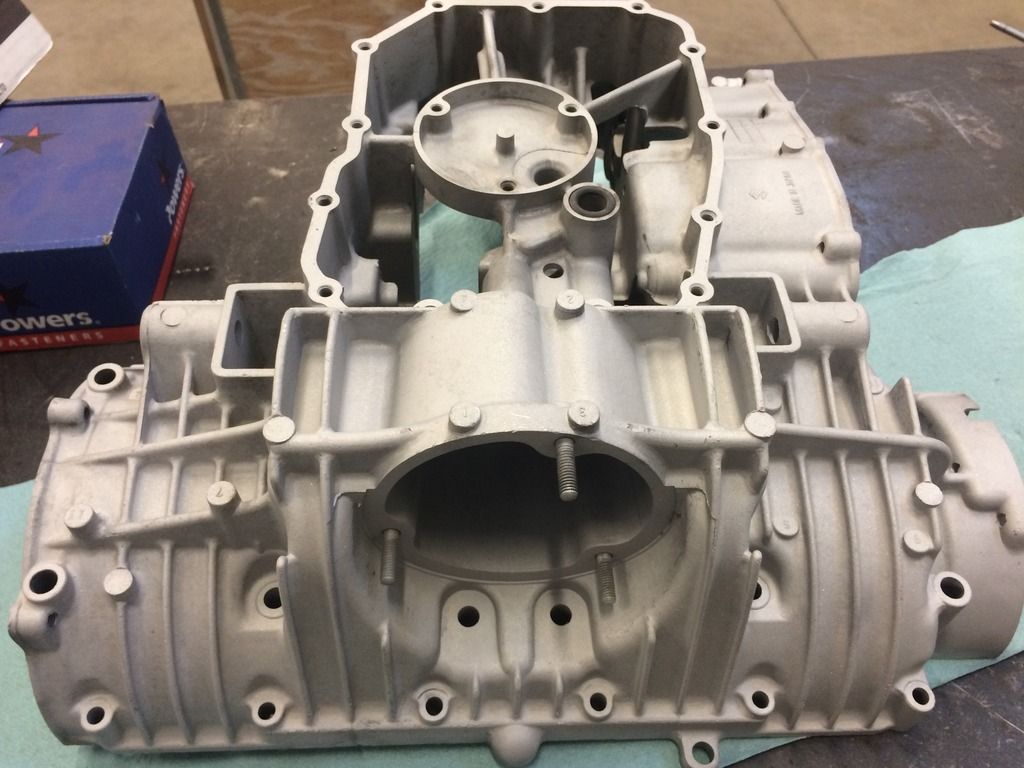
            bottom transmission case after I sandblasted it


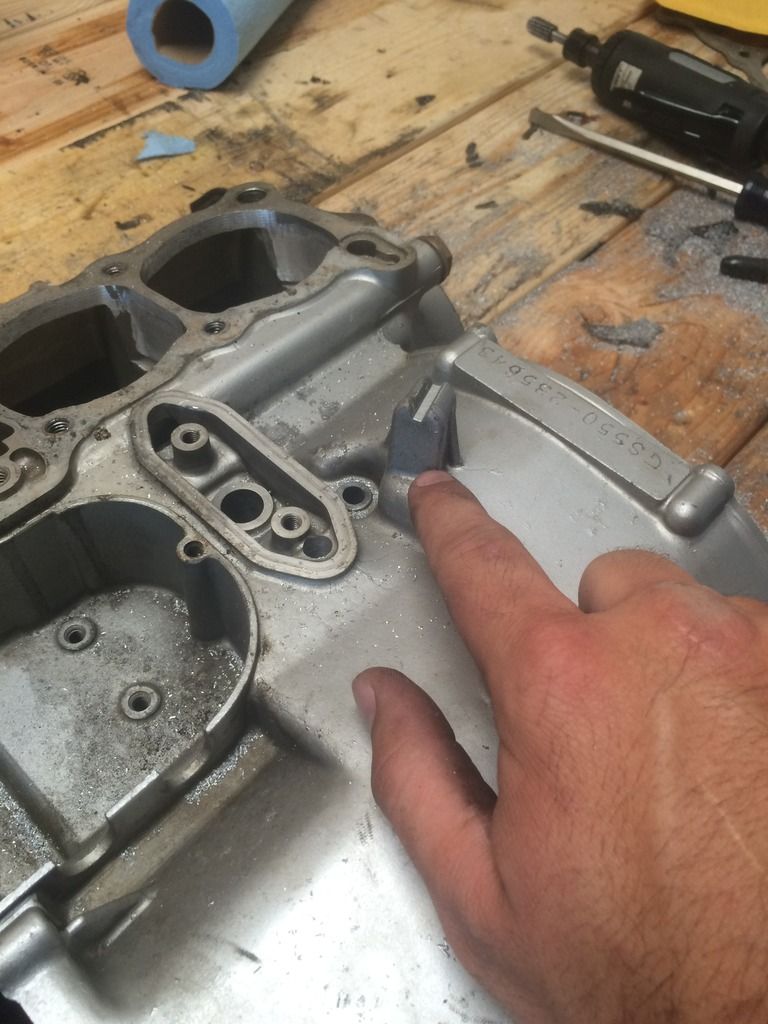
            marking the areas where I need to grind on the top case to get the 650 cylinders to fit


            This was my first major mess up. I was not thinking and ground into the crank cradles. I ended up buying a new top case.


            here is a picture of the new top case that I got. It came off a 550L, so the guy says anyway. This was the only thing I noticed that was different between my old case and this new one. Does anyone know what it is for?


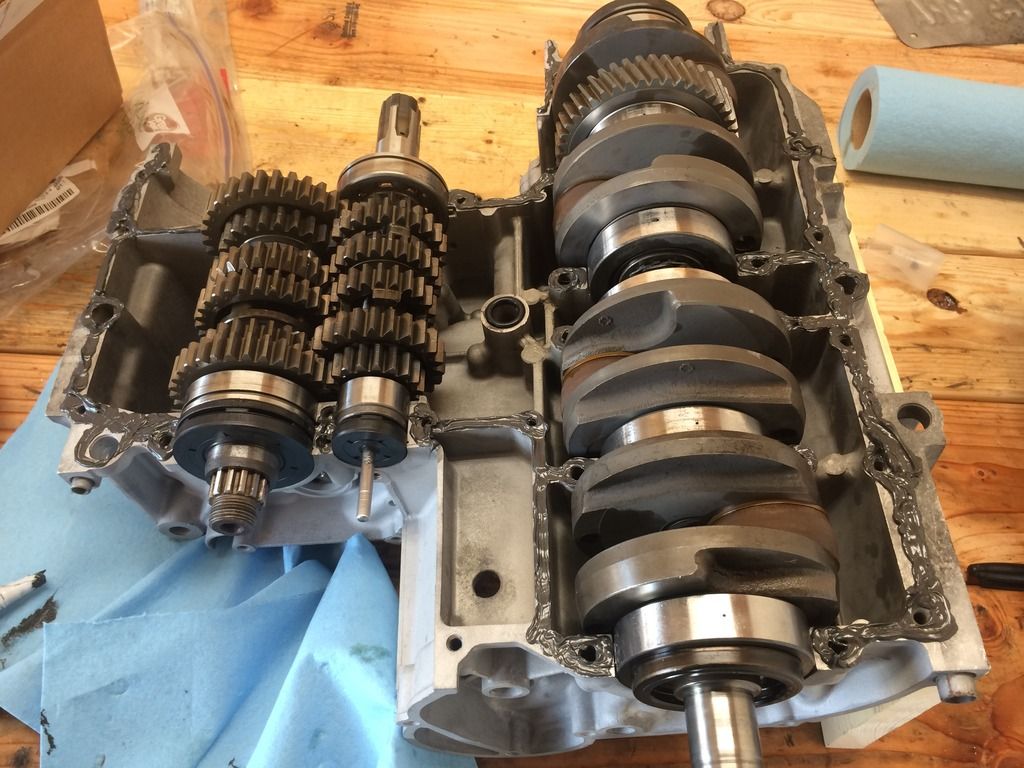
            Here is a picture of the bottom case after I got the transmission back together and new seals put in the transmission. I also have the sealant put around the edge ready to put the top half on.


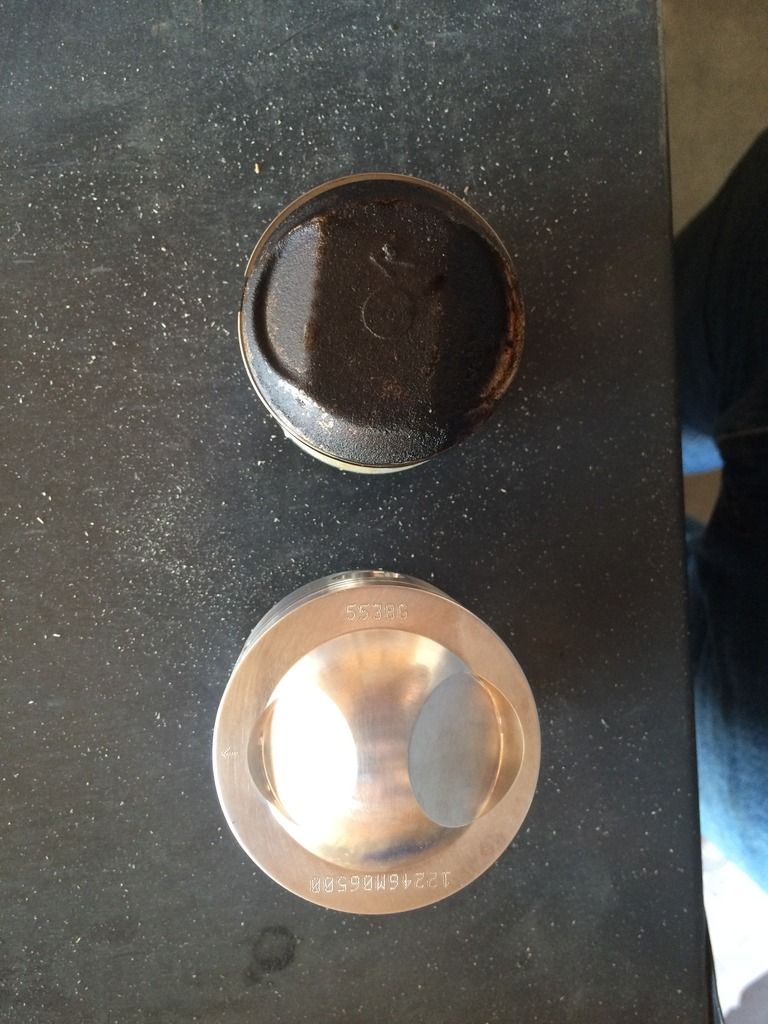
            Lastly here is a picture of the new 650 big bore piston I got from wiseco compared to the old 550 piston

            Comment


              #7
              You might have gotten away with shortening the cilinder barrels so you don't have to grind into the main bearings.

              You can find my project here, but no recent progress unfortunately, I'm planning on having an update within a month or two.

              I have blocked off all internal oil passages to the head and I am using a AN fitting to direct oil from the main oil manifold (just above the main bearings) to the head.
              The oil will flow through a thermostat which will have the same effect of what you were talking about except without the electronics.
              It will be fully open after start directing uncooled oil to the head and once the oil starts to get warmer it will direct more and more oil through the cooler.

              Main problem is to get oil volume to the crank roller bearings (they don't need pressure) and pressure to the head plain bearings.

              I am using the GS400 oil pump with GS500 gears for more flow.

              Comment


                #8
                Oh grinding into the main bearing cradles was a mistake. I just was not paying any attention. The cylinder barrels fit inside the case without having to be shortened. I ended up getting a new case to fix my mess up of grinding into the cradles.

                Comment


                  #9
                  Hey Guys,

                  I am thinking about having my 650 head that I have rebuilt and ported. I am completely new at this and so I am not sure how much I would be looking at spending, or who to take it to. I was hoping someone on here would be able to help me out with that.

                  I did however find a rebuild service on eBay and I would like to get some opinions on it. Here is the link: http://www.ebay.com/itm/SUZUKI-GS100...ZW2Lu8&vxp=mtr

                  Comment


                    #10
                    Hey Guys,

                    Sorry I have not posted in a long time, work has been keeping me pretty busy. Last week I was able to get quite a few part fabricated. Including part of my new airbox, carb elbows, carb mount plate and a plate for where my electronics are going to go.


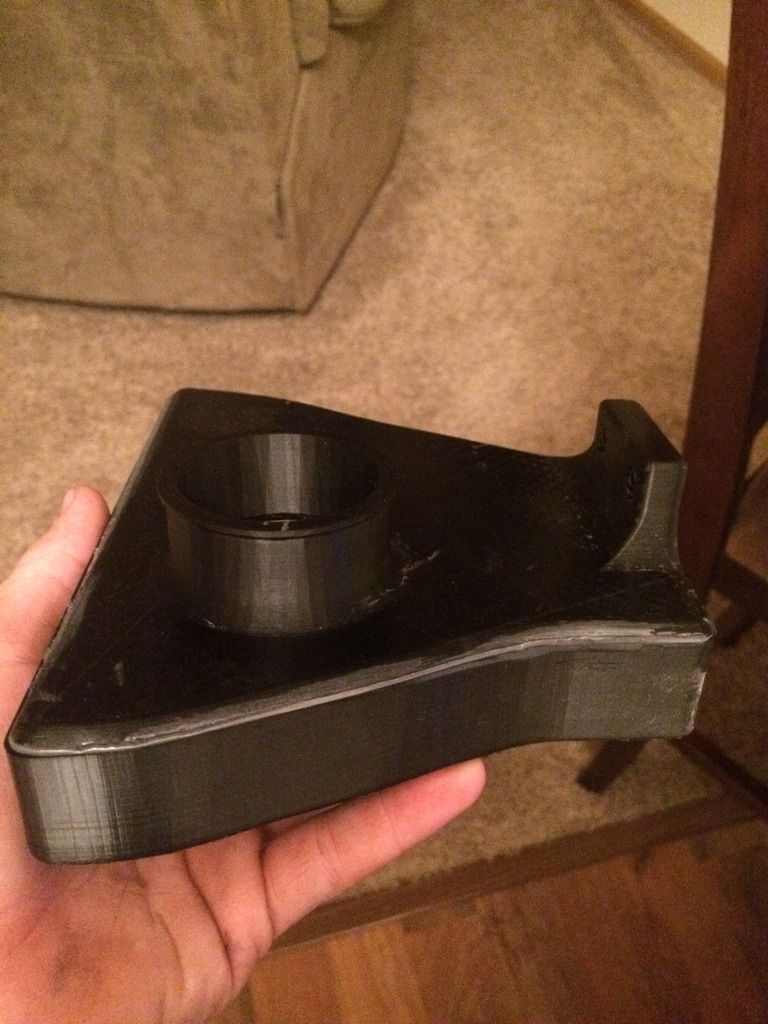
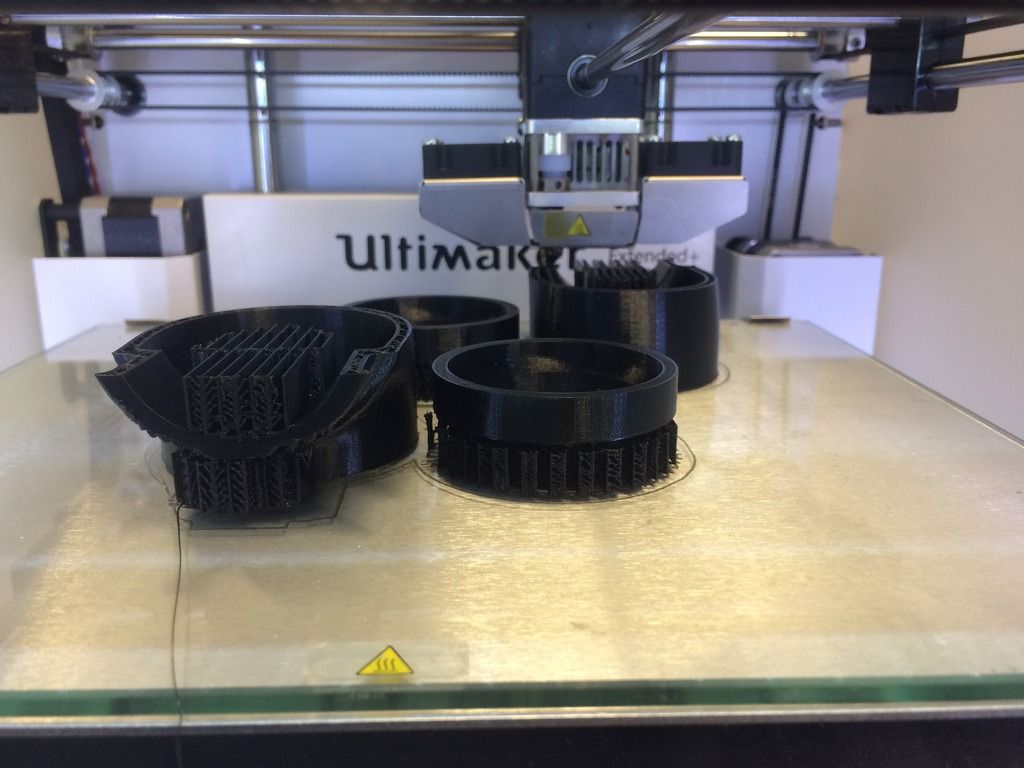
                    Here is a picture of the front part of my new airbox. I decided to change up the airbox design, because it is pretty difficult to remove the carbs with the old airbox system, and I have read in a few places that adding pod filters still can be difficult to get in and out. Also the outside filters rub up against the frame. So with this new design I am hoping to be able to remove my carbs easily, and not have the any part rubbing on the frame. I used 1" and 1/2" Styrofoam board from hobby lobby to get the general shape I was needing to get the airbox to fit in the location of the old one. After I got the shape I was wanting, I used solidworks to create a 3-D model. Finally, I save the 3-D model as a STL. file and used an Ulti-Maker 2 extended to 3-D print the new airbox. I used colorfabb's black XT material for the airbox. I know the finished part looks a little rough right now, but this was a rapid prototype. Once I get the final shape and ensure that everything fits I will use a finer nozzle, which will create a much smoother finish.


                    To mount it to the bike I designed in two hexigonal holes on the top part of the airbox, so I can mount it to the cross-member where the old airbox use to mount.


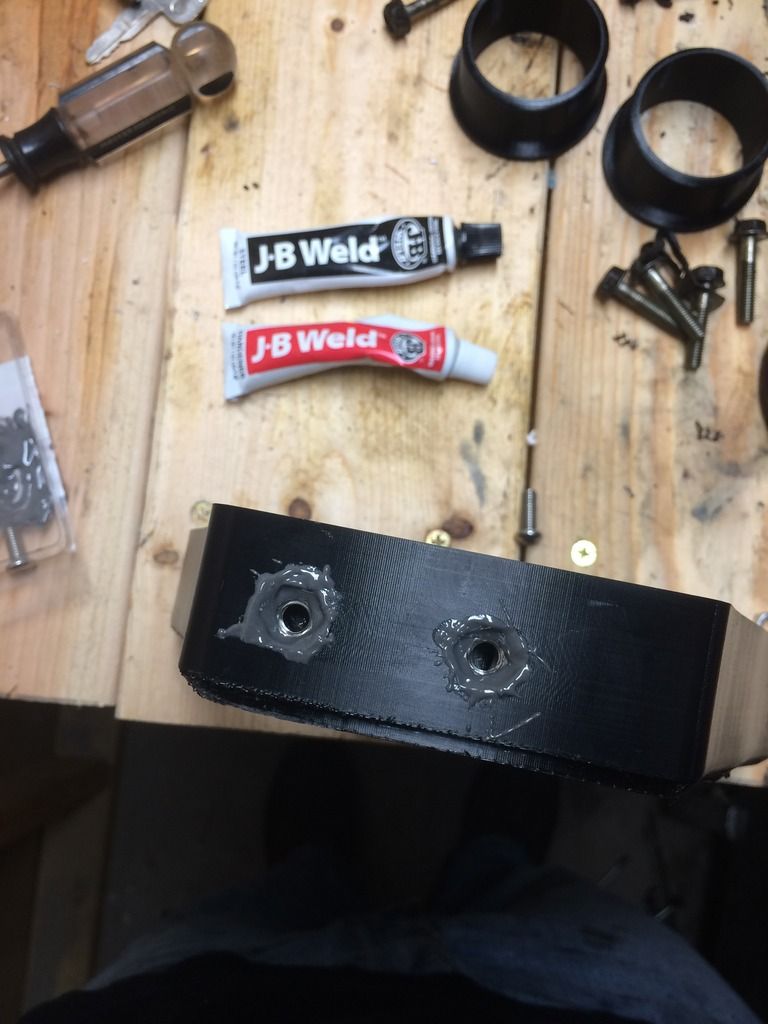
                    Here is a picture of 2 of the 7 parts parts of the airbox after I got them JB welded together. I am hoping this weekend I will have access to the 3-D printer again, so I can finish printing the parts.


                    Here is what the airbox looks like whenever it is mounted in the bike.


                    Here is a picture of the Carb elbows being printed. These elbows/adapters will be what connects the hose that will be coming off of the airbox to the carb inlets.


                    Here is a picture of me using 1/2" thick Styrofoam board to get the general shape of the plate that will be used to hold all of my electronics.


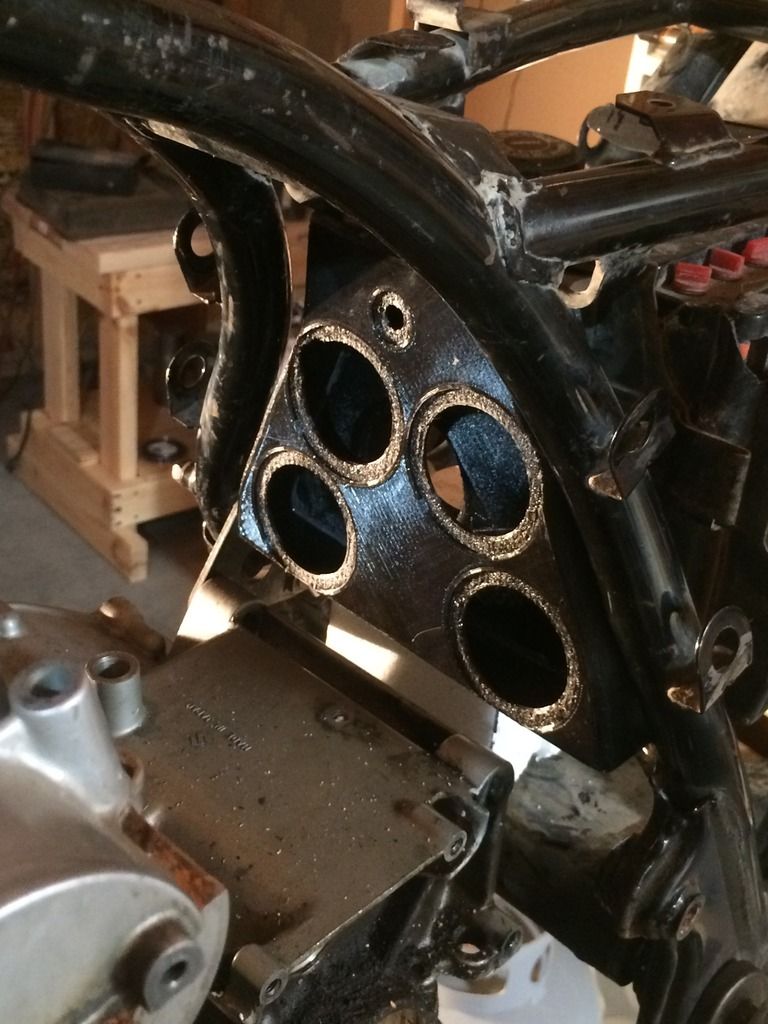
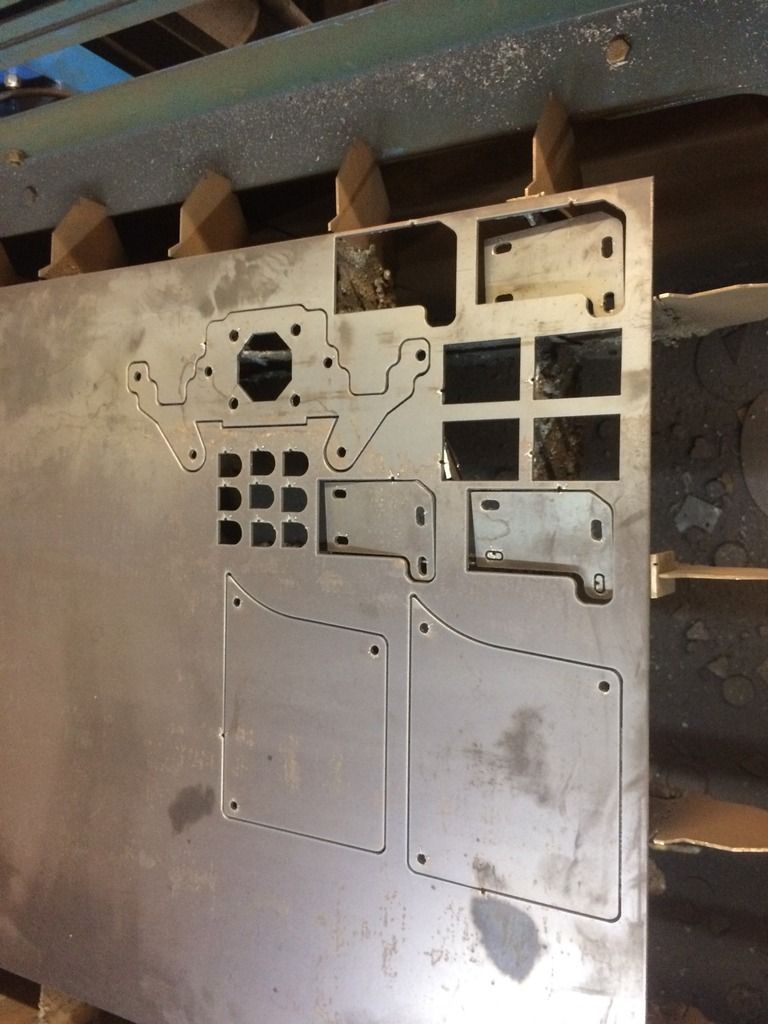
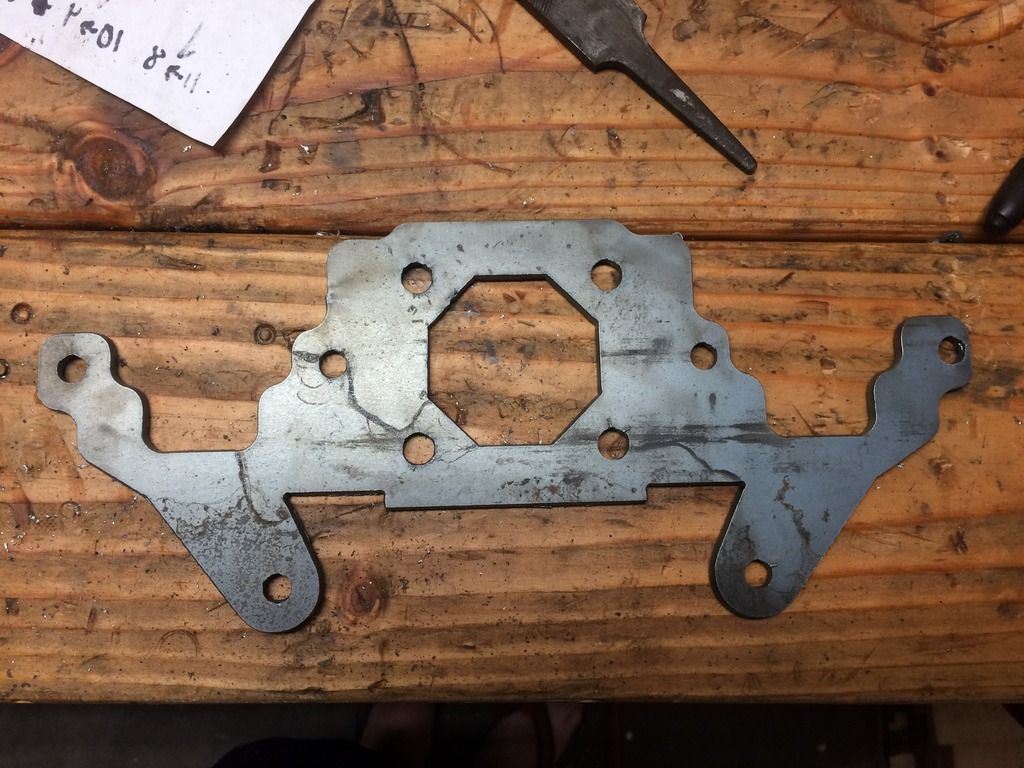
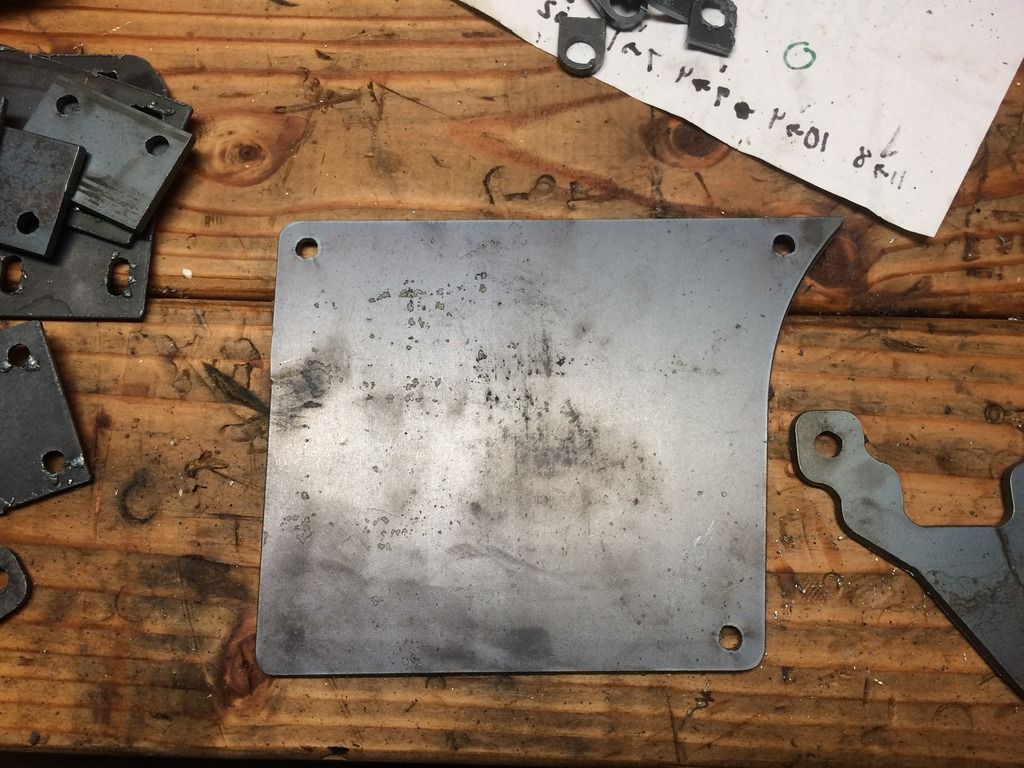
                    On top of having access to a 3-D printer this weekend, I was also had access to a CNC plasma cutter. This gave me the ability to cut out my new gauge cluster mount, my electronics mounting plate, and my new carb mounting brackets.


                    Here is my new gauge cluster mounting plate.


                    My electronics mounting plate


                    Finally here are the two plates that will be used to hold the weight of my carbs.

                    Comment


                      #11

                      To top the weekend off I drilled the hole in my transmission case, where my oil circulation system will draw oil from the engine. My plan is to draw oil from the bottom left side of the transmission, go through an electric pump, then go through an oil cooler, and finally re-enter the engine through the cam cover at the top of the engine. I am using JIC-6 fittings for the oil system. I am hoping this week I will have time to do some research on how much oil flow I will need to keep the engine cool.

                      Does any one know the flowrate of the mechanical pump on the GS550s?
                      Does anyone know what temperature the bikes should run at?

                      Thanks,

                      Andy

                      Comment


                        #12
                        Wow, that looks like a really thorough job you're doing here. Keeping an eye on this thread.

                        Your 3D-printed airbox gave me the idea to build one myself as well. One which makes it easier to remove the carbs...
                        #1: 1979 GS 550 EC "Red" – Very first Bike / Overhaul thread        New here? ☛ Read the Top 10 Newbie mistakes thread
                        #2: 1978 GS 550 EC "Blue" – Can't make it a donor / "Rebuild" thread     Manuals (and much more): See Cliff's homepage here
                        #3: 2014 Moto Guzzi V7 II Racer – One needs a runner while wrenching
                        #4: 1980 Moto Guzzi V65C – Something to chill

                        Comment


                          #13
                          This might be a bit late, but cases are line bored together, so just buying another top half may cause you some issues if they don't match perfectly.

                          If it was me, I'd probably re-use the case you've over trimmed - to be honest you haven't taken off that much and it more than likely won't be a problem.

                          Also, that's a LOT of sealant You really only need a smear along the faces - most of what you have there is going to be squeezed out into the engine....which isn't good.
                          Current:
                          Z1300A5 Locomotive (swapped my Intruder for it), GS450 Cafe Project (might never finish it....), XT500 Commuter (I know - it's a Yamaha )

                          Past:
                          VL1500 Intruder (swapped for Z1300), ZX9R Streetfighter (lets face it - too fast....), 1984 GSX750EF, 1984 GSX1100EF (AKA GS1150)
                          And a bunch of other crap Yamahas....

                          Comment


                            #14
                            Hey Guys,

                            Thanks for your comments back. I am trying to do as thorough of a job as I can, because I don't want to have to redo something later. ha ha ha

                            Hillsy: I decided to take the cases apart again, so I can drill a couple holes in the bottom case. I will remember to use less sealant next time. Also I am using the matching cases, because I didn't want any tolerance differences.

                            Does anyone know what is the best sealant for the job? I am currently just using high temperature gasket maker from NAPA.
                            Last edited by Guest; 11-17-2016, 02:44 PM.

                            Comment


                              #15
                              Hey Guys,

                              Sorry I have not posted for a while. Ever since november it has been to cold to really work in my garage, because I live in Fargo and my garage is not heated or insulated. On top of that I am in the middle of moving and my job has been making me travel quite a bit. With that being said, I have gotten a few things done/started since I last posted. Here is the list:

                              I have finalized a storage compartment design for the bike, but I have been having trouble with the 3D printer I have been using. I have started the print again and I am hoping that the this will be the 3rd and final time.

                              I have finalized the airbox design, and have 90% of it printed out. I have to finish the storage compartment before I finish the back part of the airbox.

                              I got the head completely redone. Valve ground, new valve guides, springs tested, and had it ported.

                              I got gs650 front forks off of ebay. They have the dual caliper mount, so I can make the front brake dual disc

                              Finally, I have come up with a mount to hold the carburetors in place, since my new air box does not support them.

                              Hopefully, once I finish moving I will be able to post some pictures

                              Thanks,

                              Andy

                              Comment

                              Working...
                              X