Announcement

Collapse
No announcement yet.

750 Katana Resurrection

Collapse
X
 
  • Filter
  • Time
  • Show
Clear All
new posts

  • KiwiAlfa156
    replied
    Well, as I write, it's Easter Sunday in New Zealand. It seemed an appropriate day to finish the resurrection of the 750S Katana. It's not road legal yet, and I don't have time today for a cheeky spin, but I've been up and down the drive a couple of times. So I'll call that the first ride .


    ​​​​​​


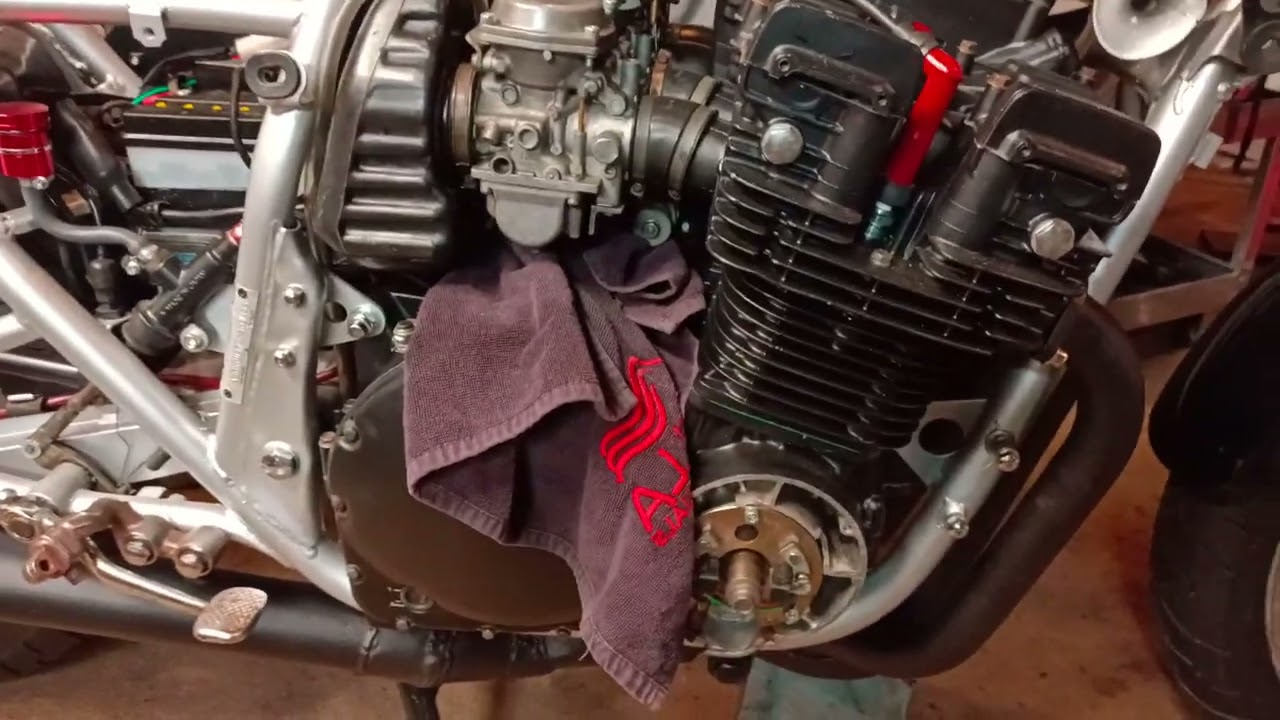
    In the past couple of weeks I've fixed the oil and fuel leaks, replaced the head gasket, set the mixture screws and balanced the carbs.

    When I first ran it there was a distinct cam chain noise and not much chain slack, with the top end off I rocked the crank back and forth while pulling on the cam chain, front guide removed. It suddenly gave me extra links worth of slack . I think the chain had a static 'bubble' of slack hanging beneath the crank sprocket. As the crank rotated, the chain jumped a position. But the guides held the chain on the sprocket so the slack remained under the crank and maintained the timing relationship between crank and cams. It never turned into chain jumping teeth, throwing the timing out and trashing the valves. Reassembled the cam noise is gone. So the oil leak was serendipitous.
    Last edited by KiwiAlfa156; 04-09-2023, 02:28 AM.

    Leave a comment:


  • KiwiAlfa156
    replied

    I thought I was being so careful... The seal looks damaged and I doubt I'll find a replacement, which is a problem as I don't want to risk leaks and pressure loss. So a new gasket has been ordered.

    The carb leaks turned out to be the o-rings in the fuel gallery tube between carb 1 and 2. So replaced these with the appropriate rings from my o-ring kit. Two of the drain plug seal washers were aso leaking, so I renewed these too. Didn't have the correct size washers so made some using thick gasket paper, cut with a 10mm and 6mm hole punches. Pressure tested the whole shebang overnight using the auxiliary tank hung way above the carb set. Nice and dry after 8 hours. Note to self about doing this testing before fitting the carbs over a freshly painted engine....

    I'm finally getting excited about finally riding this thing. I guess extended period resto/rebuilds happen either because you're time-poor, or have no deadline or pressing need to set a deadline, or any combination of the above. Also when starting with something a bent and abused as this Kat, it's basically eating the Elephant one spoon at a time, so the focus is very immediate. And it's only now after (briefly) running it, with not much left to do, that I've started imagining actually riding it.
    Last edited by KiwiAlfa156; 03-08-2023, 04:45 PM.

    Leave a comment:


  • Suzukian
    replied
    You're well on your way, even with these minor problems. You did a fantastic job on this bike.

    Leave a comment:


  • KiwiAlfa156
    replied
    Got her running about an hour ago.

    A couple of problems, leaking carbs and and oil leak at the head gasket.... Think one of the o-rings hasn't sealed...


    Leave a comment:


  • Suzukian
    replied
    I think that chain guard came out great. It has functional beauty to it.

    Leave a comment:


  • KiwiAlfa156
    replied
    Originally posted by Suzukian View Post
    If you fill tubing with sand, and weld caps at the ends, you can bend it without the pipe crumpling.
    Yeah, I got the pipe and the sand. I'll use the pipe that came on the bike to get her on the road. Want to ride her to an historic bike race meet in early March.

    Last edited by KiwiAlfa156; 02-15-2023, 01:57 PM.

    Leave a comment:


  • Suzukian
    replied
    If you fill tubing with sand, and weld caps at the ends, you can bend it without the pipe crumpling.

    Leave a comment:


  • KiwiAlfa156
    replied
    Been a slow couple of weeks. Unfortunately Auckland, where I live has been battered by an extreme rain event and severe flooding, and a week later cyclone Gabrielle came through and has just smashed us again.


    I did manage to make a chain guard out of some scrap sheet, and will work on tidying up the old exhaust. It's the last piece required for a start up. I'm thinking of building my own 4 into two into one. I've never made a exhaust before. But I'll give it a crack.

    Hopefully the next post will be the starting video.


    Leave a comment:


  • KiwiAlfa156
    replied
    Originally posted by dweller View Post
    Very nice rebuild. Good work. Any updates?
    Hi there, yes an update coming soon. Been away on our 3 week NZ summer vacation down in the South Island.


    Back home now and will be completing the build shortly.

    Leave a comment:


  • dweller
    replied
    Very nice rebuild. Good work. Any updates?

    Leave a comment:


  • Suzukian
    replied
    Sweet! You've got to be chomping at the bit!

    Leave a comment:


  • KiwiAlfa156
    replied
    Engine pretty much finished. Cam end covers, complete the wiring and exhaust and it's start time.

    Leave a comment:


  • Suzukian
    replied
    It's looking really good. Nice and tight.

    Leave a comment:


  • KiwiAlfa156
    replied
    A Suzuki parts guy I knew back in the early 80s gave the tappet adjuster to me. I've had it for 40 years.

    Fitted the new aftermarket coils. They're a little larger and have a wider bolt spacing than the OEMs. Had a short length of aluminum flat, so made a pair of brackets.


    Found the best position for the coils and made a pattern out of a gasket paper offcut transferred the pattern to the mounting holes to the alloy flat and then bent to suit. Cut to shape and drilled some decorative 'weight saving' holes


    Cut 7mm copper core leads and screwed on new NGK resistor caps.

    Last edited by KiwiAlfa156; 11-27-2022, 08:56 AM.

    Leave a comment:


  • Suzukian
    replied
    I was very surprised to the find the valve adjusting tool for your bike, and my GS750ESD is the exact same as my 1975 CB400F (which I also purchased new). I love when you don't need to buy a specialized tool. I think the cam follower, is , for people who work on their own bikes the only way to go. You can literally tune these bikes up in a parking lot, or the side of the road, if need be.

    Leave a comment:

Working...
X