.png "Powered by vBulletin")
Originally posted by Baatfam
View Post
-
Always liked your Red 83 Bob. Remind me where Nardys Blue one went and why don't I ever see pics of it anymore.....82 1100 EZ (red)
"You co-opting words of KV only thickens the scent of your BS. A thief and a putter-on of airs most foul. " JEEPRUSTY -
Thanks! Looks OK in pictures and from a distance. LOLOriginally posted by bonanzadave View Post
Nardy's blue bike is here in Eastern Tennessee, NE of me in Kingston. The new owner is a forum member, and goes by the screen name "willie." He doesn't seem to post much.Bob T. ~~ Play the GSR weekly photo game: Pic of Week Game
'83 GS1100E ~ '24 Triumph Speed 400 ~ '01 TRIUMPH TT600 ~ '67 HONDA CUBComment
-
Good to see the GS still in operation.Originally posted by Baatfam View Post
Had 850G for 14 years. Now have GK since 2005.
GK at IndyMotoGP Suzuki Display... ... GK on GSResources Page ... ... Euro Trash Ego Machine .. ..3 mo'cykls.... update 2 mocykl
Comment
-
Great. Will be expecting some post about your ride. (and see you in June).Originally posted by Charmayne View Post
.
Had 850G for 14 years. Now have GK since 2005.
GK at IndyMotoGP Suzuki Display... ... GK on GSResources Page ... ... Euro Trash Ego Machine .. ..3 mo'cykls.... update 2 mocykl
Comment
-
I had similar, and replaces all three studs, and switched to using ny-lock(?) nuts (that have the hard plastic portion) instead of the acorn nuts. Yah, me, me that likes everything stock. I think it was bwringer that suggested that. Seems that with those nuts there seems to be less reason-desire-tendency to over-tighten them.Originally posted by cowboyup3371 View Post
Had 850G for 14 years. Now have GK since 2005.
GK at IndyMotoGP Suzuki Display... ... GK on GSResources Page ... ... Euro Trash Ego Machine .. ..3 mo'cykls.... update 2 mocykl
Comment
-
Well new sprockets and chain but even though I started at 9am and its now 5pm I still have to put on the chainguard, sprocket cover, and reattach the peg. Probably another 45 minutes but it will have to keep until tomorrow.
I would/should have been done by 1pm but .. if you didn't get the memo .... those $20 Amazon/ebay chain tools aren't worth $1.
I spent hours trying to get my master link flared. Now I had read all the bad reviews and poo pooed them and ... they are spot on. $20 in the garbage along with some 3 hours of time.
I had bought a clip on master link in case I ran into trouble but .. Once I had the front plate pressed it kind of became a mission. I will admit .. I did think about pulling that sucker and just installing my clip on but I worked it out.
So what would new install of chain and sprockets have cost me if I brought it to my local mechanic. Just curious. Parts cost me about $150 but that was with a spacer I didnt need and will put up for sale and that dreaded awful sucky chain tool. I am just looking to feel a little better about my efforts.
Comment
-
I bet they would charge at least 2 hours labour to change sprockets and chain.
My local name brand dealer is currently at $106 an hour.2@ \'78 GS1000Comment
-
Add a couple of hours to get to the dealership and back, and total time is a wash.
+++++
I did one of the simplest possible jobs using a wrench. Last summer, I installed a Suzuki center stand on my Wee Strom. Bolting it on was straight-forward. Putting on the springs was a royal PITA, requiring strength that I just don't have. I bought several pry bars and ended up making a complex fulcrum to pivot a bar on, to maximize mechanical advantage....
Because the ground clearance is reduced with a center stand, Suzuki includes a longer feeler for the left foot peg. A few days ago I finally got around to changing the feeler, from about 1/2" to about 5/4" The strength of the blue Lok-Tite surprised me a bit. Last year, I bought a large set of Gear Wrench ratcheting combination metric wrenches, 5mm to 32mm. I have the usual collection of wrenches, coming from different manufacturers, different sets. They are mostly loose in boxes because the plastic holders that come with the wrenches break easily. The big set came in a tool roll that should last as long as I'm going to need the wrenches. This was one of my first uses, and I ended up needing to use a socket in a 1/2" drive ratchet to remove the old feeler peg. I figured that tightening the new feeler peg with new wrench would just about provide optimum torque.sigpic[Tom]
“The greatest service this country could render the rest of the world would be to put its own house in order and to make of American civilization an example of decency, humanity, and societal success from which others could derive whatever they might find useful to their own purposes.” George KennanComment
-
Im pretty sure the parts would have cost me a good deal more at the mechanic as well. I should have used the savings to get a proper chain tool. Next time!
I also got to do a bunch of clean up on parts since everything was apart.
She looks good all new and its nice to be able to spin the back wheel and not have any tight spots!! It has since been buttoned up and everything is on and she is ready to ride.

 Last edited by Guest; 03-04-2018, 12:51 PM.
Comment
-
That's one of the best things about doing our own work. That while it's apart type cleanup for me usually leads to discovering something else that needs attention.Originally posted by Boriqua View PostRoger
Current rides
1983 GS 850G
2003 FJR 1300A
 Gone but not forgotten 1985 Rebel 250, 1991 XT225, 2004 KLR650, 1981 GS850G, 1982 GS1100GL, 2002 DL1000, 2005 KLR650, 2003 KLX400
Comment
-
New front tire and tube on my TTR125. Now for the rear.
VGustov
80 GS 1100 LT, 83 1100 G "Scruffy"
81 GS 1000 G
79 GS 850 G
81 GS 850 L
83 GS 550 ES, 85 GS 550 ES
80 GS 550 L
86 450 Rebel, 70CL 70, Yamaha TTR125
2002 Honda 919
2004 Ural Gear upComment
-
Finished installing the new top on the Miata this morning. Now it just has to sit in the sun until I can latch the top.
Love the glass window...

 Bob T. ~~ Play the GSR weekly photo game: Pic of Week Game
'83 GS1100E ~ '24 Triumph Speed 400 ~ '01 TRIUMPH TT600 ~ '67 HONDA CUBComment
-
Made the TU250X a heavy(errr) breather.
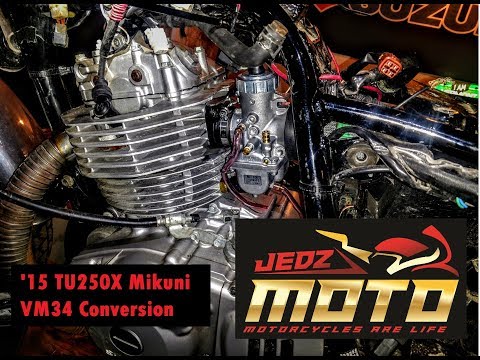 Jedz Moto
1980 Suzuki GS1000G
1988 Honda GL1500-6
2018 Triumph Bonneville T120-
2020 Honda Monkey Z125
2001 Honda Insight - 65MPG
Originally posted by Hayabuser
Cool is defined differently by different people... I'm sure the new rider down the block thinks his Ninja 250 is cool and why shouldn't he? Bikes are just cool.Comment
-
What was wrong with the chain tool? I have one that has done about 6 chains so far with no issues. It is a Alpha Moto brand. Are you SURE you didn't need that spacer? It goes between the countershaft and the sprocket to space the sprocket out 6mm so the nut doesn't bottom out.Originally posted by Boriqua View Postsigpic
09 Kaw C14 Rocket powered Barcalounger
1983 GS1100e
82\83 1100e Frankenbike
1980 GS1260
Previous 65 Suzuki 80 Scrambler, 76 KZ900, 02 GSF1200S, 81 GS1100e, 80 GS850GComment
-
I didnt need the spacer. There were three thin shims in the back of the sprocket. They probably equaled less than 1/3 the thickness of the spacer. I know the spacer was to go on front but it didnt need it. I threw a caliper on both the new 530 sprocket and the old 630 and they were the same thickness. Everything was the same in the rear and front except for sprocket diameter and the nut tightened up just fine.Originally posted by bobgroger View Post
The tool .. ugh ... It broke the chain just fine. I ground the head of the link to be cut with a dremel and course sanding wheel and the tool was able to push the pins out just fine except after 2 pins the push rod was noticeably bent. I had ground the pins flush to the face plate.
The trouble was with re-installation of the new master link. There is an flat anvil with a groove that goes across the back of the link and a push plate with two holes that in theory go over the pins at the front. Except on mine the holes that were in the front push plate didnt line up with the pins in my master link. I kept trying to get the master link front plate to seat and it wouldnt budge. Which of course led me to bend the cheap steel handle used to press. Then I realized it was never going to move because the holes were to far apart.

I resorted to using the tool with a single anvil but using a nut to fit over the individual pins at the front and went back and forth between the pins to make sure I sat the plate evenly.
Then after all that I checked the existing links with a caliper and made sure I had pressed my new master plate to the same depth.
Now it was time to flair ... Bwhahahahah .. I break out the "rivet" attachment which is simply a rounded shaft and went to flair the head of the pin. I measured the thickness of the pin so I would know exactly how much flair I was adding. I got a couple of turns on the tool and figured let me check because I dont want to much flair and I took my caliper to the pin head and no change ... Hmmmmm .. so I go at it again. Take it off and nothing. So I look at the "rivet" shaft and the tool is so soft a steel that it had pressed into the cavity of the pin but didnt flair anything. Basically it made a nifty deep circle with shoulders of the rounded head of the tool. The pin had made an extrusion out of the "rivet" tool. The more I turned the more pronounced the shoulders became as the tool embedded itself in the head. I then tried to create more of a taper on the tool and tried again .. same thing .. it just dug into the pin. The face of that "rivet" tool was originally a dome and that extrusion you see was what went into the pin head cavity.

I spent a couple of hours trying to figure out what to do. I had already pressed my master link and didnt want to take it off and replace it with the clip link. Then I remembered that I had recently taken apart a reloading machine and kept the bearings. They were about 3/16 in and hardened. I managed to use the tool to push the bearing into the master link pins and used a crescent wrench to turn the handle as the cheap handle was bent and Wala ... instant flair to about .6mm
I have used chain tools on bicycles for years. This was just a sloppy tool and I had to resort to ice cream sticks as shims to make it work without needing three hands but I could have lived with that. The problem was the steel it was fabricated of. Its just not hard enough or robust enough for the task.
Edited to add
Took the bike out and its awesome.Last edited by Guest; 03-04-2018, 04:35 PM.Comment

Comment