Announcement

Collapse
No announcement yet.

'82 650L Refurb/Mod

Collapse
X
 
  • Filter
  • Time
  • Show
Clear All
new posts

    '82 650L Refurb/Mod

    How's it goin' all? Starting a rebuild and I'd like to share it with you if you don't mind! I've owned this 650L for just under 3 years and have finally decided to give it the love it deserves (or the mutilation?)!

    A little background on me; I'm 21 years old, working for Goodyear as a GS (GS on the GS, giggity) atm. Went to a 2 year college for automotive and am currently working my way up to Master Tech or specialization in transmissions. Only have 2 ASE's at the moment and I need to dearly expand my tool collection to get there.


    Anyway, back to what truly matters; THE BIKE! Here's a photo of when I first got it:


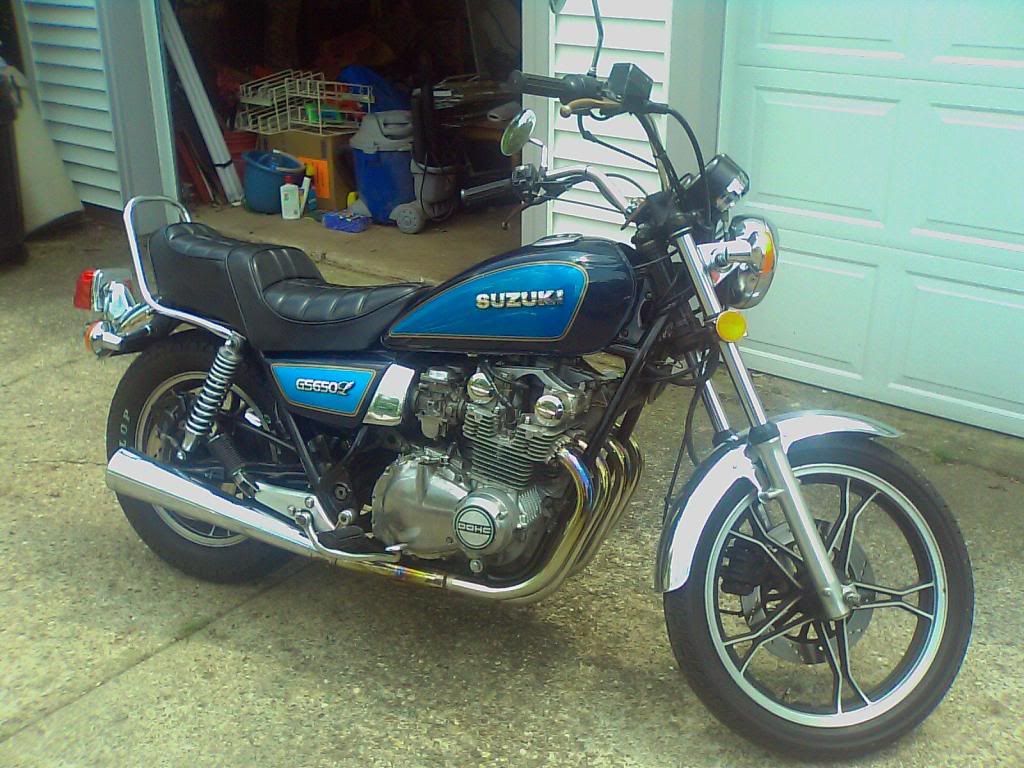
    Isn't she a beaut?!? It's in great condition. 12k miles on it when I purchased it, and I have since ridden it lightly. Here's the year after I first got it, with very few modifications:


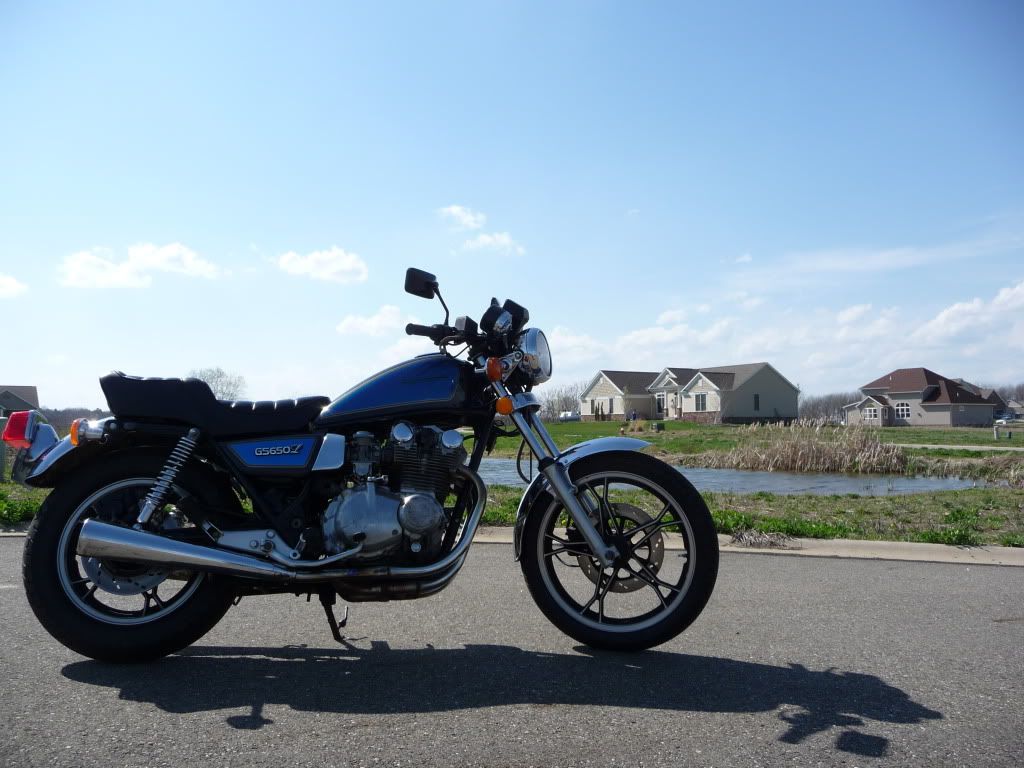
    Straight bars, new mirrors, removed rear seat bar. Lost right side suzuki tank badge and DOHC badge off ignition cover. (If anyone has either and is willing to sell, I'd be interested!)

    Now keep in mind that I have no true plans for this rebuild. I'd like very much to do a straight refurbish and at least have anything different reversible/exchangeable, but I'd also like to put my own style into this. I'm in great conflict over this... In general I love the look of a bike with little chrome, leaving only slight accents of chrome here and there if any. Obviously that would not stay true to the refurbish. I am open to any and all opinions, so throw them out there! Criticism as well!

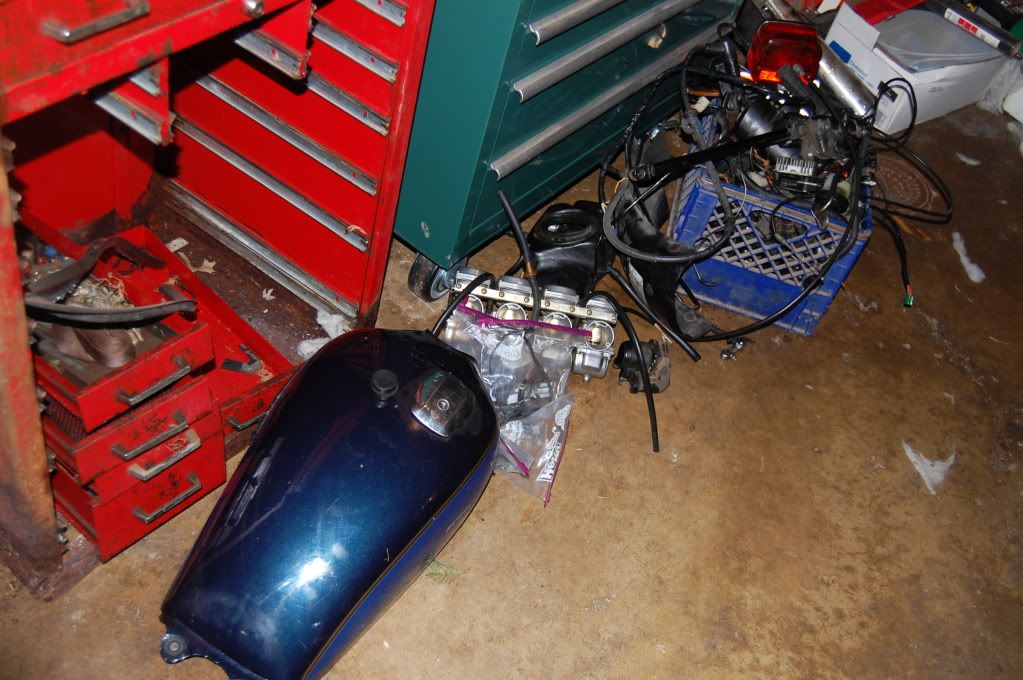
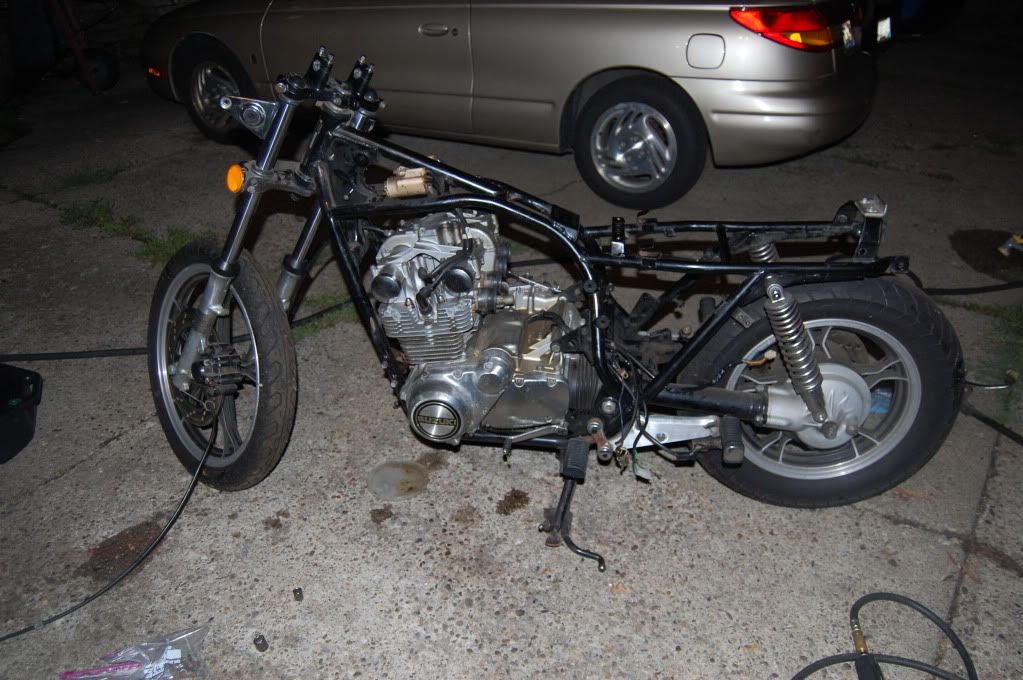
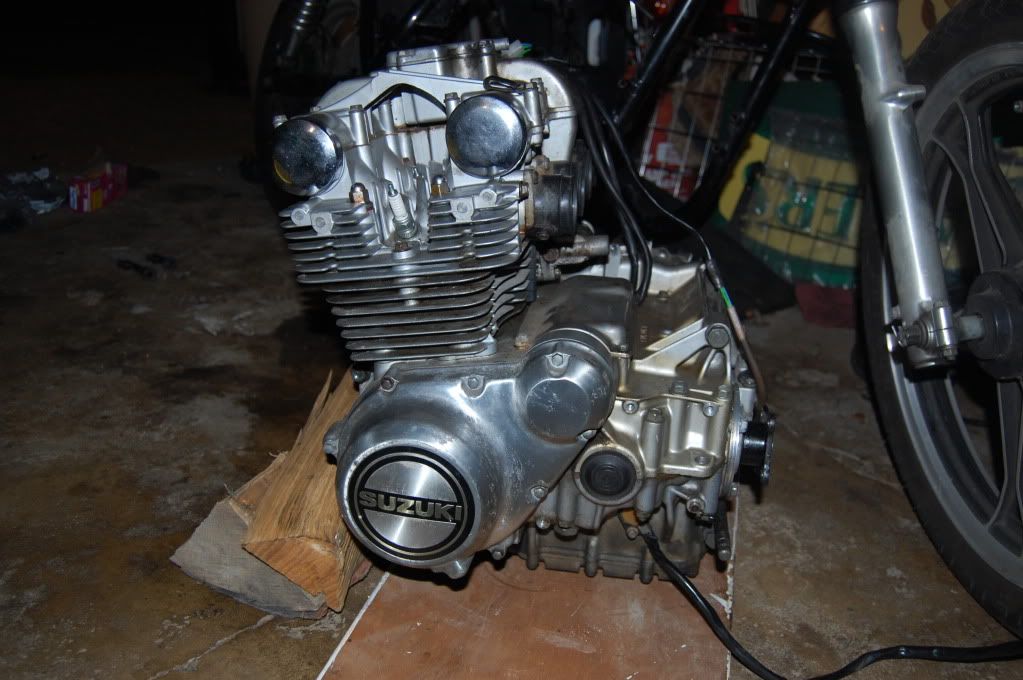
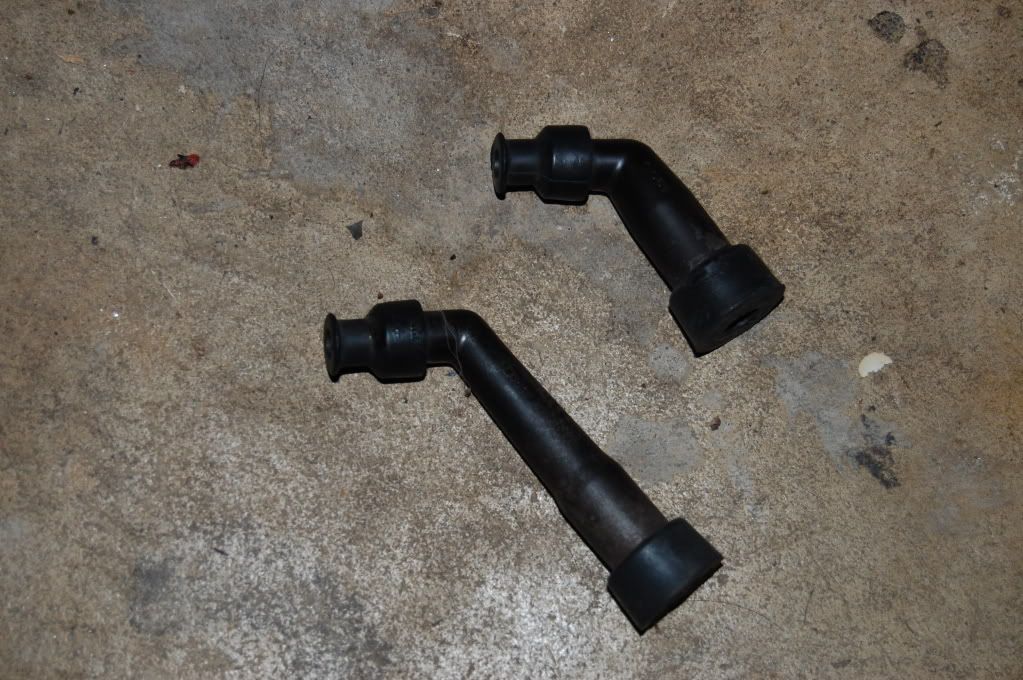
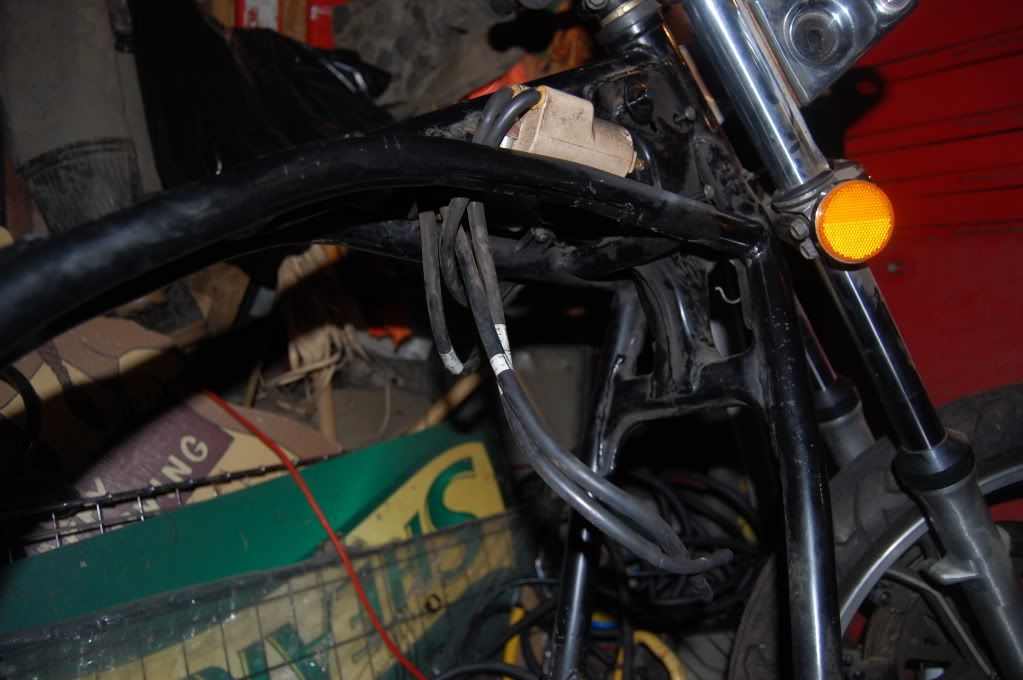
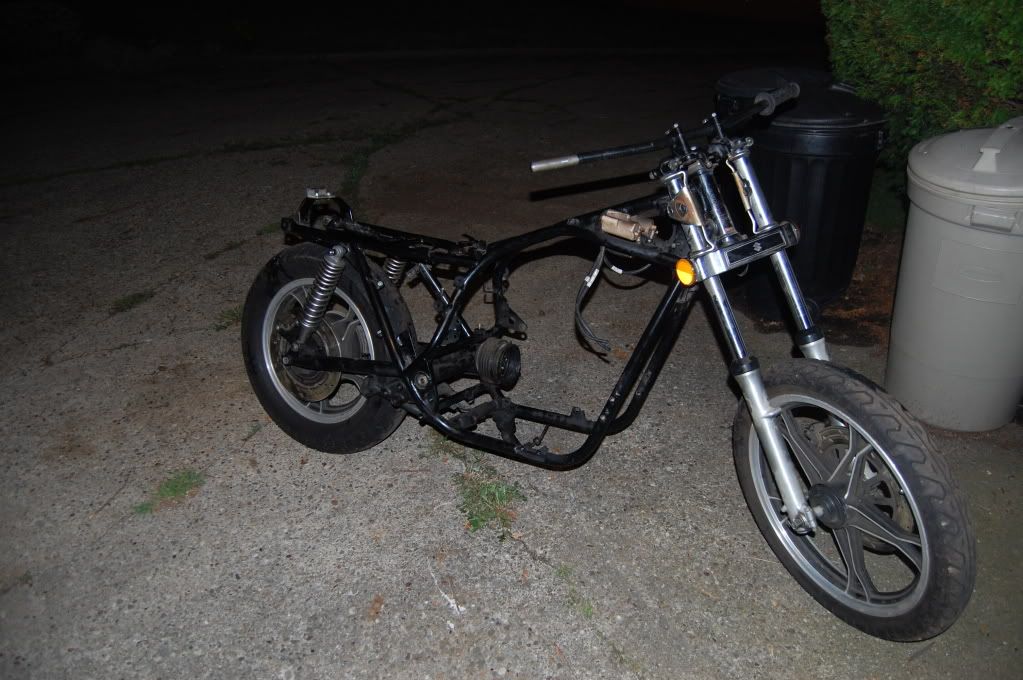
    Today was the start to the tear down. It was late into the day and it was so humid you could practically swim across the garage, so I just did some light removal. Got most of the electronics, airbox, rear fender and handlebar/gauge cluster.


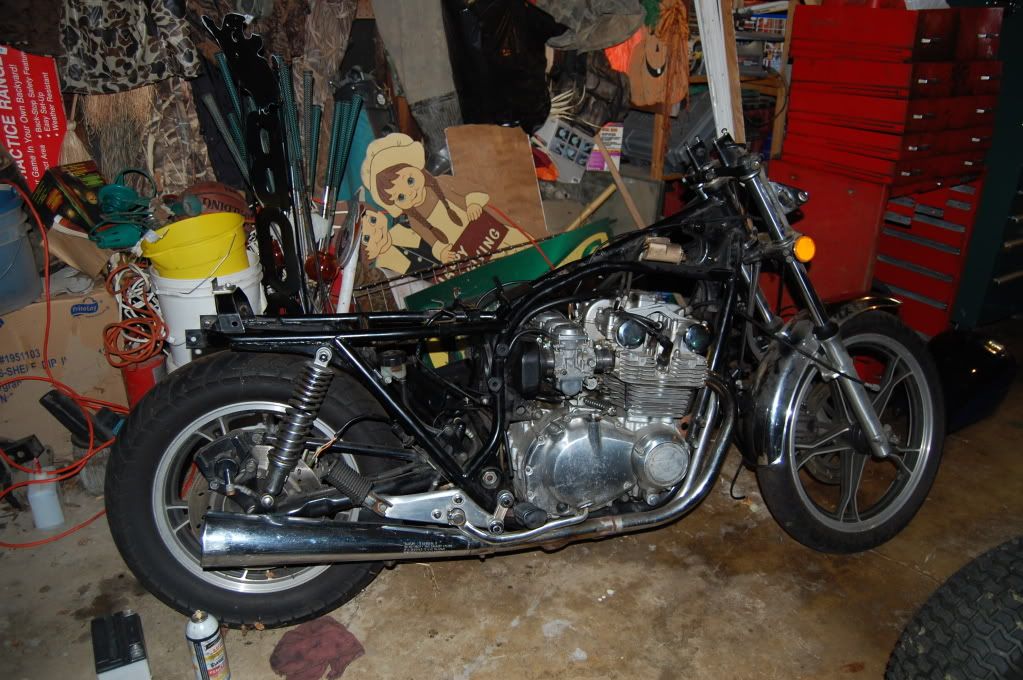
    All of which fit neatly and orderly into a single milk-crate, which is good because I am in the process of making more room in the two door garage. So there will be plenty of space after selling a redundant riding mower, old tool box and moving out a new one.


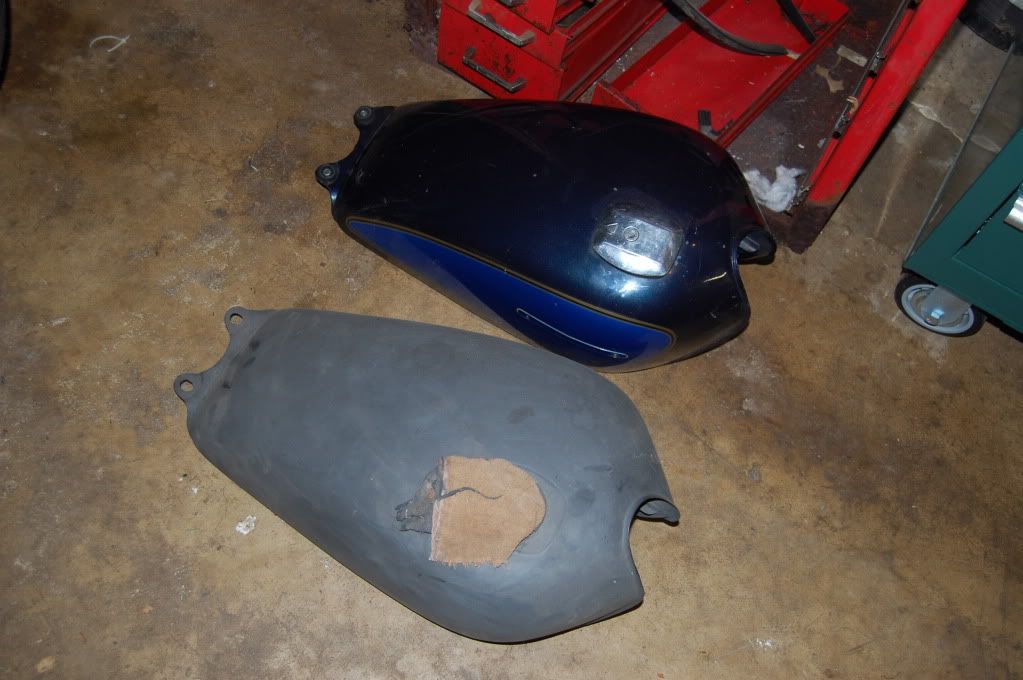
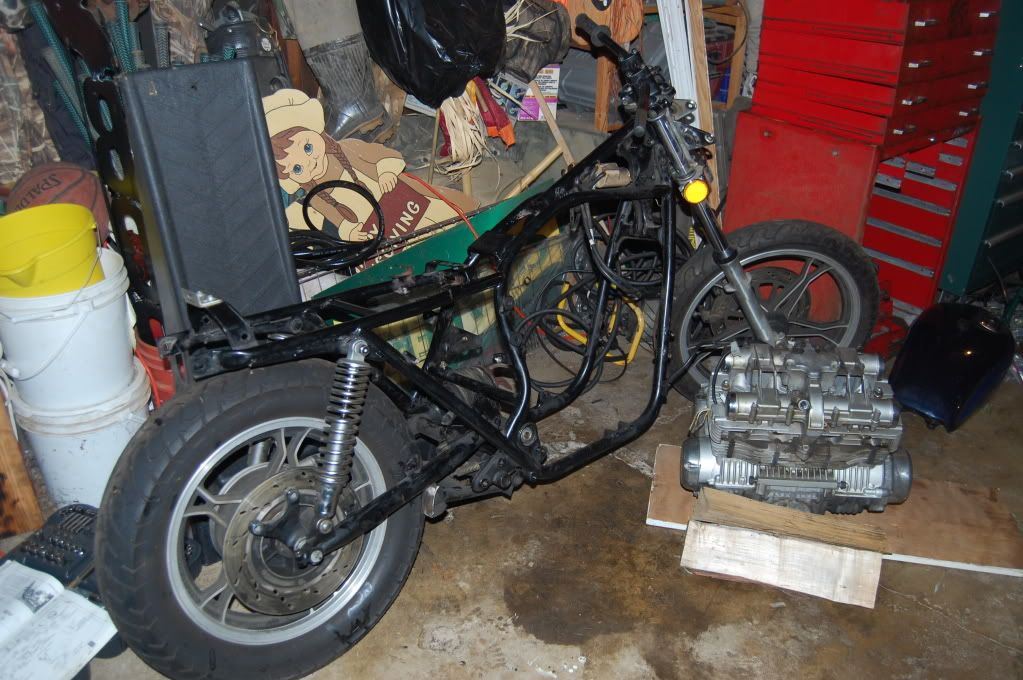
    Also have purchased a second fuel tank as to keep the stock one, though I'd like to restore the original paint job on the stock tank. (Few chips and cracks in paint). It's been Kreme'd, sanded and primed and has only light body filler on a few spots, smoothing over the side badge plates as well. Wish I had seen Hoosier Daddy's 'Works' method before I had kreme'd it.

    Last edited by Guest; 07-19-2011, 12:13 AM.

    #2
    I'll be interested in seeing what you do with this. Are you bobbing or making a cafe out of it? Or just putting it back to its formal glory?
    Cowboy Up or Quit. - Run Free Lou and Rest in Peace

    1981 GS550T - My First
    1981 GS550L - My Eldest Daughter's - Now Sold
    2007 GSF1250SA Bandit - My touring bike

    Sit tall in the saddle Hold your head up high
    Keep your eyes fixed where the trail meets the sky and live like you ain't afraid to die
    and don't be scared, just enjoy your ride - Chris Ledoux, "The Ride"

    Comment


      #3
      Uncertain where I will be going with this. I'm torn between a straight refurbish or actually modifying it. More than likely not a cafe though.

      Comment


        #4
        Personally I would just refurbish it but I'm funny that way. Others will tell you to "de-L" it but I like their looks.

        Have fun no matter what you do.
        Cowboy Up or Quit. - Run Free Lou and Rest in Peace

        1981 GS550T - My First
        1981 GS550L - My Eldest Daughter's - Now Sold
        2007 GSF1250SA Bandit - My touring bike

        Sit tall in the saddle Hold your head up high
        Keep your eyes fixed where the trail meets the sky and live like you ain't afraid to die
        and don't be scared, just enjoy your ride - Chris Ledoux, "The Ride"

        Comment


          #5
          de-L it as in go over to chain rather than shaft driven?

          Comment


            #6
            No, get rid of the bars, seat, and everything else that makes it the L model. Although it was explained to me I don't agree with all of the reasoning.
            Cowboy Up or Quit. - Run Free Lou and Rest in Peace

            1981 GS550T - My First
            1981 GS550L - My Eldest Daughter's - Now Sold
            2007 GSF1250SA Bandit - My touring bike

            Sit tall in the saddle Hold your head up high
            Keep your eyes fixed where the trail meets the sky and live like you ain't afraid to die
            and don't be scared, just enjoy your ride - Chris Ledoux, "The Ride"

            Comment


              #7
              Yeah, the giant step seat and the stock bars turn me off aesthetically, and at the moment I'm leaning more towards a modified rebuild. Its a tad bit cooler today so I'll be doing more of the teardown today. Anyone have suggestions on a clutch kit? I have looked around a bit but was wondering if anyone has had good experiences with a certain one?

              Comment


                #8
                Biggest difference in day 2 of the tear down is the size of the parts pile. (Pile sounds so unorganized... but believe me it isn't!)


                After removing the exhaust I'm fairly certain that I'd like to replace it. Any suggestions on this would be appreciated.


                I also need to figure the best way to remove the engine and transmission by myself when I come to that point, which is pretty much up next.

                Funny thing happened not too long after I snapped that last picture. I live in a pretty populated inner-city area first off, so I was working out in the driveway when a fox comes strutting down the center of my street! It even turns to look at us (my girlfriend and I) without breaking it's pace. I've only ever seen foxes in a zoo before, so to see one quietly trotting through my neighborhood was quite a sight. Magnificent creatures. Glad this one wasn't rabid, haha.


                So all in all I have pretty much everything removed except for a few things here and there and the three main components; drive axle, trans, and motor. It's been quite a breeze thus far, hardly any bolts have given me a hassle and everything just pops right off for the most part. Hopefully after the next time I get a chance to work on it we'll have a bare frame and we can start in on the rebuild.

                Comment


                  #9
                  Can anyone explain to me what it means on a stage 3 jet kit that driveability may be compromised? How do they mean?

                  I'd probably like to go with individual filters and an aftermarket exhaust.

                  Comment


                    #10
                    Subscribed! Nice to see another "L" getting some attention.
                    Thanks for the linky to my thread.
                    I too was an ASE certified Tech for 17 years then about 15 years ago I got into Industrial Maintenance... but I still like to tinker on Motorized Vehicles Good luck to you!
                    I removed my engine by myself with the bike on the center stand and a floor jack and a small piece of plywood under the oil pan. I had made a little "dolly" and slowly slid it out sideways onto it. Once I was ready to Re-install I laid the engine on it's side on a blanket and set the bare frame sideways down on top of it. then dropped the bolts in from the top , installed the nuts and rotated the whole thing back upright... much easier!
                    I have seen posts here of guys putting different mufflers on the stock headers, that is an option for your exaust.
                    As far as your stage 3 drivability question goes, the more Hi Performance you make something, the less street friendly it is. As an extreme, imagine tring to ride a full-on drag bike around town in traffic. Although not that drastic, the carb kit will retune your carbs for higher performance but city manners may suffer. Kind of like putting a leash on that fox and expecting it to behave like a poodle
                    Last edited by Guest; 07-20-2011, 12:11 PM.

                    Comment


                      #11
                      Funny you would say that, a co-worker was telling me about a very tame pet fox, haha. (and a not so tame pet raccoon..)

                      I was thinking about somehow using a jack to assist the removal, but a dolly is a pretty good idea to add to it. What about the reverse of your re-installation though? Laying it down and lifting the frame off?

                      I'll also keep in mind re-using the headers, their in pretty good condition as is.

                      Got the day off tomorrow but it's going to be a heat wave... Not sure if I'll be able to stand being out of a.c. for too long!

                      Comment


                        #12
                        Originally posted by Nuitdevotremort View Post
                        What about the reverse of your re-installation though? Laying it down and lifting the frame off?
                        Thats why I brought it up, I read about it after I already had mine out...

                        Comment


                          #13
                          Third day and we've got a rolling frame.


                          Little bit of advice for those riding shaft driven bikes... leave your rear brake system attached until you at least disconnect the drive shaft haha. I guess it wasn't too much more difficult but It certainly would have been easier.

                          Put a jack under the oil pan with a board to hold the weight up, unbolted all the necessary engine mounts and lowered it gently onto the frame. This is where having 4 labs came into handy! I stacked their dog beds up and laid the frame and engine down on top of them and was able to just lift the frame away from the engine. Was pretty simple, so thanks for the tip Hossier. I'd recommend removing at least the rear tire and suspension if you're going to do that alone.


                          There was one bone-headed mistake I made. I had only disconnected two spark plug wires...


                          Guess I was replacing them anyway... ha.

                          Comment


                            #14
                            As far as the sacrificial plug wires go, "You'll have that"... When you go back together do it without the front forks or the rear including the swinger, just a frame. Then you will see how much easier it is. But all in all, Good Progress!
                            Last edited by Guest; 07-21-2011, 09:14 PM.

                            Comment


                              #15
                              You should just be able to screw those boots back onto the wiring.
                              Cowboy Up or Quit. - Run Free Lou and Rest in Peace

                              1981 GS550T - My First
                              1981 GS550L - My Eldest Daughter's - Now Sold
                              2007 GSF1250SA Bandit - My touring bike

                              Sit tall in the saddle Hold your head up high
                              Keep your eyes fixed where the trail meets the sky and live like you ain't afraid to die
                              and don't be scared, just enjoy your ride - Chris Ledoux, "The Ride"

                              Comment

                              Working...
                              X