-
 Guest repliedThings are really taking shape David. Looking great.
 -
More work on the engine
Managed a bit of time in the garage tonight, after being out for about 6 hours on my Vstrom. Perfect riding weather here in Vancouver these last few weeks.
Installed the rings and then put the pistons on the connecting rods and was going to call it a day but I couldn't resist, so I installed the cylinders and the head and torqued everything down.
I used the wooden block method to hold the middle pistons, it worked really well. The cam chain tensioner was very stiff at first entering slot in the cylinder, I was puzzled but knew it came out of there so it was going back in, with a few raps from my soft faced hammer it dropped down and the tensioner freed up.
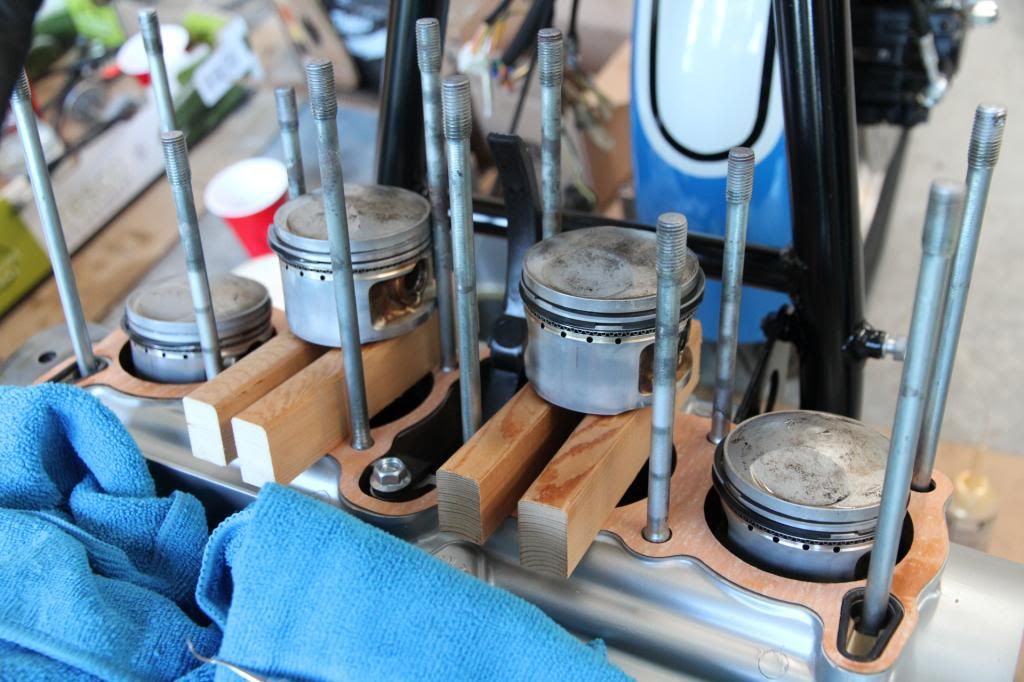
I tried using a popsicle stick to depress the rings but it broke and last thing I need is that falling into the crank, so used a small screwdriver and it worked very well, just had to be careful not to slip and gouge something.
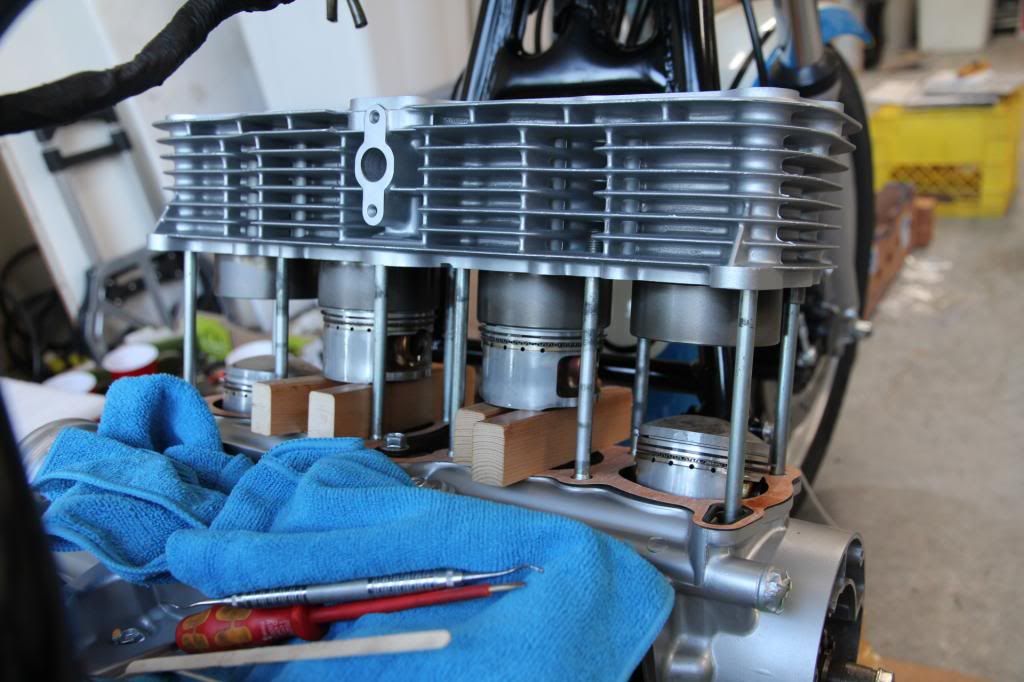
Here she is almost looking like an engine.
 Last edited by Kiwi Canuck; 07-15-2013, 12:26 AM.
Leave a comment:
-
Leave a comment:
-
More progress
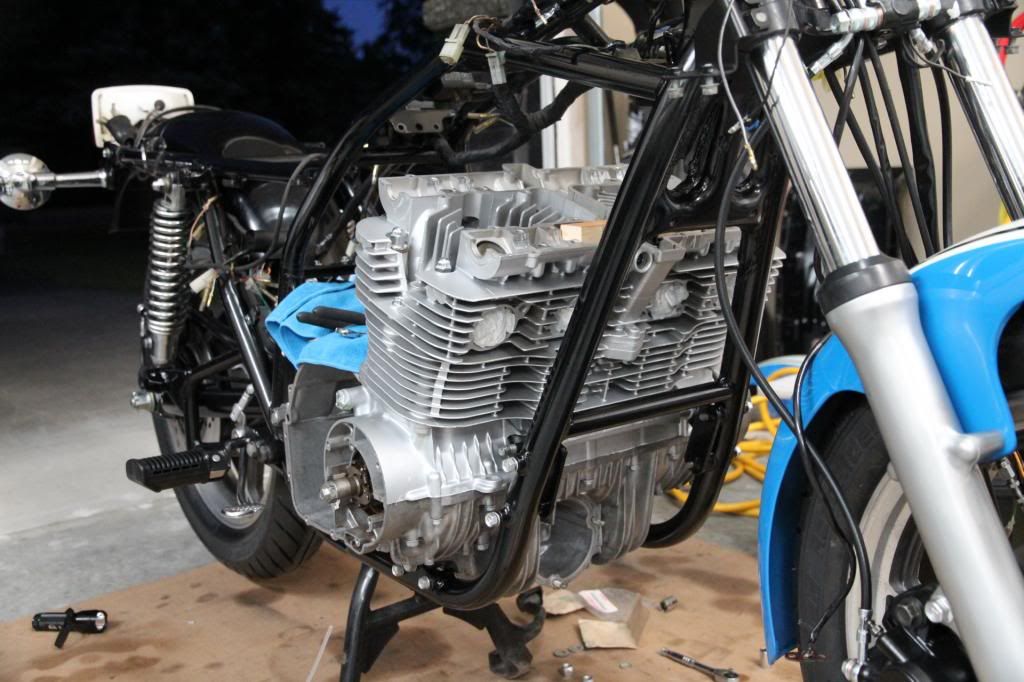
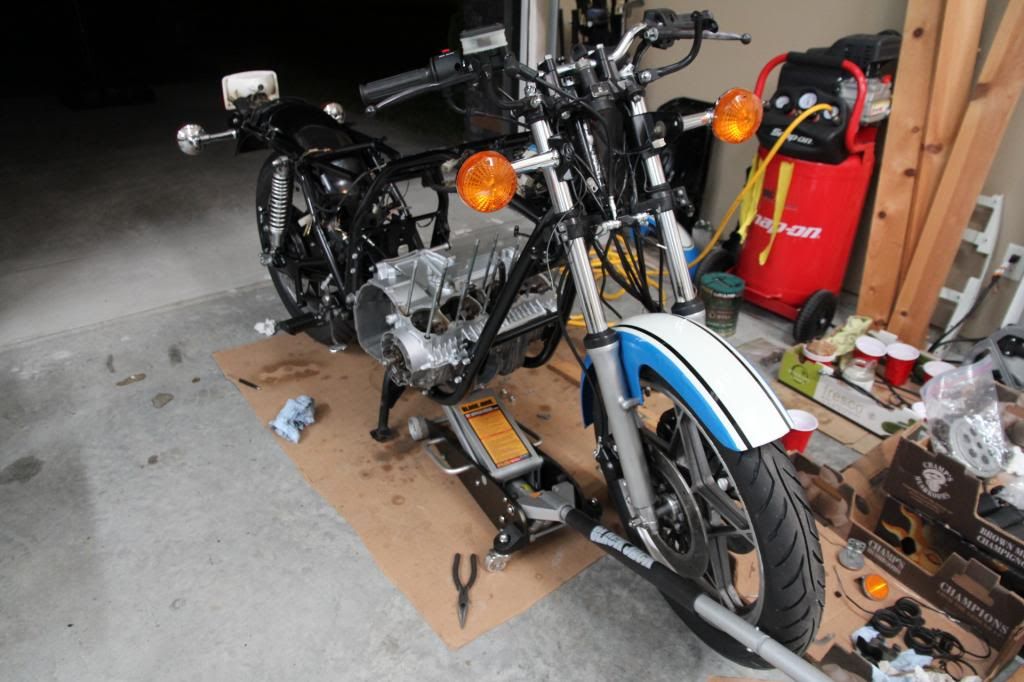
I put the engine cases back together this morning and I dropped the engine back in to the frame tonight after dinner.
I will complete the assembly while it's in the bike as I didn't want to try and muscle a fully built engine into the frame.
Went in pretty easily but I had a few issues figuring out the orientation of the rear brackets, took a few guesses to finally get them in right.
Those pesky lower mounting bolts with the slot nut or what ever they are called are a bit of work to get in, I laid on my back and used needle nose pliers and finally got the thing to thread in.
I had a few pieces go missing, I had all the bolts and nuts for the engine accounted for last week and now I'm missing a few. Very strange how that happens.")
Well I guess there is no going back now, I'm on the home stretch.
Still jacked up but almost done.
Another angle of it when it was done.
 Last edited by Kiwi Canuck; 07-14-2013, 09:50 AM.
Leave a comment:
-
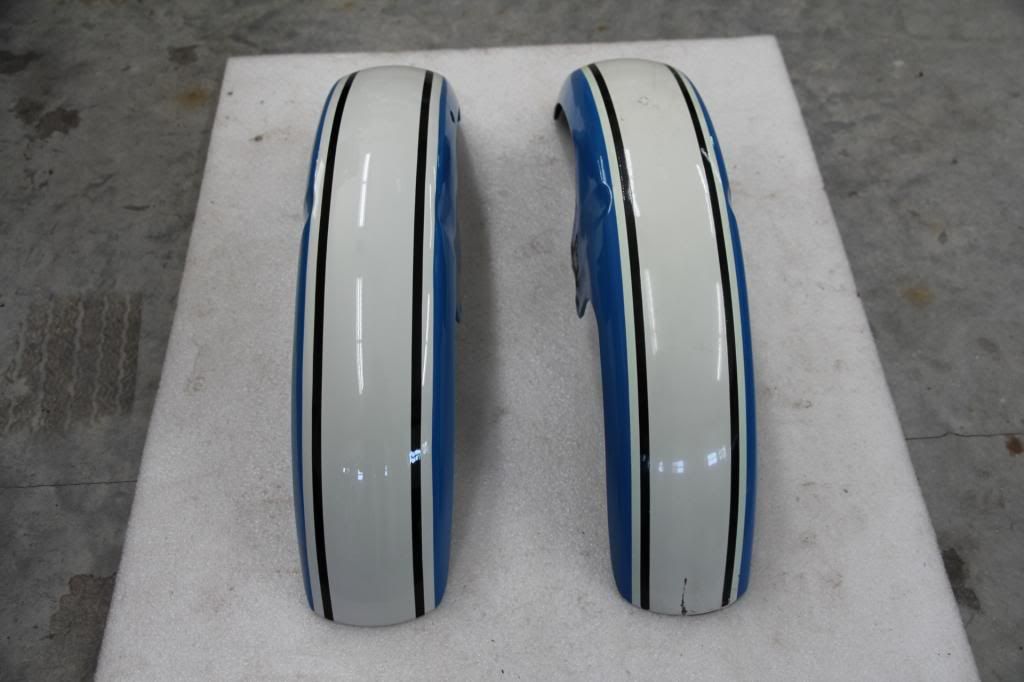
Got my front fender back from paint
Picked a few parts on Friday, I was keen to see how the new paint looked on the bike.
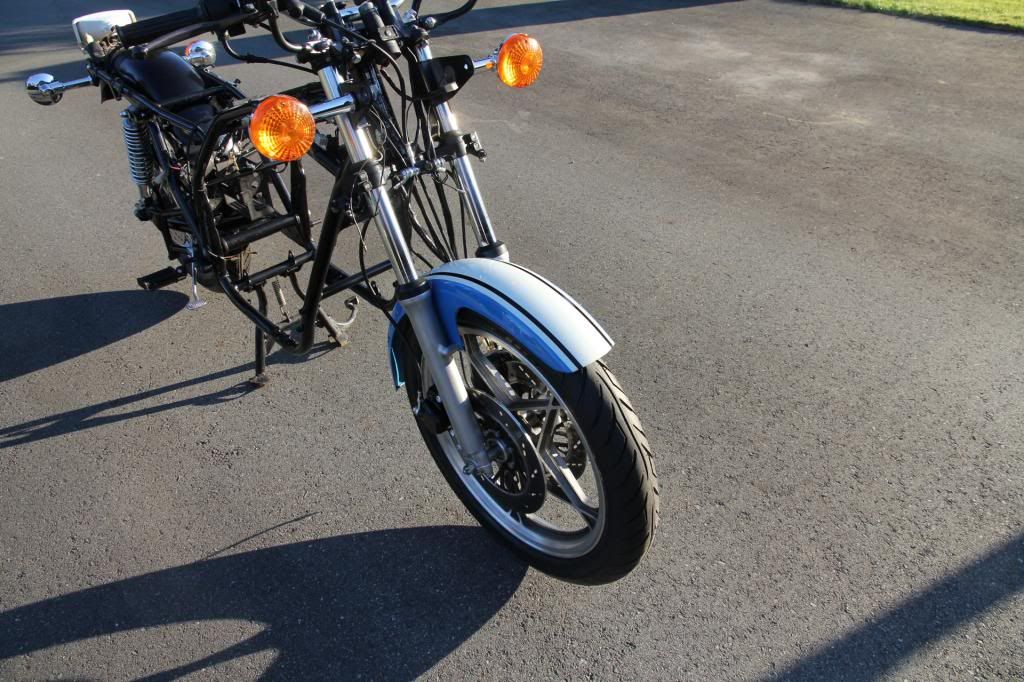
A had to take my time as it's very easy to damage the fender putting it on as the forks can scrape the paint off if you don't give the support struts a squeeze while sliding the fender into place.
Here it is beside the old one.
Here she is on the bike.
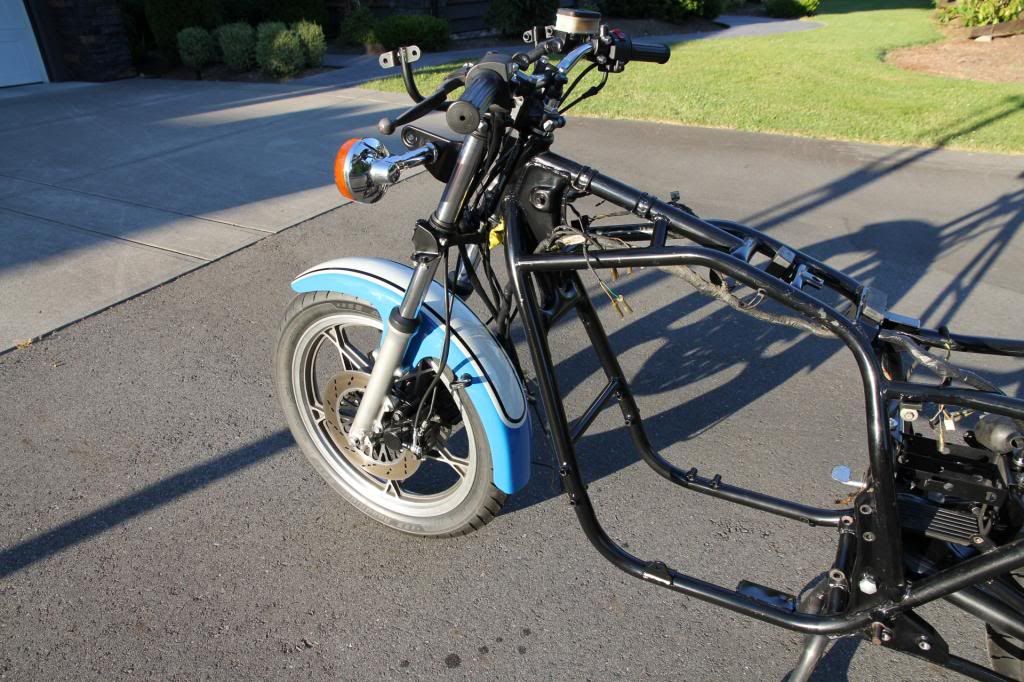
From the other front, and you can almost see my frame paint job.
Leave a comment:
-
Clutch Hub Rebuild
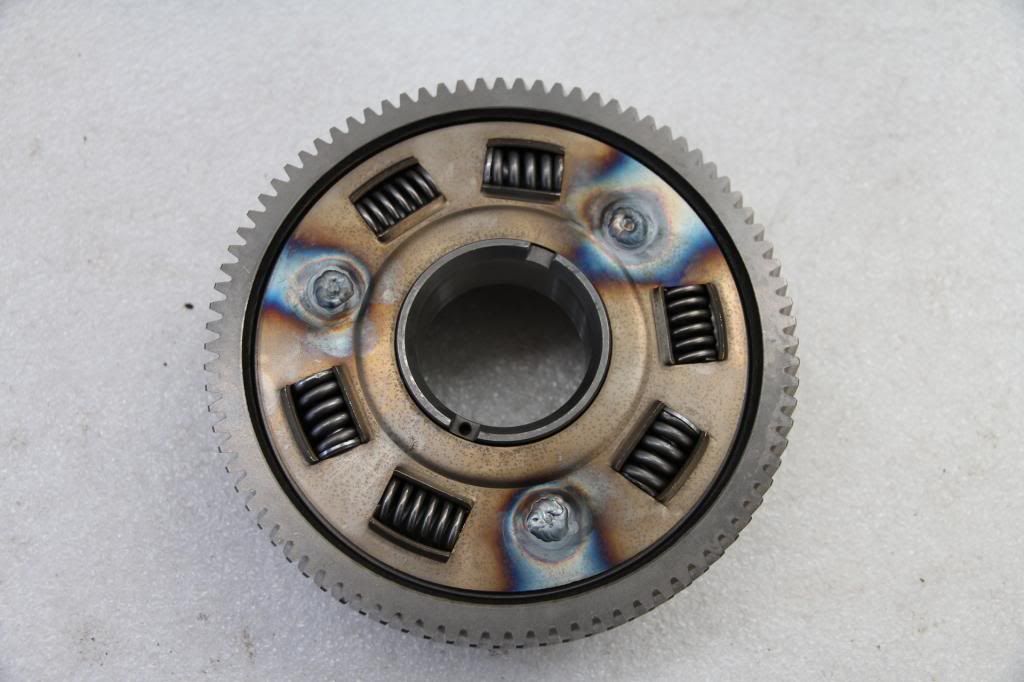
I checked my clutch basket and sure enough the springs were loose, (thanks GregT for the heads up) so I took it in and got buttons machined as spacers to take up the slack and it also needed a bushing to reduce the free play in the sleeve.
Here she is all welded back up, hopefully that will eliminate any need for more work later.
 Last edited by Kiwi Canuck; 07-15-2013, 10:15 AM.
Leave a comment:
-
There goes that 100 point resto. lol.
A couple years ago i was in the same predicament with an '80 CBX. Ended up making the same decision as you as i wanted to ride it not show it.
In the end i got lucky that the eventual buyer liked that it had a bit of patina.Leave a comment:
-
The Predicament
I have been busy getting things ready to re-install the engine and other than the fact that I have somehow managed to misplace a few bolts for the engine mounts, I have also come to realize that some of the work I’ve done so far is not quite up to snuff compared to all the new parts I’ve bolted on.
I had a moment this morning when I almost relented and stripped the bike back down to the frame so I could start from scratch and get the frame and swing arm powder coated and then get the lower crankcase vapour blasted and ...... and......
I had it all planned out and then reality hit, what was I thinking, man talk about scope creep. I see that on construction jobs we work on, not for me, keep this on track and be ready to ride before the summer is over.
So I got the sand paper out and got to work, a few hours later and a can of VHT primer and a new can of VHT Roll Bar & Chassis paint cracked open for the occasion and I had a much better looking frame in no time.
I will drop the motor back in tonight or tomorrow if I can find those bolts, as I'm by myself I will not have the head on as that should help with the weight.
Pictures to follow on the next post.Last edited by Kiwi Canuck; 07-14-2013, 01:42 AM.Leave a comment:
-
Thanks Hakamisu, as mentioned before, I'm not very accomplished at body work and I'm not sure if I want to become proficient at it as there are a few good guys around here who are very capable and it makes sense to get help when needed.
Pictures have a way of looking better than in real life, the lid is not as good as I would like even though it's much better than before..
Cheers,Leave a comment:
-
Guest repliedYou where right not to use the double banjo.Take a guess what happened when I did I have quite a few later style doubles around so I used 1 of those.
Last edited by Guest; 07-10-2013, 04:18 AM.
I have quite a few later style doubles around so I used 1 of those.
Last edited by Guest; 07-10-2013, 04:18 AM.Leave a comment:
-
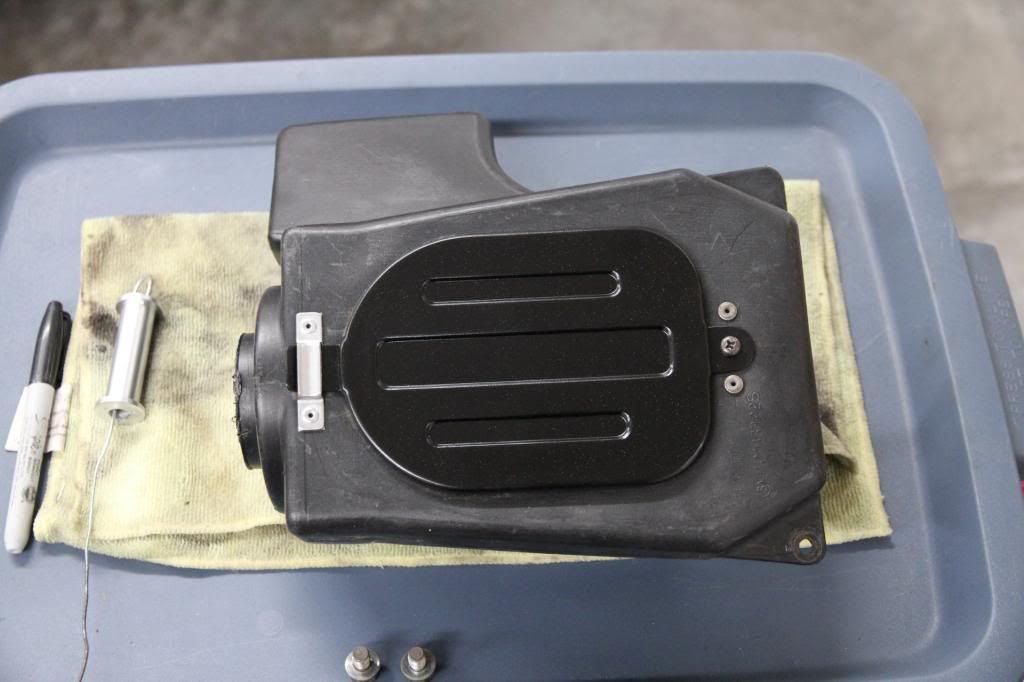
Air Box
Finally fixed up the air box lid, not a great picture, but I got it a lot better than the first time.
This is not easy and I guess I would get better with practice but drywall mudding and bondo work is definitely not my gig.
Before picture

After the 2nd try.
 Last edited by Kiwi Canuck; 07-09-2013, 11:54 PM.
Leave a comment:
-
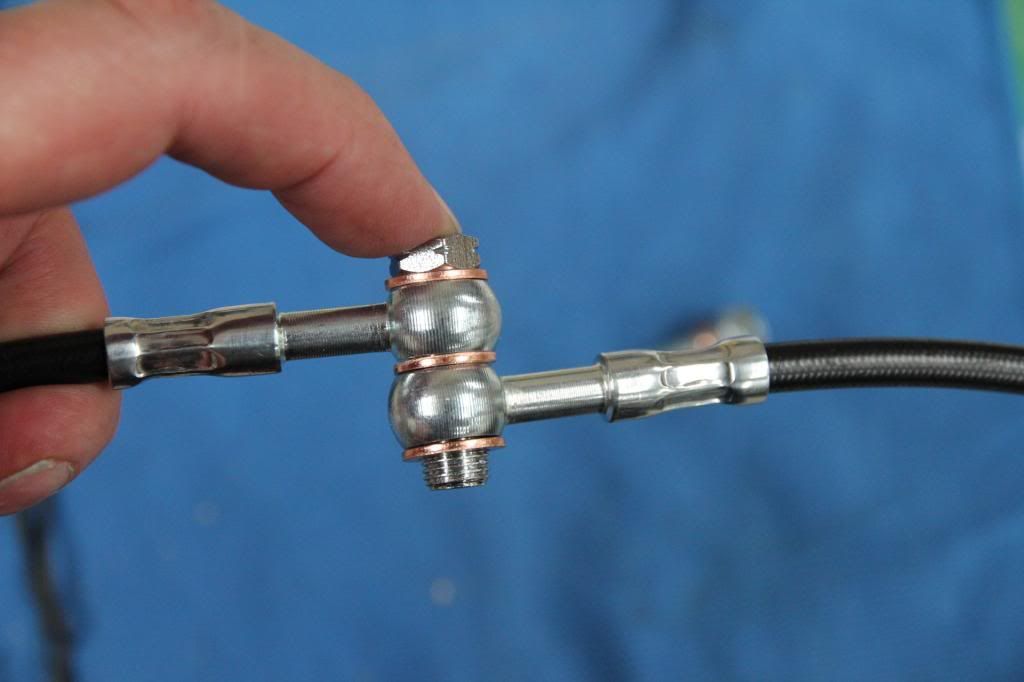
Rennsport Stainless Brake Lines
First off, good company to deal with, very satisfied with overall experience.
Pro's
Made custom lines to my exact requested dimensions.
Good pricing and very fair shipping costs.
Very good customer service,
Good looking product,
Different colour jackets to choose from and black or silver banjo bolts
Ships with extra banjo bolts and washers.
Cons
Offset curves only come in 45 degree bends, I needed about 30 -35 degrees.
(Still works but not perfect.)
Double banjo bolt shipped seems too short, it was about 6mm shorter and I didn't feel like it was going to hold without stripping.
I cleaned up and used the original one.
(that's all they have as far as double banjo's so hopefully they will find a different supplier soon)
Picture of the short double banjo bolt.
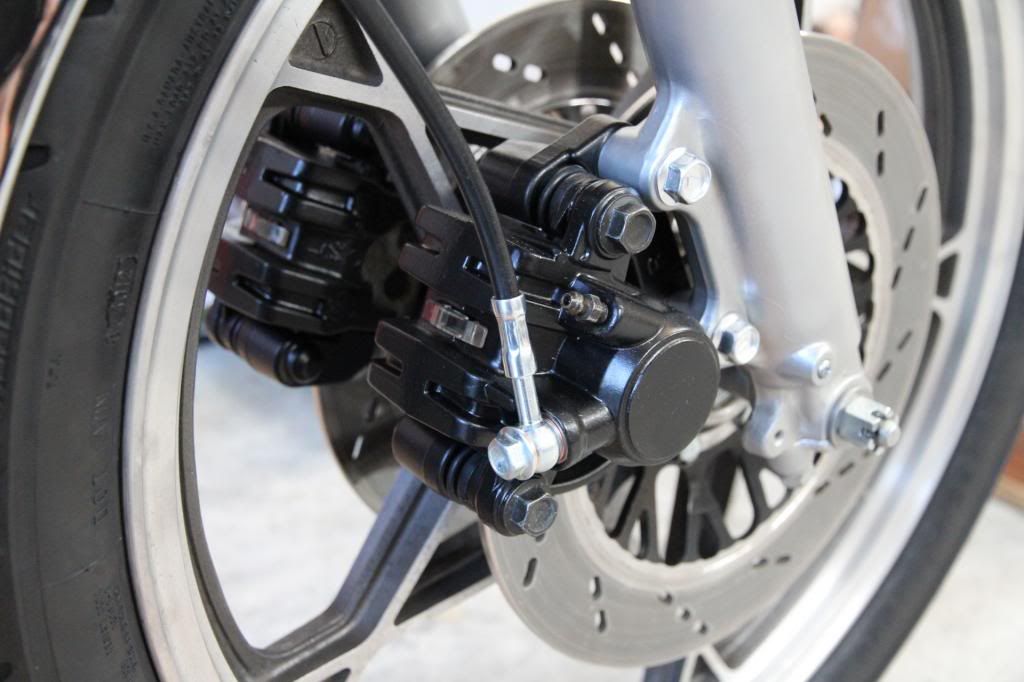
Picture of the lines installed
 Last edited by Kiwi Canuck; 07-09-2013, 11:27 PM.
Leave a comment:
-
Front Brakes completed
Finally got a few minutes in the garage this morning before work and got the Rennsport Stainless Steel Brake Lines installed and tightened down.
My review of the product will follow this post.
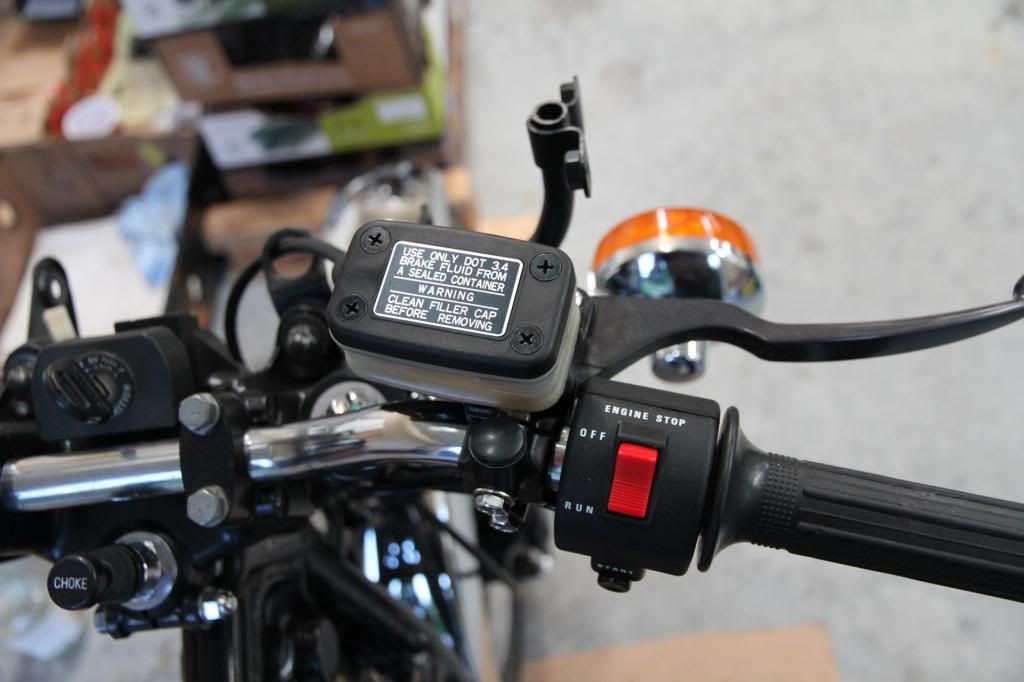
Tonight I filled the master cylinder and "burped" the system, I read a few other posts and decided to try the brake lever bumping method.
I removed the tank and taped up the new starter switch assembly in case I got excited and spilt some fluid, then filled up the master cylinder, gave the lever a few careful slow pumps and got a few bubbles out, then I started tapping the lever just a bit and then started getting good sized bubbles.
Every now and then I tested the lever for pressure.
It took about 5-6 minutes before I started to feel pressure on the lever and another 3 minutes and it was really nice and firm.
I fitted a tube to the bleed nipple and gave each a pump, undid the nipple and tightened it before I released it, Clear with no bubbles.
I had to top up once during the burping process and again to bring the level up a the end.
Awesome, nice when a plan works.
Leave a comment:
-
Front Master Cylinder Rebuild
I finally got the plunger out, I brought the master cylinder to my shop and used the drill press to drill a hole in the plunger. (still don't have a drill press at home)
While jamming a screw driver into it so it wouldn't rotate or depress while drilling, really needed 2 people but managed by myself.
Once I'd drilled a deep enough hole used a #8 self tapper and drove that into it and then used a claw hammer to gently pry it out as straight as I could, it took 2 or 3 goes as it did not want to budge at first.
Finally came out and then I used a very small brass bristled brush to clean out the rust and corrosion, along with copious amounts of liquid wrench and my pinky finger wrapped in a paper towel to clean out the liquid wrench and gunk.
Noticed the seal in the rebuild kit that attaches to the spring was a lot smaller diameter than the one that came out, maybe 1-2mm smaller, hopefully the new one will seal properly.
I will find out soon as I have received my stainless steel brake lines from Rennsport and hopefully get them installed this weekend.Leave a comment:


Leave a comment: