 . I had a similar experience with Toyota earlier this summer with my 2010 4 runner. Needless to say I freaked at them and it got rectified but I no longer will let them do any work for me unless it is warranty work.
-
Isn't that comforting, you pay the "professionals" to take care of your car and pay the ridiculous price cause you want it done CORRECTLY and the f you over and don't do what you paid for, seems to be a common trend these days. I had a similar experience with Toyota earlier this summer with my 2010 4 runner. Needless to say I freaked at them and it got rectified but I no longer will let them do any work for me unless it is warranty work.
-
 Guest repliedWant to send an E or S to me in Aus mate ??/
Lovely work by the way. very thorough.Leave a comment:
-
Project stalled still need more parts
So I'm waiting on a shipment of parts from Boulevard, wheel bearings, a few screws and bolts and some other misc. items I can't remember, but I will hopefully have it by early next week and I can get it all bolted back together again.
In the mean time I thought I would do a little maintenance on my car which is a 2008 Mercedes ML320 Turbo Diesel.
I have always taken it into the shop because I didn't have the tools or the know how.
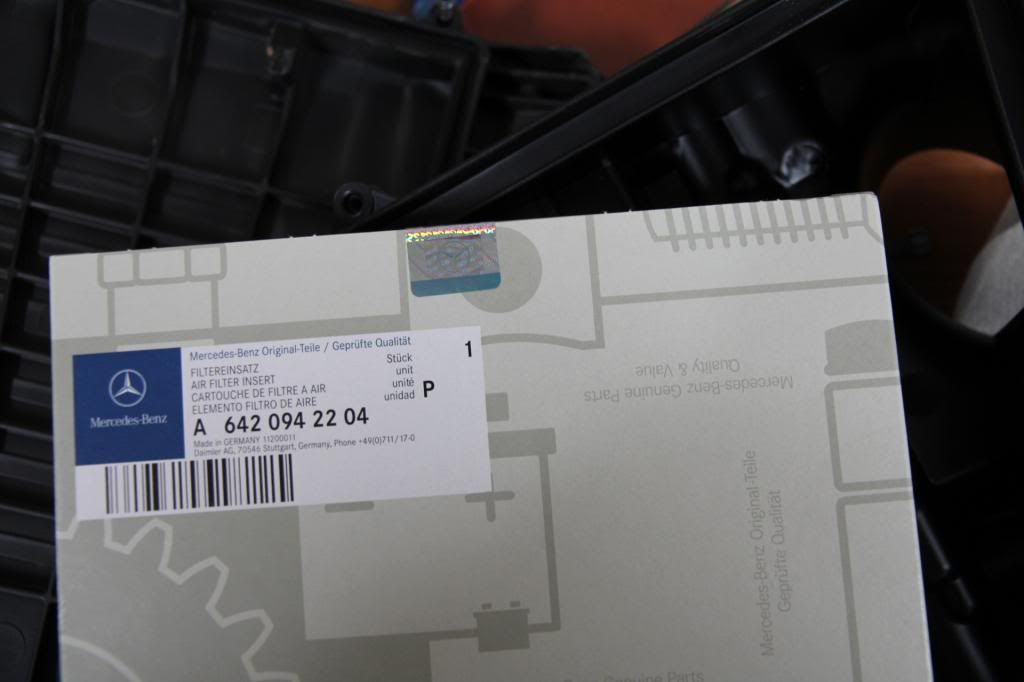
Today I went to the dealer and purchased the parts to replace the air filters (2 of them) and the fuel filter.
I needed to buy torx sockets as that what's used on this car, so off to Canadian Tire to find something, got a set of standard torx sockets as they didn't have their Maximum brand available.
They will do for now, but I will get a better set if I continue to work on this car.
First things first, find a You Tube video on the fuel filter change, watched that and was ready to tackle the job.
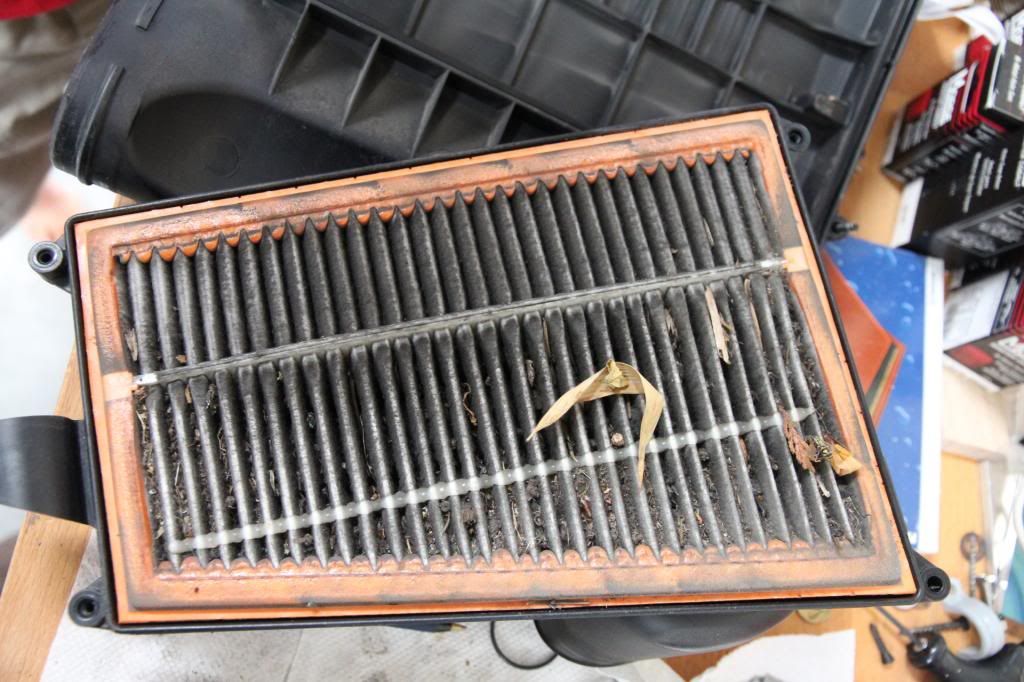
Got the first air filter out and discovered that the service techs who looked after my car had never changed the air filters as it looked pretty bad,.
Nice new original OEM filter.
Got them both replaced and the body work all bolted back together that needed to be removed to get the filter housings out, it took about an hour to get that done. then onto the fuel filter.
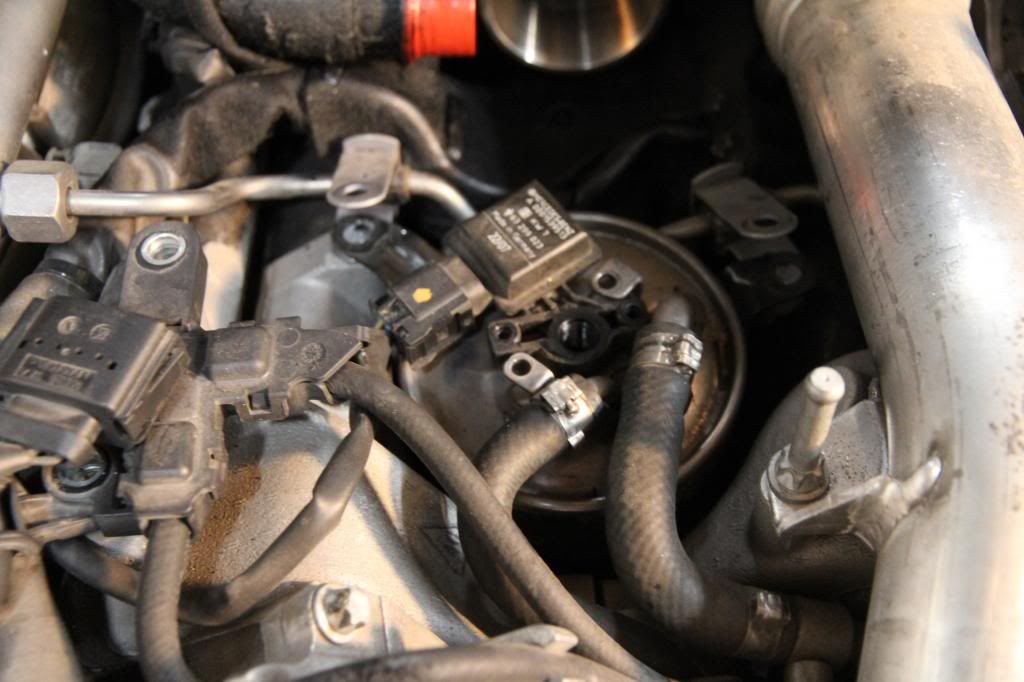
Here it is with special clips holding the hoses on, I did buy spares in case I destroyed the old ones when I took them off.
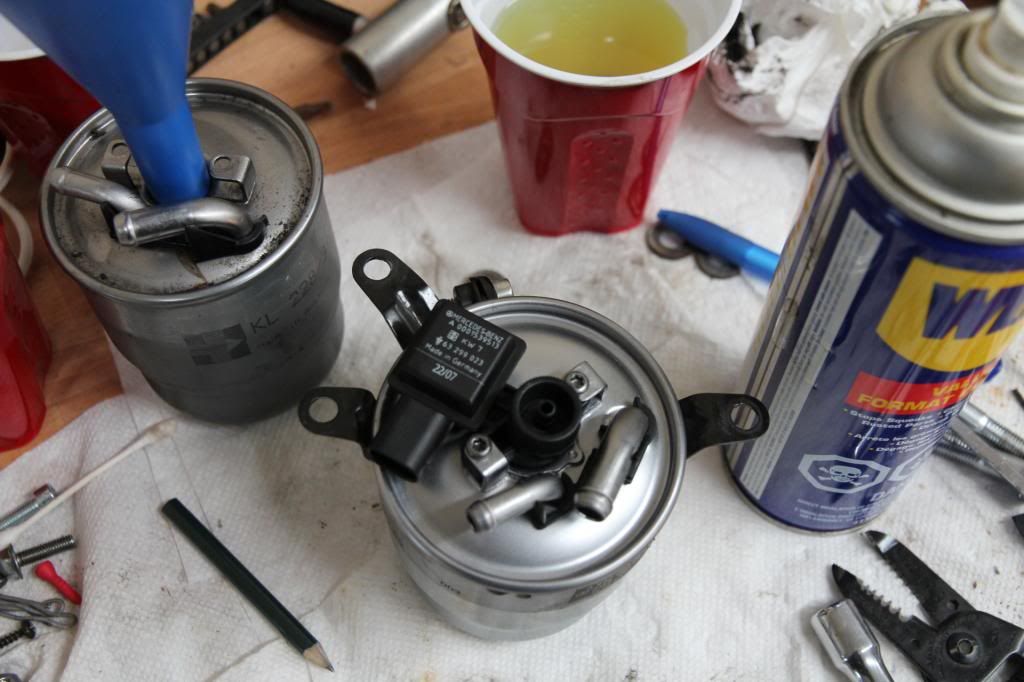
And the new one all setup and filled with diesel ready to go back in.
Got it all bolted back in and she fired right up, took it for a test drive and it's all good, about 1 hr 45 mins and saved about $400 in labour (and taxes) to change out those items..
Maybe I will do a little more on this car now that I've got the tools. (and You Tube) Last edited by Kiwi Canuck; 09-27-2013, 08:28 PM.
Leave a comment:
-
Guest repliedBloody , bloody , bloody ................
I thought I was in there for a look , for a second .
I would near trade my left nut for a new console (and a front mudguard and a .......... ).
The only "spares" I've got are the $hit parts I replaced when I was doing the old girl up .
Cheers , Simon .Leave a comment:
-
I think I'm covered.
It's been almost a week since I posted and that's how long it's been since I did anything on the bike, kids birthday parties, social engagements and work have kept me a bit distracted from the project.
Not to mention riding the Boise Beauty, which I do as much as I can, I just love it and now that I've adjusted the handle bars and levers it's a lot more comfortable.
I went into the garage tonight to sort through a few parts to see which pieces I will put on the Canadian Cooley, which ones for the Boise Beauty and what are spares and what are for sale.
I want to get my application in for collector plates and need to get the bike completed for the photos, I considered just installing the stock pipes on the Boise Bike and using that but I will complete the assembly on the Canadian Cooley just for the photos and then finish the wiring details that I'm still working on afterwards.
I didn't realize I had accumulated so much stuff for the "S"'s, take a look at these.
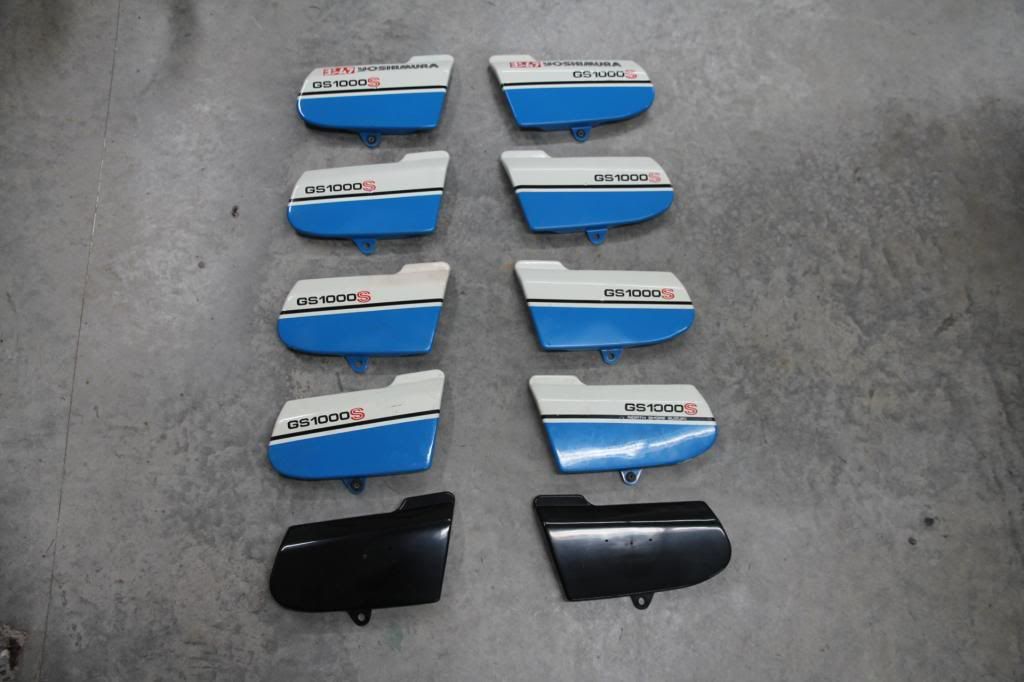
Also got 2 spare fairings and a couple of nice consoles, (OK Simon just kidding about the consoles) would like to have a spare one though, I do have the fairings but they will need some work to be keepers.
A few spare mirrors, a gaggle of turn signals and two spare tail pieces, and plenty of left over parts in their Suzuki labeled baggies, but I've no idea what they are so I'll need to go one by one and look up the part numbers and see why I ordered them. Mostly screws, washers and spacers and misc. small parts.
Well back to it.
Cheers.Last edited by Kiwi Canuck; 09-16-2013, 10:19 PM.Leave a comment:
-
-
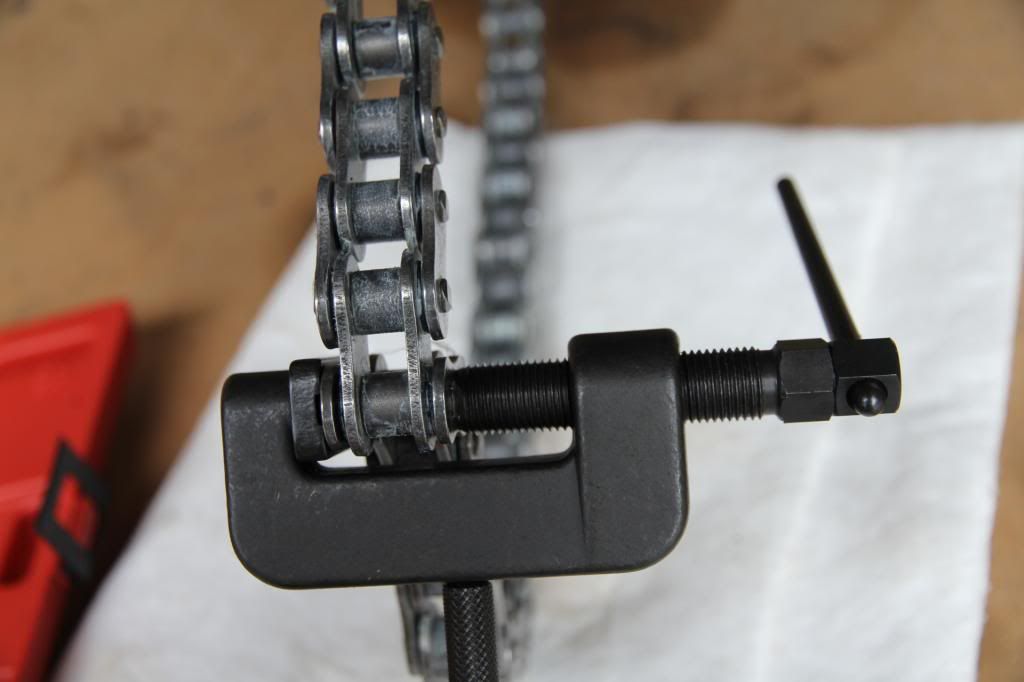
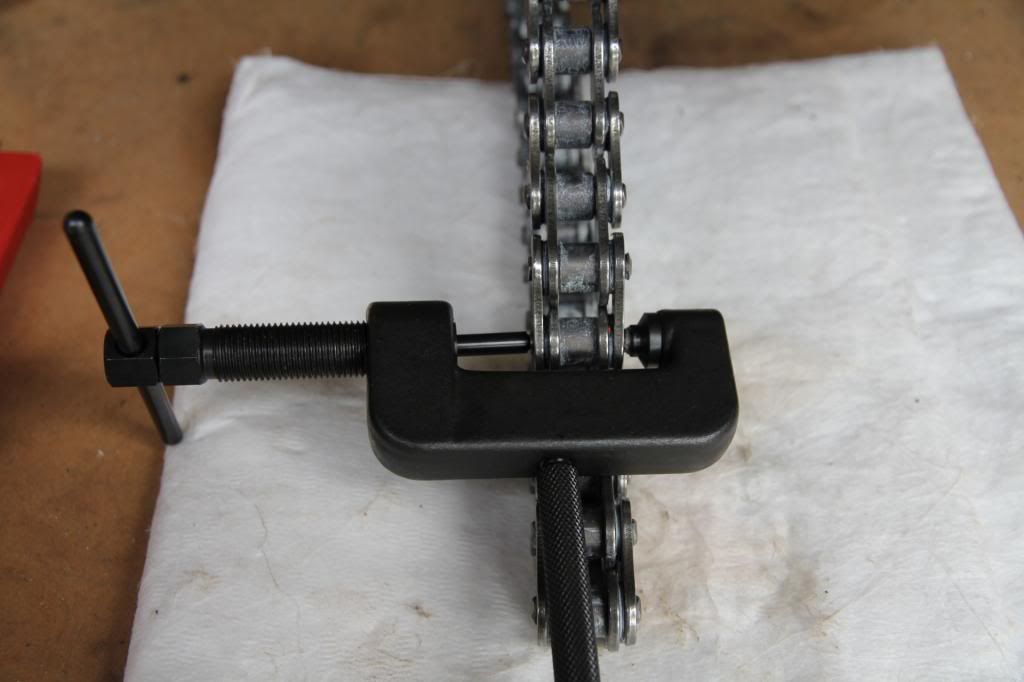
Simon, I have nothing against master links and have had bikes with them for years, but when I ordered the new chain from Z1, I chose the one that needed riveting not realising that it would be this much trouble.
One of the guys in our local club who had a master link clip come off on his Kawasaki Z1 on a ride a few months back was lucky to stop before the chain let go, the clip had come off, which is rare but apparently does happen.
I used a sledge hammer as a back stop on the other side of the chain and peaned over the rivets by hand, it worked perfectly.
At least I can use the chain tool to change a cam chain or remove a drive chain if needed in the future.Leave a comment:
-
Guest repliedNot real big on split links ?????
I've always used them and have had no trouble .
Cheers , Simon .Leave a comment:
-
If all else fails use a hammer (or two)
Looks like I will use that method as the rivet tool doesn't seem to have enough forced to flare out the rivet enough to make me feel comfortable.
Funny, I initially tried that way with 2 hammers, but I had not got the plates pressed together enough.
The chain tool was very good for pressing on the side plate without it going on too far and becoming too tight, as I used the anvil designed for that.
Certainly still worth having the tool and the quality is quite good.
Here's the picture.
Leave a comment:
-
-
Tank Sealed
Finally got around to installing the Caswell's tank liner today.
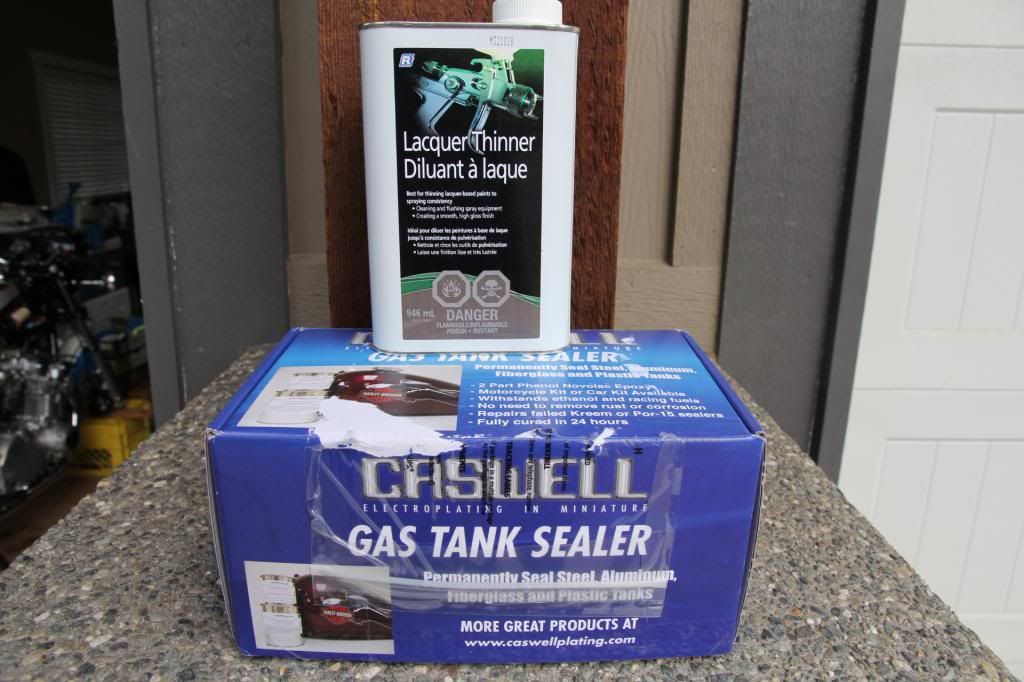
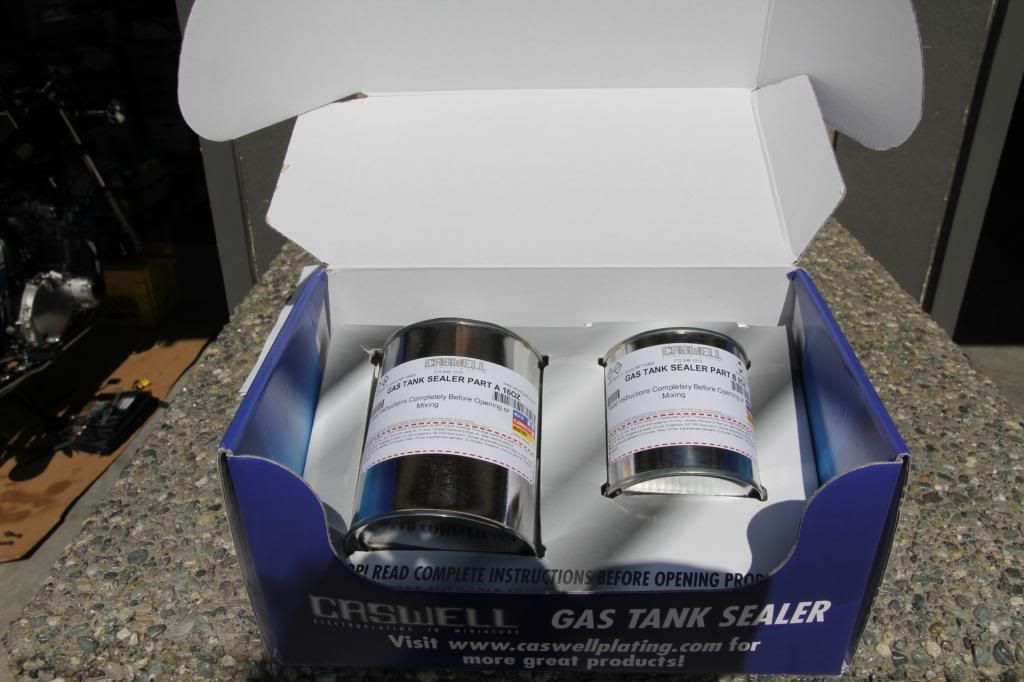
I used a bit of lacquer thinners to prep the tank and then used a small amount to thin the sealer out. (instructions recommend no more than 5% of volume) I mixed the contents of both cans into a yoghurt container and mixed in the thinners and mixed it for about 5 minutes with a wooden paint stir stick to make sure it was fully blended together.
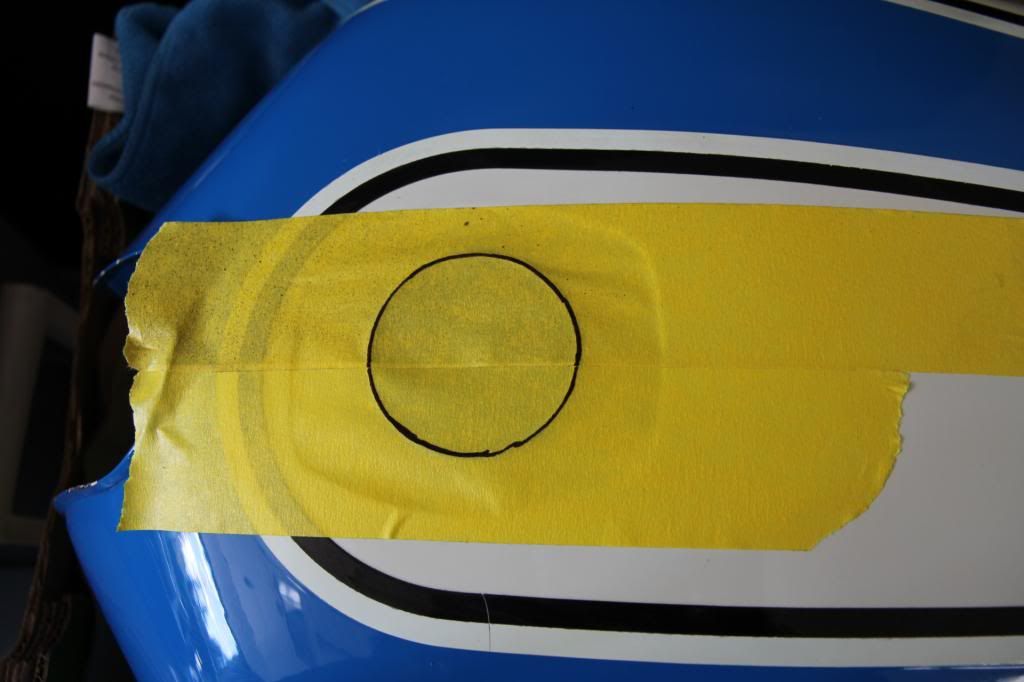
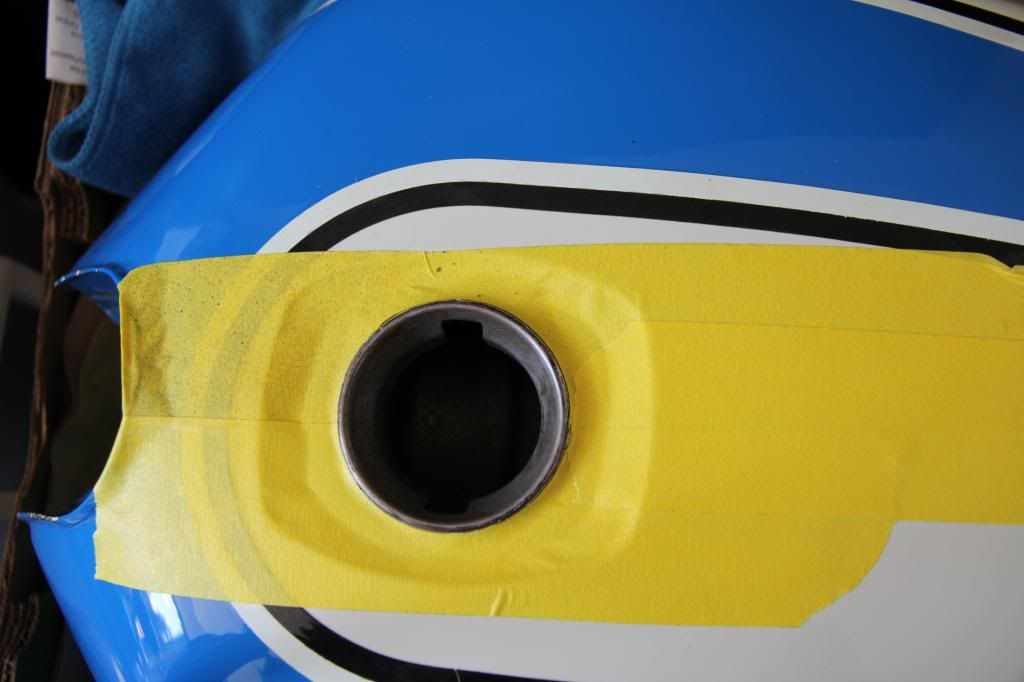
I masked the tank off so I could protect the paint.
I tape over the holes I want to mask around and then mark them with a sharpie.
I then peel off the tape and cut out the shape with scissors and then reapply the tape. Works really well and makes for a tidy job.
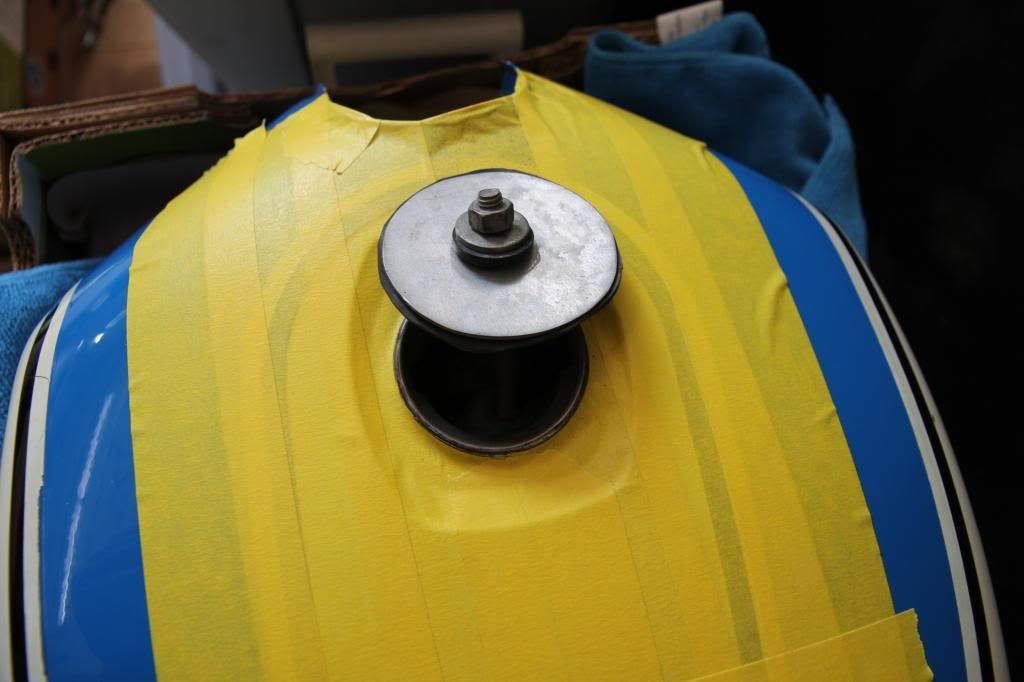
I poured the sealer into the tank and sloshed it around for a good 5 minutes or so, I lifted the cap to check it had covered the frame hump and it had, so I opened the plugged fuel cock and drained out the remaining sealant into a container.
I saved a little of the sealant to pour into the fuel tank from the top to finish off the job and leave a nice smooth finish when you look into the tank.
Was fairly simple job and no issues.
It did take more than an hour and a half for it to setup, but I expected it to take longer than normal as I had thinned it a little.
It takes about 2-3 days at room temperature to cure, so I'll find a safe place to store it for a few days.
One more job ticked off the list.Leave a comment:
-
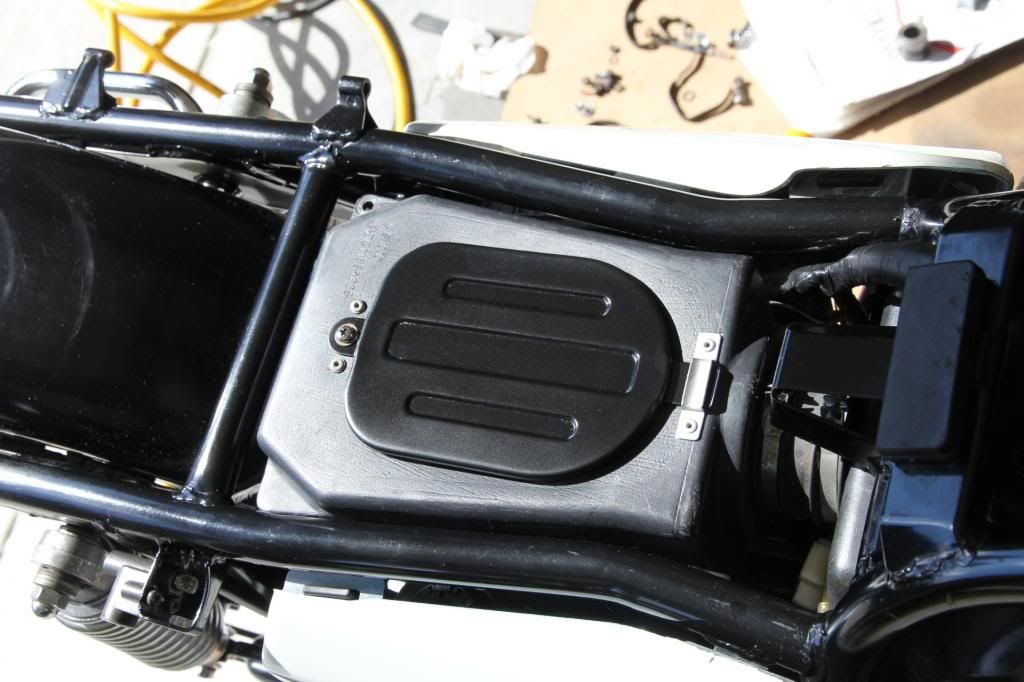
Finished off the air box lid
Got a few coats of primer paint on the air box lid last night and finished it off with VHT Gloss this morning, this one came up way better than the first one I did.
Here is the before picture.
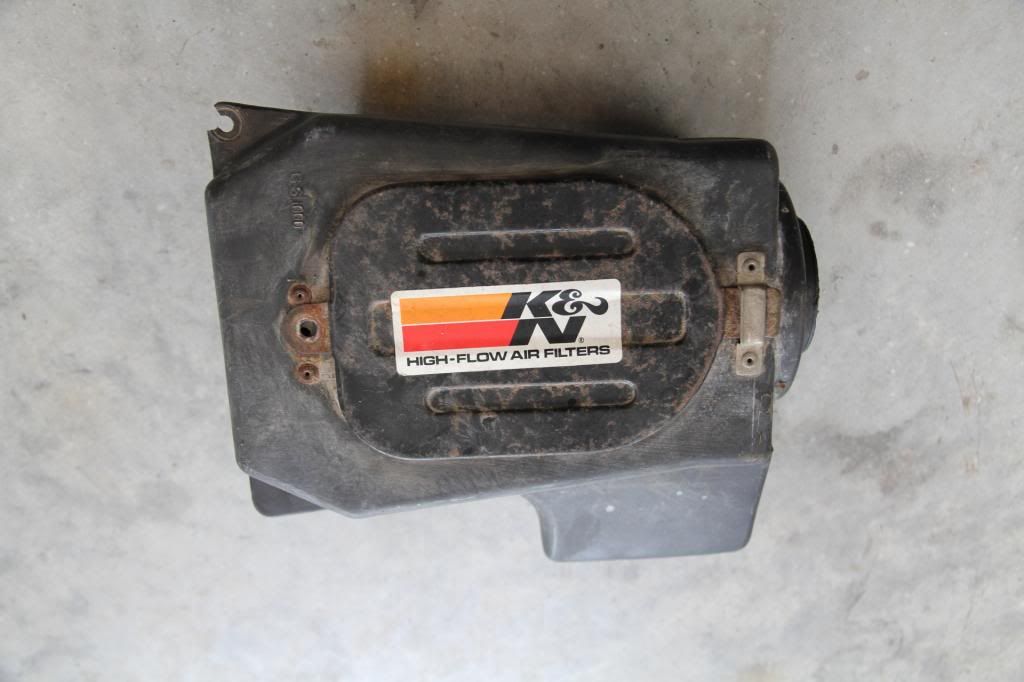
And the after I'm done picture,
Leave a comment:
-
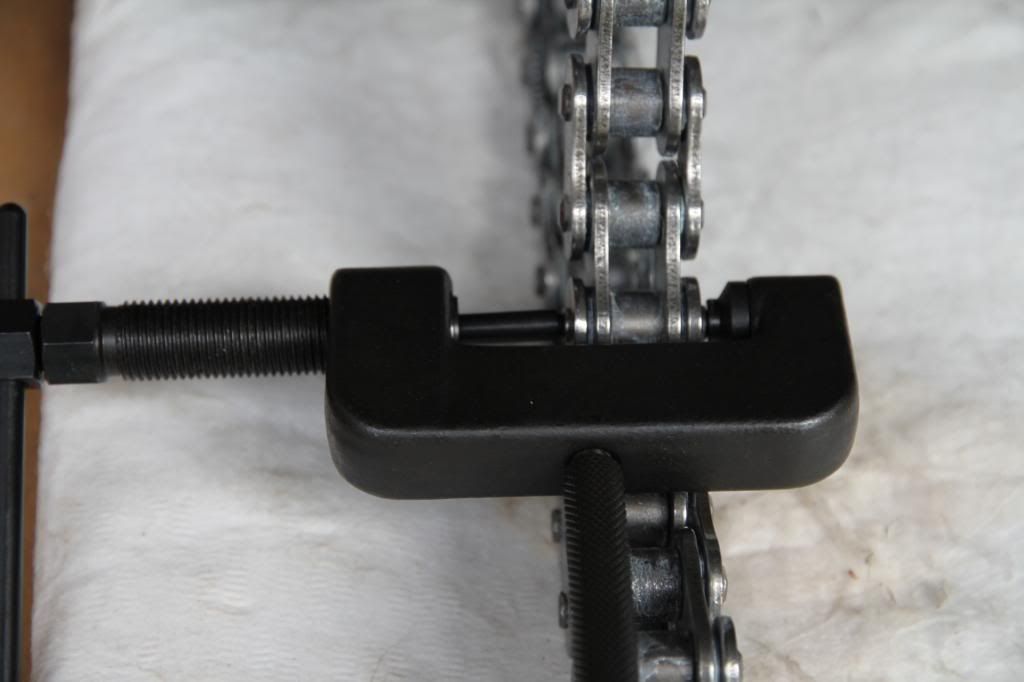
Thanks John, looks like I was doing it correctly, just need to modify the anvil to help it sit on the rivet head straight.
Here's the photos showing the pin just starting to go off center.
Leave a comment:
-
I just re-read the item description from the ebay store for the chain tool and it confirms the tool is suitable for riveting 630 chain and that it does NOT come with instructions.")
Here's the blurb from the ebay posting.
Cam Chain Breaker Riveter -Breaks and Rivets/ Stakes all over head cam chains on all model Japanese and European OHV Cam Chains.
This tool is designed to rivet chain links to form an endless chain and is versatile enough to be used on cam chain to drive chains or as a chain breaker by pushing the pin out.
Each kit includes 3 pin sizes to fit a variety of chains.
This tool will break and rivet 420-630 rear drive chains.
It comes with 2mm, 3mm, 4mm, replacement tips for different size Cam Chains.
Will break chains from #35 to #630
For chain #520 and up, it is recommend to grind the rivet head
Recommended for light to medium duty use.
This is an essentail tool, no motorcyle mechanic should do without it.
NO instruction manual.
No installation instructionLeave a comment:


Leave a comment: