Announcement
Collapse
No announcement yet.
Progress!!! 1978 GS1000E Restoration/Performance Rebuild
Collapse
X
-
 80GS850GBob
This build is absolutely sweet....don't know if you've lived in town long enough to remember, but the Saturday night Lake street cruise meets have started again in front of Ace Hardware down from the big S sign...they start to gather around 8-9pm and stay till 11ish. Maybe you could swing down some time when she's done soon - I'd love to see that bike in person!
Comment
-
Well, in response to your question, I got my butt in gear and made some decent progress today :-) !!!Originally posted by rapidray View PostWhat's going on now Anthony?????
Ray.
Built a stand to elevate the frame while I'm installing the suspension
 IMG_1602 by Anthony Monteleone, on Flickr
 IMG_1603 by Anthony Monteleone, on Flickr
 IMG_1604 by Anthony Monteleone, on Flickr
I installed the steering stem races last week, and this week's goal was to install the triples and forks
 IMG_1605 by Anthony Monteleone, on Flickr
 IMG_1606 by Anthony Monteleone, on Flickr
 IMG_1607 by Anthony Monteleone, on Flickr
 IMG_1608 by Anthony Monteleone, on Flickr
 IMG_1609 by Anthony Monteleone, on Flickr
(I ended up taking the stand off the rolling dolly - the frame was a bit too high for my liking. The above arrangement is better.)
Next weeks objectives are:
1. Build a non-marring driver to install the shock bushings into the swingarm - I will use this driver to install the bushings into the footpegs, as well.
2. Get the swingarm and rear suspension installedLast edited by philosopheriam; 12-30-2017, 12:04 PM.Cogito ergo sum - "I think, therefore I am"
René Descartes
Comment
-
Hey buddy - didn't mean to ignore your post. I've lived in Aurora since 2008, and I first moved to Naperville in 2004. Right now, I'm near New York and Eola - the west side of the Fox Valley mall. It sound's crazy, but I don;t really venture into downtown Aurora too much, aside from going to Ballydoyle's from time to time. Trust me, when the bike is done it will be the proud attendee of many a cruise night!Originally posted by 80GS850GBob View PostThis build is absolutely sweet....don't know if you've lived in town long enough to remember, but the Saturday night Lake street cruise meets have started again in front of Ace Hardware down from the big S sign...they start to gather around 8-9pm and stay till 11ish. Maybe you could swing down some time when she's done soon - I'd love to see that bike in person!Cogito ergo sum - "I think, therefore I am"
René Descartes
Comment
-
 80GS850GBob
I'm on mountain near ohio. Nice bar - street parking's a P.I.T.A. though, due to the riverboat, but there's always the parking garage.
I'm currently prepping tail and side panels for paint, along with other needed things, in hopes to have her done by spring.
Eons ago the riverwalk was quite the cycle hang out...not sure they do that any more though.
Comment
-
More progress!!! Felt motivated today
The patented "no marring" bushing driver - the washer that rests against the backside of the swingarm (or footpeg, etc - the piece you don't want to scratch or destroy the paint/powdercoat) is wrapped in several layers of duct tape. The washer that rests on the face of the bushing was ground down so the OD is a hair smaller than the OD of the bushing, and the ID of the washer is just large enough to allow the center sleeve of the bushing to sit inside it. The entire assembly worked like a charm :-)
 IMG_1632 by Anthony Monteleone, on Flickr
 IMG_1631 by Anthony Monteleone, on Flickr
Got the rear swingarm and suspension installed - only ran into a few small problems, i.e. I had to remove some of the powdercoating on the swingarm bearing seal surfaces and the areas in the frame that the seals sit against. Not a big deal, but the extra thickness of the powdercoating was causing some clearance issues. All fixed with a bit of emery cloth and an angle die grinder with a 3m facing disc.
 IMG_1629 by Anthony Monteleone, on Flickr
 IMG_1633 by Anthony Monteleone, on Flickr
 IMG_1630 by Anthony Monteleone, on Flickr
Also got the front wheel, front wheel bearings, and rotors/calipers installed - noting is super tight, as this is a test fit for clearances, etc. However, everything seems to line up fantastic. Salty's brake upgrade seems to work like a charm. I purchased the rotors (forgot which ones) that had the correct bolt pattern yet the holes simply needed to be enlarged to 8mm. I did this on my drill press and it came out great.
 IMG_1628 by Anthony Monteleone, on Flickr
 IMG_1635 by Anthony Monteleone, on Flickr
Last edited by philosopheriam; 12-30-2017, 12:08 PM.Cogito ergo sum - "I think, therefore I am"
René Descartes
Comment
-
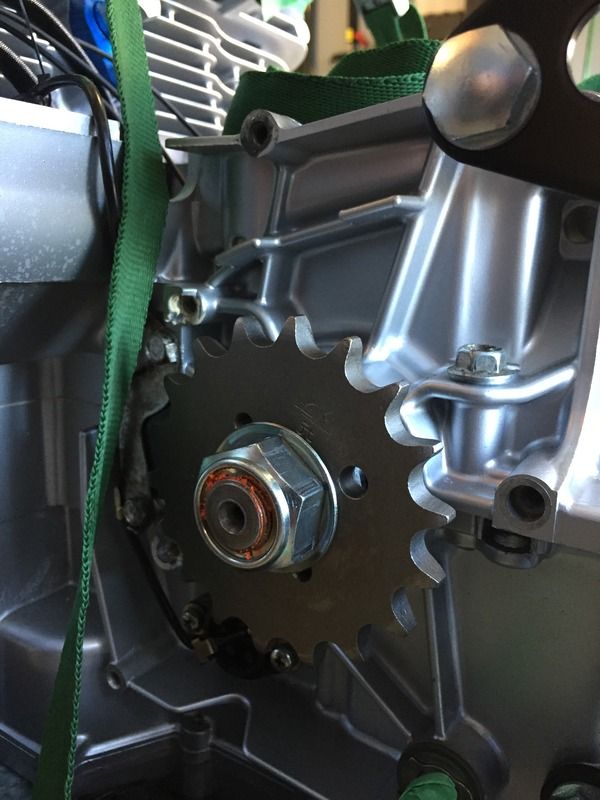
Also installed the front sprocket - a JT sprocket for a 530 conversion
 IMG_1634 by Anthony Monteleone, on Flickr
And the final product!
 IMG_1626 by Anthony Monteleone, on Flickr
Last edited by philosopheriam; 12-30-2017, 12:09 PM.Cogito ergo sum - "I think, therefore I am"
René Descartes
Comment
-
Sure looking sweet!
1983 GS750ED-Horsetraded for the Ironhead
1981 HD XLH
Drew's 850 L Restoration
Drew's 83 750E Project
Comment
-
To my knowledge, when doing a 530 conversion, the spacer goes behind the sprocket to move it outward. The 530 sprocket is nearly 1/4" thinner at the center than the original 630 sprocket. Before I install the chain, I will check for alignment nonetheless...Cogito ergo sum - "I think, therefore I am"
René Descartes
Comment
-
 SVSooke
Comment
.png)


Comment