Announcement

Collapse
No announcement yet.
Progress!!! 1978 GS1000E Restoration/Performance Rebuild

Collapse
X
 
  • Filter
  • Time
  • Show
Clear All
new posts

    TEASER: Something new in the works for Francine due to tendinitis in my clutch arm and COVID-19 boredom.

    Hint: Clutch modification

    Parts on order, stay tuned...
    Cogito ergo sum - "I think, therefore I am"
    René Descartes

    Comment


      An automatic? Cool!
      2@ \'78 GS1000

      Comment


        Originally posted by steve murdoch View Post
        An automatic? Cool!
        Not exactly.... Will post pictures and instructions ASAP...
        Cogito ergo sum - "I think, therefore I am"
        René Descartes

        Comment


          Originally posted by philosopheriam View Post
          TEASER: Something new in the works for Francine due to tendinitis in my clutch arm and COVID-19 boredom.

          Hint: Clutch modification

          Parts on order, stay tuned...
          Hydraulic?
          1982 GS1100E V&H "SS" exhaust, APE pods, 1150 oil cooler, 140 speedo, 99.3 rear wheel HP, black engine, '83 red

          2016 XL883L sigpic Two-tone blue and white. Almost 42 hp! Status: destroyed, now owned by the insurance company. The hole in my memory starts an hour before the accident and ends 24 hours after.

          Comment


            Originally posted by Rob S. View Post
            Hydraulic?
            Ding, we have a winner! Working on using mostly off-the-shelf parts with a bit of home engineering. Will post a complete write up with part #'s and photos so anyone on the site can duplicate it.
            Cogito ergo sum - "I think, therefore I am"
            René Descartes

            Comment


              Update: was going to post the entire process this weekend, but ran into some complications - nothing that can't be overcome with some additional parts, ingenuity, and garage engineering. Parts will be arriving 4/28 and 4/29, assembly will be happening on Sat 5/2.
              Cogito ergo sum - "I think, therefore I am"
              René Descartes

              Comment


                The 2000 year model GSX1100S Final edition came with a clutch assist.
                Here is one for sale on Yahoo as an example.
                ヤフオク!は、誰でも簡単に売り買いが楽しめる、日本最大のネットオークションサイトです。圧倒的な商品数を誇るヤフオク!で、落札・出品してみませんか?補償制度もあります。

                Cheers Andrew.

                Comment


                  As promised, here is a detailed write-up on Francine's conversion from a cable-actuated clutch to a Magura Hymec hydraulic system.

                  Preface - why am I doing this?
                  A. I have tendinitis in my left arm that weakens the grip in my left hand. Although my arm is improving, extended rides combined with the stiffer springs in my clutch setup make repetitive clutch pulls tiring.
                  B. COVID-19 boredom, plain and simple. When I get bored, I want to build/create stuff.

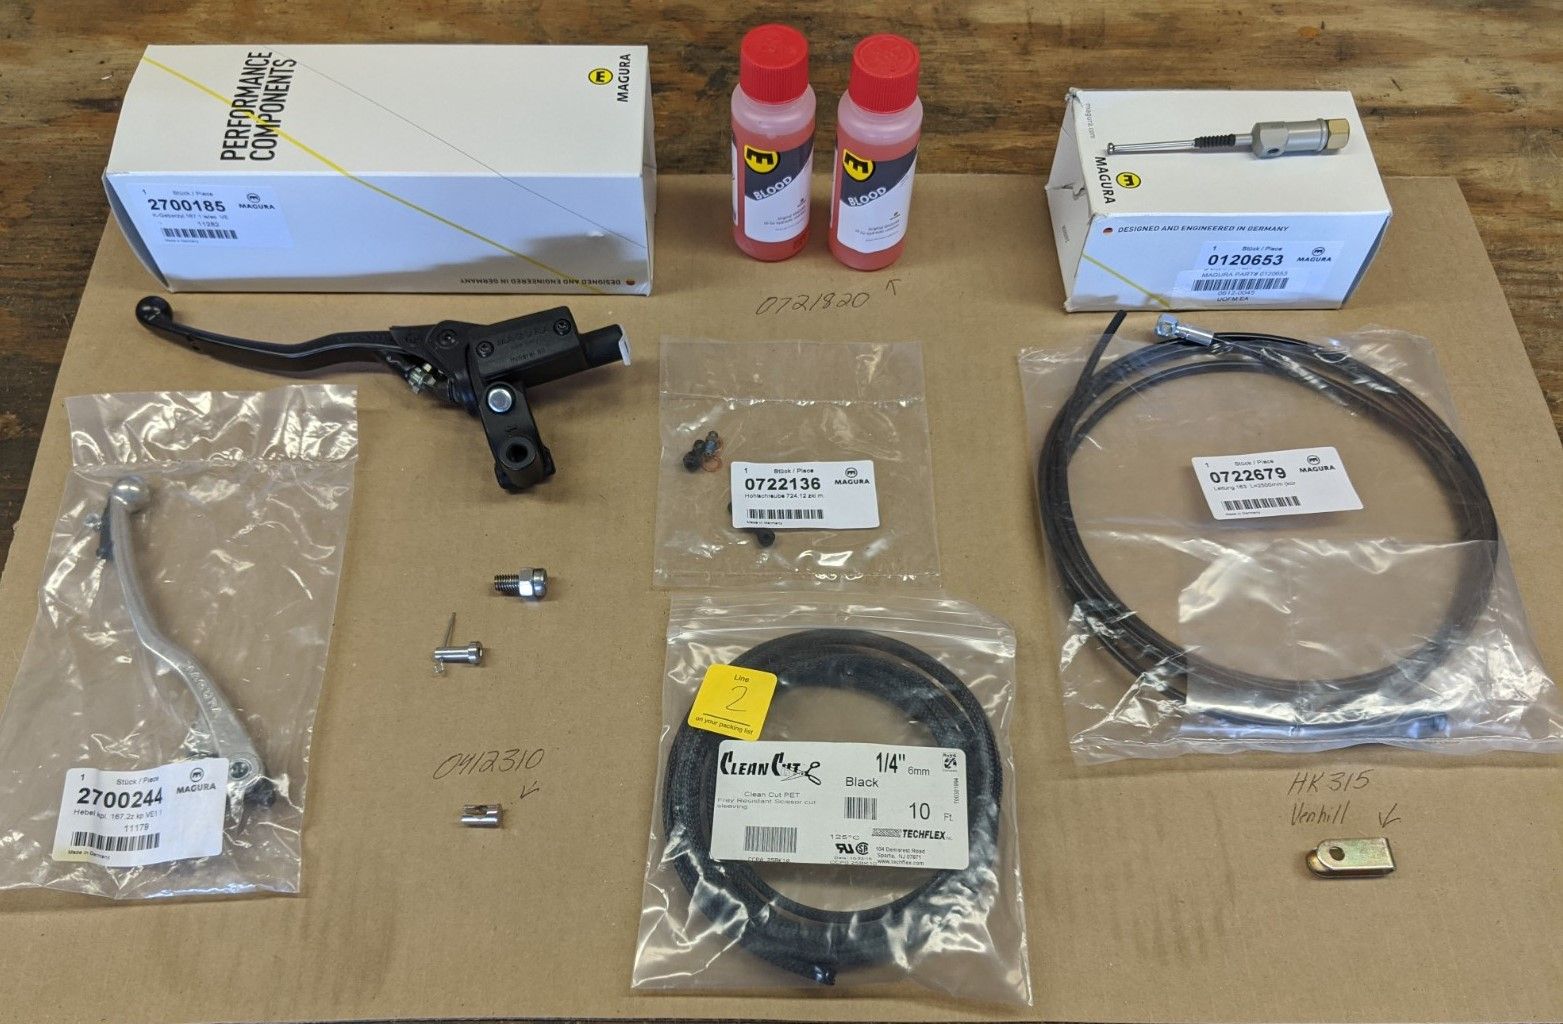
                  The initial parts:


                  Most everything was purchased from Magura USA (http://www.magurausa-shop.com/) with the exception of the clevis, which is from Venhill USA https://www.venhillusa.com/. Things like drill bits and bolts were purchased from Mcmaster-Carr (https://www.mcmaster.com/).

                  Magura makes street (163mm handle) hydraulic clutch perches in three different piston size varieties - 9.5mm, 10.5mm, and 12.5mm. The smaller the piston, the more line pressure, and thus a lighter the clutch pull. HOWEVER, as the piston size decreases, so does the amount of fluid that is displaced when the handle is squeezed which results in a shorter distance pulled by the slave cylinder. I went with the middle option, 10.5mm, because Magura uses it in most of their kits for 1000cc bikes, and I thought it would be the best compromise between felt clutch pull and proper amount of slave travel. You can also buy hydraulic clutch perches that are designed for brake fluid, however, the one I chose uses mineral oil only (Magura Blood).

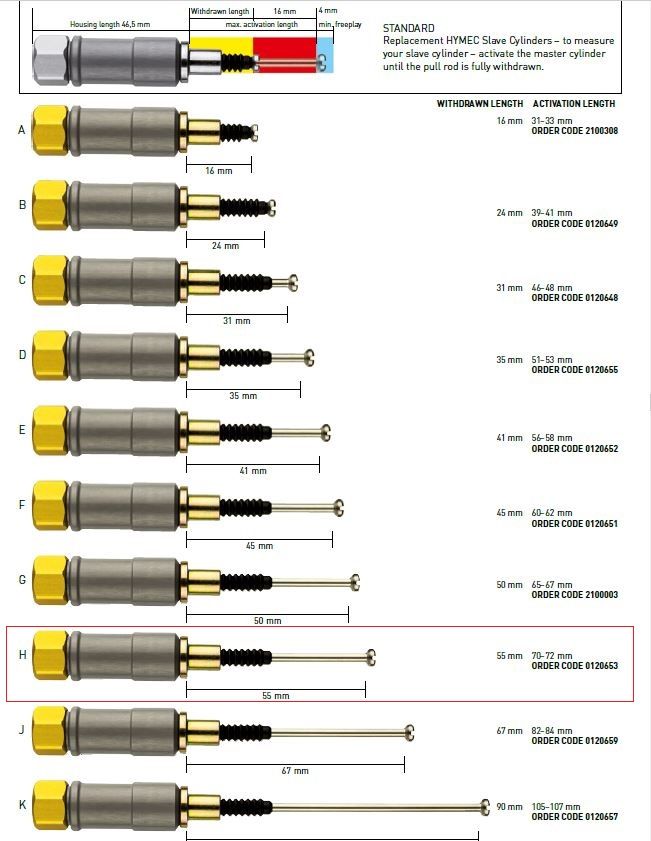
                  Step 1 - Picking a Slave Cylinder: I had an idea in my head of what the mounting adapter would look like (drilled bolt with a jam nut) and the overall height of said adapter. From this point, I measured the distance to the the clutch arm, subtracted the approximate length of the clevis, and arrived at the slave circled in red. Keep in mind, I wasn't 100% certain this was the correct slave - I may have been able to use a shorter one, but I figured that I could always take up excessive play with shims, whereas too short of a slave would be useless.


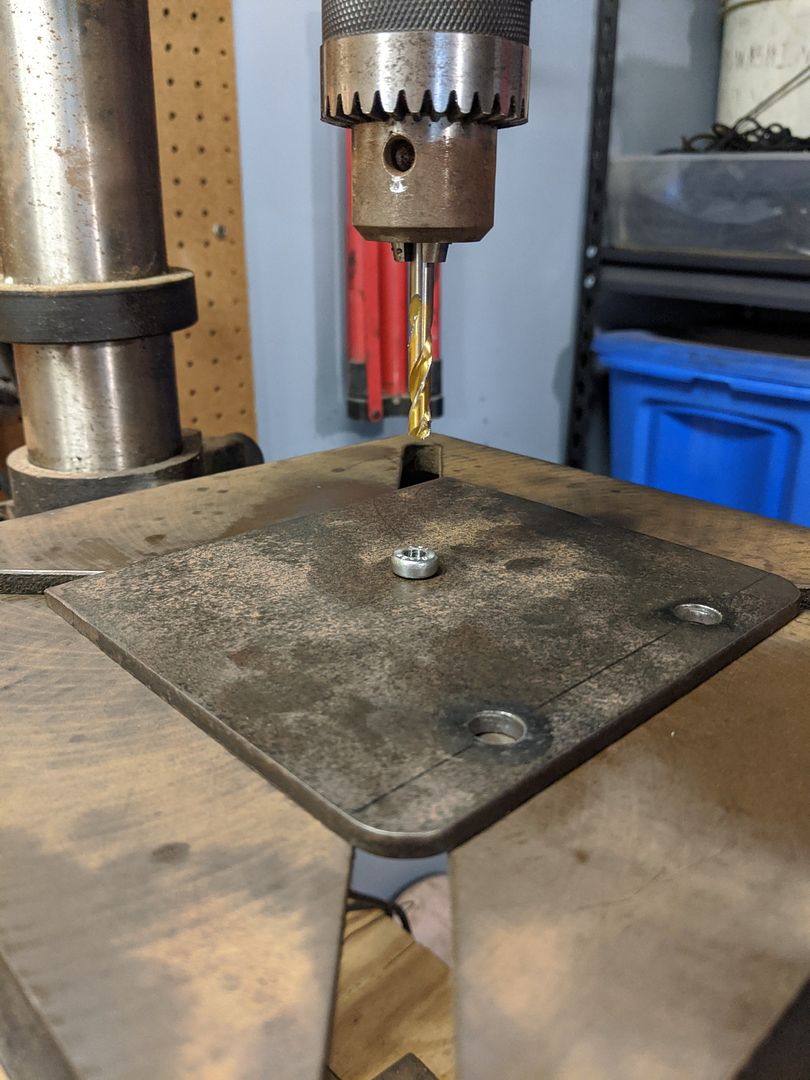
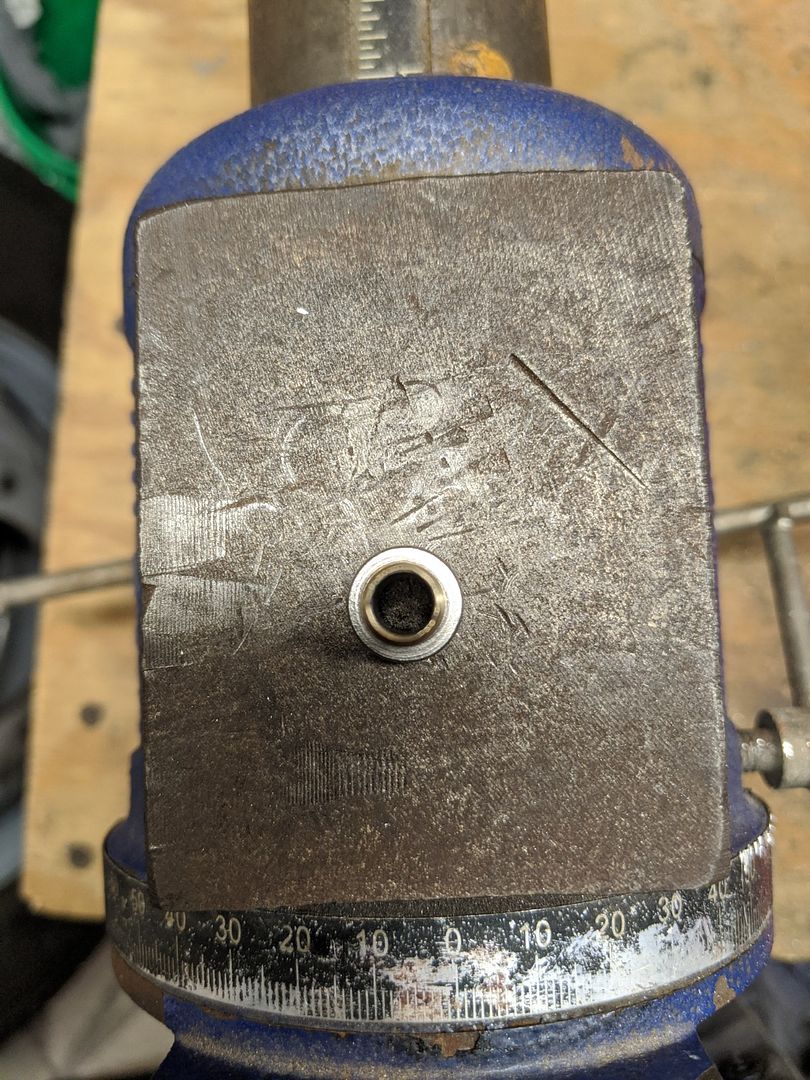
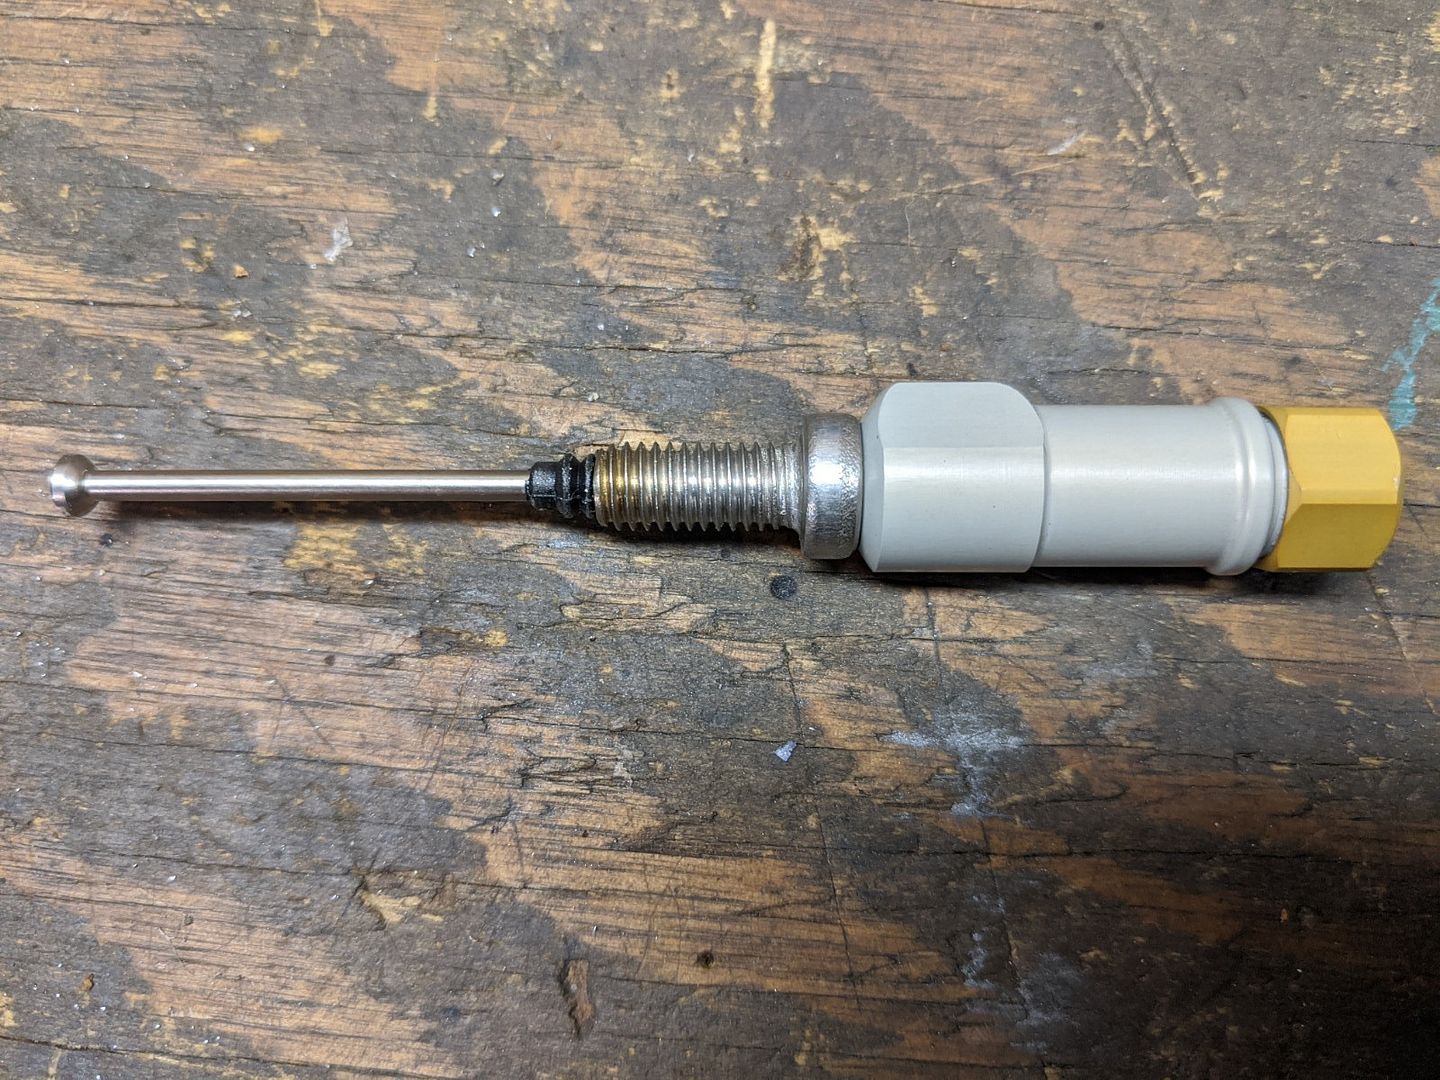
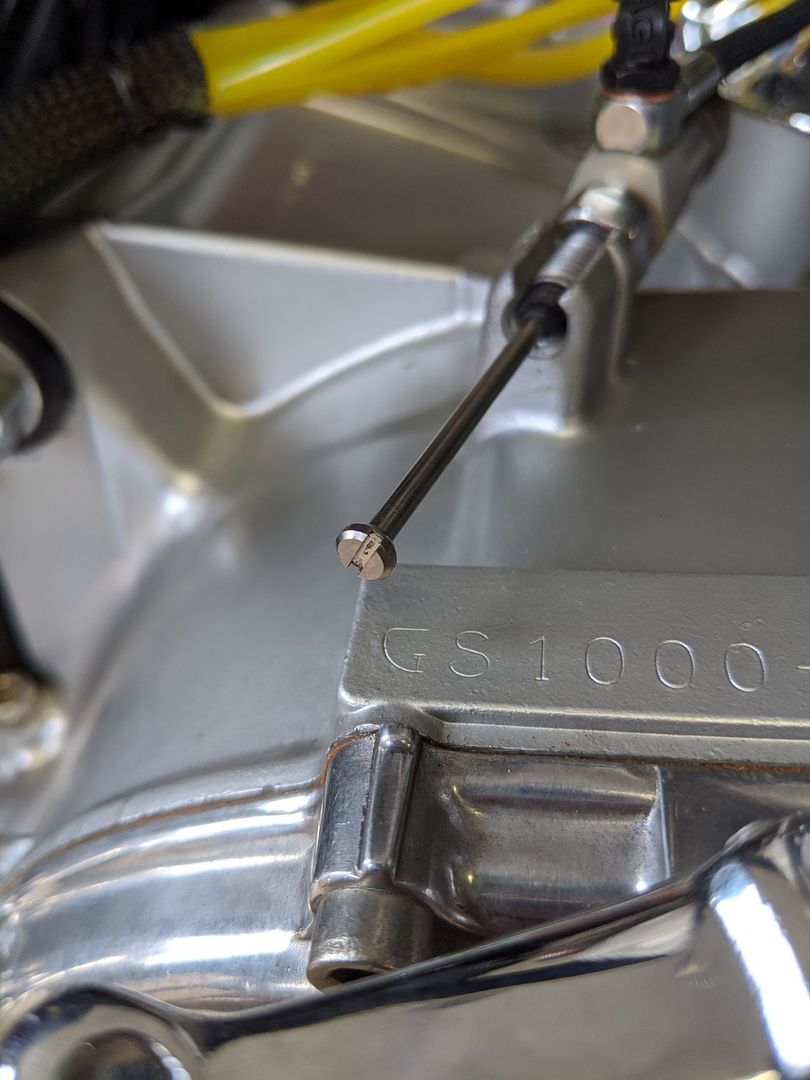
                  Step 2 - Making the Mounting Adapter. The standoff on the engine case is female M8, 1.25 pitch. The nose of the slave cylinder has a top-hat sleeve that is removable (slides off), exposing the nose of the slave which has a diameter of approximately 5.56mm (.219"). Using x2 different wire drills, first a 2ga @ .221", and then a 1ga @ .228, I drilled a low-profile stainless socket-head cap screw directly on center in my drill press. Without going into detail on this process, it was difficult and not for the faint of heart - if you don't have a decent drill press at home, this is a job a machine shop can do easily with minimal labor. Now, you may be asking why I used a socket head cap screw - the hex portion of the screw is a hair over 5mm, and I found that the 2ga wire drill centers itself fairly well inside this hex when starting the drilling process. Then, the hole can be enlarged with the 1ga drill - it is necessary to have a hole slightly larger than the .219" diameter of the slave nose. Why - because there is a rubber dust sleeve slips onto a groove at the end of the slave nose, and right at this groove the rubber sleeve "puckers" a bit, and it will not fit into a hole that is the same diameter as the slave nose. I found that .228" is the smallest hole that the rubber sleeve will slide into easily.


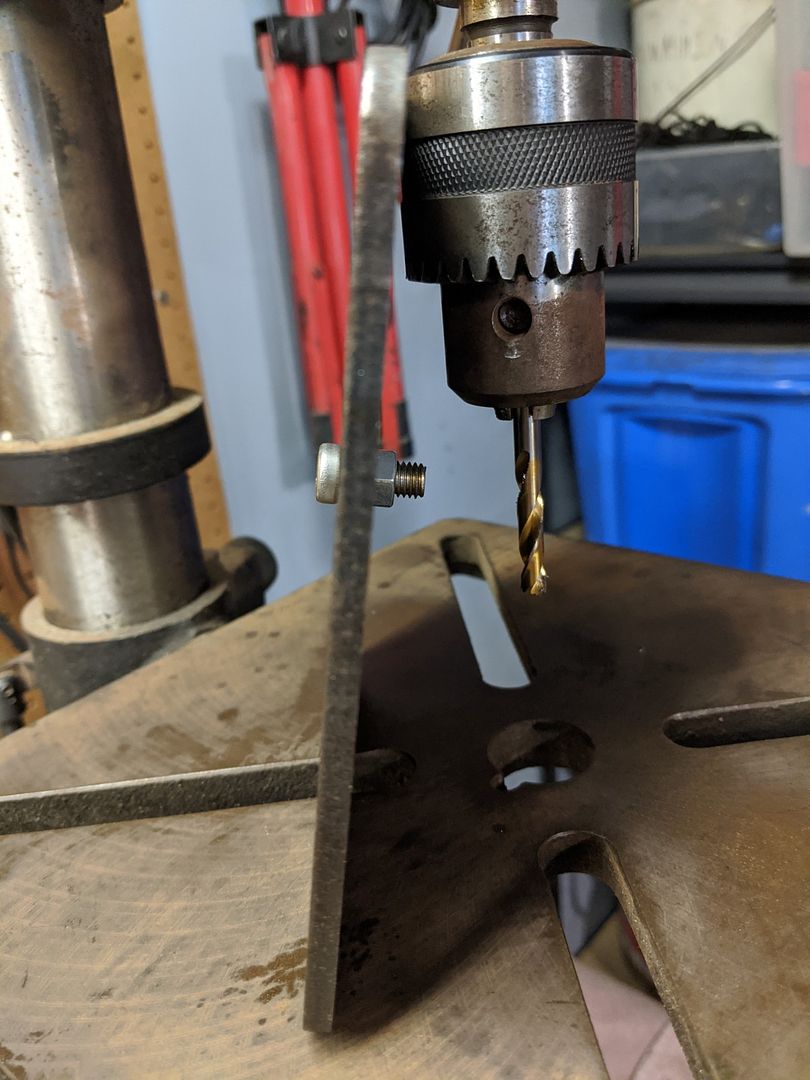
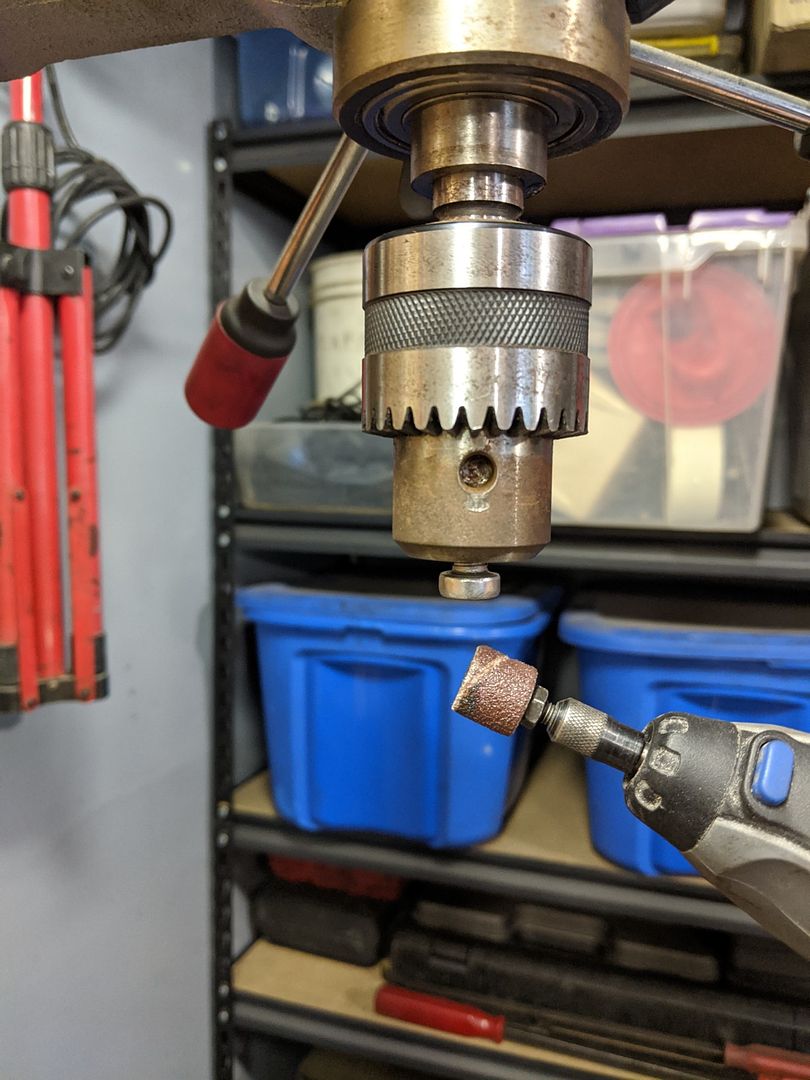
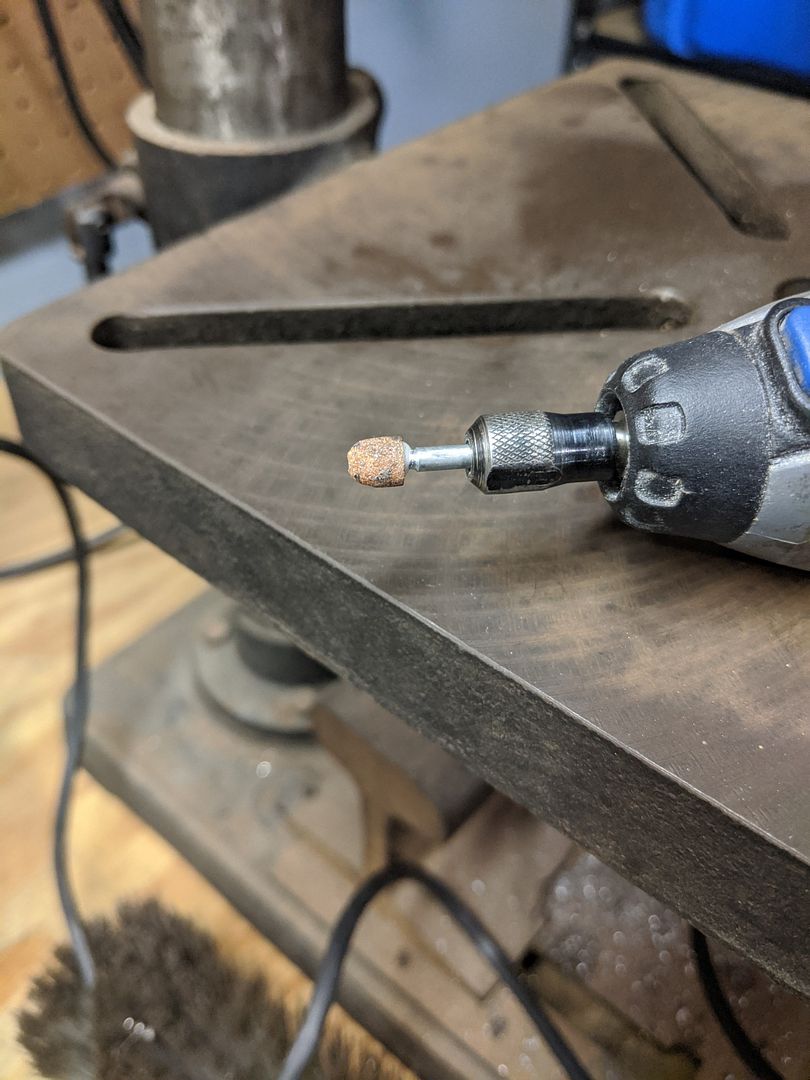
                  To re-create the taper of the original top-hat, I put the drilled bolt in my drill press and used a couple different attachments on my Dremel to grind the head of the bolt while it was rotating:


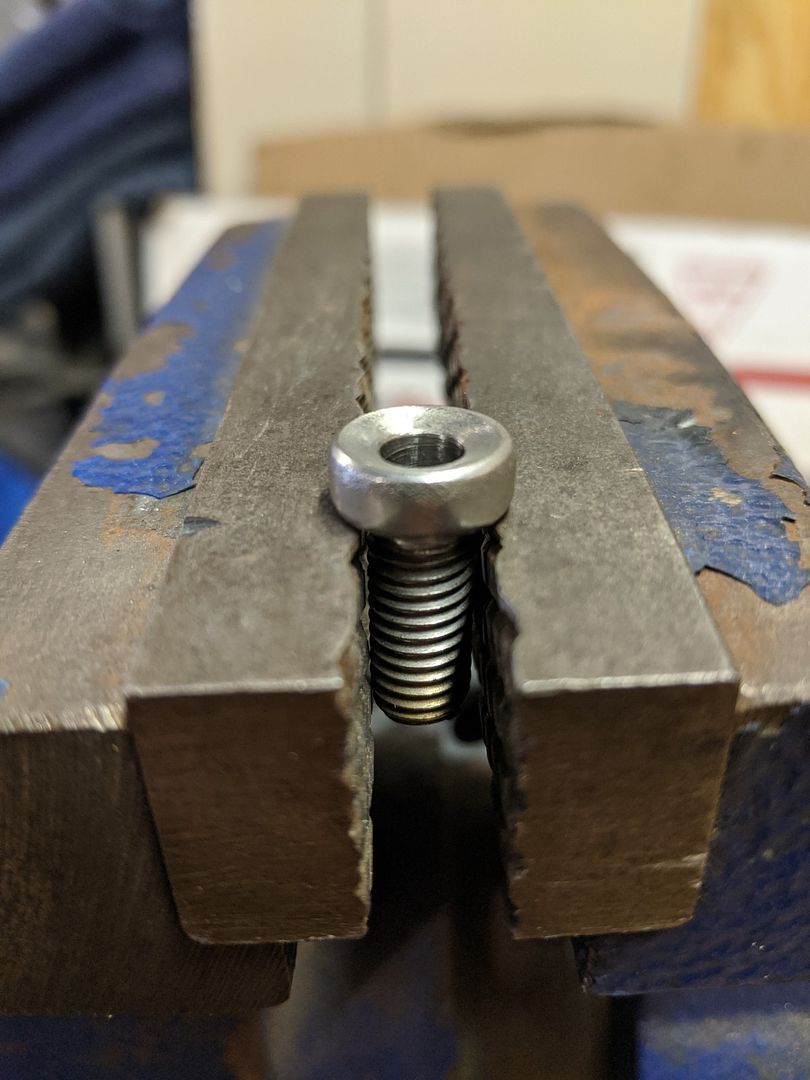
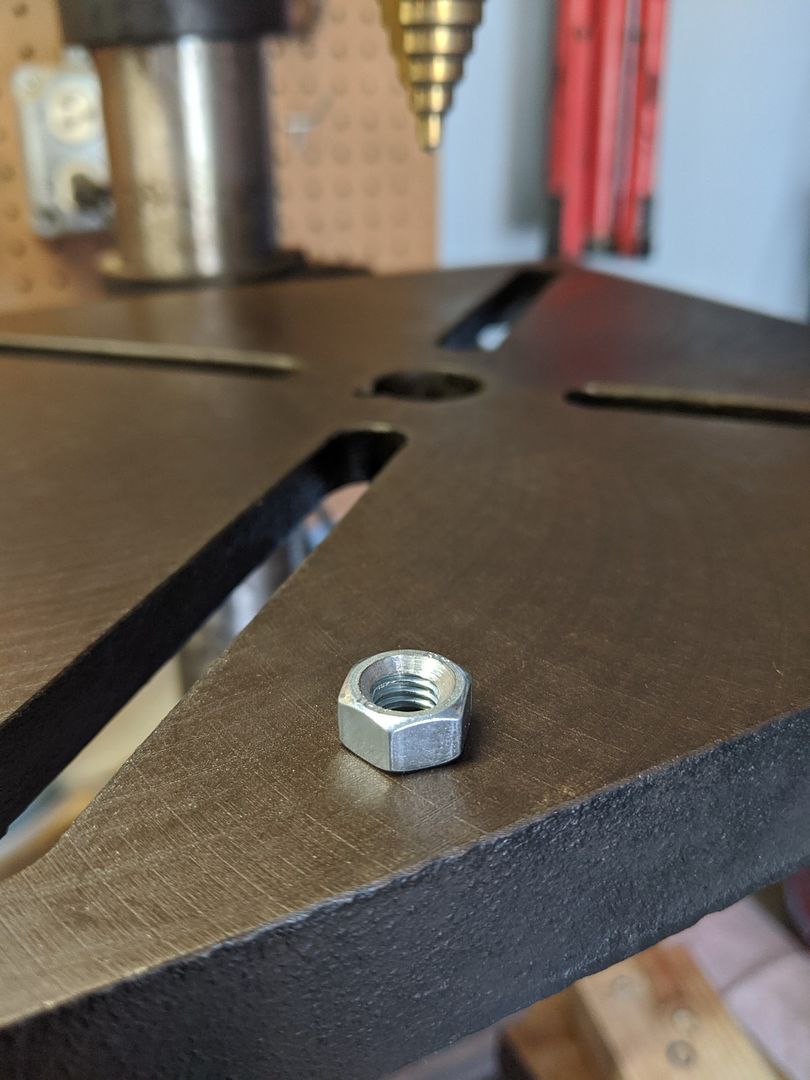
                  Drilled a chamfer into a nut to allow the jam nut to sit flush against the head of the adapter bolt:
                  Last edited by philosopheriam; 05-03-2020, 06:19 PM.
                  Cogito ergo sum - "I think, therefore I am"
                  René Descartes

                  Comment


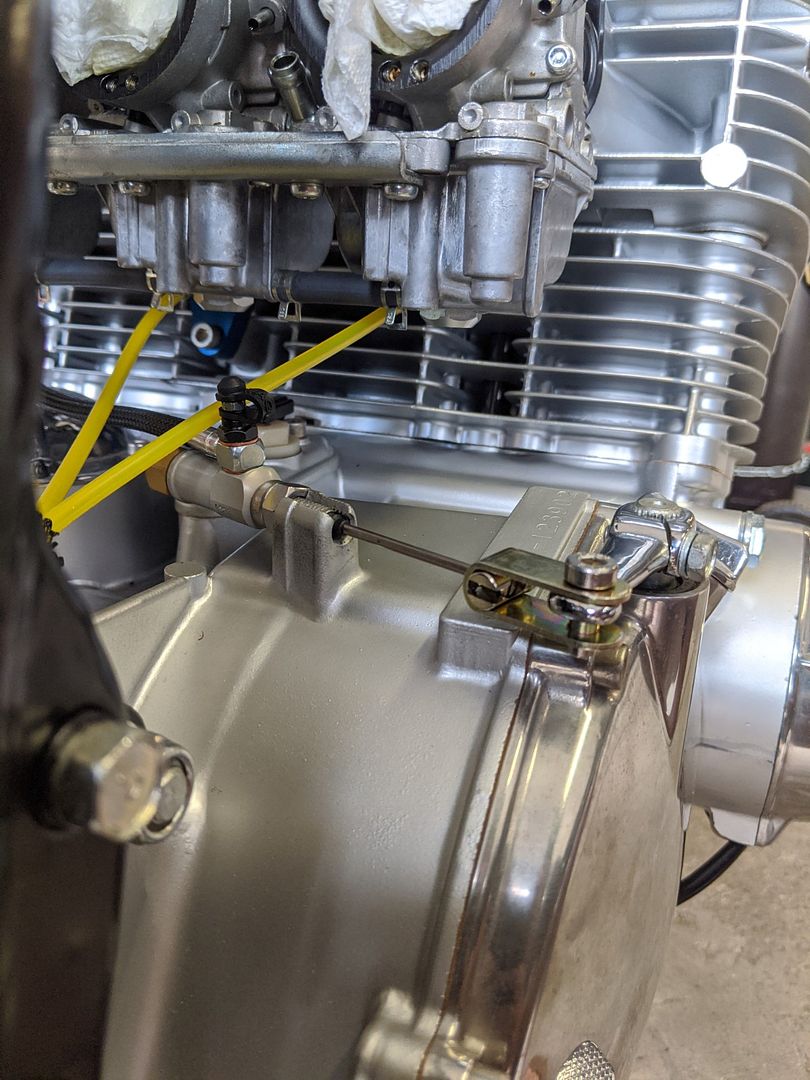
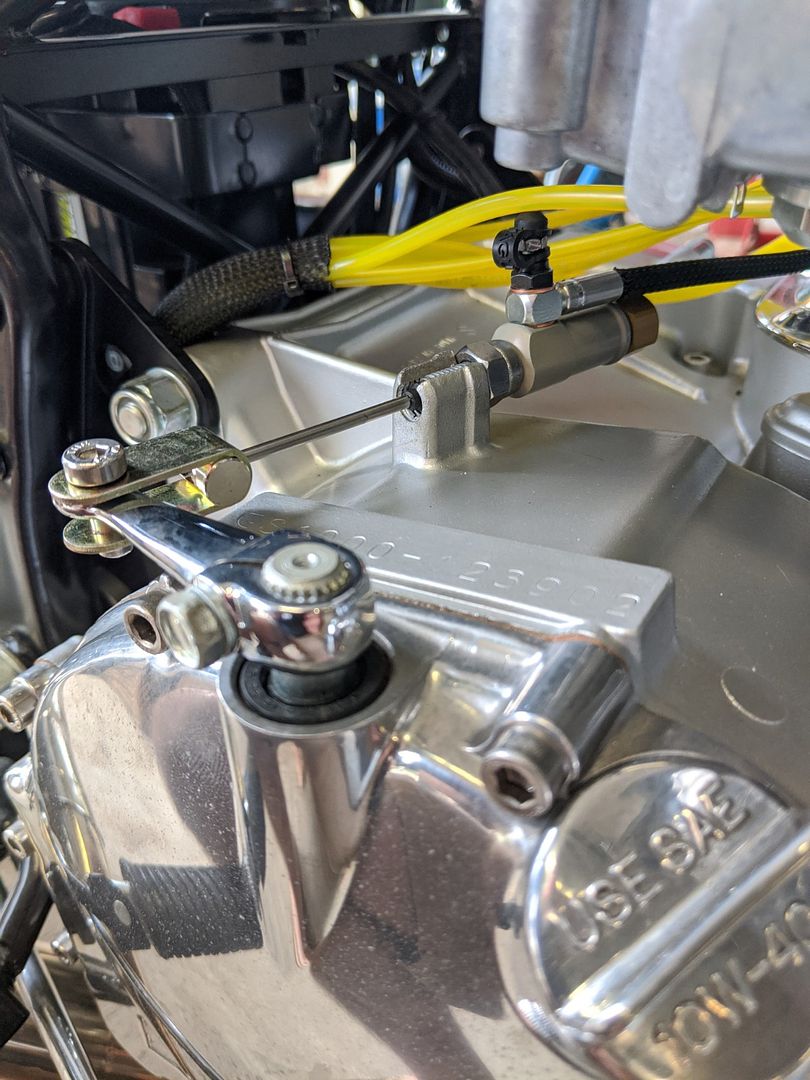
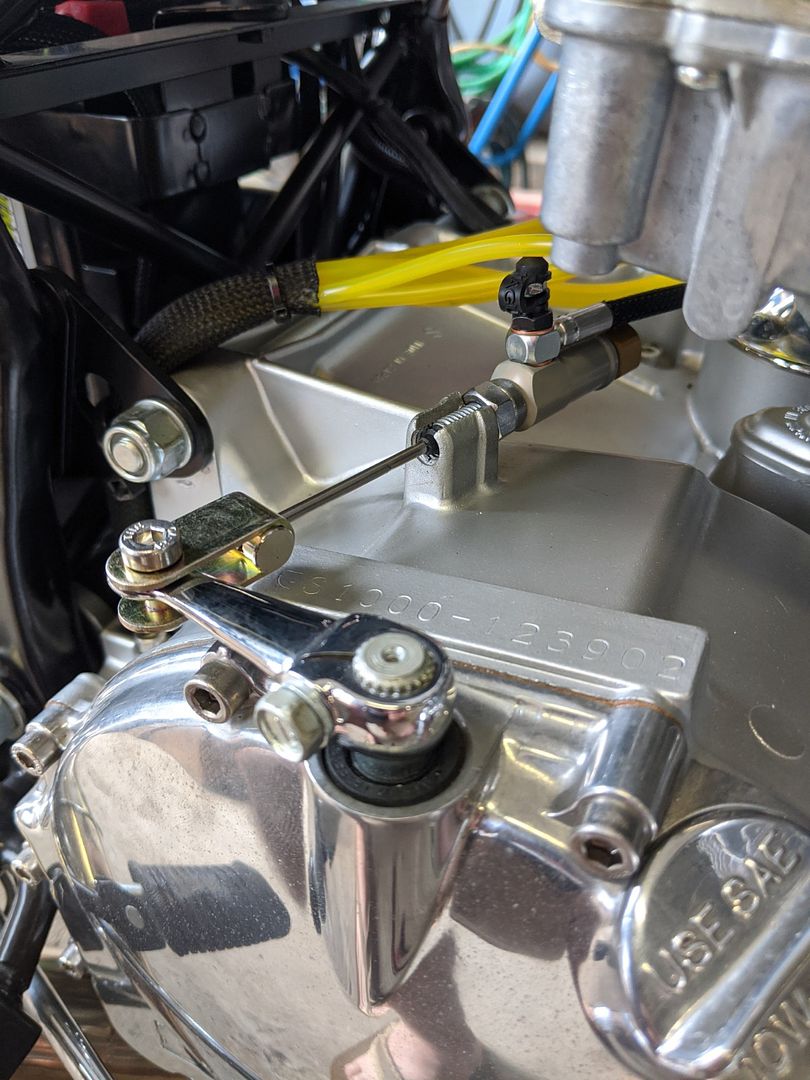
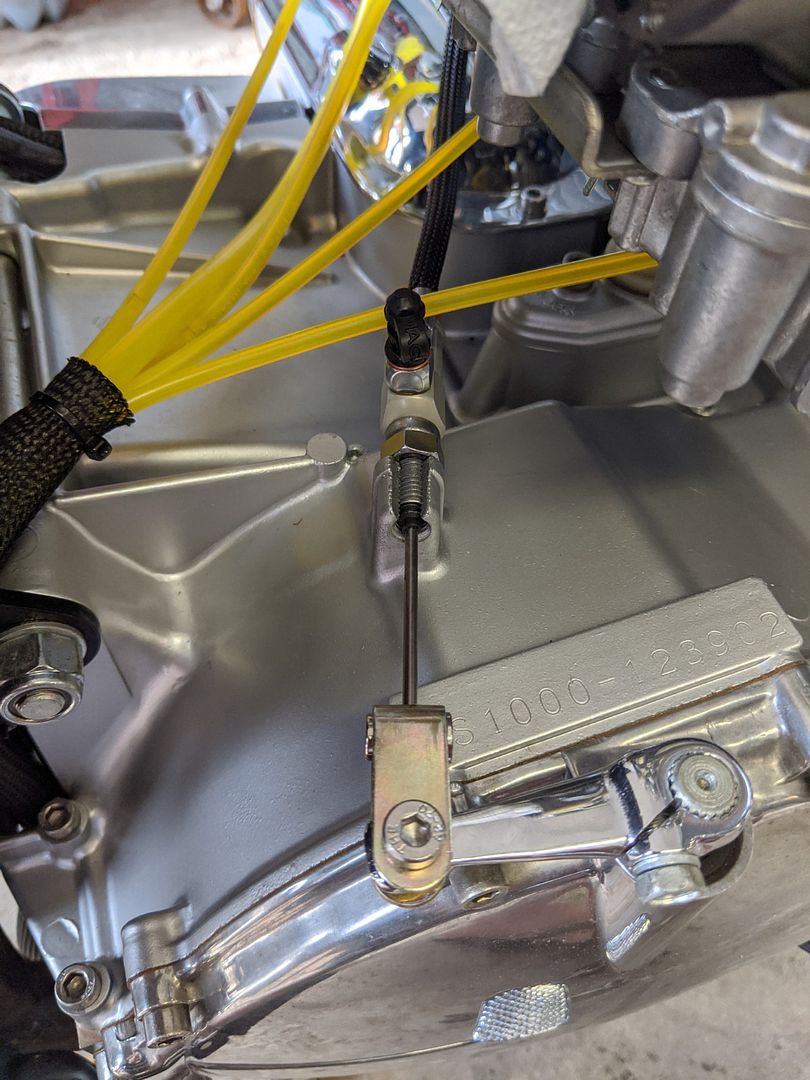
                    Step 3 - The Clevis: Originally, I was going to use a shorter and narrower clevis stolen from an old clutch cable. Unfortunately, when I mounted the slave cylinder in the engine case standoff with the adapter I made, I noticed that the clutch arm sits higher than the slave cylinder rod. With a cable, this isn't an issue, as the flexibility of the cable allows for some misalignment between the clutch arm and the mounting of the cable. However, with a hydraulic slave, the components aren't flexible, thus the pull needs to be as straight as possible to not put excessive wear on the slave bore and piston surfaces. The picture below shows what I'm describing:


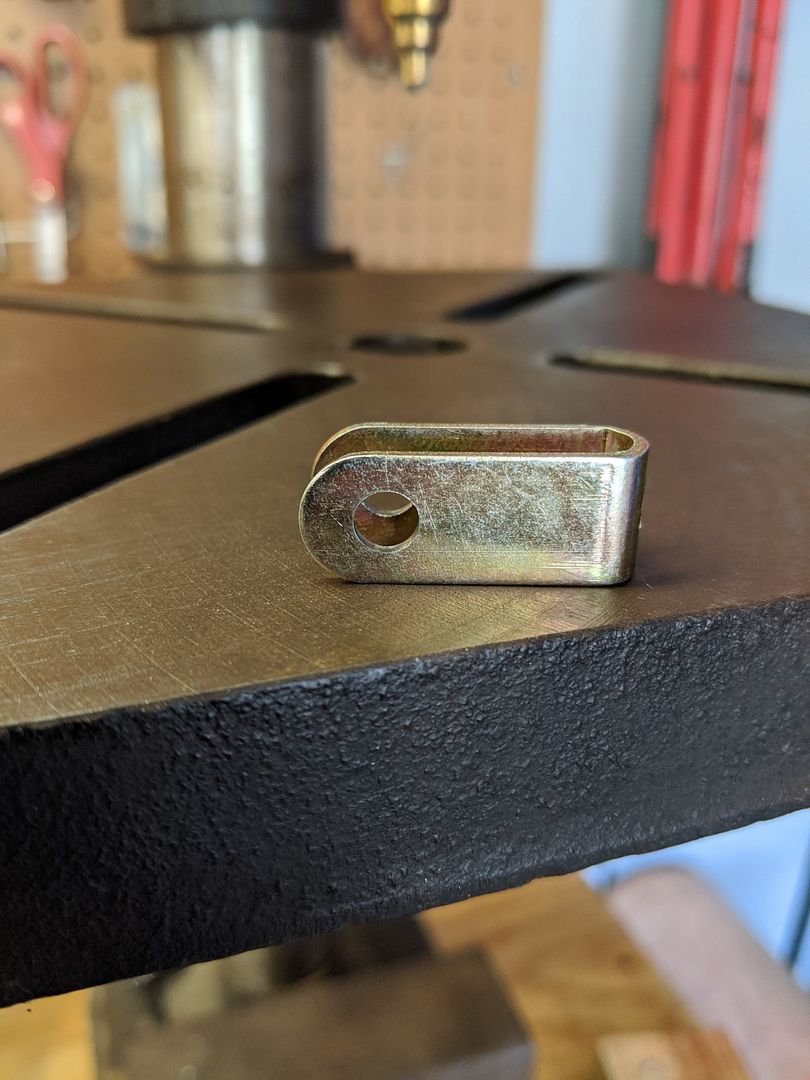
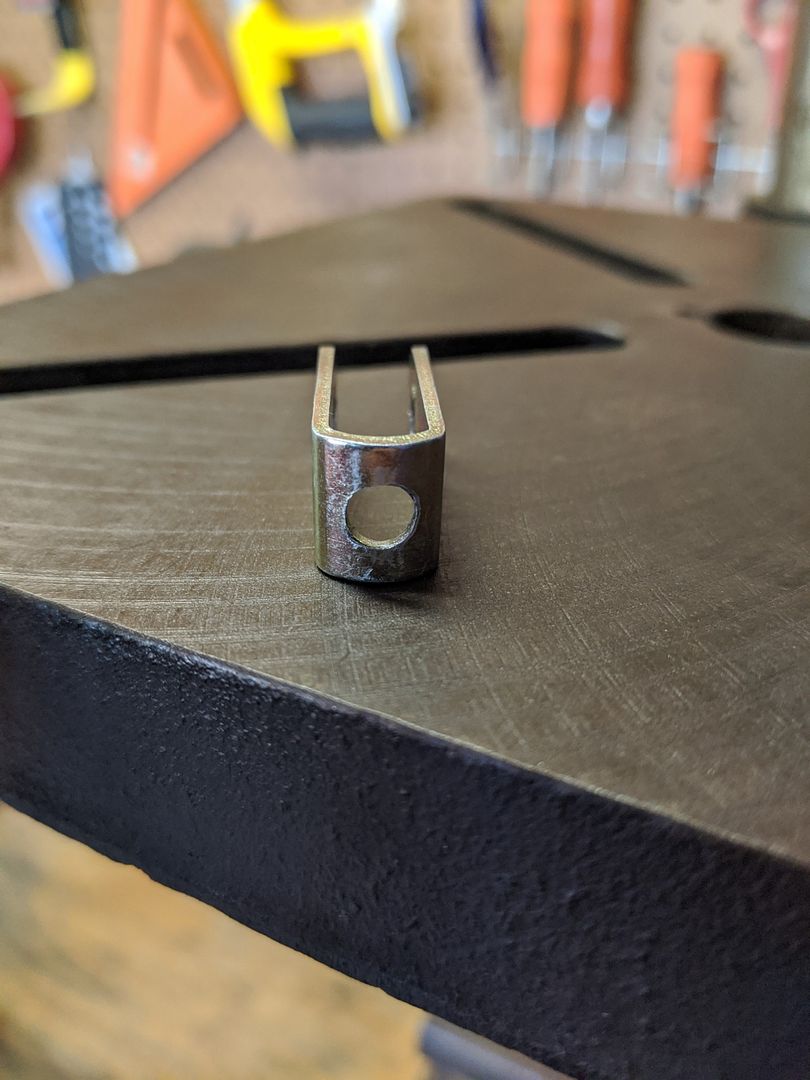
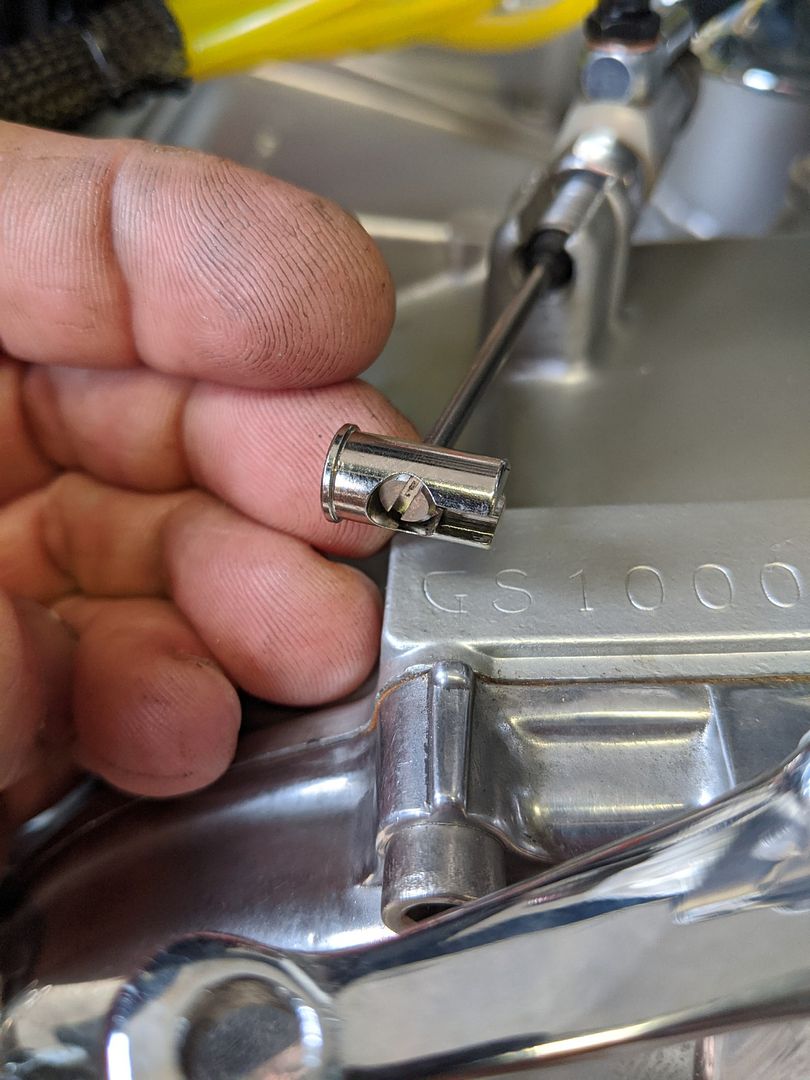
                    To remedy this, I needed a wider (taller) clevis - this would allow the rod to sit slightly below the center line of the clutch arm. After a bit of searching, I found that Venhill had exactly what I needed. From the factory, this clevis has a pin hole diameter of 5mm, whereas the GS clutch arm is 6mm. No biggie, I just drilled out the holes to 6mm. I then drilled the hole where the slave rod goes through the the back of the clevis with the 2ga wire drill, as this wire drill is nearly the exact diameter of the trumpet at the end of the rod. Lastly, a wider/taller clevis gave me the opportunity for a more elegant way to secure the slave rod to the clevis - I used a nipple adapter from Magura. The nipple is slotted and drilled with a recess for the trumpet. Once the rod is inserted into the clevis, the nipple can then be installed onto the rod and the trumpet sits into the recess, preventing the nipple from sliding off. For this system to work, the clevis has to be kept under slight tension at all times - all Magura slave cylinders have a spring inside them which pushes backwards against the rod as it goes to full extension. This is purposeful, as it keeps the system constantly adjusted and it prevents the trumpet from jumping out of the nipple recess. During the final setup, the rod should sit in the middle between maximum and zero spring tension.


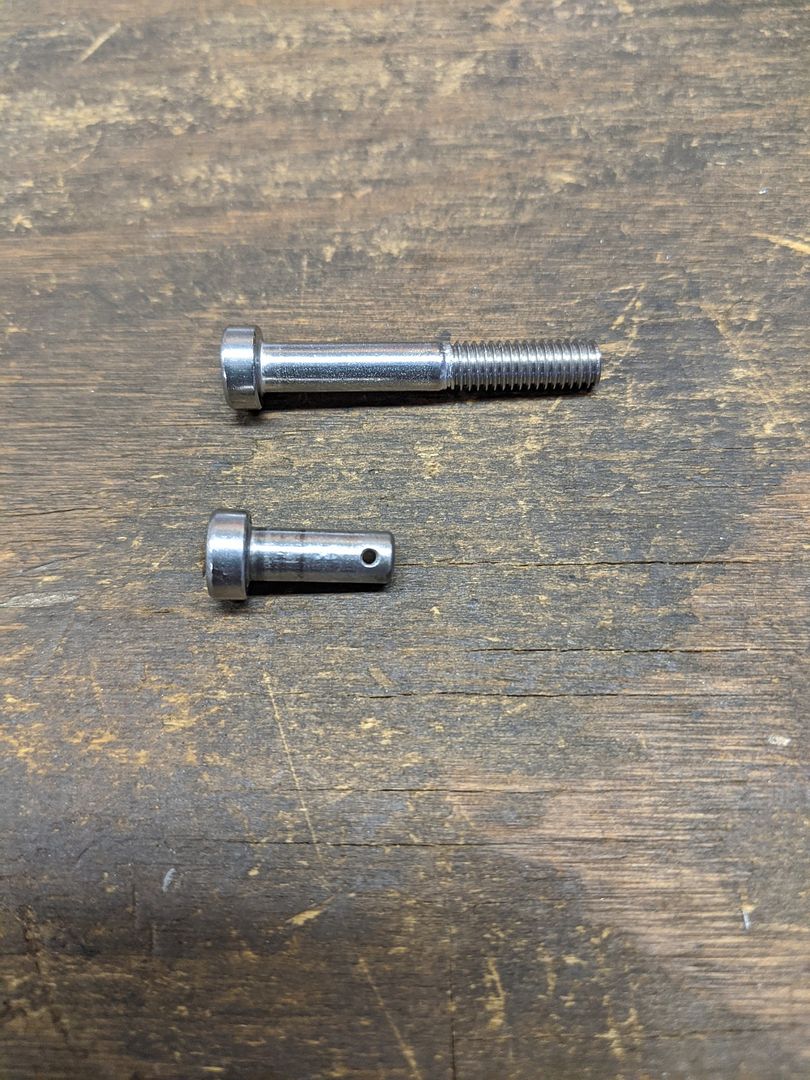
                    The clevis pin you see in the photos above was fabricated from a 6mm stainless partially-threaded bolt. I simply drilled it for a cotter pin hole and cut it to size, the hole is 1/16".
                    Last edited by philosopheriam; 05-03-2020, 06:23 PM.
                    Cogito ergo sum - "I think, therefore I am"
                    René Descartes

                    Comment


                      Step 4 - Mount everything up!


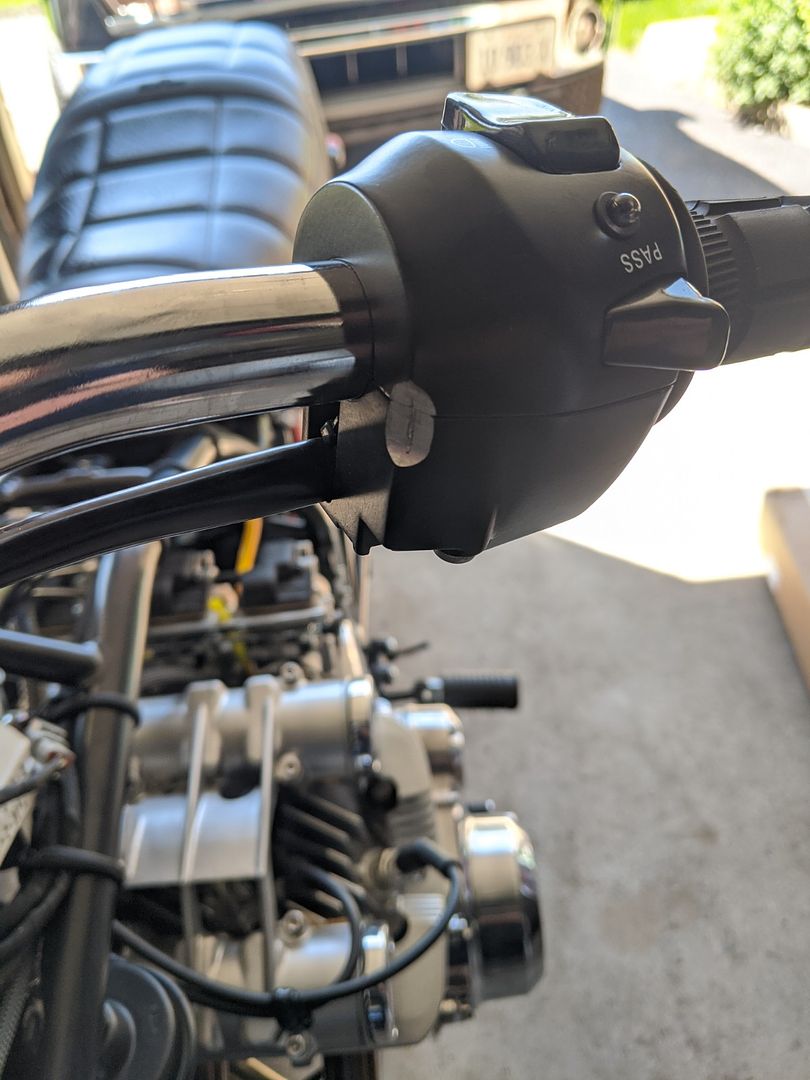
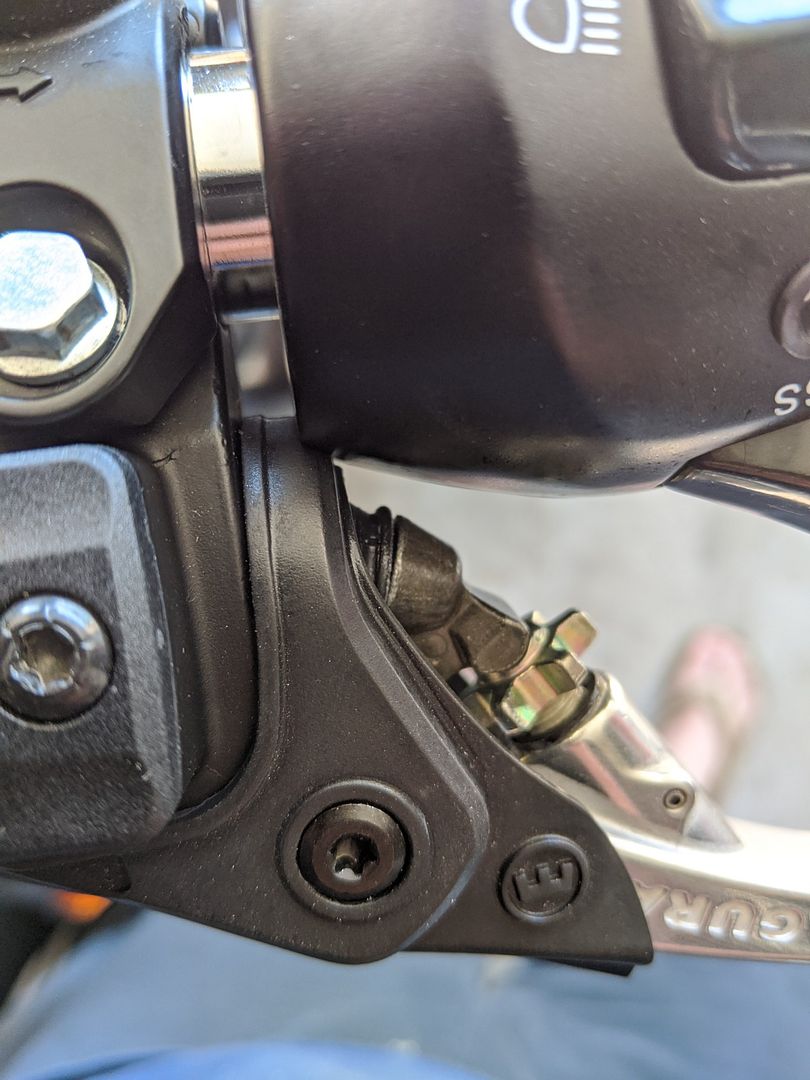
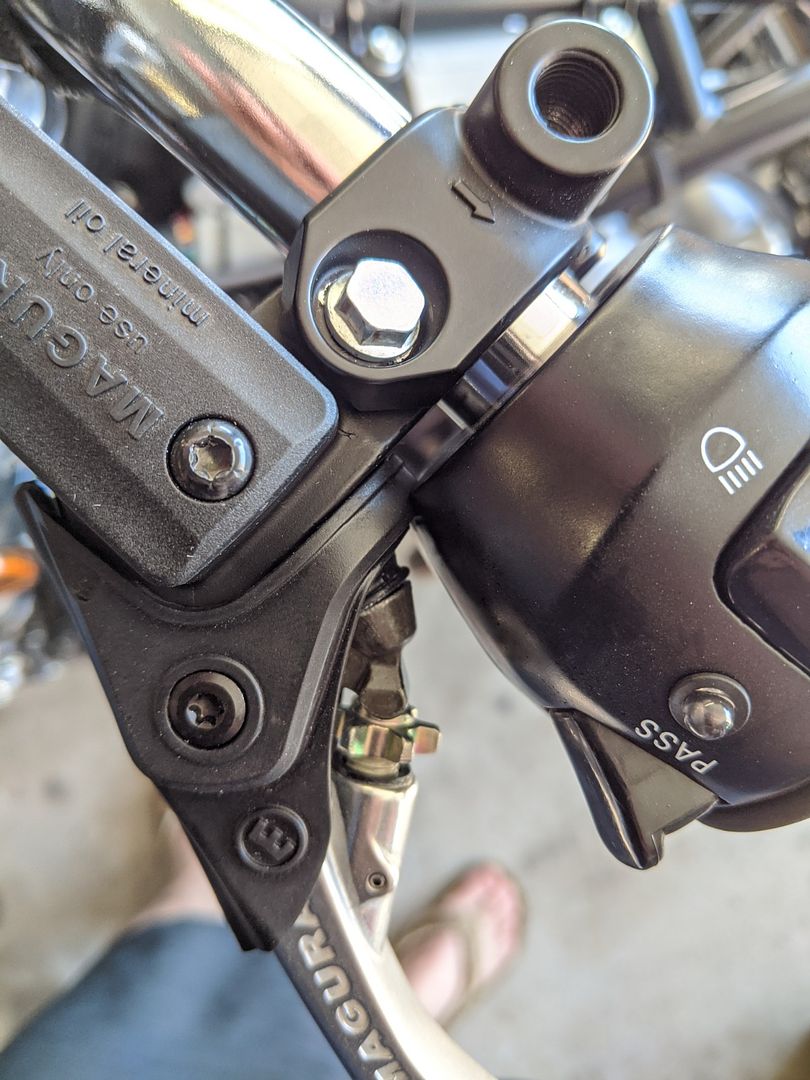
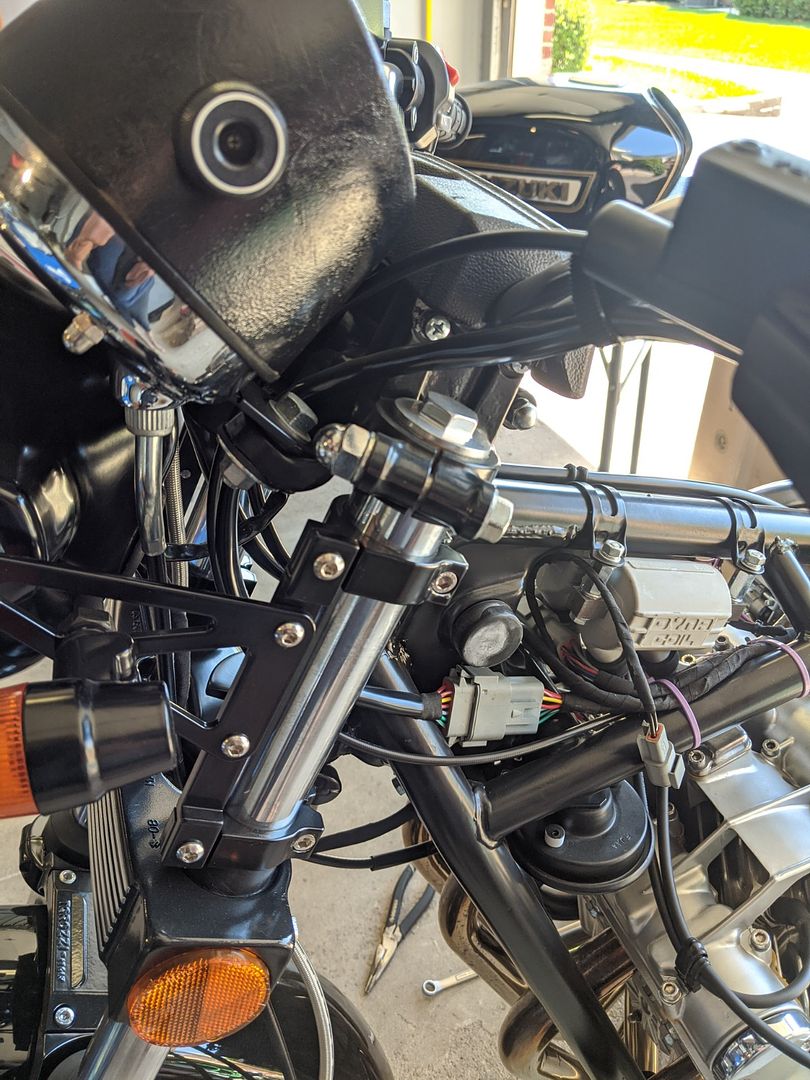
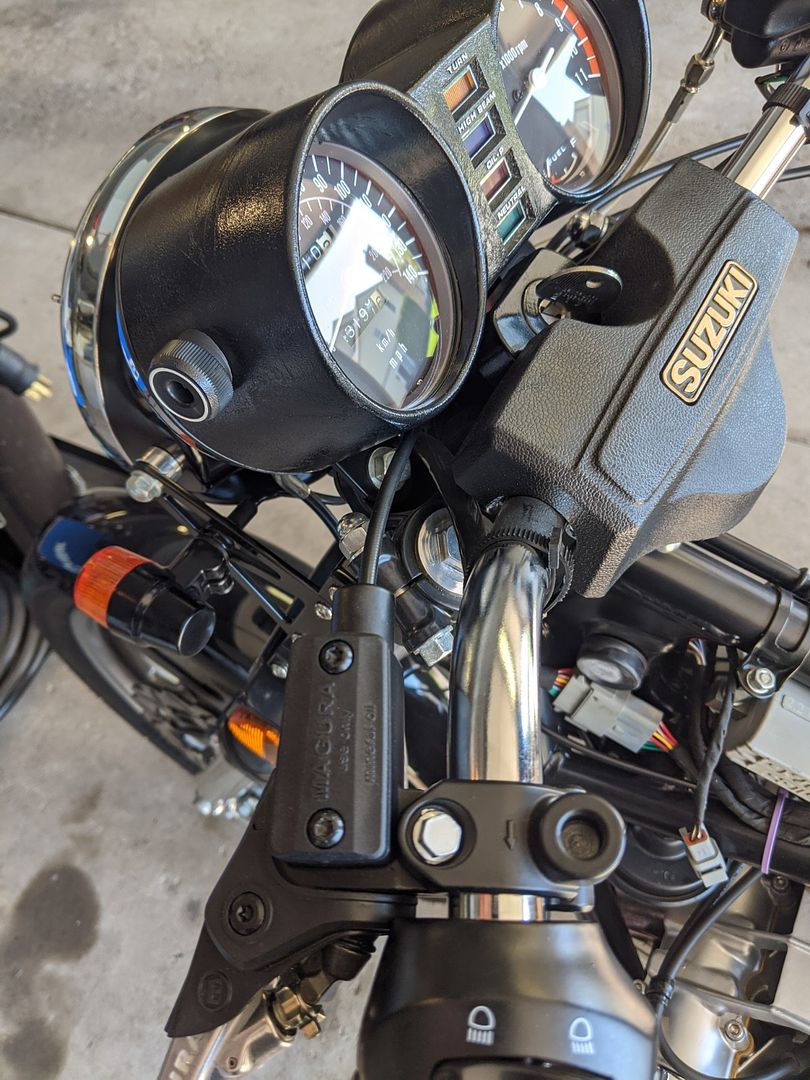
                      I had some interference issues between the Magura clutch perch and my left-side control (my controls are a bit bulky), a little fitting was required so that the end of the clutch handle wasn't too far away from the end of the handlebar. I used a die grinder with a carbide bit and worked carefully to not remove too much material:


                      Last edited by philosopheriam; 05-03-2020, 06:24 PM.
                      Cogito ergo sum - "I think, therefore I am"
                      René Descartes

                      Comment


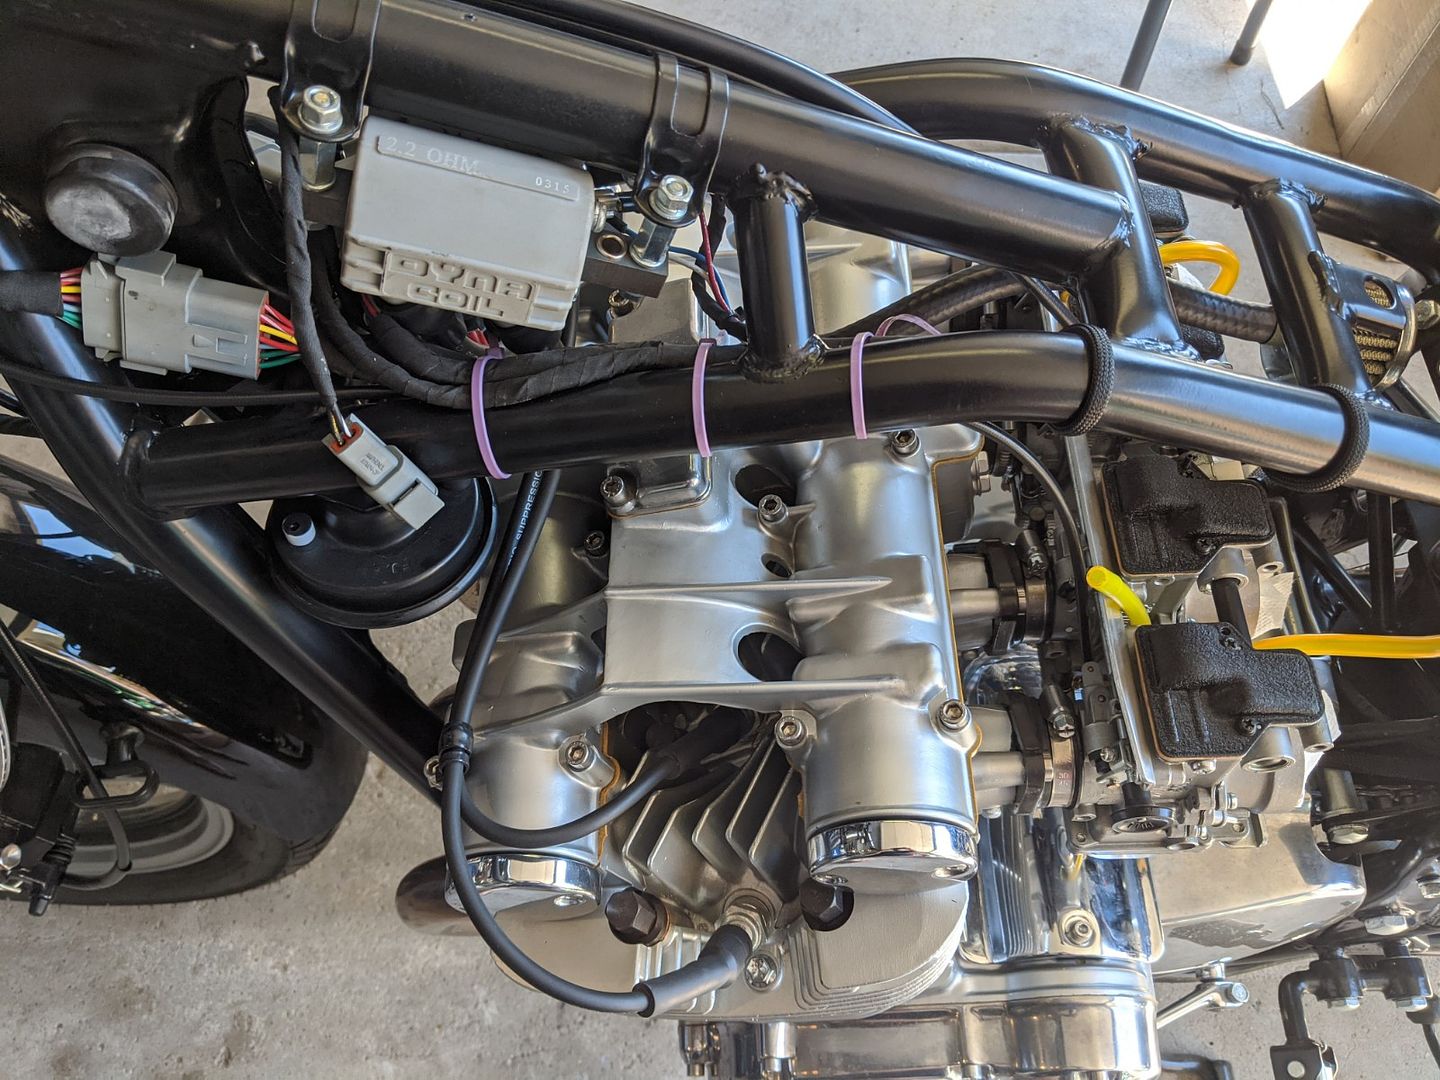
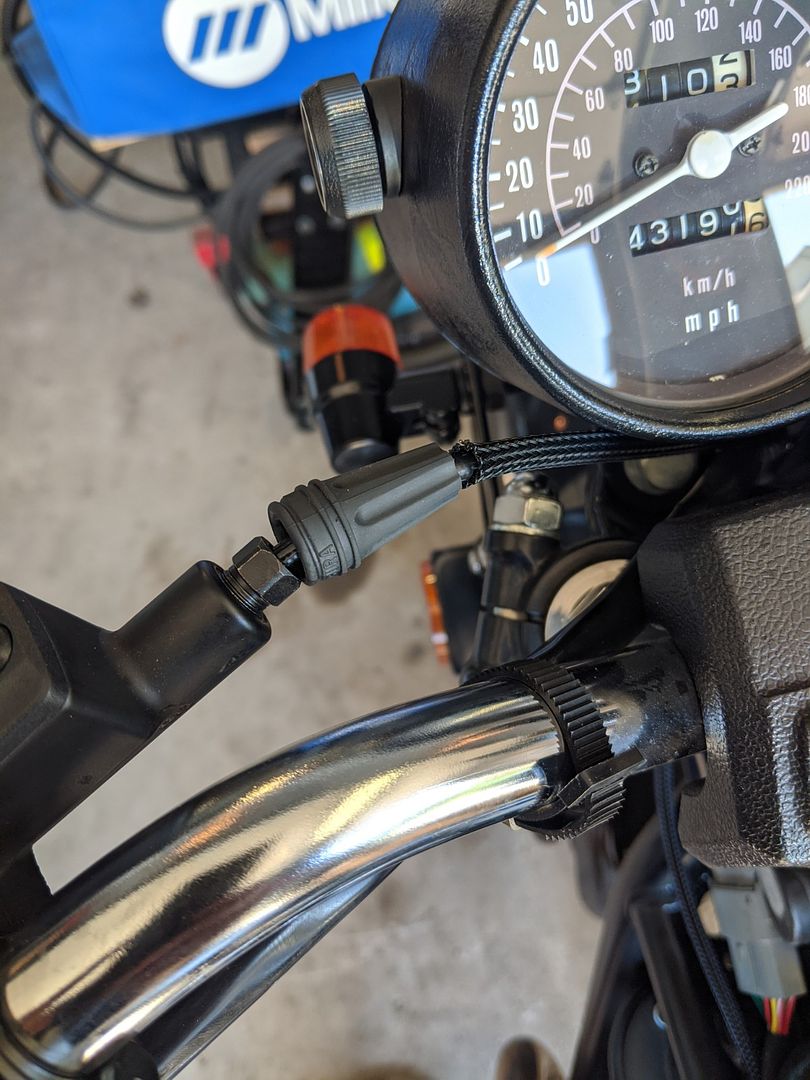
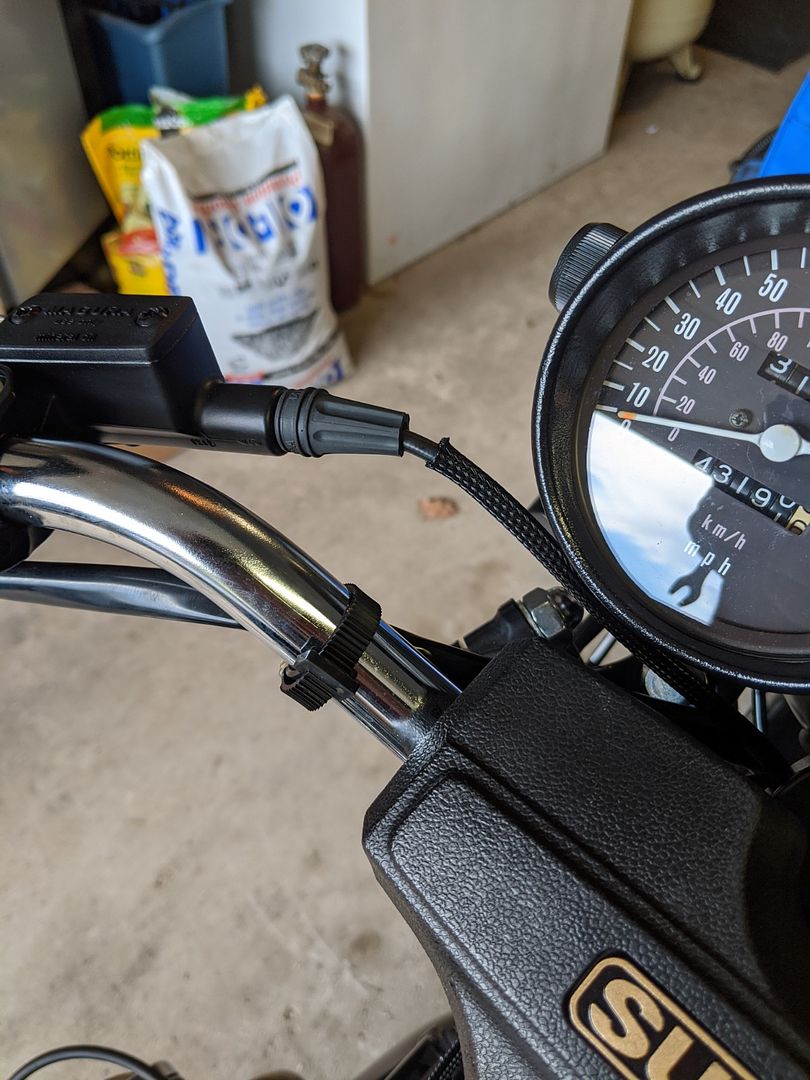
                        The clutch hydraulic line is a cut-to-size arrangement. The slave end has a banjo fitting crimped on it, and the other end is just plain - once you route the line and cut it to size, you slide on the strain relief boot, the nut, the crush sleeve, and insert the ferrule into the end of the tube. Easy peasy. In my circumstance, the strain relief boot needed a but of trimming so as to prevent the line from pressing excessively against my speedo. Also, in the last couple photos, you can see some black sleeving that I installed over the hydraulic line for chafing protection - this was purchased from McMaster-Carr and is shown in the first photo displaying all of the parts used in this project. The installation of the banjo bolt and bleeder screw at the slave cylinder don't really need any explanation. The pink zip-ties were used for mock-up routing only :-)


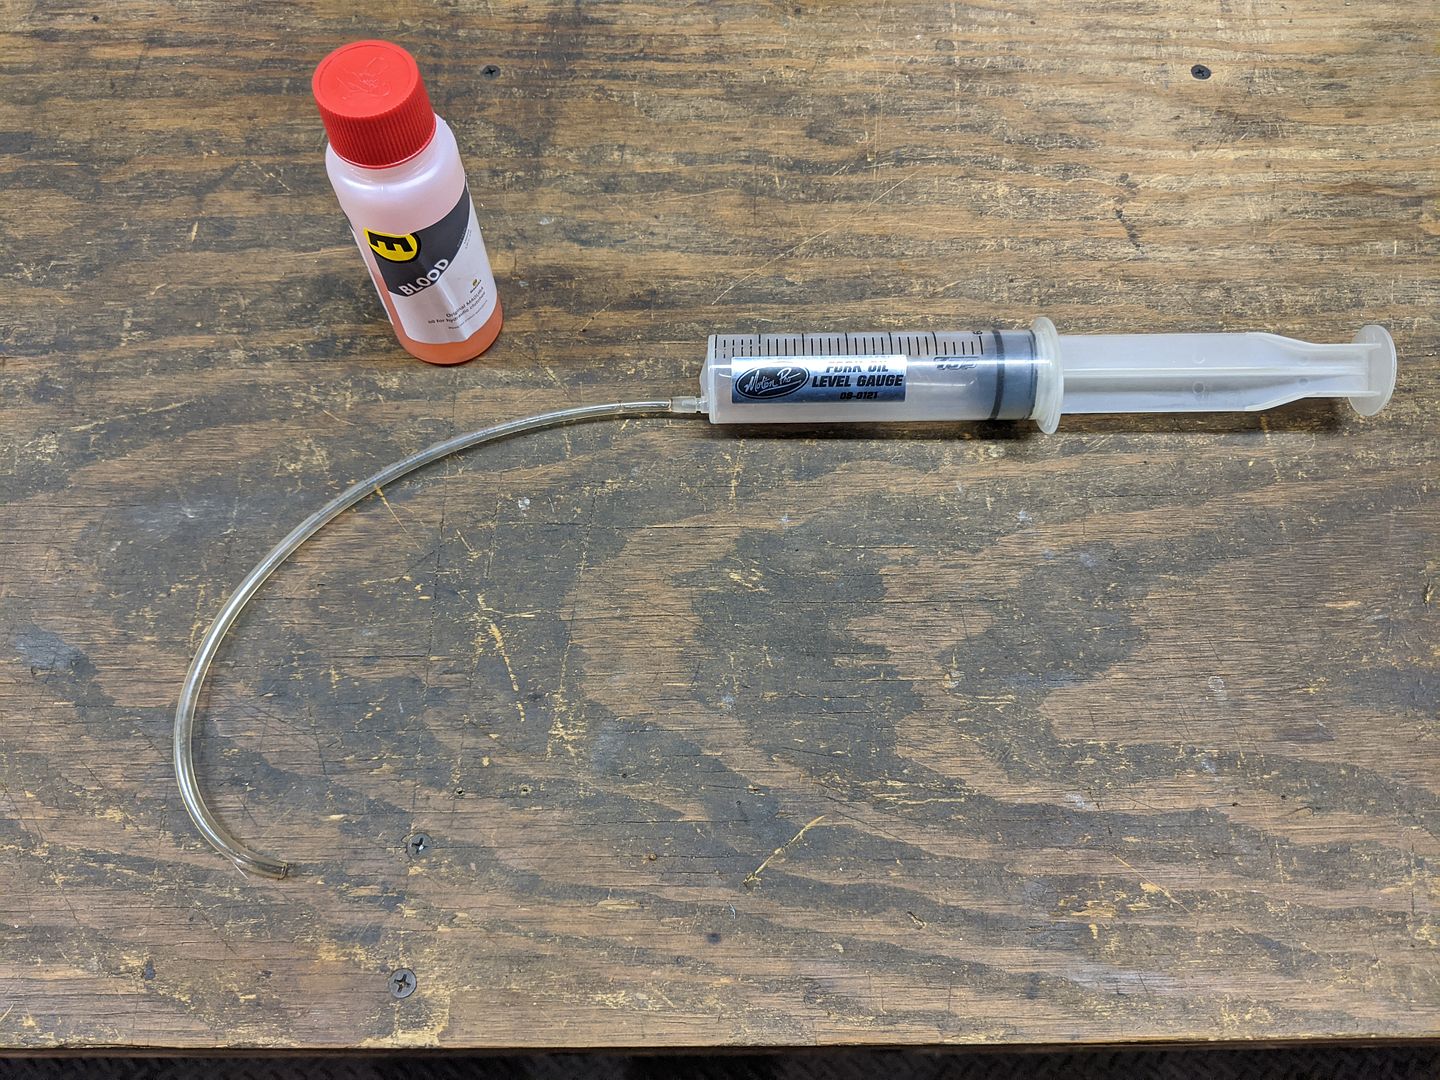
                        Step 5 - Bleeding: The easiest way to fill and bleed this system is as follows - once all of your connections are tight, connect a syringe filled with Magura Blood with a small tube to the bleeder screw and open the bleeder (I used the syringe from my fork oil gauge). With the M/C cap off and the handlebars rotated so that the reservoir is level, force fluid backwards into the system until the reservoir is full. From this point, you can easily pressure bleed the system by hand - connect a length of hose to the bleeder screw so it is pointing up and then curving down into a pan or bucket. Having the hose go upward first keeps fluid on top of the bleeder and prevents air from re-entering the system. From this point, squeeze the clutch lever and hold it, open the bleeder to release some fluid and then close the bleeder before releasing the handle. After doing this about 10x (keep the reservoir filled at all times), all of the air will be gone from the system, and you will have a solid clutch pull.


                        Last edited by philosopheriam; 05-03-2020, 06:29 PM.
                        Cogito ergo sum - "I think, therefore I am"
                        René Descartes

                        Comment


                          I think Photobucket discontinued support for video uploads, so, I'll just use Flickr:

                          VID_20200502_123034 by Anthony Monteleone, on Flickr
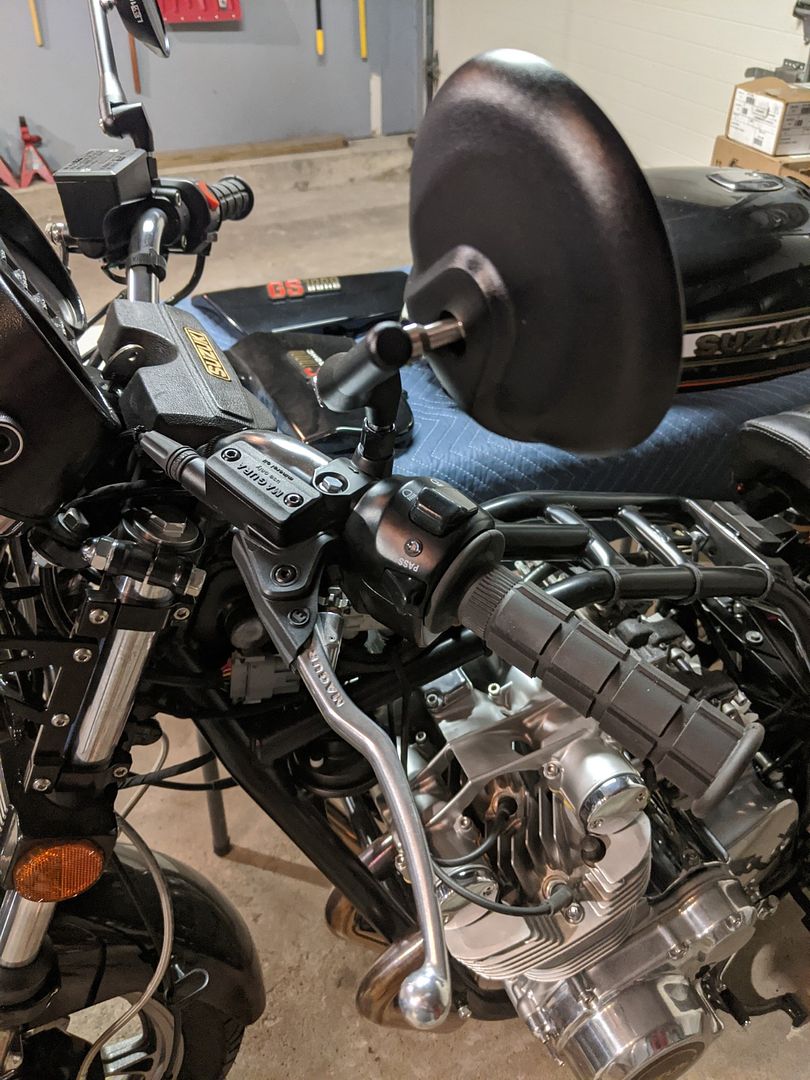
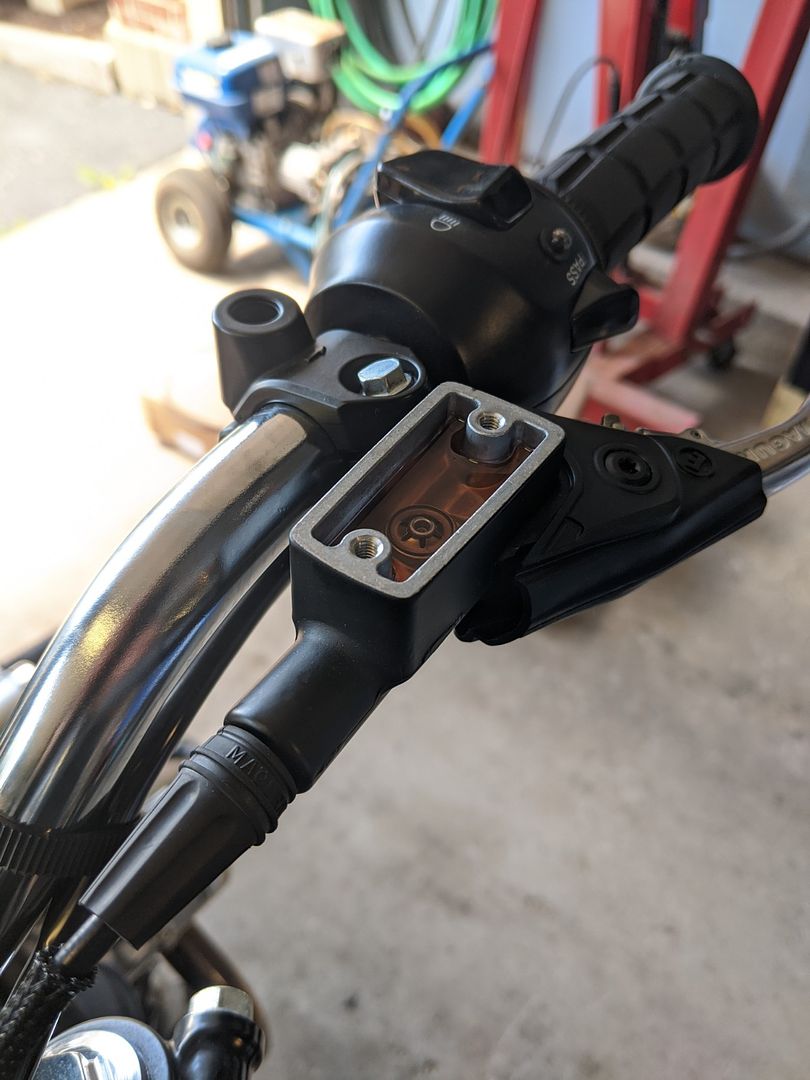
                          One final shot of the Magura clutch perch with the mirror installed:


                          Will post a riding/functionality report once I get the tank back on. More to come...
                          Last edited by philosopheriam; 05-03-2020, 06:00 PM.
                          Cogito ergo sum - "I think, therefore I am"
                          René Descartes

                          Comment


                            Well done! That is impressive!
                            1981 GS850G "Blue Magic" (Bike Of The Month April 2009)

                            1981 GS1000G "Leo" (Bike Of The Month August 2023)

                            Comment


                              Looks good. Curious to see how the ratio turned out and what kind of feel you have.
                              sigpic1983 1100 Katana - soon to be turbo Busa powered.
                              2007 GSXR1K-Sold-But not forgotten.
                              Have 2X ZG14 engine's for '81 GS750E project.
                              '82 GS750E frame is TITLED awaiting GSXR1127/12B engine and '81 1100E slowly being built.

                              Comment


                                Originally posted by gmansyz View Post
                                Looks good. Curious to see how the ratio turned out and what kind of feel you have.
                                Initial impressions: clutch pull is buttery smooth and requires considerably less effort than my cable setup. However, the proof is in the pudding - I need to see what it's like out on the road.
                                Cogito ergo sum - "I think, therefore I am"
                                René Descartes

                                Comment

                                Working...
                                X