-
Cogito ergo sum - "I think, therefore I am"
Ren? Descartes -
1978 Gs1085 compliments of Popy Yosh, Bandit 1200 wheels and front end, VM33 Smoothbores, Yosh exhaust, braced frame, ported polished head :cool:
1983 Gs1100ESD, rebuild finished! Body paintwork happening winter 2017:D
I would rather trust my bike to a technician that reads the service manual than some backyardigan that THINKS HE KNOWS how to fix things.Comment
-
I stopped counting how much $$$ I have dumped into this project... Although I'm not reckless, at some point, it's not about the $$$ anymore - it's about craftsmanship, detail, and creating something beautiful.
The trick will be installing the engine in the frame and avoiding any damage - I have a plan Cogito ergo sum - "I think, therefore I am"
Ren? DescartesComment
-
I've really enjoyed following this thread. Thanks for all your time to keep this thing going.
Beautiful results.Larry
79 GS1000E 2019 Triumph 800 XRTComment
-
Couldn't you at least have wiped some of the grime off with a rag before you took the photos? 1982 GS1100E V&H "SS" exhaust, APE pods, 1150 oil cooler, 140 speedo, 99.3 rear wheel HP, black engine, '83 red
2016 XL883L sigpic Two-tone blue and white. Almost 42 hp! Status: destroyed, now owned by the insurance company. The hole in my memory starts an hour before the accident and ends 24 hours after.Comment
-
Looking really good Anthony. Make sure you don't mix up the lower front motor mount bolts (below the crankshaft), as one is slightly longer than the other. If you tighten the longer one on the wrong side, it punches a hole into the engine cases ......BillyComment
-
Ha! Thanks for the reminder - this was fresh in my mind, as I remember a thread about somebody accidentally venting his engine case by unintentionally swapping the bolts. However, all of the bolts I removed were placed in plastic bags and marked with their respective locations/positions.Cogito ergo sum - "I think, therefore I am"
Ren? DescartesComment
-
This make me very, very happy - carburetor test fit... Everything fits as it should
 IMG_1425 by Anthony Monteleone, on Flickr
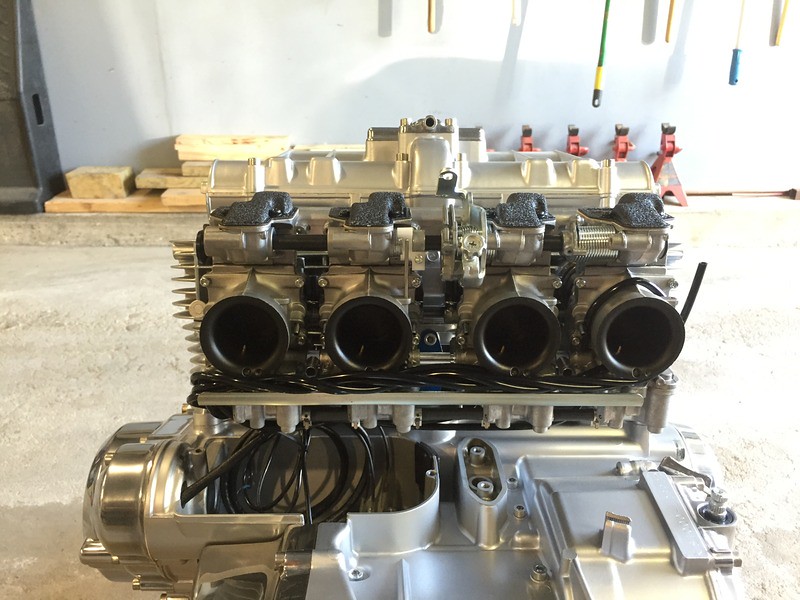 IMG_1426 by Anthony Monteleone, on Flickr
 IMG_1427 by Anthony Monteleone, on Flickr
Last edited by philosopheriam; 08-20-2017, 09:00 AM.Cogito ergo sum - "I think, therefore I am"
IMG_1427 by Anthony Monteleone, on Flickr
Last edited by philosopheriam; 08-20-2017, 09:00 AM.Cogito ergo sum - "I think, therefore I am"
Ren? DescartesComment
-

Comment
-
Hahaha me too. All the bits and pieces for the carbs for 750L #1 got tossed into a common pot (small plastic tote) during disassembly. To be fair all my other bikes the parts have been individually bagged but the carbs on this bike were so bad I'm STILL not sure they'll be salvageable. Anthony your bike is one of the pinnacle builds of this site. And I say that even after having read in their entirety the builds on Stan's (Flyboy) 1000G and Dale's (Rustybronco) Skunk etc. Awesome work and attention to detail.Last edited by Guest; 06-02-2015, 08:41 PM.Comment
-
Shiny stuff back from the chrome shop:
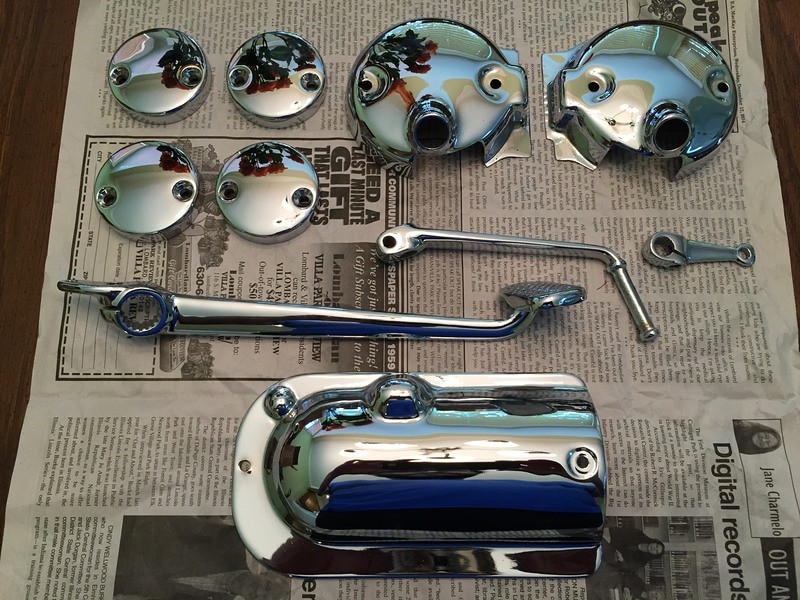 IMG_1441 by Anthony Monteleone, on Flickr
One fork leg, un-uglified... (polish only, NOT chromed)
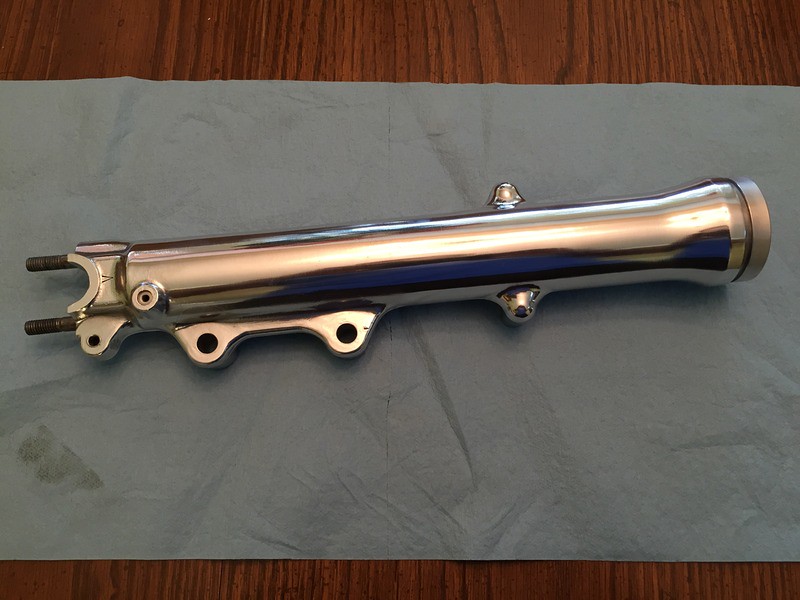 IMG_1442 by Anthony Monteleone, on Flickr
Last edited by philosopheriam; 08-20-2017, 09:32 AM.Cogito ergo sum - "I think, therefore I am"
IMG_1442 by Anthony Monteleone, on Flickr
Last edited by philosopheriam; 08-20-2017, 09:32 AM.Cogito ergo sum - "I think, therefore I am"
Ren? DescartesComment
-
Looking real good. I know from experience the work involved in getting a fork leg to look like that. If you don't mind me asking, what did the chrome work cost and who did it for you? I have a few pieces to do for mine.https://drive.google.com/open?id=0B9zH8w8Civs8ejBJWjdvYi1LNTg&resourcekey=0-hlJp0Yc4K_VN9g7Jyy4KQg&authuser=fussbucket_1%40msn.com&usp=drive_fs
1983 GS750ED-Horsetraded for the Ironhead
1981 HD XLH
Drew's 850 L Restoration
Drew's 83 750E ProjectComment
-
Unfortunately, I would not use the shop that did this chrome work again - what you can't see in the photos is some pitting on the surface of the speedo covers. Instead of calling me and telling me that the pieces are pitted badly and the finish may not come out perfect, they did it anyway and charged me the same amount. Lesson learned, I won't use them again. In reality, if they really gave a hoot, the pits could have been filled with copper or silver solder. This would have required more effort and expense, but I wasn't even offered the option. Am I making a mountain out of a molehill - perhaps. It just that if I was the artisan running that chrome shop, I would not in conscience have been able to give those speedo covers to a customer as a "finished product."
BTW: Chrome work ain't cheap, either...
As for the fork leg, it wasn't as bad as you might think - I used my soda blaster to remove the laquer, and then I progressively buffed the fork using black compound with a glued cotton wheel, red compound with a stiched buff, red compound with a loose buff, and green compound with a loose buff. When I'm finished assembling the fork, I will put some MAAS polishing cream on it to protect the finish.Last edited by philosopheriam; 06-09-2015, 05:41 PM.Cogito ergo sum - "I think, therefore I am"
Ren? DescartesComment

Comment