Beautiful work. You might want to run the clutch cable in front of the gauge cluster instead of on the outside, if you have the length.
-
-
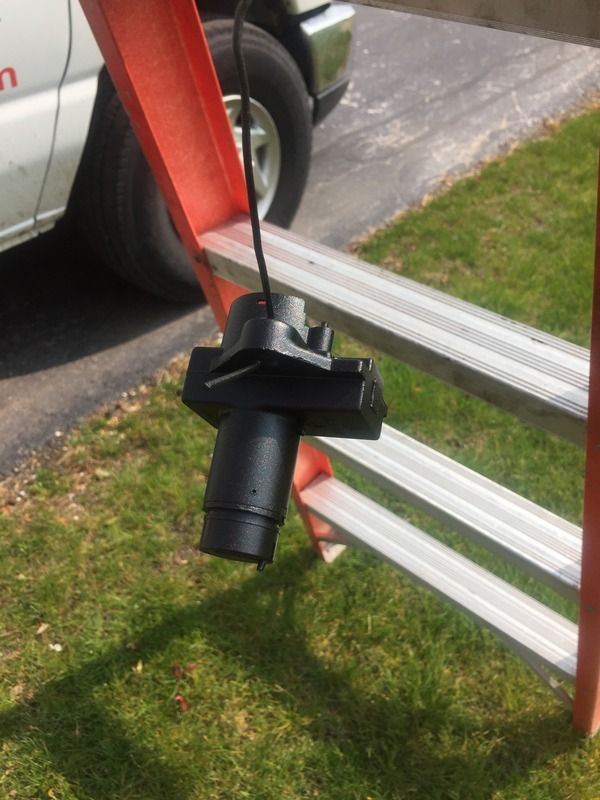
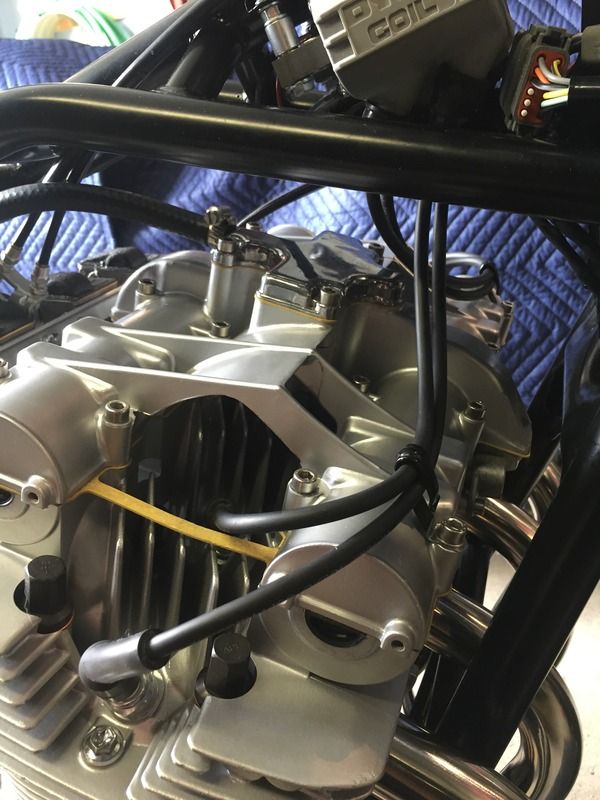
Not possible - take a look at this photo and you'll see why

With the bars I am running, a straight clutch cable (no 90 at the end) bangs into the side of the gauge cluster. Even if it cleared, the bend radius required for the cable to go in front of the cluster is too small, which in turn, causes the cable to kink and eventually bind.
In the arrangement currently on the bike, the cable has a nice gentle bend down to the frame and then through the 1 and 2 carbs down to the clutch arm.Cogito ergo sum - "I think, therefore I am"
Ren? DescartesComment
-
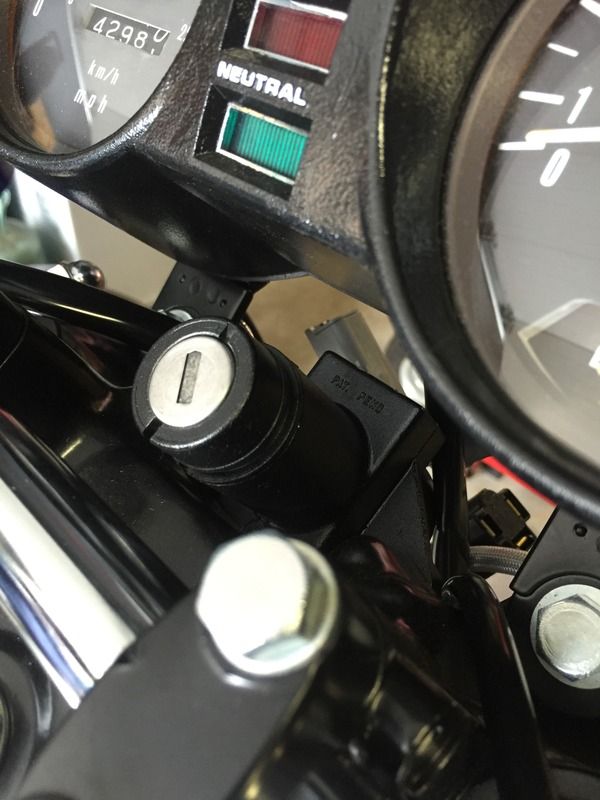
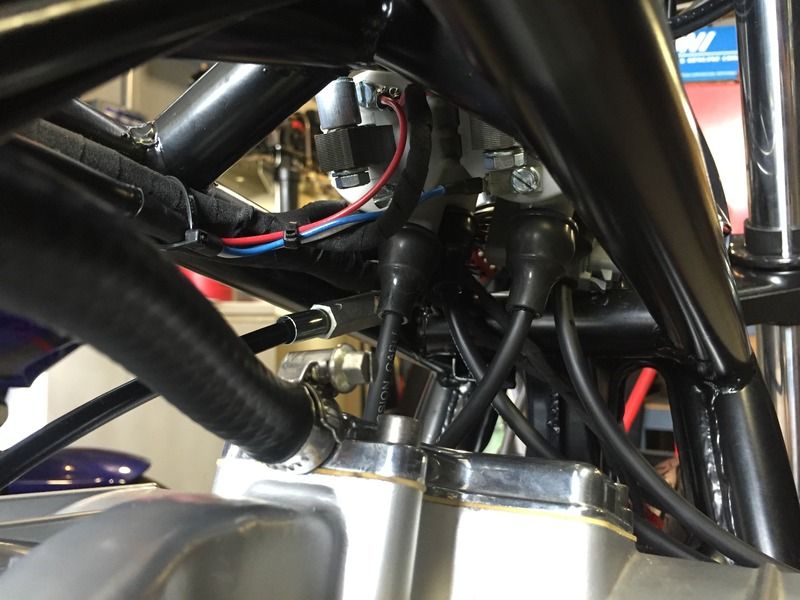
Finished the ignition switch today.
Drilled out the barrel and housing with a 3/32" drill bit so I could install new, slightly larger roll pins. The pins I had were 1/2" long, so, once they were installed I cut off the excess with a dremel.
Two coats of self-etching primer and 3 light coats of semi gloss black.


 Cogito ergo sum - "I think, therefore I am"
Ren? DescartesComment
-
Update, 5/14:
Installed the refurbished ignition switch.
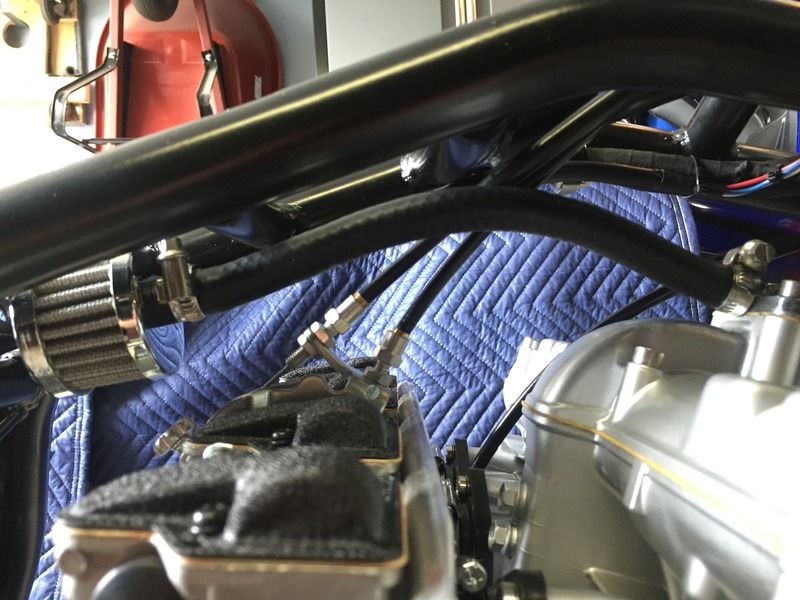
Installed the crankcase vent hose and clamps.
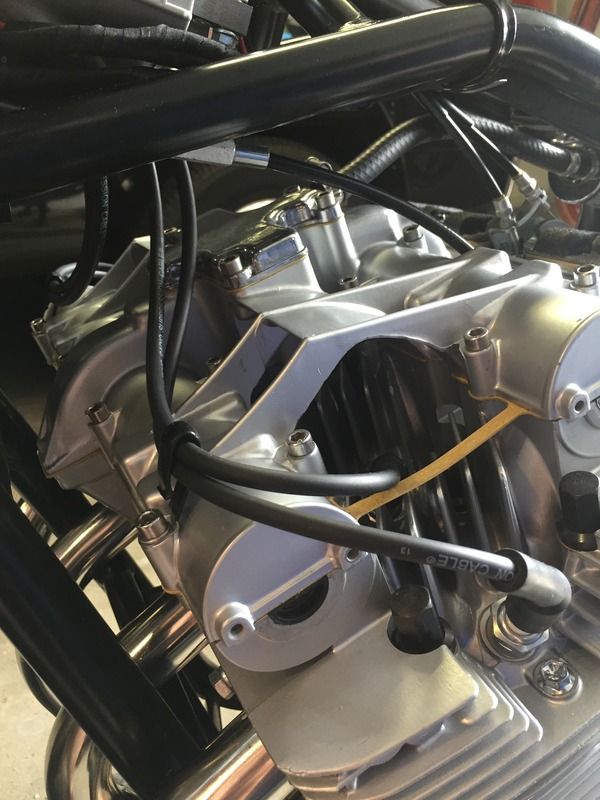
Cut the ignition wires to size and crimped the connectors on the ends.
Installed the battery and tested the ignition system for functionality - tweaked the static timing a smidge.
Removed the plugs, regapped to .028, and reinstalled.
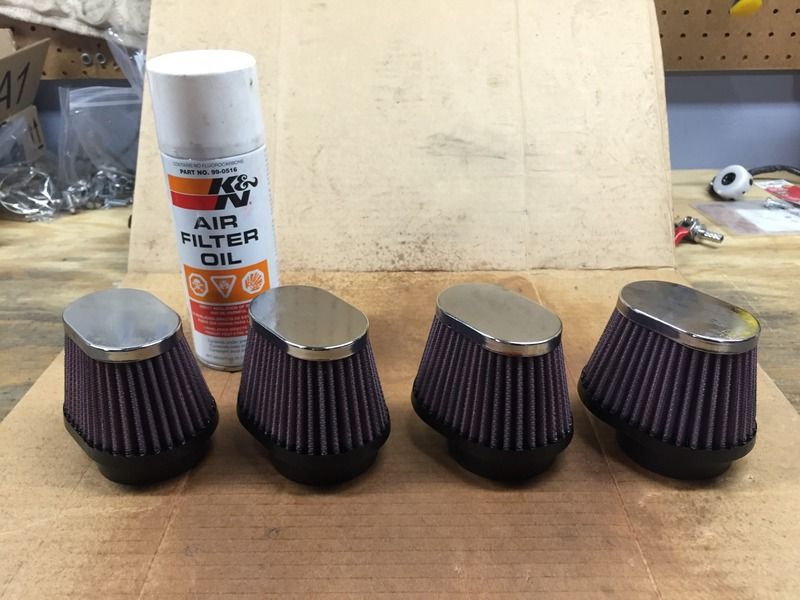
Removed the carbs, checked the float height, and set the pilot air screws to 1/2 turn out.
Oiled the pod filters.
I have some fuel line and clamps to pick up this week from McMaster Carr, other than that, THE ENGINE WILL BE READY TO START NEXT WEEK!!!!! Stay tuned :-)

 Cogito ergo sum - "I think, therefore I am"
Ren? DescartesComment
-
PS: If anyone has any first startup suggestions/tips/advice, I am all ears.
Engine has already been spun over to fill the oil galleries. The current plan is to have a box fan blowing on the motor and to not let it run below 1500 to 2000 rpm (cam break in). I will recheck the manual cam chain tensioner before startup.Cogito ergo sum - "I think, therefore I am"
Ren? DescartesComment
-
I think some of us will try to hold you to that last one....{chuckle}. Checking out mine today for obvious hacks by the Po....ugh...probably just better to start over with better wire and connectors especially since I plan on retro fitting an '83 fuse box in {I rather dislike barrel fuses}.Comment
-
I don't remember which carbs you put on, but 1/2 turn out doesn't sound like enough. Stock carbs would be 7/8 to 1 turn out of fuel, 2 on air
The cam really doesn't need break in. But, let it run 2-3 minutes at 2500-3000 rpm, 2 or 3 times. once you get it finished, run it up to 6,000, varying the speed for 200 miles.
When you sync the carbs, don't let it run too long1978 GS 1000 (since new)
1979 GS 1000 (The Fridge, superbike replica project)
1978 GS 1000 (parts)
1981 GS 850 (anyone want a project?)
1981 GPZ 550 (backroad screamer)
1970 450 Mk IIID (THUMP!)
2007 DRz 400S
1999 ATK 490ES
1994 DR 350SESComment
-
Assuming the new motor was assembled with assembly lubes in all the right places, just start her up. Keep a finger near a kill switch in case it takes off like a bat outa hell. Check for leaks while its idling. Couple minutes of idling? It will be just fine. This bike is so nice, its paining me just to see how beautiful they can be in the right hands.Current Rides: 82 GS1100E, 00 Triumph 955 Speed Triple:twistedevil:, 03 Kawasaki ZRX1200, 01 Honda GL1800, '15 Kawasaki 1000 Versys
Past Rides: 72 Honda SL-125, Kawasaki KE-175, 77 GS750 with total yosh stage 1 kit, 79 GS1000s, 80 GS1000S, 82 GS750e,82 GS1000S, 84 VF500f, 86 FZR600, 95 Triumph Sprint 900,96 Triumph Sprint, 97 Triumph Sprint, 01 Kawasaki ZRX1200, 07 Triumph Tiger 1050, 01 Yam YFZ250F
Work in progress: 78 GS1000, unknown year GS1100ES
Comment
-
Oh, and your clutch arm needs to go a notch counterclockwise1978 GS 1000 (since new)
1979 GS 1000 (The Fridge, superbike replica project)
1978 GS 1000 (parts)
1981 GS 850 (anyone want a project?)
1981 GPZ 550 (backroad screamer)
1970 450 Mk IIID (THUMP!)
2007 DRz 400S
1999 ATK 490ES
1994 DR 350SESComment
-
Ask and ye shall receive :-) I decided to be fancy and draw this with TinyCAD. If you find any errors or have any questions, just holler!
Cogito ergo sum - "I think, therefore I am"
Ren? DescartesComment
-
Sure about that - ? In the relaxed state the clutch arm is parallel with the clutch cover, giving it an angle of less than 90 degrees in relation to the clutch cable. When the clutch is pulled, the cable and arm are at a 90 degree angle. When the arm is rotated one more notch counterclockwise, it sticks out obtrusively beyond the clutch cover and its angle in relation to the clutch cable is very narrow.Cogito ergo sum - "I think, therefore I am"
Ren? DescartesComment
-
I agree with Big T. You may experience some creep when your clutch doesn't fully disengage; especially if you're using aftermarket components. Just looking at the photos, you're actually under-rotated a bit if you compare pivot center to pin center.
Excellent work, BTW...Comment


Comment