-
That's the way I HAVE to look at it sometimes... I didn't buy a part. I bought a pattern! -
The new footbrackets have arrived, and for some reason the mounting points are different from the ones I have. The rear holes doesn't allign, and is positioned 4-5mm forward and forward/up on the other one.

And the metal tabs on the frame must be flush to frame on '82 and protruding about 15mm on my '81:
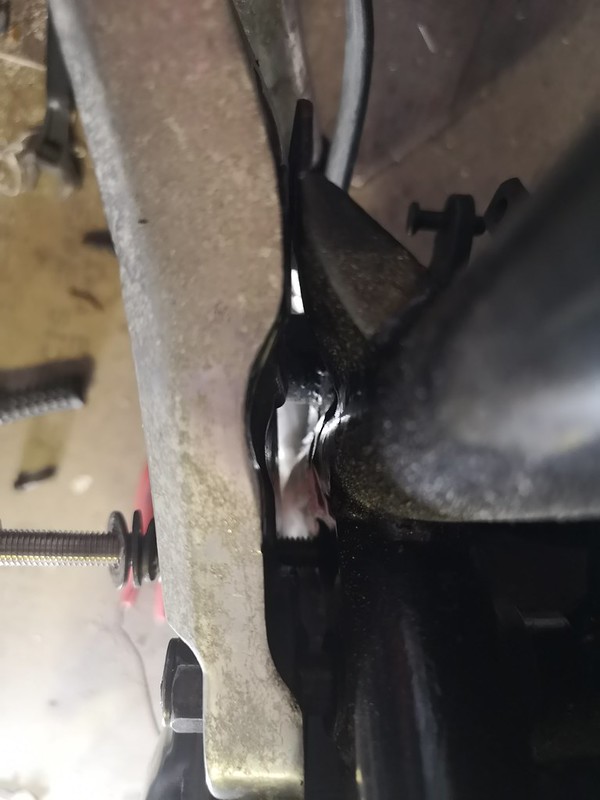
There is plenty of metal that can be removed on the inside of the bracket, but it might be necessary to also alter the metal tabs on the frame.. This turned out to be more work than I expected, and I'll save this job for later. I don't regret buying the brackets though, as they are a very nice starting point for making new, nice looking brackets
Leave a comment:
-
So, the fendermounts came the other day. They were thicker than I expected, and I also expected them to have a shim welded to the bottom so they would hide the bolts.
A little like this:
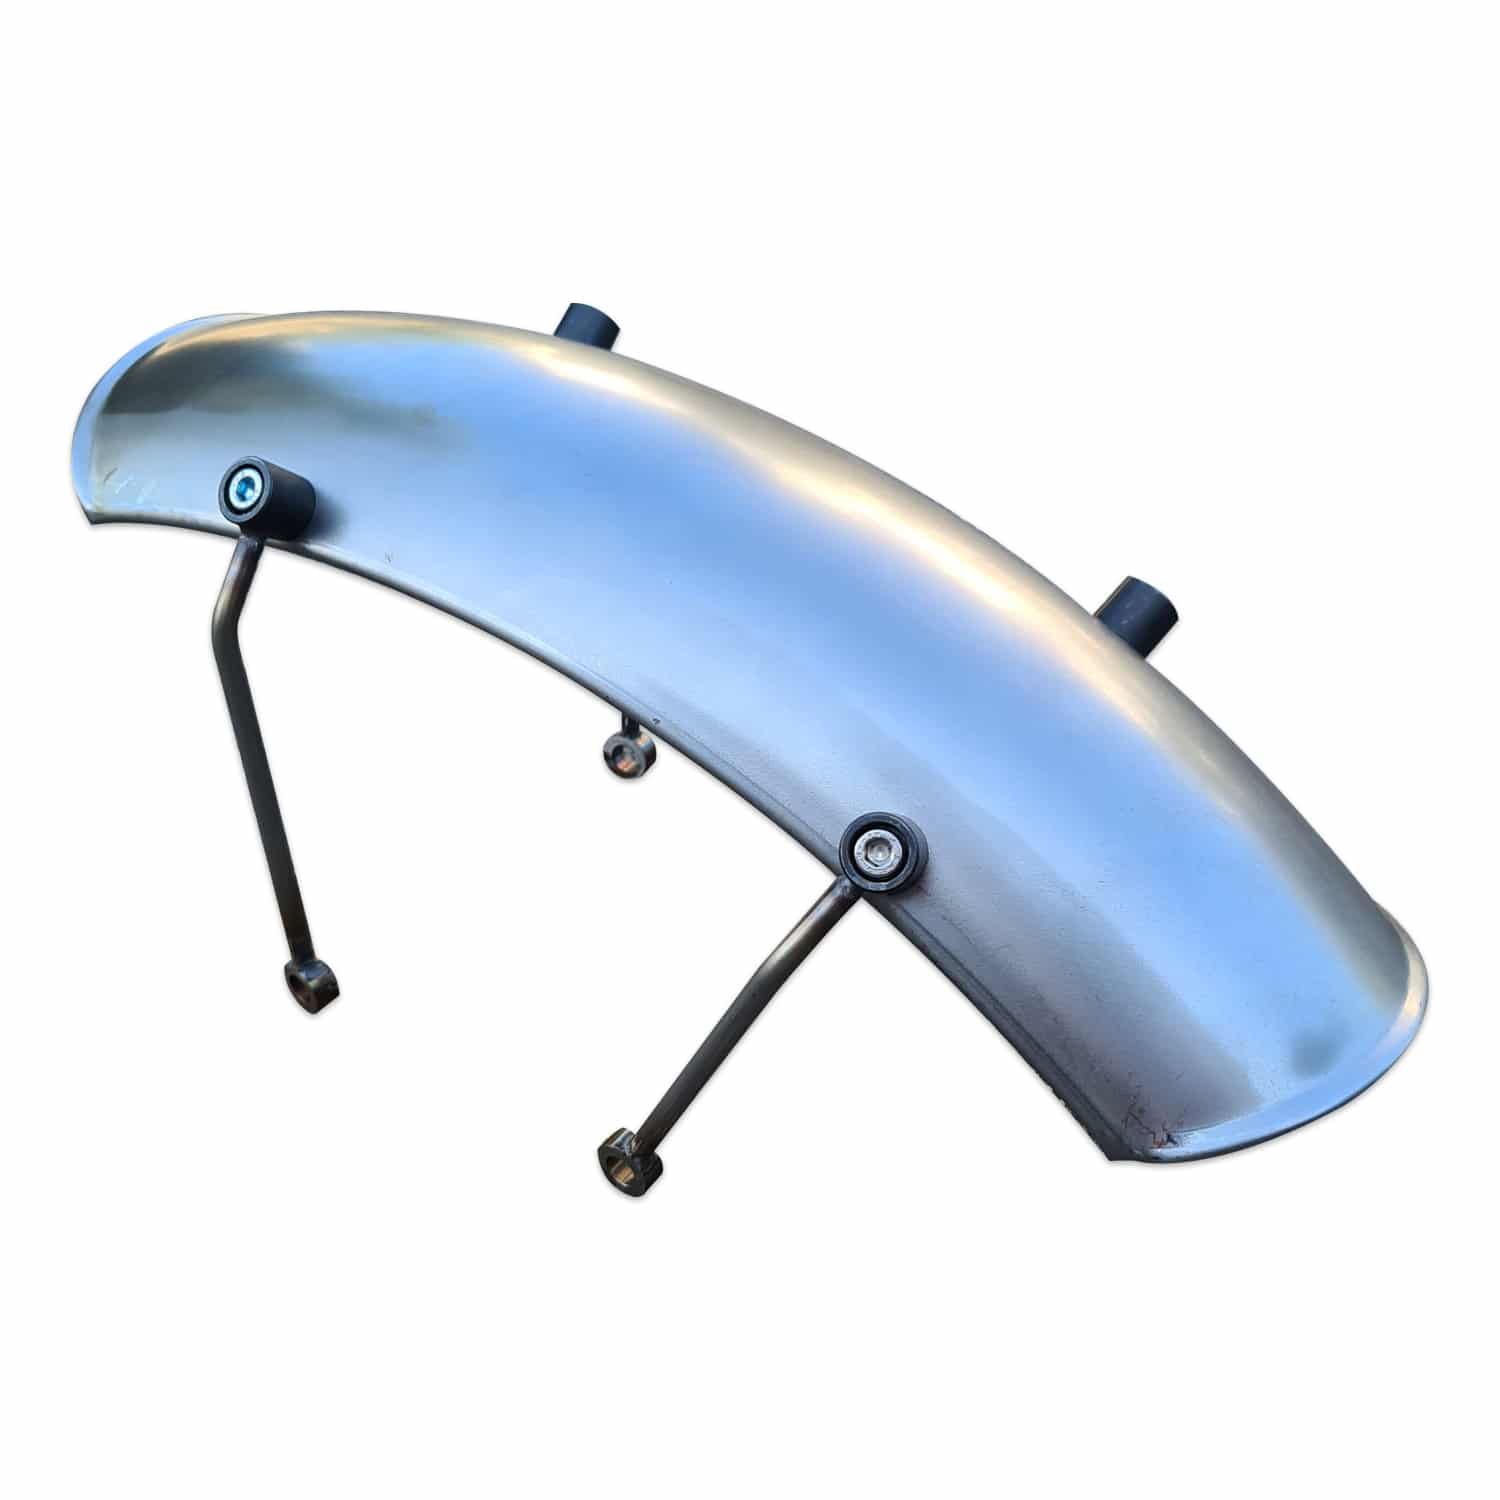
The ones i recived looked like this:

They were also way too long, but that's of course better than the alternative;

I've not descided on wether I'll shorten and bend them, grind them flat and drill/tap and put them on the underside, or bend them and weld them together as a loop.
I'm leaning towards this look:
Leave a comment:
-
Leave a comment:
-
I blazed through your thread and that thing looks insane. Really bad ass.
Overall I'm a little tired of seeing bikes getting chopped up for "caferacer/scrambler conversions" or whatever... but this thing is none of that.
Very well executed. Absolutely brilliant work my friend
Leave a comment:
-
Nice not to have all the sand and particulates scratching up the rear end either.
Leave a comment:
-
Yes, I ordered the longest fender I could find on ebay. I won't be doing long trips on this bike, so it will see minimal rain, but I like the idea of not having alle the dirt making a buildup on the swingarm, leading to moist and rust. But I will try to balance that with the looksOriginally posted by Suzukian View Post
Leave a comment:
-
So many goodies in such a short time. As far as the rear fender, the water usually is thrown tangent to the revolving object, which means the fender would have to be longer, but the bottom end could be a bit shorter. It just has to sit a little higher up on the wheel to keep the splash off the bike and your back. .
Leave a comment:
-
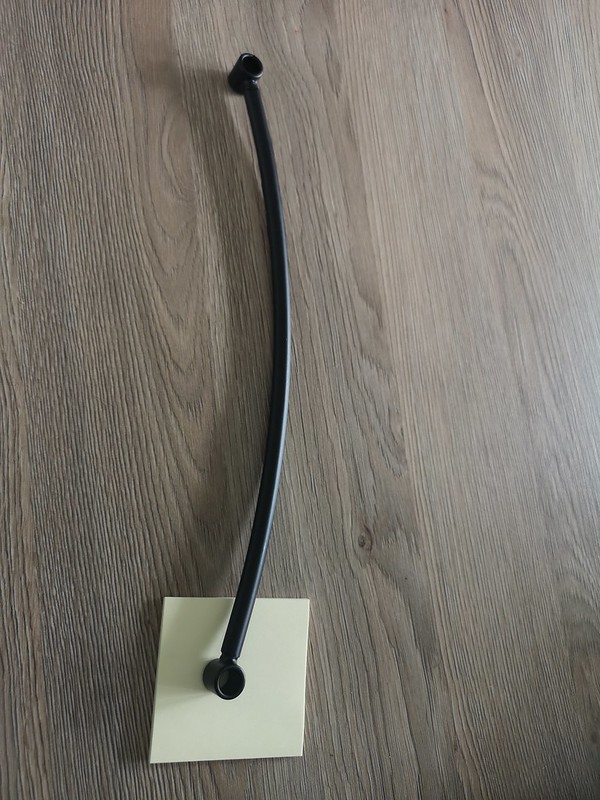
The brake lines arrived today, and while they look awesome, I immediately realized I've made a mistake. I totally forgot to take into account that I've converted my front wheel from the original 17" to 19". I was afraid the "over the fender"-wire would be too short. I mounted them, and they have a natural bend towards the rear. The aluminum fender is made out of a pretty thin material, and it seems like there would be atleast 15mm of air between fender and tyre. Can't see why that would not be sufficient.
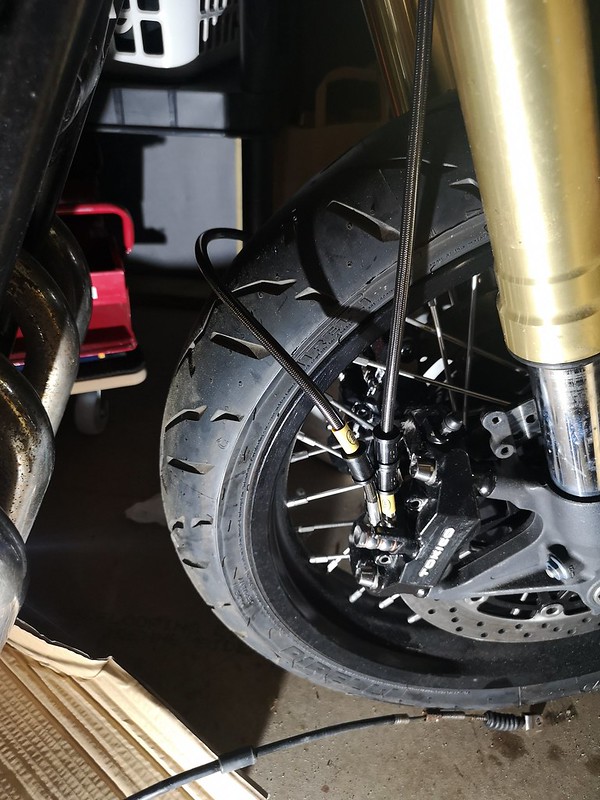

As a surprise bonus, the lines had exactly the bushings I was looking for I'll remove two of these amd install them on the rear instead.
 Last edited by LarsKroghStea; 08-20-2023, 04:06 PM.
Leave a comment:
-
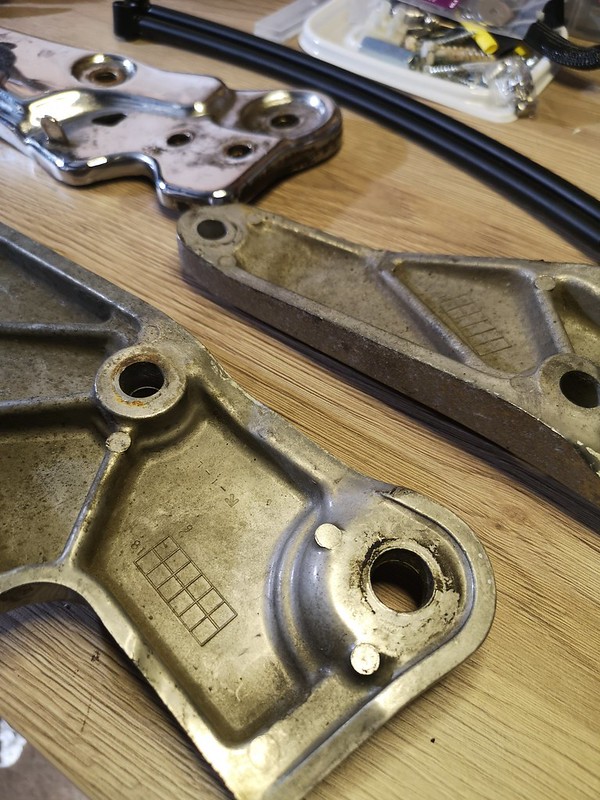
Well.. I haven't looked at these for years. These are the original footpeg-brackets, with bolts in them to show how the tabs I use for my pegs are placed. I've bent the pegs a little, but thats just a temporary solution. The brackets are also much more angled outwards at the rear than I could remember:


I bought these (actually another set, but similar) on ebay, although the shippong is as much as the parts.


When I get them I will cut them behind the middle hole, and drill and tap new holes for the rearsets. Maybe it's best to fill in the backside with "liquid metal" (don't know what you call it in the US. It's a 2K non shrink, highly adhesive, filler we use to fix boat propellers if we run them against something so they chip). I want the rearsets a little bit lower and more forward than they are now.
Last edited by LarsKroghStea; 07-27-2023, 01:04 AM.Leave a comment:
-
Don't know if you can see it on this picture, but the tabs that I've used to mount the rearset, are not at the correct angle.

This means the footpegs are not perpendicular to the frame. My bike (1981 model) came with pressed metal brackets for the rear footpegs, and they are not suited for modification. I don't know if there were different trim levels, or if it relates to difference between years, but most 1982 GSX750E's I've seen has cast aluminum brackets. If I can get a cheap pair of those (they are cheap, I just need to find some locally as it costs too much to ship them from the US), I will use them as a base for new brackets for the rearsets. That will make it easier to get the alignment and angle right.Leave a comment:
-
Not sure where I put the parts for the left pushrod, but I found this turnbuckle. It's for a sailboat, and will not corrode. I think it looks cool too
Just need to cut, straighten and drill a hole in the old gear lever.

I will also need to tap the holes for adjusting the rearset: As you can see on the next picture, the gear pedal has 12 holes with 30 degress separation, and the short transfer lever has 8 holes with 45 degrees of separation. They are connected with four bolts at the 12, 3, 6 and 9 o'clock position, and by alternating whitch holes are used one can adjust the angle in 15 degree increments.

Leave a comment:
-
The rear master cylinder I mounted, cluttered up the space under the seat:

I decided to alter the angle of the inlet from vertical to horizontal, like it is on the original:


Much better:

I'll make a bracket later, to correct the angle/position of the new master.
Leave a comment:
.png "Powered by vBulletin")
Required reading for all forum users!!!
Welcome!
Register to access the full functionality of the GSResources forum. Until you register and activate your account you will not have full forum access, nor will you be able to post or reply to messages.A note to new registrants...
All new forum registrations must be activated via email before you have full access to the forum.A Special Note about Email accounts!
DO NOT USE sbcglobal.net, att.net, bellsouth.net or email.com email addresses when registering for the forum! Email that our system sends out to these email servers is treated as SPAM and you will never receive your activation email, or any other email that our system may send out. Use an email address from gmail.com or some other email server.A note to old forum members...
I receive numerous requests from people who can no longer log in because their accounts were deleted. As mentioned in the forum FAQ, user accounts are deleted if you haven't logged in for the past 6 months. If you can't log in, then create a new forum account. If you don't get an error message, then check your email account for an activation message. If you get a message stating that the email address is already in use, then your account still exists so follow the instructions in the forum FAQ for resetting your password.Have you forgotten your password or have a new email address? Then read the forum FAQ for details on how to reset it.
Any email requests for "can't log in anymore" problems or "lost my password" problems will be deleted. Read the forum FAQ and follow the instructions there - that's what we have one for...
New users should be sure to read the FAQ as well as the posts in the Announcements forum. This will answer many of the questions you may have about how this forum works.
Before posting questions in the forums be sure to use the forum search function!!! Odds are your question has already been asked and answered before. And when posting, please make sure that you post to the correct forum.
Finally, be sure to check out BassCliff's website here. He has useful information that can't be found on this site. His welcome page containing useful GS information can be found here. Be sure to check it out!
If you are a returning visitor to the forum and can't log in using your old forum name and password, chances are your account is deleted. Just create a new forum account and you should be all set.
Leave a comment: