H
Hoosier Daddy
Guest
technical terminology... try seaching for the term "Spherical Rod End"
See here http://www.mcmaster.com/#rod-ends/=f3v0iz
See here http://www.mcmaster.com/#rod-ends/=f3v0iz
Required reading for all forum users!!!
Welcome!
Register to access the full functionality of the GSResources forum. Until you register and activate your account you will not have full forum access, nor will you be able to post or reply to messages.
A note to new registrants...
All new forum registrations must be activated via email before you have full access to the forum.
A Special Note about Email accounts!
DO NOT SIGN UP USING hotmail, outlook, gmx, sbcglobal, att, bellsouth or email.com. They delete our forum signup emails.
A note to old forum members...
I receive numerous requests from people who can no longer log in because their accounts were deleted. As mentioned in the forum FAQ, user accounts are deleted if you haven't logged in for the past 6 months. If you can't log in, then create a new forum account. If you don't get an error message, then check your email account for an activation message. If you get a message stating that the email address is already in use, then your account still exists so follow the instructions in the forum FAQ for resetting your password.
Have you forgotten your password or have a new email address? Then read the forum FAQ for details on how to reset it.
Any email requests for "can't log in anymore" problems or "lost my password" problems will be deleted. Read the forum FAQ and follow the instructions there - that's what we have one for...
If you are a returning visitor who never received your confirmation email, then odds are your email provider is blockinig emails from our server. The only thing that can be done to get around this is you will have to try creating another forum account using an email address from another domain.
If you are a returning visitor to the forum and can't log in using your old forum name and password but used to be able to then chances are your account is deleted. Purges of the databases are done regularly. You will have to create a new forum account and you should be all set.
Pete,
Would something like this do ?
http://www.minibearings.com.au/store/partslist/jointsballandsocketrightangle/fasteners/wide/1/
Dont worry about threads, or rod I can help you with that..
john

")

Oh crap... I am posting answers all over the place, here it is over here now.This is what I should have linked you too...


 ray:):


Pete, what's up with that right chain adjusting bolt? a bit rusty isn't it?Much better (love that tyre)!


Pete, what's up with that right chain adjusting bolt? a bit rusty isn't it?
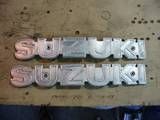
Pete, might I suggest filling in the letters with a contrasting color to set them off against the tank?
Perhaps a red-orange that might compliment the turn signals?
and fill the rest in with black like stock?
Daniel
You started the bike didn't u Pete?
Yeah, pete, what is with that chain adjuster bolt??? tsk tsk tsk, come, come now Pete, after all that good work.....
Agreed on the tank badges, they don't work for me like that either. :-k
I know you want to ride it so badly you can taste it, but no time to cut corners and take short cuts now, after all that stunning work you have done.
Just keeping you honest, brother, just keeping you honest....
I expect the same from you.
And on a less grumpy note, that tyre looks super wicked.....I like, a lot.
I do need to do something about them, and about the footpeg brackets too although they can wait, especially after fixing the gear shift setup!remember the tyres are gonna be waxy to start with, dont want you to drop it and end up on youtube on the maiden voyage... lol
