• Required reading for all forum users!!!

    Welcome!
    Register to access the full functionality of the GSResources forum. Until you register and activate your account you will not have full forum access, nor will you be able to post or reply to messages.

    A note to new registrants...
    All new forum registrations must be activated via email before you have full access to the forum.

    A Special Note about Email accounts!
    DO NOT SIGN UP USING hotmail, outlook, gmx, sbcglobal, att, bellsouth or email.com. They delete our forum signup emails.

    A note to old forum members...
    I receive numerous requests from people who can no longer log in because their accounts were deleted. As mentioned in the forum FAQ, user accounts are deleted if you haven't logged in for the past 6 months. If you can't log in, then create a new forum account. If you don't get an error message, then check your email account for an activation message. If you get a message stating that the email address is already in use, then your account still exists so follow the instructions in the forum FAQ for resetting your password.

    Have you forgotten your password or have a new email address? Then read the forum FAQ for details on how to reset it.

    Any email requests for "can't log in anymore" problems or "lost my password" problems will be deleted. Read the forum FAQ and follow the instructions there - that's what we have one for...

  • Returning Visitors

    If you are a returning visitor who never received your confirmation email, then odds are your email provider is blockinig emails from our server. The only thing that can be done to get around this is you will have to try creating another forum account using an email address from another domain.

    If you are a returning visitor to the forum and can't log in using your old forum name and password but used to be able to then chances are your account is deleted. Purges of the databases are done regularly. You will have to create a new forum account and you should be all set.

Anyone have a GS1100E wiring diagram?

  • Thread starter Thread starter Sojourner
  • Start date Start date
S

Sojourner

Guest
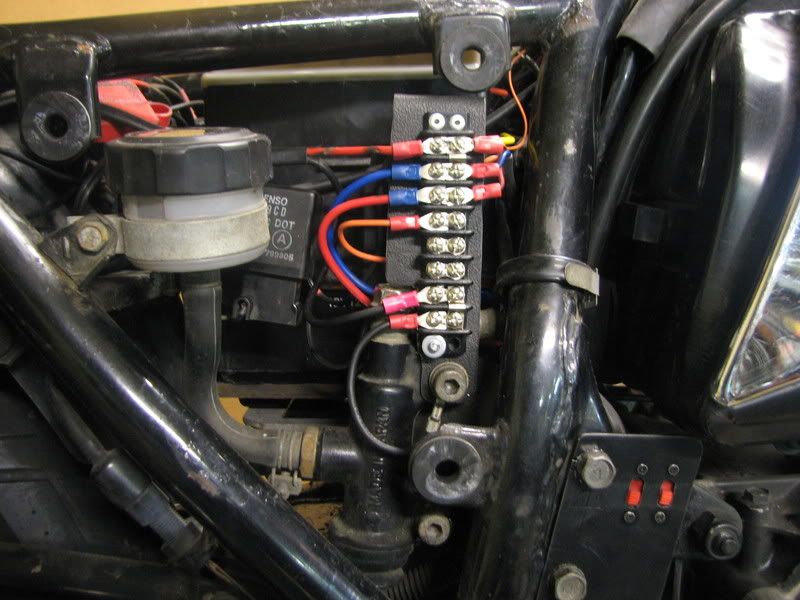
I've been looking at the GS1100 diagram on BassClif's site, but I don't think it's the right one for my bike. For example I don't have any gear indicator lights aside from a neutral indicator light. The other thing is the brake switches. The rear brake switch is part of the MC correct? Mine has a G/W (green w/white tracer) and a B/W (black w/white tracer). According to the diagram on BassClif's site those colors are for the side stand indicator. I don't think I have one of those either...

Any help? I thought I had an issue I am having with my brake light and tail light while looking at the wiring diagram at work. When I got home though none of the wires I thought were the culprit even ru to the right spot!
 
The rear brake switch is part of the MC correct?
Nope. The rear brake switch is completely separate from the master cylinder.

If you look on the right side of the frame, you will see the reservoir attached high, to the rear of the triangle of frame tubes. The hose out the bottom of the reservoir leads down and forward to the master cylinder. Below the reservoir is a tab that holds the brake switch. It should angle down and forward. There should be a wire with a spring in the middle that follows the line of the frame tube down to a tab in the brake pedal. Out the top side of the switch will be the wires that go to the fuse and the brake light.

You can see the switch near the bottom left corner of this picture, just below the frame rail.

IMG_4812.jpg


.
 
So what are the G/W and B/W wires that "plug" in the bottom of the resevoir? Taking my oldest to the ER right now, I'll have to check and see if I have a switch like the one in your picture (bottom left, under the diagonal frame member).
 
B/W is always ground. Test with your multimeter. The other should be power, follow the wiring diagram found on BassCliff's web site.
 
Wiring diagram is in the factory service manual.
 
B/W is always ground. Test with your multimeter. The other should be power, follow the wiring diagram found on BassCliff's web site.

As stated above, the only diagram on BassClif's site for an 1100 obviously is for a different year or model/trim level (ex: an L and not an E).

Thanks Nessism, I'll check the factory manual I've got. Forgot about it being there!
 
Last edited:
So what are the G/W and B/W wires that "plug" in the bottom of the resevoir? Taking my oldest to the ER right now, I'll have to check and see if I have a switch like the one in your picture (bottom left, under the diagonal frame member).
Your dashboard on your bike has a low brake fluid level indicator. thats what those wires are. Its a dummy light switch.
 
All the Suzuki Service Manuals carry the wiring diagram. Some are in color and on BC's site. But the color codes in the SSMs are listed and not that difficult to follow. Seems like there was also a thread here also listing wiring diagrams.
AFA Clymer or Haynes. IDK. Never found them worth looking at.
Sorry if you found that difficult to follow; I admit to presuming certain things.
 
When you get it, I suggest you make multiple copies, at at least 11x17, and then trace the wires of interest with multiple thin highlighters. Very useful. I even had one that covered half my kitchen table, but I was able to find the area of interest easily using this method.
Best of luck.
 
Yep. Sorry man, I thought you were referring to the 20+ wiring diagrams he has linked in the upper right. The GS1100 one in THAT list was for the wrong model. Totally forgot about each manual having one as well.

I've located the G/W and B/W wires I was mistaking for the rear brake switch, and they are indeed a low brake fluid indicator. I've never seen it lit, so I didn't know it was one of the options on the dashboard/light-up bike diagram thing.

So now I know where to look for the correct switch. The odd thing is still the two inline fuse holders that are on my bike but not in the diagram. I have to assume a PO put them in there, but I haven't got a clue as to why. Occasionally the tail light and brake light indicator light up on the diagram idiot light. If I wiggle the brown wire one of them goes out/on, and if I wiggle the white the tail light indicator lights up/off. The funny thing is, even if the tail light idiot light is on, the tail light remains lit. The brake light never comes on (same bulb btw, just supposed to light up brighter) if either brake is depressed- regardless of if the brake light idiot light is lit or not.

I have found a big abrasion in the wire wrap/heat shrink cover of the Turn Signal Control Unit. Close inspection shows that the B/W (ground) wire is cut in two, and the Bl/R (IIRC, it's night time here now) is only hanging together by a few copper strands. That would explain why I sometimes lose my turns signals after a big bump. Apparently the wire wiggles into an angle that the few strands just aren't enough to carry the current necessary.

Also, it appears that I have a problem with my fuel gauge. I shorted the wires from the harness (connected Y/B or was it Y/G? to the B/W ground) and the needle never moved.

Good thing I took a day's vacation to work on the bike tomorrow. Looks like I have electrical work to do aside from replacing the clutch and brakes cables as well as making/installing a new braided line from the front MC to the split (the new bars left them all too short). Might as well clean the front brake switch while I'm at it. At least there's a simple write-up on BassCliff's site, provided I don't lose the damn spring...
 
Last edited:
NP. Sounds like you have your work cut out for you.
First, the multiple copies/ many color highlighters are your friend. Isolate the areas of interest. Tackle each one at a time. If you have already discovered issues (as you have) do it one at a time.
I have investigated many harnesses and found each to have their unique issues. Just tackle it one at a time and you can get it done.
AFA the fuel gauge (a minor issue) the part in the tank is a varistor. You can purchase resistors at Radio Shack for $0.99 that will will give a different value (IDK on your bike) that will indicate a failure in the sending unit in the tank or the wiring or the unit itself. The details are in the SSM afa the values required for testing.
 
And there are no in-line fuses on the stock Suz wiring harness. You need to figure out why the are there and fix the problem, for certain. They are a patch, not a fix.
 
Those inline fuse holders in the headlight bucket are stock. They are on both 80/81 harnesses.
Just leave them alone. Work on hooking every wire up correctly with solid connections that do not faulter when wiggled.
I am going to pm you about some oddities i found with the 1100 e system
 
That's exactly where they're at, the lunchbox/bucket/headlight fairing thing. I really don't know what to call that thing- everyone seems to have their own term. ;)

Anyway, if they are stock, can you tell me what size they are *supposed* to be? It might very well be that the PO shoved the wrong one in there. It wouldn't account for the wiggle symptoms, but I'd feel better knowing they're correct.

I have a sneaking suspicion that the R/Bl wire is the culprit. Or what appears to be R/Bl? Maybe that's B/Bl? The diagram isn't the clearest scan unfortunately. Anyway, it runs from the brake light idiot light to both brake switches. Obviously the bulb is getting power since it lights up at tail light strength.

Still a tad confused why the turn signals work even thought the ground wire from the Turn Signal Control Unit is severed?
Any glass tube fuse I have used works. The fuse holders on mine have a foil sticker on them that say 10amp. I have been fooled by the glass fuses before, they appear to be intact but in fact are no good. I started with all new fuses .Not saying thats your issue, just a pointer.
 
The ones that were in there were like a 15 amp and an 7amp. I replaced them with new ones with the same ratings. Yep- already considered that angle. :(

It's the wiggle that's got me perplexed. Maybe solder in new inline fuse holders? That and the odd wire here and there without a mate. Yep- tracing them out on the correct diagram now too. One's for the battery probe, I knew that much now. If only I could figure a way to clean that up. I guess I could always unscrew the "battery" bulb from the idiot light... :lol:
I actually think that is what people do, take the bulb out. Stupid dummy light. There is supposed to be a spring in those inline holders. Do the holder halves just go right together or is there spring resistence? That keeps the tension/connection on the fuse. It could be loose wire/solder also. Its not a major part of the system, probably a protection to keep other bulbs from blowing or cutting power to the rest of the system in case of surge/ too high of amps coming through the system for whatever reason. You could splice in new holders, just a few dollars each. I am sure you can fix the current ones.
 
Well I had that "AHA!" moment today. I got the OEM clutch and brake L model cables installed on my E. I had to since my new, higher bars left the cables both about 4" short. :(

Anyway, in the midst of doing that and fab'ing a stainless brake line out of parts from Earl's (Big thanks to Nessism for his write-up) since the stock was also about 4" too short, I found the first of my brake light issues somewhat by accident. Then I went and looked and found the second issue as well. <insert facepalm here...>

The front brake lever has two wires to trigger the brake light. Now I'm not an electrical engineer, but when one of those two wires is BROKEN IN HALF, I'm guessing the switch stops working. ;)

The rear brake pedal apparently actuates a switch close to the rear diagonal of the frame that turns on the brake light. Best I can tell, there's a wire or some other such means of connection that is supposed to pull on the little nipple sticking out of the switch when the pedal is depressed. Apparently a PO didn't think it this linkage was at all necessary? The little nipple has a hole in it that had something hook through it as best I can tell. Now it has nothing.

So as soon as I can get the two small, stripped/rusted screws out of the front brake's housing I'm going to solder the wire back onto the switch board. In the meantime I'm going to dig up some parts fiches and try and figure out what piece I'm missing to work the rear brake/brake light linkage. If someone has a pic of it all they can send, I'd be much obliged.

Oh, and as for the "wiggle" problem, it's still there. Thankfully I have it packed into the headlight lunchbox pretty good and for the time being it's all working as it should. Guess I'll need to take another day's vacation and get to know my soldering iron REALLY well....
 
The front brake lever has two wires to trigger the brake light. Now I'm not an electrical engineer, but when one of those two wires is BROKEN IN HALF, I'm guessing the switch stops working. ;)
I am not an electrical engineer, either, but I can assure you that you are correct.
icon_thumbsup.gif


The rear brake pedal apparently actuates a switch close to the rear diagonal of the frame that turns on the brake light. Best I can tell, there's a wire or some other such means of connection that is supposed to pull on the little nipple sticking out of the switch when the pedal is depressed. Apparently a PO didn't think it this linkage was at all necessary? The little nipple has a hole in it that had something hook through it as best I can tell. Now it has nothing.
Yep, there is a spring that goes there. The coiled spring itself isnt' all that long, but there are extensions on each end that will reach where they need to go. One end is, as you have found, in the little plunger in the switch. The other end should attach to the brake pedal. Look just inside where the brake pedal pivots through the frame, you will see a small tab sticking up, and there is a hole in the end of that tab. You can probably find a suitable spring in the assortment drawer at the hardware store.


So as soon as I can get the two small, stripped/rusted screws out of the front brake's housing I'm going to solder the wire back onto the switch board.
If that doesn't work, there are a couple of options available. A new switch is only about $10. The new switch includes EVERYTHING that is added to the master cylinder housing to make the brake light work: plastic tab that fits into the hole in the handle, spring, copper contact, circuit board with wires, housing and two screws. If you only want the circuit board, I have one at home, but won't be home for a couple of months.


In the meantime I'm going to dig up some parts fiches and try and figure out what piece I'm missing to work the rear brake/brake light linkage. If someone has a pic of it all they can send, I'd be much obliged.
Look at the parts fiche for your bike. In the "STAND" fiche, you will see the brake pedal. The inner part of that is item #13. The tab to which the spring attaches is directly over the 13 and rather hard to see. It is NOT the tab going to the rear where pin #17 goes through. Now look at the "WIRING HARNESS" fiche, the spring is #19.


Oh, and as for the "wiggle" problem, it's still there. Thankfully I have it packed into the headlight lunchbox pretty good and for the time being it's all working as it should. Guess I'll need to take another day's vacation and get to know my soldering iron REALLY well....
Just a few tips for proper soldering:
- CLEAN your connections
- Heat the work, not the solder
- More heat is NOT the answer
- Put the heat-shrink on FIRST

:D

.
 
Back
Top