• Required reading for all forum users!!!

    Welcome!
    Register to access the full functionality of the GSResources forum. Until you register and activate your account you will not have full forum access, nor will you be able to post or reply to messages.

    A note to new registrants...
    All new forum registrations must be activated via email before you have full access to the forum.

    A Special Note about Email accounts!
    DO NOT SIGN UP USING hotmail, outlook, gmx, sbcglobal, att, bellsouth or email.com. They delete our forum signup emails.

    A note to old forum members...
    I receive numerous requests from people who can no longer log in because their accounts were deleted. As mentioned in the forum FAQ, user accounts are deleted if you haven't logged in for the past 6 months. If you can't log in, then create a new forum account. If you don't get an error message, then check your email account for an activation message. If you get a message stating that the email address is already in use, then your account still exists so follow the instructions in the forum FAQ for resetting your password.

    Have you forgotten your password or have a new email address? Then read the forum FAQ for details on how to reset it.

    Any email requests for "can't log in anymore" problems or "lost my password" problems will be deleted. Read the forum FAQ and follow the instructions there - that's what we have one for...

  • Returning Visitors

    If you are a returning visitor who never received your confirmation email, then odds are your email provider is blockinig emails from our server. The only thing that can be done to get around this is you will have to try creating another forum account using an email address from another domain.

    If you are a returning visitor to the forum and can't log in using your old forum name and password but used to be able to then chances are your account is deleted. Purges of the databases are done regularly. You will have to create a new forum account and you should be all set.

Back to bikes

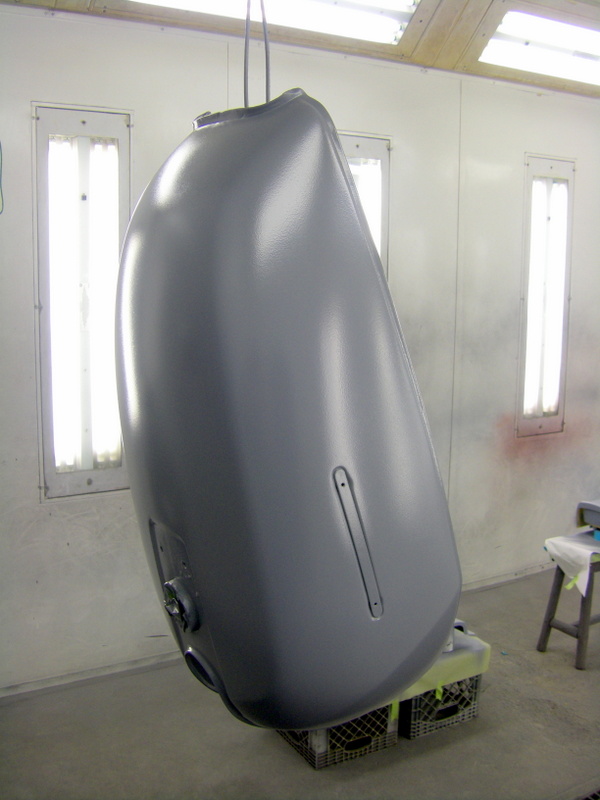
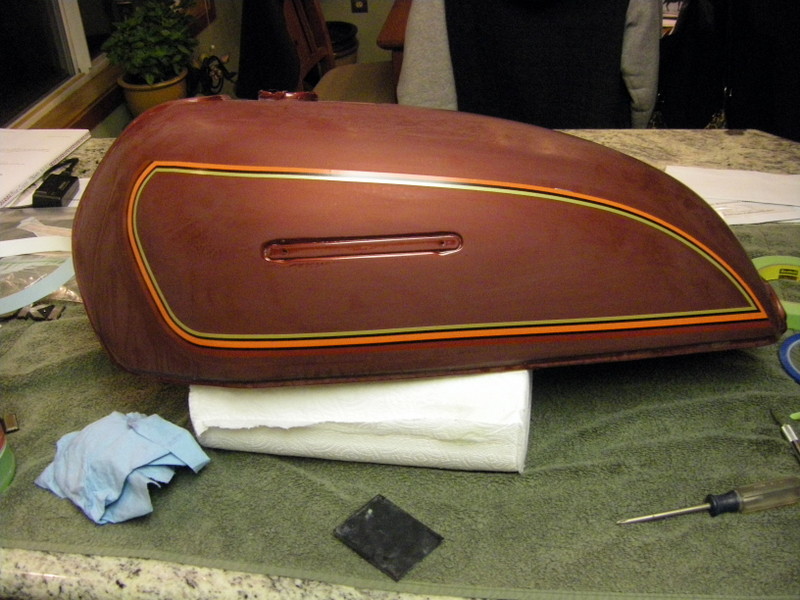
I got started sanding today. If there's one thing I took away from it..is that powder coat does NOT like to be sanded. It's like Armour. Now I see why it's so useful in industrial applications. I sanded the tank with 400 grit DA disks and got a good scuff on the tank..but knew I needed to strip it to metal around the filler. I'm positive the fumes wouldn't penetrate the powder coat..but it will the paint line..so off it goes. 30 minutes later..jeez.


It sanded down pretty nice, but took awhile.


Hand sanding the bottom of the tank took 2 hours with 180 grit and then 400 to smooth it out. So many grooves and crannies to get into.


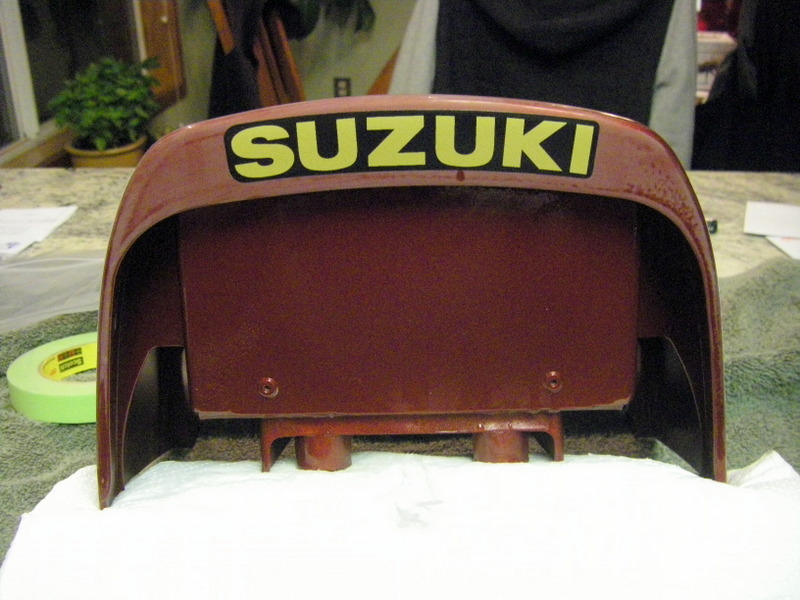
The mystery of the powder coated tail section has been solved. It..wasn't..powder coated after all! The second I started sanding it..it was obviously paint. Such a perfect match texture and color-wise I just assumed it too was powdered. It sanded much easier.


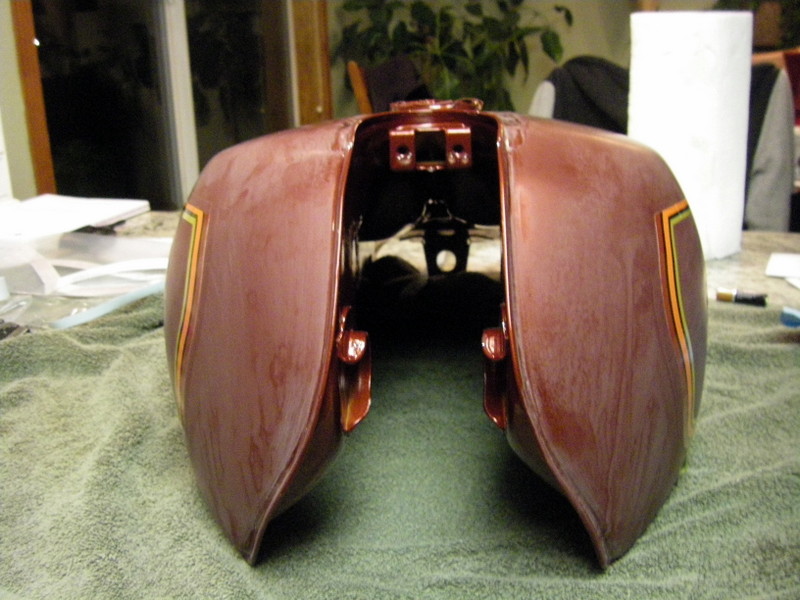
The side covers and gas filler cover were a piece of cake.


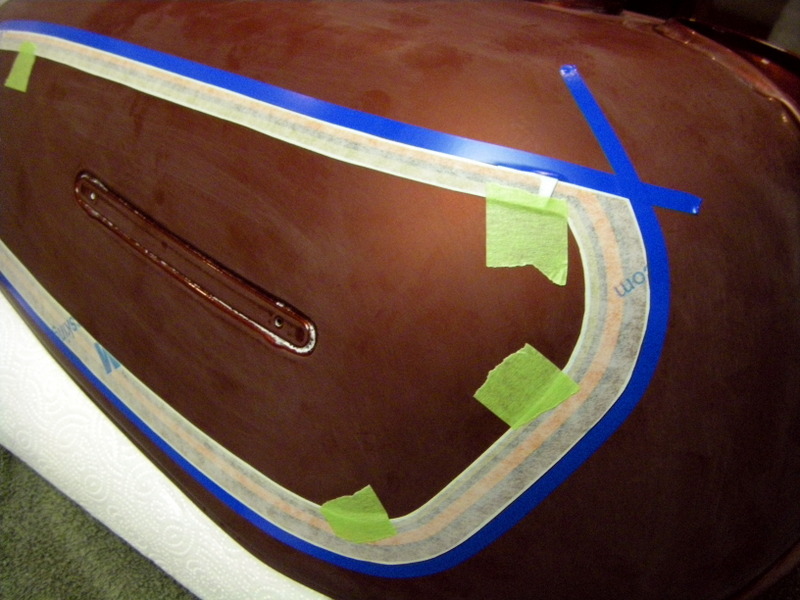
I'll paint both sides so the under side was sanded, too.


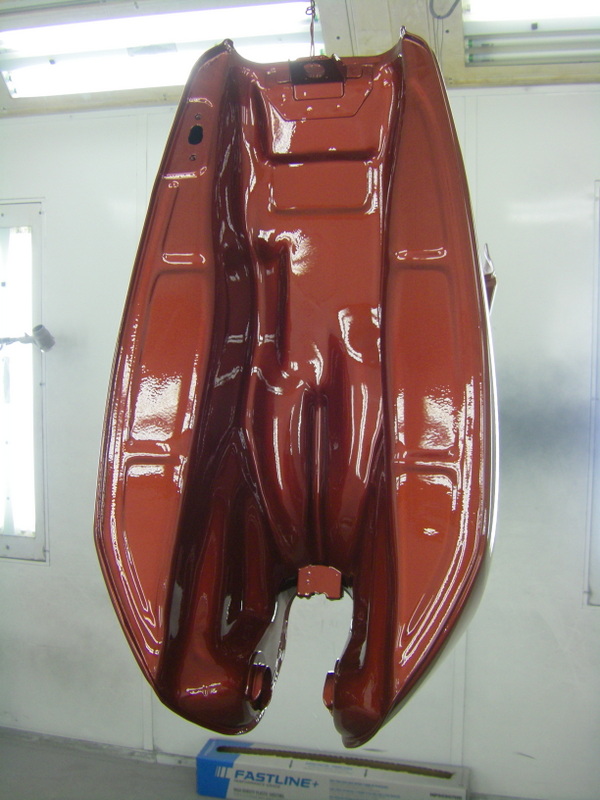
Because the tail was painted, I went ahead with polyester high-build on that and the side covers.


Last edited:
I went with epoxy primer for the tank. Should make a nice barrier between the powder and the base coat. I'll let it cure till next weekend and scuff it up with some 600.


All in all, a good day.
 
Looking good Larry!

What kind of primer is polyester? Catalyzed?
 
Polyester primer is almost a spray putty. It is indeed catalyzed and uses a bit of reducer. It's main purpose is to cover fresh body work, plastic fillers, fiberglass. It fills voids and low spots really well, and sands super easy. Epoxy is mainly used to cover and protect bare metal and can be body worked over the top of it..but it has no fill capability. It also dries to almost a shell, which is why it was suggested to me to use over the powder by my friend, Jason. It, too, uses a catalyst but no reducer. I'll wet sand it with 600 next weekend and that should get it ready for the base coat.
 
Last edited:
Hmm, regular paint on the rear cowl..... just shows how easily I can be duped. In my defense this was 10 years ago and my introduction to powder coating.
BTW, I'm glad this project is contributing to your already impressive skills and knowledge.
 
Thanks, Mal. I've enjoyed the process. You weren't duped. I can totally understand thinking it was powder coated. It's appearance, feel, look, texture, color were all an amazing match to the tank. I'm glad it was painted, it really does make it easier. The parts look real nice and I can't wait tp spray the color coats.
 
The photos look great Larry, doubtless it looks even better in the flesh! Do you ever sign your work? Maybe a signature, initials or symbol? If I had your Jedi skills I would!
 
I've signed a few gas tanks on the under side, Mal. Only when asked to do so, though. I'm always honored..so, sure.
 
The color we selected is as close to stock as I could find..only better. They didn't make colors like this back in the late 70's. It's a 2014 Dodge Ram color with a ton of pearl and metallic. It's gorgeous..but expensive. $300 for a pint..but man, it's gonna look nice.


I should be able to get started on it next weekend. Can't wait. It's gonna be a fun project. Thanks for looking.

Dodge has some great colors. I had a Ram with " White Gold " paint. I can't tell you how many people would say how much they like the color, also had lots of metallic.

And since it looks like you are painting bikes again.....White Gold would look good on a project!
 
Thanks, Pete. On to block sanding the parts and painting today. Started with 400 wet followed by 600 to smooth out the 400 scratches.


A primer touch up here and there.


I always hang parts if I can and always attach a "handle" to keep the part from spinning while I spray. Drives you crazy chasing and running around in circles..


Amazing how such a beautiful color can look so dull until the clear coats are applied.


Clear coats on the tank and tail. Three total. They came out real nice.


Last edited:


While the clear was drying I moved on to the side covers and filler cover. The backs first..


After the backs dried, I did the fronts.


I really like the way these look..but I wonder if they're too satin..hmm. Do they need to be a bit shinier black..? No big deal to re-do them with maybe a base coat black w/o any polishing. Just not sure. Any thoughts? Mal, what do you think?

I'll sand the tank and tail mid-week and get the decals going..then more clear next weekend. All and all, things are moving along nicely.
 
Last edited:
Excellent Larry, I'm enjoying the process. The photos look great and it's all going look even better in my hands... The side covers are perfect from the photos but it's your call whether to repaint - I trust your judgement 100%.
Looking forward to seeing the the tanks with the decals on...
 
Excellent Larry, I'm enjoying the process. The photos look great and it's all going look even better in my hands... The side covers are perfect from the photos but it's your call whether to repaint - I trust your judgement 100%.
Looking forward to seeing the the tanks with the decals on...

I think I'll leave them the way they are then, Mal. I love the way they look, they're absolutely flawless and with the emblems, they'll really pop.
 
Ah that's fantastic Larry, that colour is awesome!

Wait till you can see it in natural light. The pearl and the metallic will really show up. Florescent lights are nice to spray by, but they hide the true beauty. I'm hoping I can get to the decals in the next couple of days so they have a bit of time to gas out before the next round of clear coats.
 
After sanding the tank and tail section with 600 last night, I got started on the decals. Decals make me lay awake at night. Always a bit of anxiety involved in putting them on and trying to get them correct and symmetrical on both sides. I had some pictures that Mal sent me and some examples on the internet to use as a guide but just had to eyeball what I thought were the right measurements. The decals pretty much dictate where they're going to lay smoothly. No forcing them to bend to your will. I started out by laying them on the tank. These come in 2 pieces, one for the bottom and one for the top with intersections at the bottom rear corner and the top front corner. Once they were in place, I held them with bits of tape then ran a piece of Fineline tape around the outside as a guide to lay them for good.


I have a special solution specifically made for applying graphics. Way better then soapy water. No film left to worry about. Once the backing paper was pulled off and the decals revealed..whew..nice.


Followed the same steps for the other side. I think both sides lined up well. very glad for that.


After spending 2 hours on the tank..the tail section took about 20 minutes.


I'll let them breathe and gas out till Saturday then back in the paint booth for the second round of clear coats. I'm pretty stoked how the parts are coming along.
 
Last edited:
I'm getting pretty stoked too Larry, surprisingly.... so is the wife!

Steve, on Larry's advice I bought the decals form Diablo Cycle out of London, Ontario.
 
Back
Top