C
cvmgtwowheels
Guest
Sharp looking bike, looks fast standing still. Were are you so I can send you my bike to get done? HA HA!!
Required reading for all forum users!!!
Welcome!
Register to access the full functionality of the GSResources forum. Until you register and activate your account you will not have full forum access, nor will you be able to post or reply to messages.
A note to new registrants...
All new forum registrations must be activated via email before you have full access to the forum.
A Special Note about Email accounts!
DO NOT SIGN UP USING hotmail, outlook, gmx, sbcglobal, att, bellsouth or email.com. They delete our forum signup emails.
A note to old forum members...
I receive numerous requests from people who can no longer log in because their accounts were deleted. As mentioned in the forum FAQ, user accounts are deleted if you haven't logged in for the past 6 months. If you can't log in, then create a new forum account. If you don't get an error message, then check your email account for an activation message. If you get a message stating that the email address is already in use, then your account still exists so follow the instructions in the forum FAQ for resetting your password.
Have you forgotten your password or have a new email address? Then read the forum FAQ for details on how to reset it.
Any email requests for "can't log in anymore" problems or "lost my password" problems will be deleted. Read the forum FAQ and follow the instructions there - that's what we have one for...
If you are a returning visitor who never received your confirmation email, then odds are your email provider is blockinig emails from our server. The only thing that can be done to get around this is you will have to try creating another forum account using an email address from another domain.
If you are a returning visitor to the forum and can't log in using your old forum name and password but used to be able to then chances are your account is deleted. Purges of the databases are done regularly. You will have to create a new forum account and you should be all set.

all you need left is some spoke rims and you'll be good..
do you still have that mold for your tail?
")
byrdman, since you referred me to this thread, I wont feel bad about asking a question in it.
How did you go from the foam mock up to the final product? How's the seat feel?
Any pics of this you can share?
wow!!! that paint's so perfect it looks like an airbrushed light highlight!! =P~
great work!
I have a clearcoat related question. After my bike was delivered I had to charge the battery and the previous owner did not remove the plug on the breather tube. As a result when I charged the battery it popped the top so to speak and sprayed acid out on the tank and the surrounding area. I didn't notice this at first and as a result the clearcoat on the tank has little tiny spots that have turned brown and look like paint overspray. I called a body shop and they told me that there is no way to fix this and that the whole tank will have to be repainted. I thought the clearcoat could be lightly sanded to get rid of the spots and then re-shot. If you weren't looking for it you probably wouldn't even notice. Any thoughts?
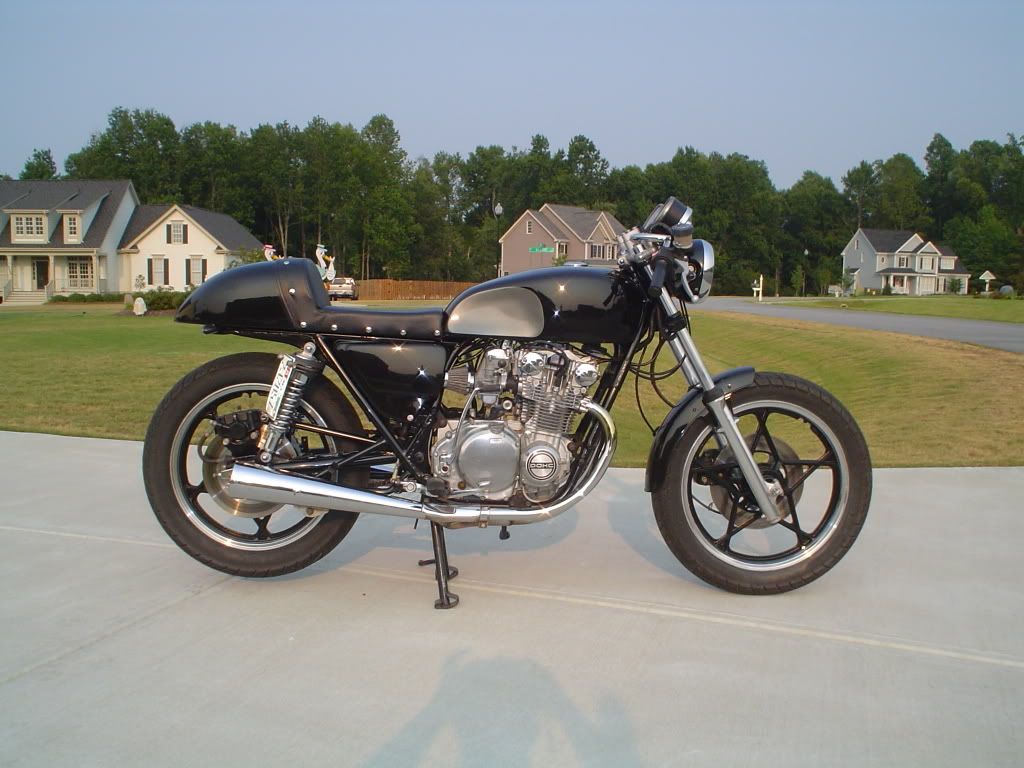
Nice work man!! I love that tank! By any chance you wouldnt be willing to give a few pointers on how you did the knee inserts would you? I can see the basic jist, but im scared to death to try it without some idea of how to start...[FONT="]I finally finshed the bodywork on the tailsection and sprayed it with duplicolor gloss black and duplicolor clear. Wet sanded with 2000 between coats and taped it off in gold trim to match the tank. This is how the bike received its name the "SCUD" since the guys that i ride with all told me the tail section looked like a SCUD missle - haters! I like it so I guess that all that matters.[/FONT]
[FONT="][/FONT]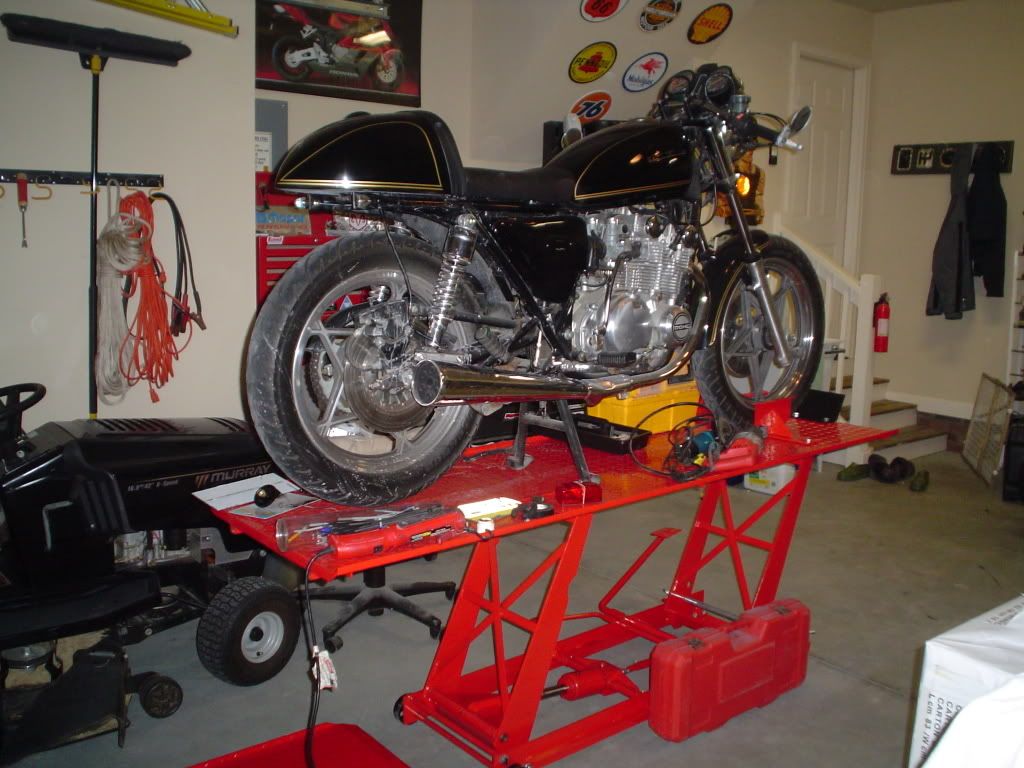
[FONT="]I never really liked the look of the L tank on the bike so I scored a GS550E tank on ebay that I began grafting onto the L frame. The front and rear mounts had to be removed and relocated on the frame. I used the original rear mount and just moved it back on the frame to accomodate the larger tank. I had to add a cross member but it all worked out pretty well.[/FONT]
[FONT="][/FONT]
[FONT="][/FONT]
[FONT="][/FONT]
Nice work man!! I love that tank! By any chance you wouldnt be willing to give a few pointers on how you did the knee inserts would you? I can see the basic jist, but im scared to death to try it without some idea of how to start...
any info would be great!
Thanks and keep it up man that's sweet!!
Hey byrdman,which coils did you get? and which dyna S ignition exactly?
Beautiful bike byrdman. Congrats on the bike and the babies. I painted my bike with that same scheme in different colors. Like you say though, the rattle can stuff, even if it is the automotive, isn't durable. I will use a spray gun with "real" paint next time or have someone else do it.