• Required reading for all forum users!!!

    Welcome!
    Register to access the full functionality of the GSResources forum. Until you register and activate your account you will not have full forum access, nor will you be able to post or reply to messages.

    A note to new registrants...
    All new forum registrations must be activated via email before you have full access to the forum.

    A Special Note about Email accounts!
    DO NOT SIGN UP USING hotmail, outlook, gmx, sbcglobal, att, bellsouth or email.com. They delete our forum signup emails.

    A note to old forum members...
    I receive numerous requests from people who can no longer log in because their accounts were deleted. As mentioned in the forum FAQ, user accounts are deleted if you haven't logged in for the past 6 months. If you can't log in, then create a new forum account. If you don't get an error message, then check your email account for an activation message. If you get a message stating that the email address is already in use, then your account still exists so follow the instructions in the forum FAQ for resetting your password.

    Have you forgotten your password or have a new email address? Then read the forum FAQ for details on how to reset it.

    Any email requests for "can't log in anymore" problems or "lost my password" problems will be deleted. Read the forum FAQ and follow the instructions there - that's what we have one for...

  • Returning Visitors

    If you are a returning visitor who never received your confirmation email, then odds are your email provider is blockinig emails from our server. The only thing that can be done to get around this is you will have to try creating another forum account using an email address from another domain.

    If you are a returning visitor to the forum and can't log in using your old forum name and password but used to be able to then chances are your account is deleted. Purges of the databases are done regularly. You will have to create a new forum account and you should be all set.

Carb rebuild qusetions

  • Thread starter Thread starter GS750GUY
  • Start date Start date
Here's the bench sync write-up from Keith:

http://www.thegsresources.com/_forum...ad.php?t=80632

text below...


Quote:
Originally Posted by KEITH KRAUSE
The VM bench synch.
FULLY CLOSED POSITION first ('78/79 GS1000): Take the tops off the carbs. Throttle return spring INSTALLED. Be sure the throttle valve arms and throttle pulley are torqued to the throttle shaft and the throttle shaft stopper plate is tightened.
Turn the idle adjuster knob to make a good clearance between its tip and the throttle pulley. Above each slide is the slotted adjuster screw and its holding nut. Loosen the holding nuts. Hold the carbs with the ENGINE side facing you. Look at the small nick at the bottom of the slide. When done, you want these to all look as close to uniform as possible. On the 1000, you can start with any carb. Turn the slotted screw to fully close or seat, the throttle valve. Don't tighten it down. Just seat the valve. When you see the valve stop dropping, stop turning the screw. You'll find that the screws are very sensitive. It does take decent eye sight and a careful hand. Once the valve is fully closed, hold the adjuster screw STILL and tighten the holder nut to 3.5 ft/lb. NO MORE. Repeat to the others. When done, the small nicks should look uniform.
Now the FULLY OPEN POSITION: There's a slotted screw under spring tension mounted on the carb bracket. When you open the throttle fully, the pulley will stop when it hits this screw. Turn the carbs so the FILTER side is facing you. Raise the valves by pushing up the throttle pulley until it stops and hold it. Look up and inside the bore. Note the bottom of each valve. The bottom of all the valves must be between .5mm and 1mm above the top of the intake chamber. Turn the slotted screw in to decrease the gap, out to increase. It usually only takes a 1/2 turn or so, if needed.
Now turn up the idle adjuster knob enough so the bike will idle when you do the vacuum tool synch.
A good bench synch will make the vacuum synch easier/quicker.
Use two fans. Stop if you think the motor's getting too hot. Remember to adjust the side air screws by using the highest rpm method before the synch. This is to be done on a warmed up engine. The ignition timing, tappet clearances, and throttle cable slack must be correct too. Clean and oil those K&N's with K&N filter oil and mount.
Note the initial vacuum levels at start up. I synch at about 3,000 rpm's. Don't rev the bike suddenly or you'll suck up mercury. Easy on the throttle. Adjust the higher level(s) to match the lower levels. Don't over tighten the adjuster screws. Get the levels as close as possible. If you can get them so the difference between the highest and lowest level is about 1/2", that's good. Double check all adjustments by slowly opening/closing the valves. It takes practice. You can do it.
 
Thanks Paul for posting that for me. I made a more recent reply about synching that was part of Hoomgars long thread titled something like: GS1K bad fuel mileage, re-jet attn Keith Krause?
I swear this time if someone will just type out the "click this, click that" procedure so I can remember how to post a link, I'll write it down.
I don't know why this computer stuff is so hard for me to remember.:oops:
 
Here's Keith's newer description from this thread http://www.thegsresources.com/_forum/showthread.php?t=80632

The pertinent text:

The VM bench synch.
FULLY CLOSED POSITION first ('78/79 GS1000):

Take the tops off the carbs. Throttle return spring INSTALLED. Be sure the throttle valve arms and throttle pulley are torqued to the throttle shaft and the throttle shaft stopper plate is tightened.

Turn the idle adjuster knob to make a good clearance between its tip and the throttle pulley. Above each slide is the slotted adjuster screw and its holding nut. Loosen the holding nuts. Hold the carbs with the ENGINE side facing you. Look at the small nick at the bottom of the slide. When done, you want these to all look as close to uniform as possible. On the 1000, you can start with any carb. Turn the slotted screw to fully close or seat, the throttle valve. Don't tighten it down. Just seat the valve. When you see the valve stop dropping, stop turning the screw. You'll find that the screws are very sensitive. It does take decent eye sight and a careful hand. Once the valve is fully closed, hold the adjuster screw STILL and tighten the holder nut to 3.5 ft/lb. NO MORE. Repeat to the others. When done, the small nicks should look uniform.
Now the FULLY OPEN POSITION:

There's a slotted screw under spring tension mounted on the carb bracket. When you open the throttle fully, the pulley will stop when it hits this screw. Turn the carbs so the FILTER side is facing you. Raise the valves by pushing up the throttle pulley until it stops and hold it. Look up and inside the bore. Note the bottom of each valve. The bottom of all the valves must be between .5mm and 1mm above the top of the intake chamber. Turn the slotted screw in to decrease the gap, out to increase. It usually only takes a 1/2 turn or so, if needed.

Now turn up the idle adjuster knob enough so the bike will idle when you do the vacuum tool synch.
A good bench synch will make the vacuum synch easier/quicker.
 
Thanks!

Thanks!

Thanks Paul and Keith!! You have both been very helpful.
I'm afraid it's going to be a looooooong winter. I'll be counting the days when it will be nice riding weather again. I've been reading all I can find about the "78" GS750EC and how many of the cycle writers back then raved about the machine. I do like it's appearance and styling much better than many of the newer bikes today. I realize that in today's bike standards the bike is probably not overly impressive however I can't wait until it's road worthy.
Thanks again!! You guys are the best!!
GS750GUY. (HAROLD)
 
Carb cleaning question

Carb cleaning question

Here I am again guys.
I'm now inside the carbs of my "78" GS750 and have started the cleaning process. I notice there is a tan colored, hard, thin residue all over the inside covering the float bowls, the floats themselves, and everything that seems to have come in contact with the two years of stagnant gasoline exposure. I also notice that the several different kinds of carb cleaner I have tried to use does not even budge the stuff. When I carefully use an exacto knife on flat areas it either flakes off in hard flat chunks or scrapes off as a powder residue but the carb cleaners seem useless in removeing the stuff. It seems the only way to remove it is to physically scrape the stuff off. If this being the case, I'm wondering how in the world carb cleaner is going to clean this crud from all of the small passages within the system without physically removing it some how. What is the best spray carb cleaners to use? And do these seem to disolve this stuff? Someone said it seems the cleaners that come in spray cans seem to be more concentrated than the dips.
Thanks,
GS750GUY
 
My bike sat for thirteen years. Two years is nothing :)

I think you must dip. I used Gunk brand Small Parts Cleaner. A one gallon can with basket, at my local autoparts store, cost just under $20 if I remember correctly. It will remove those solid deposits. I soaked for a little longer than the recomended 25 minutes, May 45 or so. I think even longer might have been better, but they look and work great now.

I used spray choke cleaner as a follow up, just to blow out any of the loosend particles. From my experience, spray cleaner alone will not do the job, as you seem to be finding out. PS, I had to use the choke cleaner and some extra time to get the spring loaded tips of the float needles free'd up. I found out about this on my 5th go around with the carb disassembly :oops:

NOT DIPPED ____________________________________________________DIPPED

img_1116.jpg
img_1119.jpg
 
Last edited:
More carb challenges

More carb challenges

A lot of good information being posted on cleaning those old carbs. The closer I look, the more complex my task seems to become. I'm working on a '78 GS750 that sat dormat since 1981. At some point the tank and carbs were removed and drained. Each carb was placed in its own coffee can for many years. Apparently, there was enough gas left to leave a substantial amount of sticky gum with the slow evaporation. I now have new o-rings, gaskets, etc. and my gallon can of gunk. I started on carb 1 last night and quickly realized that the slide is frozen (gummed) in the carb body. A quick inspection indicates that all four have this problem. Rather than using brute force, I'm thinking that I should remove all the screws, o-rings, and other rubber parts and immerse the entire carb in the gunk until the slide can be removed. Is there any problem with leaving parts in the gunk for hours or even days?

Does this make sense???

rickt
 
My Cv carb slides were frozen. I sprayed liberally with choke cleaner and let them sit. I sprayed and sit, sprayed and sit, prayed and sit... for two days. They wouldn't budge. Finally I applied a constant firm pressure for about three minutes. And finally, like a glacial flow, they began to move.

If you don't have any re-usable rubber parts involved, I don't think hours(?) in the dip will harm the metal surfaces.

Side note- Today is my birthday, and it's raining out, so I can't ride. I have been riding every day that I can since putting it back on the road in early September. I can think of nothing better to do today than discuss my newest/ oldest favorite hobby, GS motorcycles! My wife and family are taking me out to dinner tonite, and my wife gave me some money to buy some real motorcycle boots. Riding my GS after 13 years of not, makes me feel like a kid again. What better gift than that!
 
Last edited:
In answer to the question about which spray carb cleaner, I'd say Berrymans is the strongest I've encountered.

And I'll echo the sentiment that you've got to DIP!

Also, I feel blowing out all the passages with a compressor is also a big part of the job. Lots more power behind a compressor than a spray can of carb cleaner. Dip, spray, blow out with compressor.
 
I agree you should dip them. Even with the possibility of problems with the rubber sleeves on the fuel tee and connectors, I'd take them apart and let them soak for a while. Even if the dip doesn't take it all off, it should soften the muck enough for the spray to finish it off. Even with the spray - don't be in too much of a hurry to wipe or blow it off. It evaporates pretty quickly, and you don't want it to dry, but you can leave it for 30-45 sec to let it work its magic.

The only possible issue with leaving them in the dip for a long time is the epoxy that is used to cover the brass plugs. When manufacturing the carbs they often have to drill all the way through them even if they only need the hole on one side. On the other side where the hole shouldn't go through they put in a brass ball to plug the hole and that is covered with epoxy. The dip will soften the epoxy and it comes off. I left mine without it, but if that makes you nervous, you can mix up some epoxy when after they're clean and put a dab on the plugs.

There is also a plastic/nylon looking ridge in each body that fits in a slot in the side of the slides to guide them. I left my carbs in the dip for several hours and it had NO effect on the guide. I don't know what it's made of, but even though it's not metal, it doesn't seem to mind the dip.
 
Thanks!!

Thanks!!

Thanks again to all of you for taking the time to respond. Denydog, your before and after photo's are awesome. You have convinced me to definetely dip.
I know what you mean. I would talk about bikes all the time if I didn't have to feed myself. :)
GS750GUY (HAROLD)
 
Thanks

Thanks

Thanks again guys!!
I've taken your advice regarding dipping and took a chance on the fuel tubes. I found they are the kind without seperate rubber seals. But I'm going to take the chance anyway. They were a very tight fit and I'm going to hope they go back together with a good leak-proof seal. One of you mentioned having the carbs off of your bike five times before you achieved a cleaning that worked. AS much as I love working on my bike I can't imagine doing this carb cleaning job that many times without a certain amount of frustration. I'm anxious to move on to other parts of the bike.
I found Berrymans at OReiley's auto parts for $14.95 per gallon. A bargain to me since I was hearing the $20.00 range. This stuff is great!! Two float bowls in the basket for 30 minutes and they came out looking like brand new. Way better than any result I was getting from any spray carb cleaner.
Thanks again for all the help!!
GS750GUY.
 
Ooooo Nooooo. Back yard mechanic panic.

Ooooo Nooooo. Back yard mechanic panic.

GS750Guy here again. I'm in the midst of my "78" GS750EC carb rebuild project. Guys & gal's here is one to test your experience & wisdom:
I know you guys and gals that have been at this for a long time could probably tell some real dooozies of stories regarding what you have discovered when tearing into a bike project.
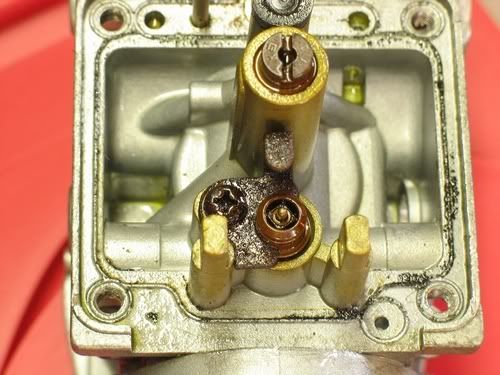
I completed three carbs and got to my #4 carb and was about to remove the Pilot Fuel Screw when my first inclination that something was wrong was when I noticed the head of this screw was set waaaaay lower into the shaft than the other three I had removed. The head of this Pilot Fuel Screw was probably half way down into the shaft that it screws into. The heads of the other three were very near the top of the shaft. As I removed the screw it was apparent what had taken place. I suspect someone had put some undue force on this screw in the past and broke off the tip in the shaft. In their attempt to correct this and still use the broken screw they filed a new point on the screw and then in order to get the screw to seat further into the hole to accomodate its new shorter length they filed off the bottom four rows of thread from the screw so it would seat further into the hole. When I inspectecd the hole in the carb throat that this screw services I noticed the hole was three to four times larger than the same hole in the other three carbs. It appears they may have enlarged this hole by either drilling out the broken tip or forcing the broken tip out through the hole enlargening the hole. Ironically, cylinder #4 was operating when I had the carbs on the bike. It was running very rich but it was running.
In light of the expense of buying carbs is there any way I can continute to use this carb? Could I just buy a new Pilot Fuel Screw to replace the broken one? I realize that due to the enlarged hole I would need to set my screw deeper to fill the larger hole and adjust from there. Since this screw is mainly a fine tune screw for the fuel mix does this sound mechanically doable? I don't know if I can buy just one carb or not. I've only seen them in sets and are very very expensive.
Again your wisdom is appreciated. You are probably getting tired of hearing from the GS750GUY.
THANKS!!!!!!!!:confused:
 
If the hole is bigger as you're looking at it from inside the throat, you are gonna have to replace that carb body. You could try to repair it with JB Weld and re-poke a smaller hole or something but it'll never be right. Get a carb or set of carbs off eBay or in the forsale section here on the forums. You may be able to find a carb from a different size bike but as long as it's the same style of carb you should just be able to swap the jets out to make it match your other three.

Good luck.
 
Bummer. I'll have to defer to more experienced carb folks for a definitive answer. I'd guess that with the right shape tip, you could adjust it so that it has the same effective opening and allows the same flow as the other carbs, but it would add a large unknown to your efforts to get the whole system tuned properly and running smoothly. Finding a new #4 carb body would be the preferred solution. A lot of Kawasaki's from that era also used the Mikuni VM carbs, so that might expand the possibilities.
 
Exactly. While technically possible to repair or work-around the problem, it's highly impractical and likely you'll never get it "just right". And any time you have trouble, you'll never know if it's a result of that messed up carb since it'd be an unknown.
 
There might be someone here who's willing to seperate a bank of carbs for you. Myself, I have a bad set of CV's, but with a little work the #2 & 3 carbs could be salvaged, so I'd be willing to break them up and send one to someone who needed it, or send them the whole set since 1 & 4 are shot. Maybe someone here has a similar set of VM's. Post under the parts wanted and see what turns up.
 
I can't give a solid opinion unless I saw how much the hole is enlarged.
A replacement body would be the best thing but if you don't mind experimenting you can try to make it work. If you don't like the results, then look for a replacement. Depends on how big the hole is and how important your time is. I'd look for another carb but I'm trying to consider you may want to be more practical about it? Don't forget that separating the carbs may create a leak at the infamous "T" fitting or tube couplers. It has to be another #4 carb too.
I suppose in theory, if the hole was enlarged up to a certain amount, that amount could still be filled by turning in the screw more. The pilot fuel screw assists the pilot jet. It's the fine tuning for each cylinder. It has a noticable effect on the pilot circuit. You'll notice any problems mostly at warm up/idle and lower speeds. Up to about 1/4 throttle position will be effected though until the jet needle takes over completely. The smaller the throttle opening, the more the effect.
 
#4 Pilot fuel screw..THANKS

#4 Pilot fuel screw..THANKS

Thanks again guys for your insight concerning this. The hole is not huge....maybe three to four times it's normal size. They are slightly bigger than a hair anyway. Based on what an old Zuzuki mechanic told me about the situation Keith's theory makes sense. The mechanic told me that if the hole is still small enough that it can still be filled with the screw then the screw can still be adjusted for correct fuel mixture. He said the purpose of the screw adjustment is to meter the amount of fuel and air mixture to the carb throat and that as long as the hole is small enough the taper of the screw will be able to meter this flow by resetting the screw position. He said the screws primary purpose is to fine tune the fuel burn and you can tell if it's doing the job by looking at the plugs.
I guess the worse that can happen is that I will eventually have to replace the carb. I'm debating if I should go through the headache and expense to find another #4 carb body.....or just buy a new screw and see if an adjustment to the screw will do the trick.
THANKS AGAIN!! IT REALLY HELPS TO BOUNCE THINGS OFF ONE ANOTHER.
YOU GUYS ARE THE BEST!
GS750GUY
 
I've got a rack of VM26 carbs off my 79 750E that I've been cannibalizing. You can have the #4 carb body and pilot fuel screw if you want them. Let me know.
 
Back
Top