so after some research I have found the method to the madness.
First buying a taillight from LP and cannibalizing it would be cheaper and easier. I even thought about just using a Ducati Monster tail light, it has a nice clean look that fits our bikes body as stock or caf?.
But where is the fun in that! I decided to go ahead and make my own LED light assembly. Right now I am in design and parts phase, so no cool pics of molds and electrical just yet.
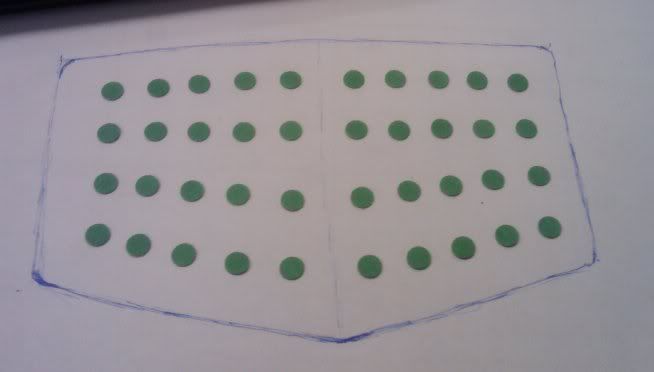
Some quick notes the tail light will consist of 40 bi-color (red and amber) LEDs. The LEDs will be done up in 4 arrays, divided into two banks (right and left). I have included a basic circuit of the system, do realize the diagram is for only half of the system. The down side is my system is not as slim and slender as LPs or a system designed by a true electronics engineer. So I will have two large bulky automotive relays that switch the two arrays from red two amber. (I am still researching LED drivers that can possibly do this for me, but they aren't small either).
As for the lens this will be a little more complicated. Now I could make it easy and just maker a clear version of my current tail light. But of course my mind went into over drive. I want to eliminate the the side and rear reflectors, and the small circle diffuser pattern. Plus I am going to cut 1/2" to a full 1" off the lens height. So to start I am going to make a mold of my current light, and make a lens. Then take the new lens and modify it with clay, and epoxy as I see fit. Then make a new mold and viola a clear lens for my LED light project.
So first here is a picture of the LED array that I mocked up. Problem is hole punch dots are 7mm and the LEDs are 5mm. But it gets the idea across.
This is the part of the circuit, courtesy of google search
Parts:
R1______________10K 1/4W Resistor
R2______________33R 1/4W Resistor (See Notes)
R3______________15R 1/4W Resistor (See Notes)
D1___________1N5819 40V 1A Schottky-barrier Diode (See Notes)
D2--D13________LEDs High brightness, high efficiency red types (See Notes)
Q1____________BC547 45V 100mA NPN Transistor
Q2____________BC337 45V 800mA NPN Transistor
SW1____________SPST Tail Light Switch
SW2____________SPST Brake Light Switch
Comments:
This circuit was designed on request to drive a Light-cluster formed by several LEDs that can be mounted in the vehicle as a tail and brake light.
When SW1 is on, the cluster will illuminate at medium brightness. When brakes are operated, SW2 will be closed and the cluster will shine at maximum brightness.
These two brightness levels of the cluster are obtained by a constant current source drive formed by Q1 and Q2. The two constant current levels are set by R2 and R3 values.
Notes:
- The cluster can be formed by up to 12 LEDs as shown in the circuit diagram. Common cluster types usually range from 5 to 10 LEDs.
- Using the values shown above, stand-by current was 1mA; SW1 on = 20mA, SW2 on = 60mA.
- Constant output current value can be changed by varying R2 and/or R3.
The formula is: R = 0.6/I (in Amperes).
- Please note that the brake current is obtained by paralleling R2 and R3 values.
- Use high brightness, high efficiency red LED types of suitable size and change R2 and R3 values to suit LED's Absolute Maximum Ratings.
- Any Schottky-barrier type diode can be used in place of the 1N5819: the BAT46 type will be a very good choice.
Last for those that want to know how I am going to make the mold

Great read lots of pics. Only difference is I am using Tap Plastics (much cheaper).
http://www.alumilite.com/howtos/TailLightMoldingEquipment.cfm
I shall post as parts arrive and get built.
Enjoy