• Required reading for all forum users!!!

    Welcome!
    Register to access the full functionality of the GSResources forum. Until you register and activate your account you will not have full forum access, nor will you be able to post or reply to messages.

    A note to new registrants...
    All new forum registrations must be activated via email before you have full access to the forum.

    A Special Note about Email accounts!
    DO NOT SIGN UP USING hotmail, outlook, gmx, sbcglobal, att, bellsouth or email.com. They delete our forum signup emails.

    A note to old forum members...
    I receive numerous requests from people who can no longer log in because their accounts were deleted. As mentioned in the forum FAQ, user accounts are deleted if you haven't logged in for the past 6 months. If you can't log in, then create a new forum account. If you don't get an error message, then check your email account for an activation message. If you get a message stating that the email address is already in use, then your account still exists so follow the instructions in the forum FAQ for resetting your password.

    Have you forgotten your password or have a new email address? Then read the forum FAQ for details on how to reset it.

    Any email requests for "can't log in anymore" problems or "lost my password" problems will be deleted. Read the forum FAQ and follow the instructions there - that's what we have one for...

  • Returning Visitors

    If you are a returning visitor who never received your confirmation email, then odds are your email provider is blockinig emails from our server. The only thing that can be done to get around this is you will have to try creating another forum account using an email address from another domain.

    If you are a returning visitor to the forum and can't log in using your old forum name and password but used to be able to then chances are your account is deleted. Purges of the databases are done regularly. You will have to create a new forum account and you should be all set.

Fuse Box upgrade

I can tell you how I did it if you want.

Hey, even if you don't want, I'm gonna do it anyway. :D

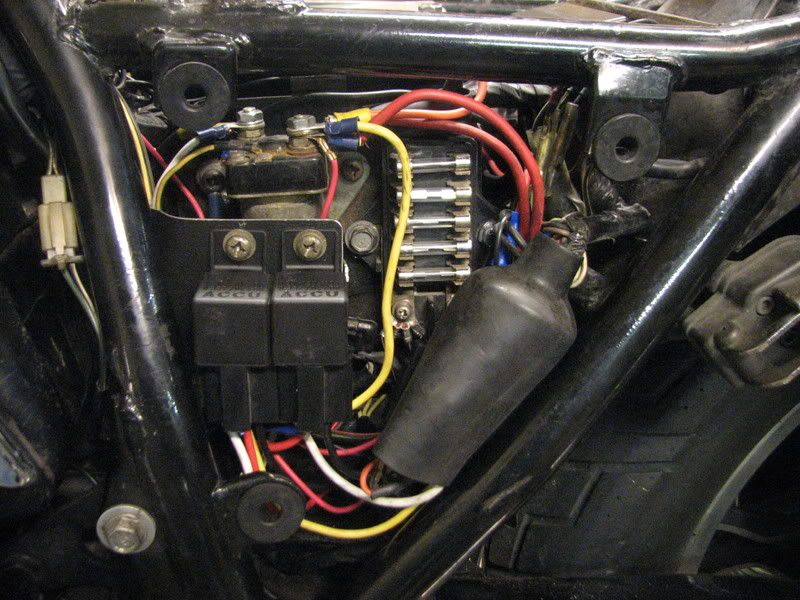
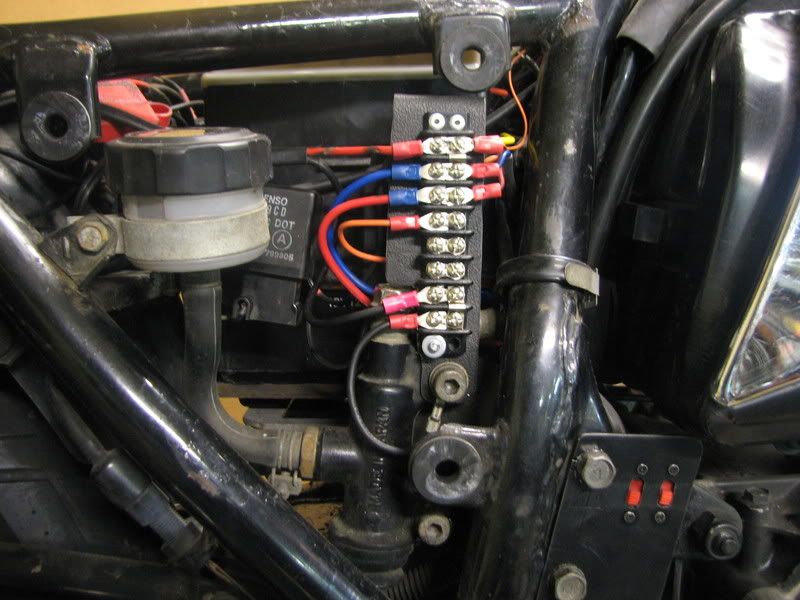
At the fuse panel is a 4-pin plug. One wire comes from the ignition switch to feed the top three fuses, the other three wires are the ones going from the fuses to their respective circuits. I removed the headlight wire from that plug and re-routed it to a relay, using terminal 30 on the relay. From terminal 87a on the relay, I routed a wire back to the headlight feed where I disconnected it. (You could also just cut the wire before or after the plug, I chose to remove the terminal from the plug and insert another terminal.) Back at the relay, connect terminal 85 to the starter terminal on the solenoid and terminal 86 to ground. Here is how it now works: Terminal 87a is "normally closed", meaning that it will pass current from 30 to 87a. When the starter is activated, you now also activate the coil in the relay, which moves the power from terminal 87a to 87, which has nothing attached. Since 87a now has no power, the headlight goes OFF. When you release the starter button, the relay relaxes, power returns to 87a and the headlight comes back ON. Note that this is a fail-safe system. If the relay malfunctions and does not operate, you still have a headlight, it just won't go OFF when you push the starter button.

.
 
Actually Steve, that was subtle prompting to get you to explain it to me. I have progressed from complete doofus, to just kind of clueless when it comes to electronics. After this I may progress to just a bit dim.
 
For all the farkles on my wife's bike, I used a distribution panel (terminal strip) mounted under the right side panel. Switched power is fed to the panel from a relay under the left side panel. When I installed that relay, I also added a relay that cuts power to the headlight when the starter button is pushed. Here are the relays:
IMG_4813.jpg


Here is the terminal strip:
IMG_4812.jpg


The strip has changed a bit since this picture was taken, but there are a few items connected at the top to switched power, one row is constant power, the bottom rows are all grounds.

Can't say as I would recommend this to everyone, but it works for me.

.

Does your terminal strip have two seperate metal strips on the back?

Just trying to figure out how it works cause it seems compact and useful!
 
Does your terminal strip have two seperate metal strips on the back?

Just trying to figure out how it works cause it seems compact and useful!
Nothing on the back except plastic. :)

The two screws that are side by side in the picture are connected by a strip under the screws. The top two pairs and the bottom two pairs are each connected by a small jumper that you can see bridging over the barrier on the right side. That gives four screws with the same connection. My general thought was power in on the left, power out on the right. For example: in the second row from the top, the blue wire on the left comes from the (added) relay on the left side of the bike. That relay is activated when the key is turned ON, so anything connected to those top four screws has switched power. The wires on the right go to the CB radio, GPS and voltmeter, the wire on the top left goes back to the tail light. The tail light was flickering a bit when the headlight modulator is used, so I moved its feed to a steady power source. The third row is fed by the red wire on the left, which is the normally closed contact from the relay, meaning it has power when the key is OFF. The wire on the right goes down to one of the switches in the lower right corner that are for the LEDs on the edge of the gas tank. That way we can park the bike at the light parades we attend and have lights on without having the key on. My wiring was incomplete when that picture was taken, but there is now a wire going off to the right of the lone orange wire, but I can't remember what it feeds. All the grounds are together at the bottom for convenience.

The terminal strips are from Radio Shack and only cost a few bucks each. If you choose to use fork-type terminals like I did, make sure you get the ones with the narrow legs that fit the terminal strips. The normal fork connectors are too wide.

.
 
Last edited:
Back
Top