As mentioned, you need to depress the top cap slightly to relieve pressure against the spring clip. I think you can do it using a large handled screwdriver. Be ready with a smaller screwdriver to dig the clip out of the groove as soon as you depress the cap.
-
Required reading for all forum users!!!
Welcome!
Register to access the full functionality of the GSResources forum. Until you register and activate your account you will not have full forum access, nor will you be able to post or reply to messages.A note to new registrants...
All new forum registrations must be activated via email before you have full access to the forum.A Special Note about Email accounts!
DO NOT SIGN UP USING hotmail, outlook, gmx, sbcglobal, att, bellsouth or email.com. They delete our forum signup emails.A note to old forum members...
I receive numerous requests from people who can no longer log in because their accounts were deleted. As mentioned in the forum FAQ, user accounts are deleted if you haven't logged in for the past 6 months. If you can't log in, then create a new forum account. If you don't get an error message, then check your email account for an activation message. If you get a message stating that the email address is already in use, then your account still exists so follow the instructions in the forum FAQ for resetting your password.Have you forgotten your password or have a new email address? Then read the forum FAQ for details on how to reset it.
Any email requests for "can't log in anymore" problems or "lost my password" problems will be deleted. Read the forum FAQ and follow the instructions there - that's what we have one for...
-
Returning Visitors
If you are a returning visitor who never received your confirmation email, then odds are your email provider is blockinig emails from our server. The only thing that can be done to get around this is you will have to try creating another forum account using an email address from another domain.
If you are a returning visitor to the forum and can't log in using your old forum name and password but used to be able to then chances are your account is deleted. Purges of the databases are done regularly. You will have to create a new forum account and you should be all set.
You are using an out of date browser. It may not display this or other websites correctly.
You should upgrade or use an alternative browser.
You should upgrade or use an alternative browser.
R
Runeight
Guest
OK guys, thank you.
R
Runeight
Guest
Reading more into then needed. Thanks guys.

I do not have a seal driver but have heard of using a socket, inverted, along with an extension to seat the seal.
Good or bad?
I do not have a seal driver but have heard of using a socket, inverted, along with an extension to seat the seal.
Good or bad?
R
Runeight
Guest
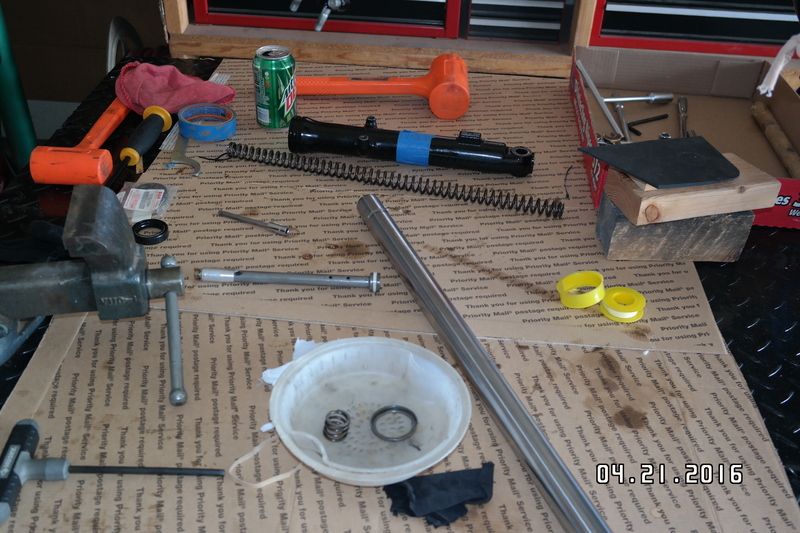
Everything apart on the right side. Yeah, they fight ya but I won. Need to clean and reassemble then the left side. Spring in spec.
Not going to run air. Book states 150 cc per side.
Not going to run air. Book states 150 cc per side.
R
Runeight
Guest
Can anyone tell me what size fork seal driver I would need? Having a heck of a time setting the seal without one.
Also, in the picture with the white basket I forgot which way the spacer goes. I believe it's sitting correct in the basket when you install it.
Also, in the picture with the white basket I forgot which way the spacer goes. I believe it's sitting correct in the basket when you install it.
R
Runeight
Guest
I tried that but can't get the diameter I need. I ordered a adjustable seal driver.
I did did get the seal down but could not get the snap ring on. Needed to go further. I'm trying to get it out now and start over. Ordered two more seals. The damn thing just won't budge. Been on it all day. One seal. I'd be fired in a real shop huh?
I'm about ready to send them out for a rebuild. Should of done this in the first place.
S
SVSooke
Guest
Are you SURE they are 33mm seals?Got given a set of 35mm seals because an idiot parts guy though they'd fit.The proper seals slid right in.
R
Runeight
Guest
I used OEM seals. Checked the part number several times. The saying "proper tool for the job" comes to mind here. I used a tire spoon with electrical tape for prying. On the opposite side I slit a piece of fuel line to pry against.
The old seal popped right out. I put the right fork lower in the freezer last night. Popped right out. I kept thinking what could I use to pry with? Dawned on me in the middle of the night. Could of saved a lot of frustration if I walked away earlier which is what I finally did.
New seals ordered, again, and a tool to install them correctly. With all the forks I have done, with the exception of the Ducati which I sent to Race Tech, I can't believe I never bought a seal driver. I'll have one now.
Sometimes I just get stupid, I'll admit it.
Thanks guys.
R
Runeight
Guest
Last week I finished up the triple and added some new parts. Found new OEM headlight mounts on flea bay. Ordered up new top and bottom rubber mounts and trim rings.
Old.
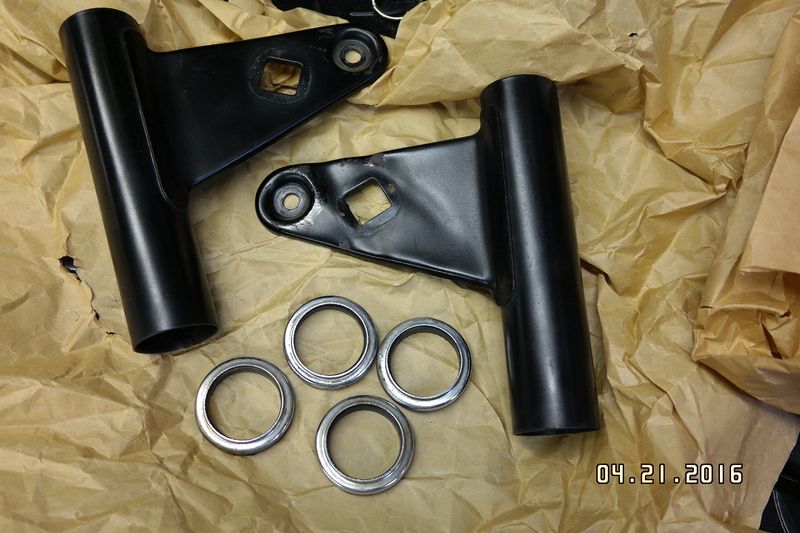
New.

Installed.

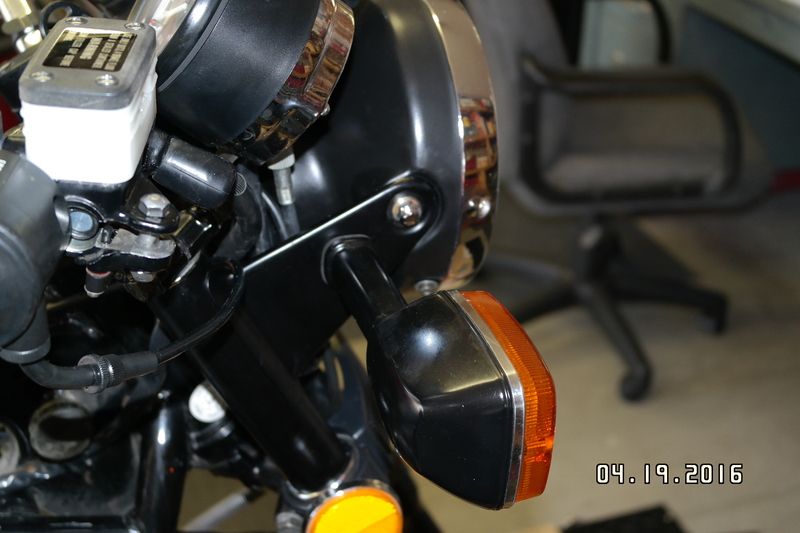
Cleaned up the instrument area and mounted everything up.

I am amassing quite a few good used parts so if your doing a budget build and in need of certain parts I might have what you need. Small stuff, nothing big like exhaust, carburetors etc.
Old.
New.
Installed.
Cleaned up the instrument area and mounted everything up.
I am amassing quite a few good used parts so if your doing a budget build and in need of certain parts I might have what you need. Small stuff, nothing big like exhaust, carburetors etc.
Last edited:
L
loud et
Guest
I couldn't find the "just right" size pvc pipe either so I took a piece that was slightly too big and just used a belt sander to sand down a couple inches on the end so it fit perfectly.
R
Runeight
Guest
That will work.
R
Runeight
Guest
Yea!
Yea!
Fuel tank repaired.

Yea!
Fuel tank repaired.
R
Runeight
Guest
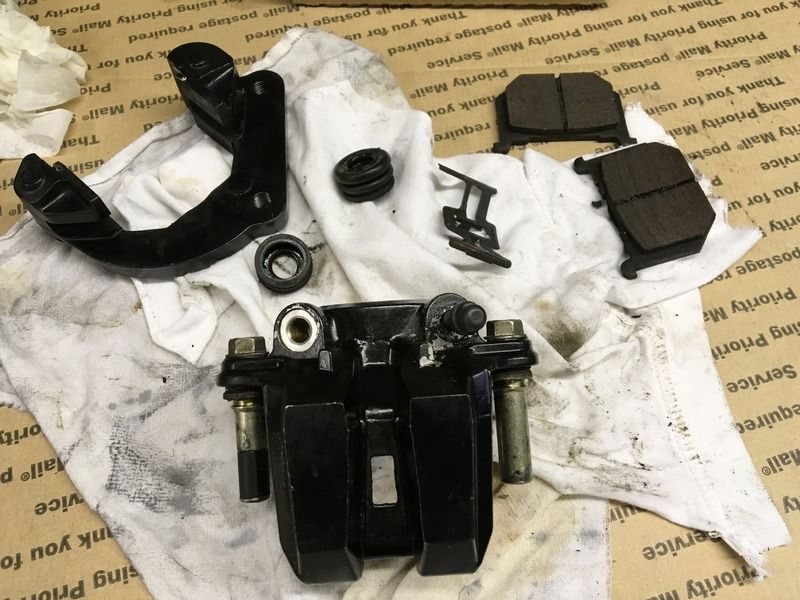
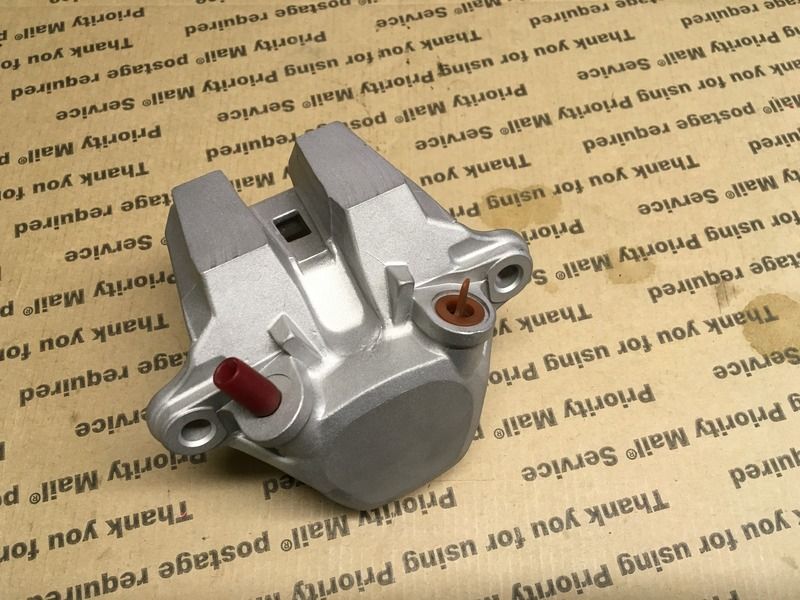
On to the brakes..
On to the brakes..
Parts ordered for a cleaning, paint and rebuild. Makes no sense to do the MC, rotor and not the caliper.
On to the brakes..
Parts ordered for a cleaning, paint and rebuild. Makes no sense to do the MC, rotor and not the caliper.
L
loud et
Guest
Parts ordered for a cleaning, paint and rebuild. Makes no sense to do the MC, rotor and not the caliper.
See the caliper slide pin on the left....the one with the rubber sleeve?
Did you happen to find that part available for purchase? Just the rubber? They call it the "axle bushing" and it's been unavailable lately. Mine (and some others here) are swollen and won't slide freely in the bore.
Just curious if you found them?
R
Runeight
Guest
No, it's still good. Not swollen.
Didnt know it was NLA.
Didnt know it was NLA.
L
loud et
Guest
No, it's still good. Not swollen.
Didnt know it was NLA.
It's not discontinued.....just on backorder from Suzuki Japan. Being made in Japan with an unknown date of availability. That's what the parts dealers tell me.
R
Runeight
Guest
Got it, thanks.
R
Runeight
Guest
Parts arrived from CMS. Pretty quick I might add. Intake pipes. Everything from the head back to the air box will be new.

R
Runeight
Guest
Well this is now clean!
Well this is now clean!
And ready for paint.
Before.

After.

Well this is now clean!
And ready for paint.
Before.
After.