• Required reading for all forum users!!!

    Welcome!
    Register to access the full functionality of the GSResources forum. Until you register and activate your account you will not have full forum access, nor will you be able to post or reply to messages.

    A note to new registrants...
    All new forum registrations must be activated via email before you have full access to the forum.

    A Special Note about Email accounts!
    DO NOT SIGN UP USING hotmail, outlook, gmx, sbcglobal, att, bellsouth or email.com. They delete our forum signup emails.

    A note to old forum members...
    I receive numerous requests from people who can no longer log in because their accounts were deleted. As mentioned in the forum FAQ, user accounts are deleted if you haven't logged in for the past 6 months. If you can't log in, then create a new forum account. If you don't get an error message, then check your email account for an activation message. If you get a message stating that the email address is already in use, then your account still exists so follow the instructions in the forum FAQ for resetting your password.

    Have you forgotten your password or have a new email address? Then read the forum FAQ for details on how to reset it.

    Any email requests for "can't log in anymore" problems or "lost my password" problems will be deleted. Read the forum FAQ and follow the instructions there - that's what we have one for...

  • Returning Visitors

    If you are a returning visitor who never received your confirmation email, then odds are your email provider is blockinig emails from our server. The only thing that can be done to get around this is you will have to try creating another forum account using an email address from another domain.

    If you are a returning visitor to the forum and can't log in using your old forum name and password but used to be able to then chances are your account is deleted. Purges of the databases are done regularly. You will have to create a new forum account and you should be all set.

Weasel's 1978 GS750 cafe racer project

  • Thread starter Thread starter Weasel
  • Start date Start date
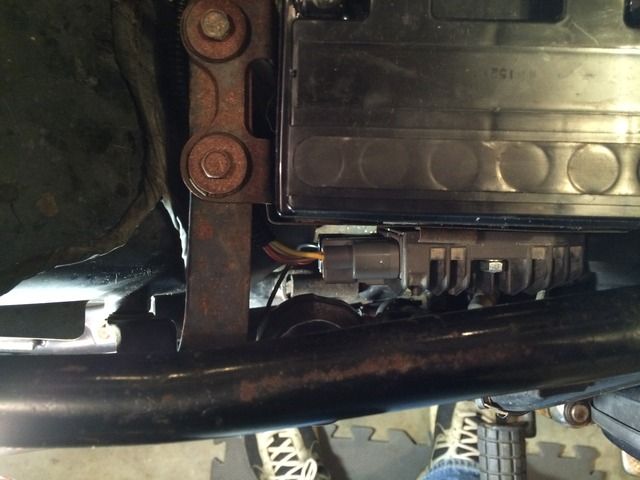
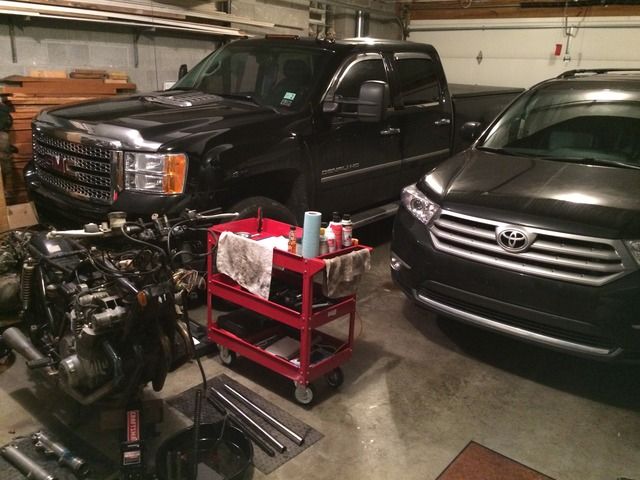
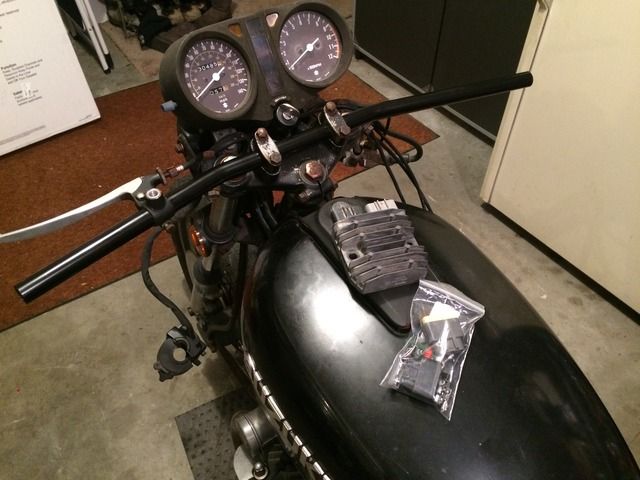
Hope you all had a Merry Christmas. Not much wrenching on the bike this week but I still have another week off so I'll be getting more into the electrical system. Decided to install some drag bars while I was disassembling switches and checking wires. The old bike looks better already. The wires are in pretty bad shape. I'm thinking I should just start from scratch since I'll be replacing switches, lights and gauges anyway.

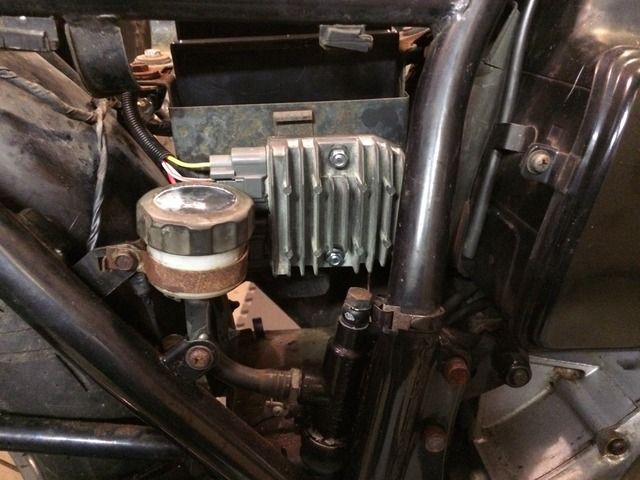
The new R/R unit showed up along with the connectors. I have a new battery on the way too. The Motogadget M unit seems like a slick way to go if I'm wiring from scratch. Anyone have any thoughts on going that route?

EB4DB798-5696-4640-B8DA-4F5912399DE1.jpg
 
Working on a '78 750 too... Also in PA. Lookin' good so far, man. Keep it up!
 
I haven't been able to find an R/R for less than $50 on eBay. Who was the seller?
 
Got the ignition push button sorted out and working now. Won't have to bring myself to the brink of a heart attack kicking this thing while I work on getting it running properly.

Video:

 
I would like to replace the stock gauges with minis like these....

http://www.dimecitycycles.com/2-5-inch-chrome-mini-speedometer-with-white-face.html

Those gauges DCC sells are very impressive in person, and the housings/bezels are stainless steel even! Down side is that they are very fragile. Heed the warnings seriously from DCC when they say to mount them with a BIG rubber cushion vibration isolator... wife dropped her gs550 from a standstill on a grassy hillside dirt road and the spring broke in the speedo. I uncrimped the bezel & shortened the coiled spring, working again.
They are also sensitive to cable entry angle, cables must unter NOT ON ANY BIND, have to be free&clear of headlight & obstructions or else they act very whacky & will wear out prematurely.

I use air conditioner compressor vibration isolator rubbers with steel sleeve inserts on them. The steel sleeve is important, prevents you from clamping down on the rubber too tight which would severely reduce it's vibration isolating abilities.

Take those 2 precautions and you will have a very sharp looking set of gauges. I prefer the black face with all the indicator LED lights as my personal favorite.
 
Last edited:
Good choice on the gauges Zagg. I'm a minimalist when it comes to all that stuff, gauges, turn signals, mirrors, switches/controls...the smaller, more low-profile the better. On a side note, I found a powder coating place not far from me and they have reasonable prices and fast turnaround. Once this thing is running good, I'm going to send over a few pieces to see what their work is like.
 
Those gauges DCC sells are very impressive in person, and the housings/bezels are stainless steel even! Down side is that they are very fragile. Heed the warnings seriously from DCC when they say to mount them with a BIG rubber cushion vibration isolator... wife dropped her gs550 from a standstill on a grassy hillside dirt road and the spring broke in the speedo. I uncrimped the bezel & shortened the coiled spring, working again.
They are also sensitive to cable entry angle, cables must unter NOT ON ANY BIND, have to be free&clear of headlight & obstructions or else they act very whacky & will wear out prematurely.

I use air conditioner compressor vibration isolator rubbers with steel sleeve inserts on them. The steel sleeve is important, prevents you from clamping down on the rubber too tight which would severely reduce it's vibration isolating abilities.

Take those 2 precautions and you will have a very sharp looking set of gauges. I prefer the black face with all the indicator LED lights as my personal favorite.

Thank you for the advice and all the info, Chuck!
 
Good choice on the gauges Zagg. I'm a minimalist when it comes to all that stuff, gauges, turn signals, mirrors, switches/controls...the smaller, more low-profile the better. On a side note, I found a powder coating place not far from me and they have reasonable prices and fast turnaround. Once this thing is running good, I'm going to send over a few pieces to see what their work is like.

Yeah, me too. I like clean and simple. I'm new to the whole powder-coating thing. I wouldn't even know what a "good" price is lol. It's cool you have someone close. The more time you can spend in person getting to know them (and them getting to know you) the better.

Thanks for the link to the eBay seller. Appreciate that.

I was checking out the Motogadget brain you are looking at. Looks like a nice upgrade. What are you doing with your lights? Are you going the LED route?
 
Zagg, I do like a lot of the low profile LEDs. I was reading that there can be some compatibility issues with our bike's old relays and LEDs. Sounds like it's a simple fix but I'll cross that bridge when I come to it. I think that Motogadget M-Unit would solve a lot of those issues but they're pretty pricey. However, I've been down this custom motorcycle road before and have ended up with a few machines that I would never get my money back out of. Oh well, these projects are paid for in cash a little at a time so it doesn't seem to hurt as bad.

I got the new R/R wired and installed today.

5966BE06-FC5F-4C28-9AF6-5A1F9207240C.jpg


The SH-775 is about 3 times larger than the stock unit so I installed it on the opposite of the battery box. Plenty of room and no clearance issues.

0CD8631C-BE8D-44FB-B0F8-037C67938D5A.jpg


8458325B-5EC9-4899-B6AD-89155A9E5909.jpg
 
I assembled, charged and installed a new AGM battery. Needed a break from electrical work so I tackled the front end. Disassembly was pleasantly, surprisingly easy. There's really not much to these old front ends. Trying to decide if I want to try painting the lower legs myself or try out the powder coat shop in the next town over. I have a small sprayer here that I have experience with spraying epoxy wood finishes but I have very little painting experience beyond rattle cans.

3A88338E-3C60-4498-92C8-B2398035F9B8.jpg


It was nice to finally lose that bulky gauge cluster. I'll have to order a set of fork seals, wheel & steering bearings and have them ready once I clean and either paint or powder coat all the front end bits. Anyone have any tips or encouragement for a DIY paint job? She's starting to really drop weight now!

3D8517D1-22A4-4596-957B-AD4E25716DED.jpg
 
After thinking about it, the powder coat will hold up better to road debris so for $100 US I am going to go that route. Whew, those fork seals were seriously neglected. Got a free workout trying to pry those things out. Any suggestions on what to soak these things in to degrease for powder coating? I usually use Simple Green for those jobs.

EA97C1A0-46DC-43FC-846D-C485798A45EE.jpg


The original Showa sticker is still on one of the legs.

E1E68B07-5F30-432A-B8CC-F93BAAD06DE8.jpg


Guess I need to think about colors now. I'll make some copies of a sketch I did and try to steal my kids colored pencils. I'm thinking a lot of black, shiny & matte, with some red & silver.

C632C8CF-CC27-4450-8522-40122BA8F916.jpg


I'm sort of partial to black :D

92C134A9-6D80-4E6D-9B09-6A171971ADC2.jpg
 
Dude you GOTTA GOTTA GOTTA drop $63-ish shipped in MikesXS.com cartridge emulators into those forks while apart, & if you have 2 springs per side, ditch the short ones & substitute a piece of copper pipe, pvc pipe, bicycle aluminum seatpost, etc, and 4 washers for the removed progressive spring.

If one spring per side, chop 5" or so out of it, file the end flat (wedge angled to nothing), & re-shim so your spacer comes up out the top at least 1/2" with front end topped out. Do one side at a time if on bike. This will get you to about .75 or .8 kg/mm, which is way better than the soft saggy stockers. Very very well worth it. Use 10 or 12.5w oil, no more than 15w on reassembly. The new fork valves will make the compression dampening DRASTICALLY BETTRR, softer on harsh bumps, more firm in cornering & braking, very very excellent upgrade. A must, please do..., along with good grippy tires in best size match for rim width (Pirelli Sport Demons, Shinko 230 TourMaster, Avon am26 RoadRiders )
 
Thanks again Chuck. Yeah I've been checking back and reading through all your advice on page 1 as I go. I burned up the parts budget over Christmas break, waiting to reload it on pay day this Friday. I'm going to order all the seals you recommended along with the steering & wheel bearings and the emulators.
 
Yup. You have stock 35mm forks, right? July 8th-10th 2016, save the date! AMA announced the 2016 Vintage Motorcycle Days weekend dates. Spend Fri& Sat there if you can, so we'll worth it, ESPECIALLY if camping on site....
 
Last edited:
Yes, and they have the 2 springs each. Do I make the replacement pipe the same exact length as the short spring? Same size washers as the stock one in between the springs? Where do I want the washers?
 
Washers on top of springs and on top of spacers. Fork fully extended, drop emulator in going the correct direction, drop spring in & 1st washer, hold fork upright & fully extend to top out spring, then insert skinny tape measure & measure top of spring washer to top of fork, add probably 1/2" to 1"+. 1"+ if you are above ~180lbs. This is your preload.
Once bike is fully assembled, sit on bike with all your weight and balanced off the kickstands. Have someone use a marker or tape (on wiped clean chrome tubes) to mark where the top of the outer fork dust boot is on the chrome. Get off, lift weight off front until suspension is fully topped out, measure from dust boot to mark. This is your static sag. I believe you should have 1/2"-3/4" if you want a sporty ride, 1" for a more plush cushy ride but still fairly compliant handling. You can do this solo by putting a small zip tie "just snug" around the upper/inner fork stanchion tube instead of marking with sharpie. Cut shorter if it's too stiff, cut longer spacer if too soft.

Ideally .90 or 1.0kg/mm Sonic brand springs or Racetech springs are what you want (maybe 1.1kg/mm if racer handling w/190lb+ rider) , with 1/2" or so of preload, but those are $80-100 & as with rear shocks, pretty easy to install down the road after the big money has gotten the main parts of the bike built and on the road.
At that point, at minimum, buy some $209 Hagon or Progressive shocks sprung for you+bike's weight (Dave Quinn Motorcycles offers free Hagon spring exchanges if 1st try isn't the best).
I'd recommend the $300 Hagon 2810 adjustable dampening version, but for a few bucks more, you can get a fancy YSS eco-line very nice alloy body infinitely adjustable preload rebuildable re-valvable shock for like $329, & YSS-USA.com are great about spec'ing springs, exchanging, re-valving based on rider/bike weight & riding style.
For under $500, you can get the base model YSS piggybacks, or a very nice non piggyback alloy body 60 clicks externally adjustable shock with +/- 10mm ride height adjustment. Very awesome. Or Ikon 7610 steel body twin tube shocks with external rebound adjustment. The classic mid grade old school shock (formerly Koni 7610).

Jacking up the rear slightly with a slightly taller shock will improve steering response, or you can run the stock size 4.00x18 rear and ditch the harder to find 3.25x19 front for a 90/90-19 (same width, modern profile, 25.5" diameter vs 26.1" stock), and this will give you more crisp steering. The 4.00 rear is a taller tire than what most people switched over to in the 110/90-18, so the 4.00 will have more sidewall flex but have a more meaty look if that's what you're after. DO NOT exceed the tire manufacturer's tire width recommendation for what fits on your stock 1.85&2.15 width rims, extra rotating weight will slow the bike down, tire profile will get pinched for less straight line contact patch, & make the bike "flop" into turns as you lean over. Some run a 100/90-19 on front, but I wouldn't do that in a brand like Avon that tend to run wider than comparable brands.jacking up the rear and dropping the front slightly is the overall best handling way to get quicker steering, but overdo it & bike will be running less than 3.7" trail, Making it very twitchy. "Trail" is how much the axle&tire contact patch on the ground "trail behind" the imaginary line from the center of the steering stem projected onto the ground from the headstock. The steering stem points to the ground D ahead of the tire contact patch. More triple tree offset (forward), steeper rake, and/or smaller front tire diameter all reduce trail. More trail means more stable but harder to steer. 3.85-4" is a great balance for a sporty feel.

Proper springs & shocks, adjustable slightly longer length rear shocks, and dropping the triples on the forks no more than an equal amount of raised ride height in the rear will really sharpen up the decent steering to a modern sport spec. Use a rake&trail calculator or measure it carefully and accurately the manual way. The more you jack up the rear &/or drop the front, the steeper the rake gets (higher caster # or in other words less "rake" - and proportionately reducing the trail from a stable neutral 4.2" down to 3.9" or even 3.75" for very quick turn in but without a steering damper, can be twitchy at high speeds especially on brake dive/suspension travel (i.e. aftermarket springs needed)
 
Last edited:
Thanks again Chuck. I took the triples apart to clean up for PC. I'm assuming I can lose the headlight mounts, they don't appear to offer any structural support to the forks. I plan on adding a smaller light and custom mounts anyway. And yes, say goodbye to the plastic reflector bar.

A56C8025-6D45-417A-A24B-C3AA9266E7E4.jpg
 
Back
Top