
I ordered the top frame beam extensions today.
They will cost me more than the frame itself...
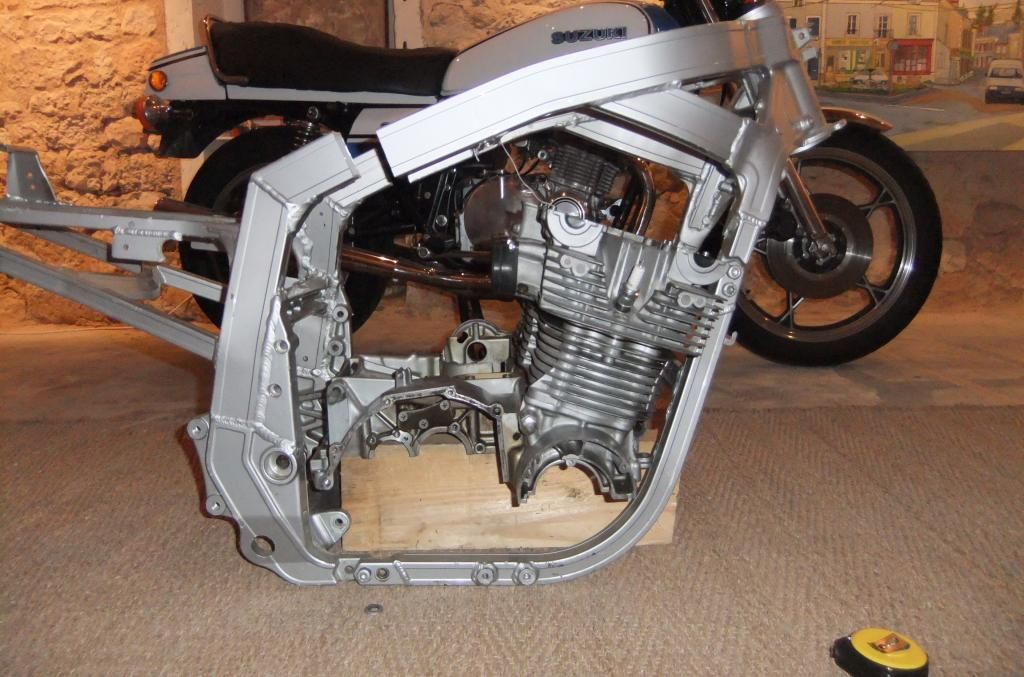
In the meantime, I decided to extend the top frame beams along a straight line as it will not only look better but it will also give a little more headroom for the cylinder head.
Contrary to what I mentionned earlier, by extending the top rails, the rake angle will decrease slightly which is also a good thing.
Last but not least, it should now be much easier to fit the GSXR 1100 OEM air filter, well know to be a nightmare to work with!
The resistance to traction specification for the aluminum I'm using is 280N/mm2.
As the cross section at the weakest point is roughly 500 mm2, it should resist to traction of 140 KN or 14 tons.
Seems OK to me?
It's not the strongest available but it is suitable for welding.
-
-
There is a BIG difference in the section of the GSXR 750 and GSXR 1100 frame beams.
It's obviously a risk to cut the top beams but on the other hand, I'm going to weld the two hollow parts together with a solid part.
I don't have the skills to do a Finite Element Modeling of the structure but I'm sure the stress is far less on the top rail compared to the head stock.
My goal was to keep it simple so that it could be reproduced easily.
Also, the cost of machining special parts can quickly go beyond the price of most GS 1000's on the market.
I want to get myself an XR 41 for way less than an XR 69 from Harris...Leave a comment:
-
-
This is a lot of work and I think its still a bad place to cut a old gsxr frame.Mesure twice but cut once.
The top section is the strongest part of the frame and these old frame where not remembered for their good road manner.
They drive like a powered hinge, my last one was a 1216 in a 86 gsxr 750 frame, flex is good.
I still have a 86 gsxr1100 frame and a gs1000 engine that are waiting to be mated together and again i will not touch the top section.
The swingarm pivot, steering stem and both axle will not be in the same place with the top portion modified.
Google old suzuki racing pictures and check what they have done to old gsxr frame.
MarcLeave a comment:
-
Hi Chris,
Yes, many options were open but reworking the junction between the longer top rails and the shorter rear verticals would be a nightmare as nothing is parallel.
Reworking the bottom rails is also a challenge as they only run parallel under the engine.
So far, with my approach, I don't need to touch the bottom rails except to extend them through a simple Z shaped bar.
I will go tomorrow to see my local machinist with my drawings for the extensions and see what he says.Leave a comment:
-
I did wonder why you sawed straight through the middle, further back at the bend downwards would be the place, easier to join and brace and stronger, possibly using plate doublers that would blend in without notice, I dont know how the tank would fit, if you would have to remake mounting lugs to accommodate the 11mm?
I think the bottom rail cut further forward to stagger the joints too.
Just a thought.
Leave a comment:
-
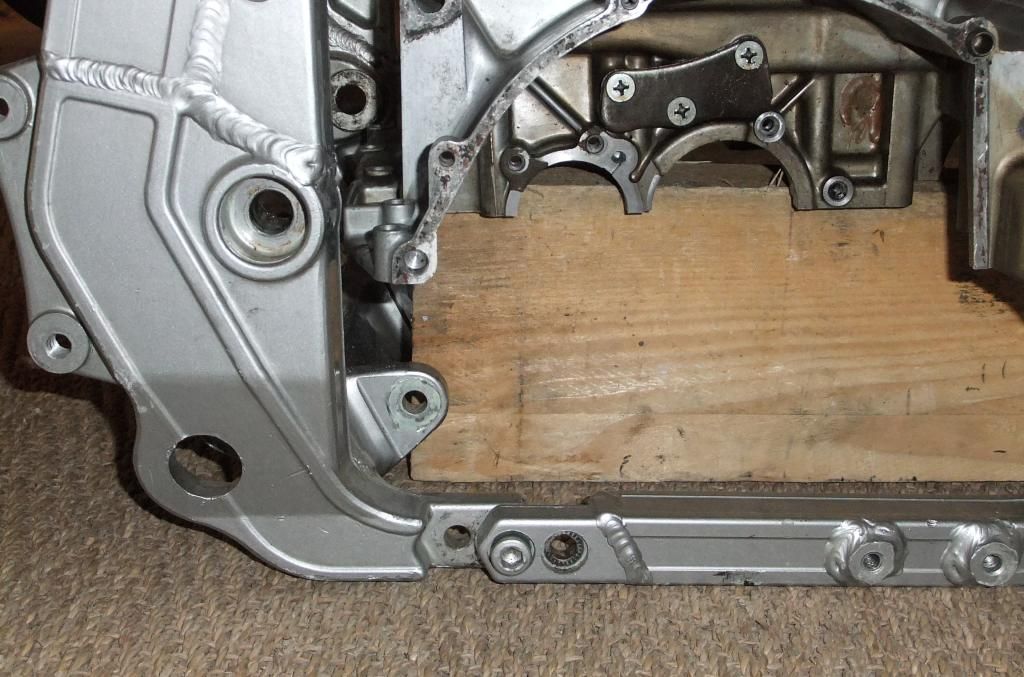
I went through some basic maths to determine the best approach in lengthening the frame.
As the top rail has an angle of approximately 20? to the horizontal, if you separate the two frame halves top and bottom by 30 mm, one is faced by a step of 10.9 mm that has to be absorbed eitheir by the top or the bottom rail or by both.
Visually, one would see a Z in the frame rails.
Splitting the difference 50/50, I guess that with the tank in place the top Z of 5 mm would not be too noticeable while the bottom one would be hidden by the engine?
Another approach would be to extend the top rail by less than the bottom rail.
In this case it's possible to avoid the step on the top rail but this time the rail would be "bent" at the junction.
In a practical case the bend would reach 10? meaning that the rear end of the bike would be lower ( unless you use a longer shock).
This approach allows the bottom rails to meet each other with no offset but also at an angle.
The first modification is the easiest to implement as you don't need to compute the angles at which the rails will meet and the machining would be simpler.
Except for the wheelbase the geometry remains identical if the step is absorbed totally by the top rail.
If not the rake will increase unless the shock is made longer.
The second approach could be more aesthetic but more complex to compute and to machine.
In this case the rake will also increase.
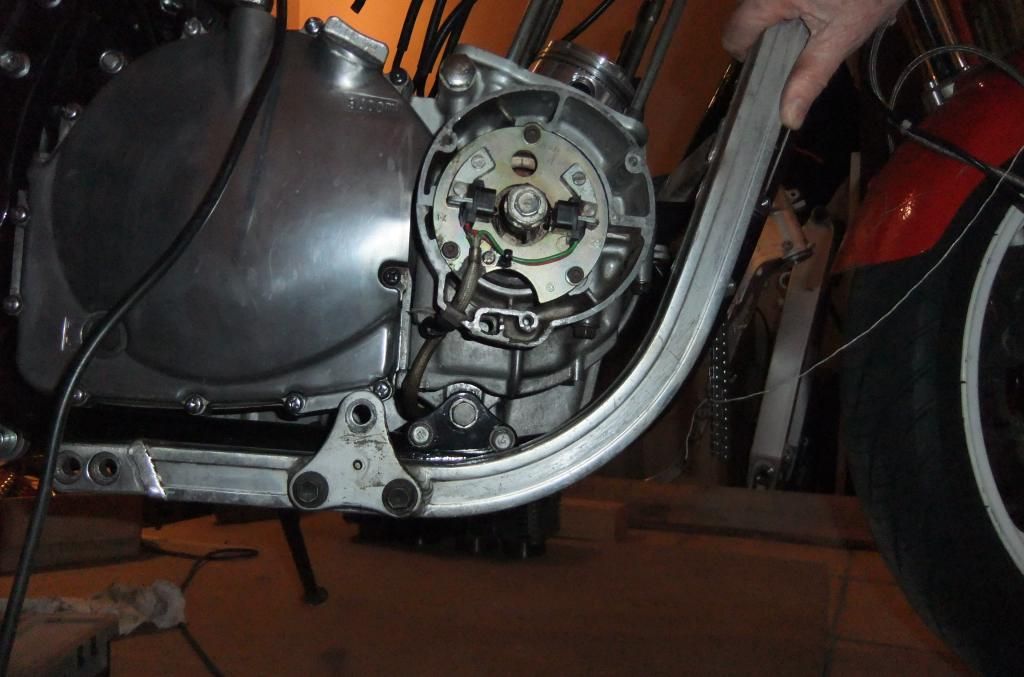
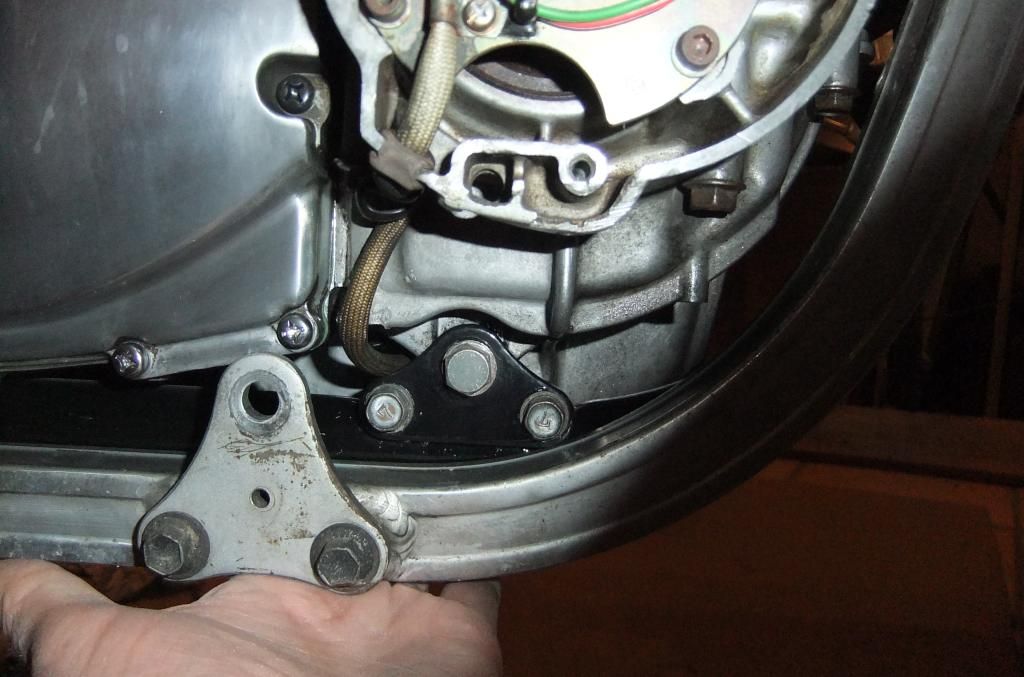
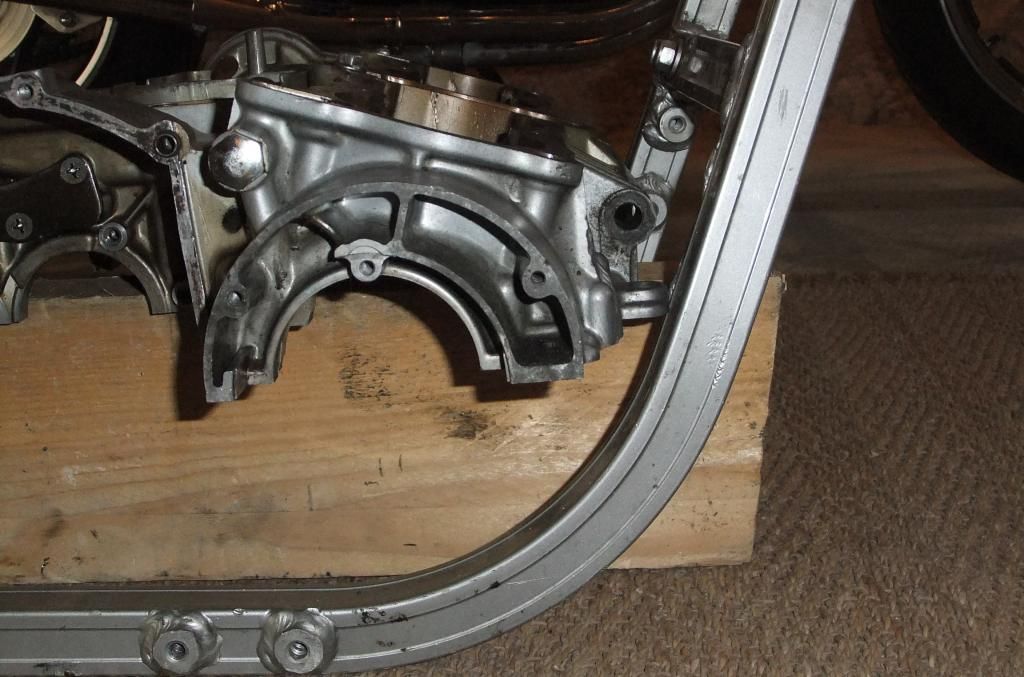
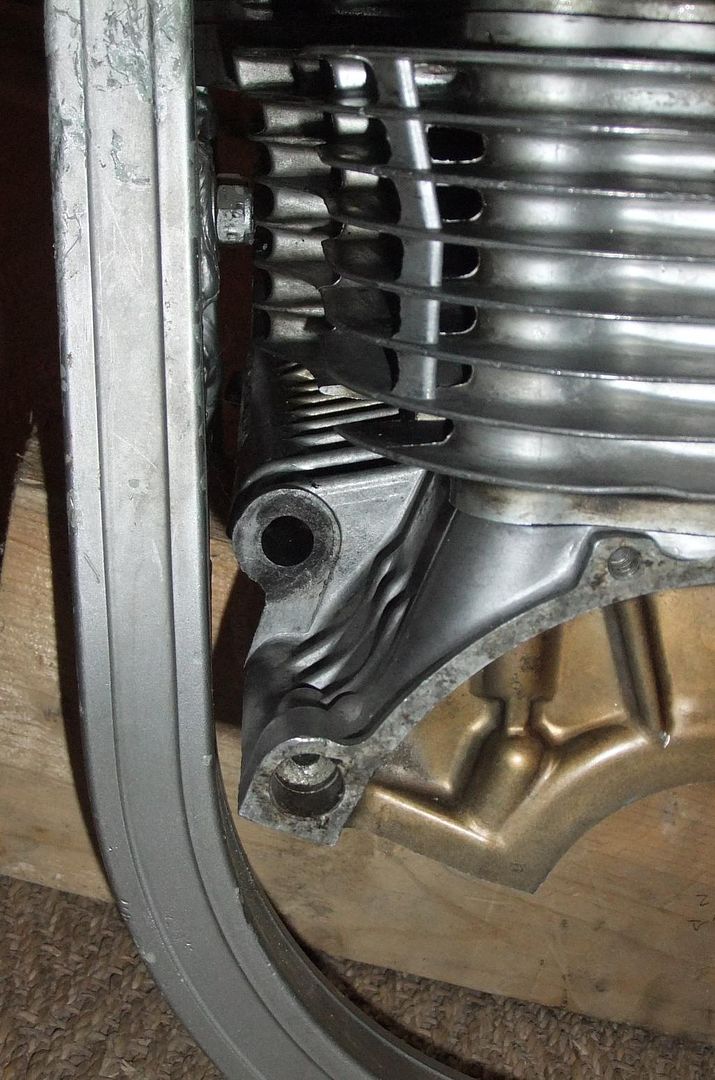
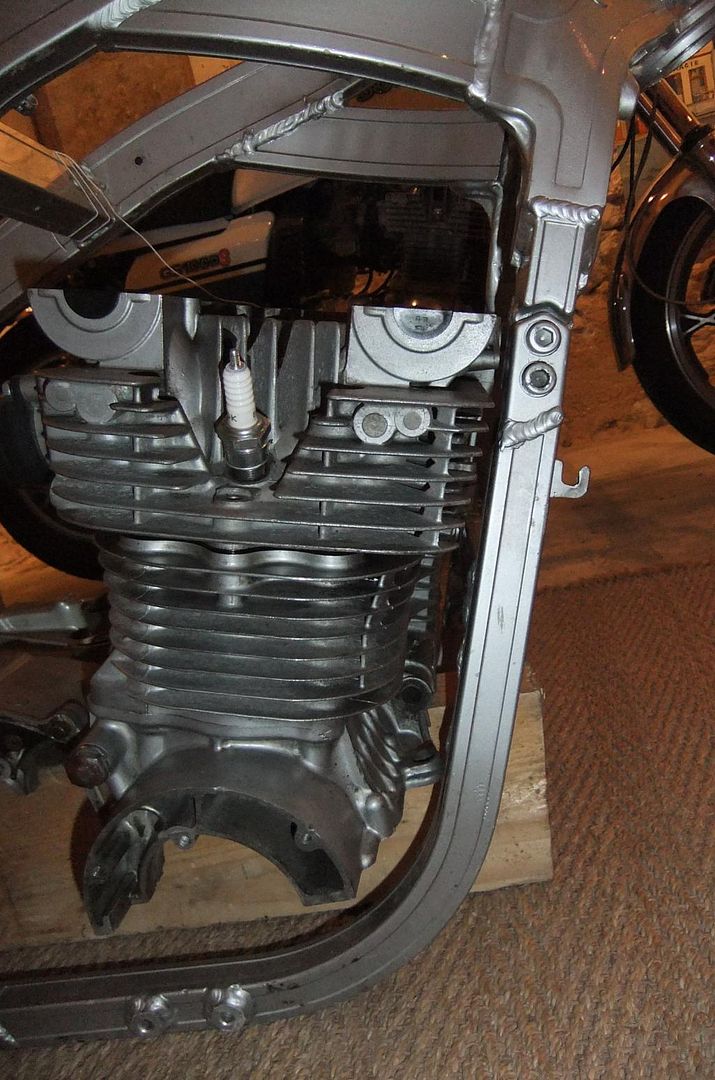
I took another picture of the lower front rail positionned against a GS 1000 frame.
In fact the GSXR frame rails have a steeper angle going up to the tank but there is apparently no issue to take the bottom engine case.
 Last edited by John Kat; 03-01-2015, 12:48 PM.
Leave a comment:
-
-
Nice project,
But why did you cut the upper portion?
You only have to modify the lower front portion of the frame to fit a gs1000 in a first gen gsxr frame.
Marc
Leave a comment:
-
-
Should be interesting once the lower case arrives. I'm betting that there's going to be some changes as a result. Looks to me like the engine is going to be raised slightly to clear the lower case on each side. Hard to tell but just going by the pictures. Interesting build.Leave a comment:
-
-
This project is entirely out of my mechanical ability but i enjoy following along.
Keep at it, John.Leave a comment:
-
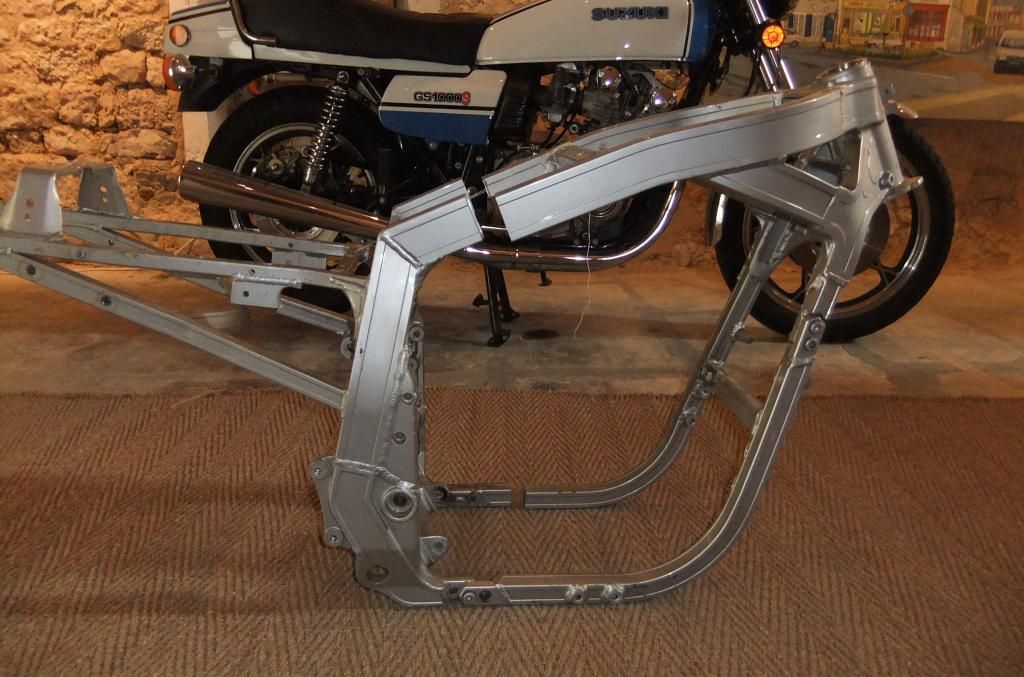
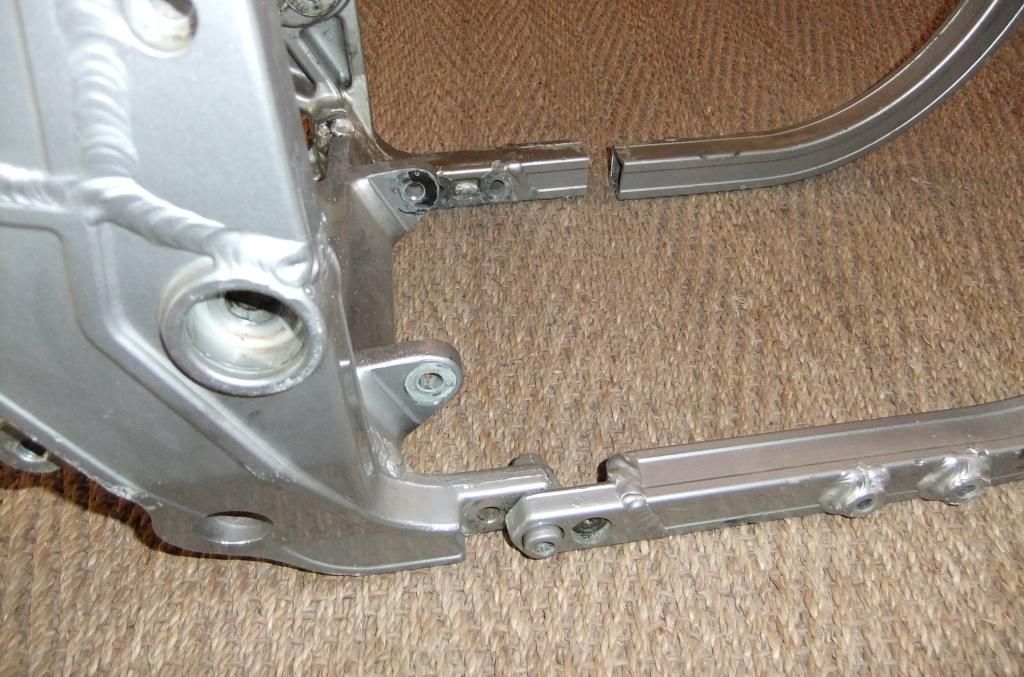
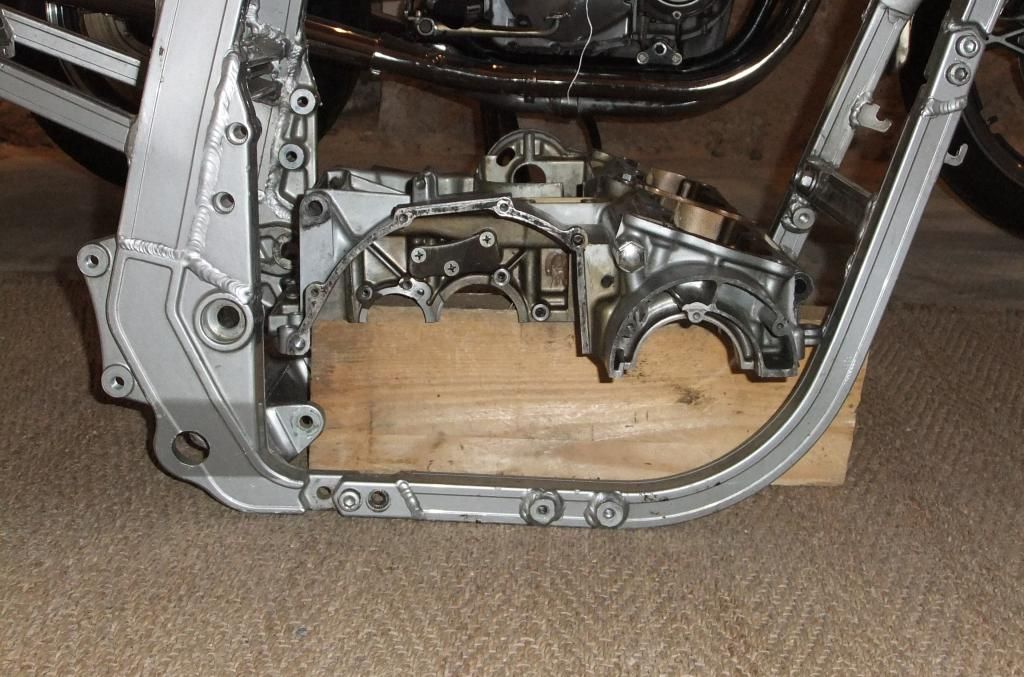
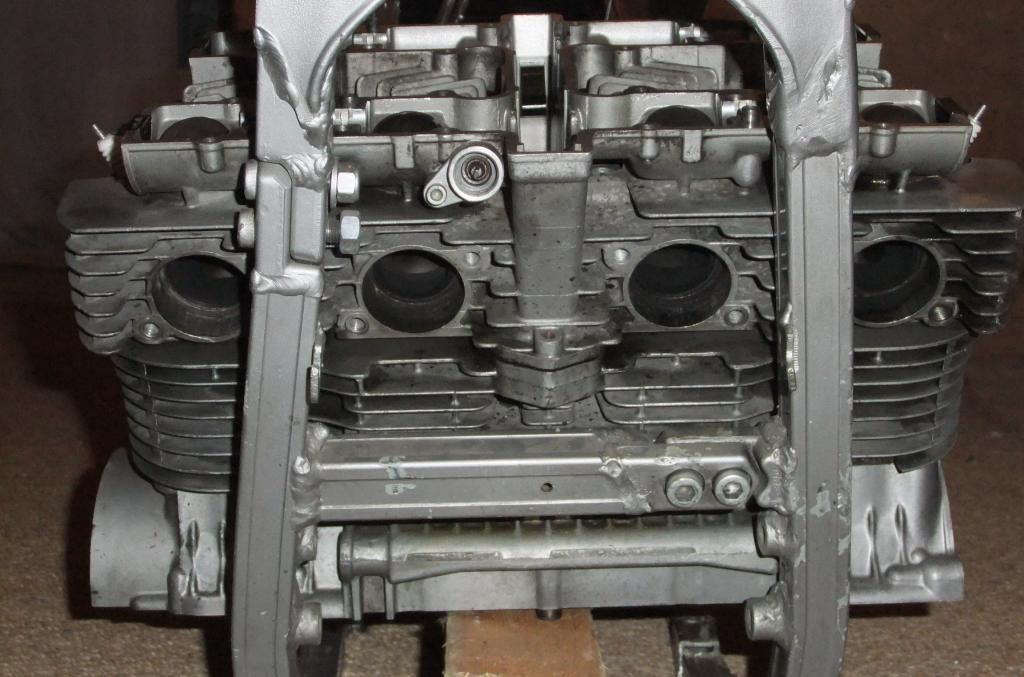
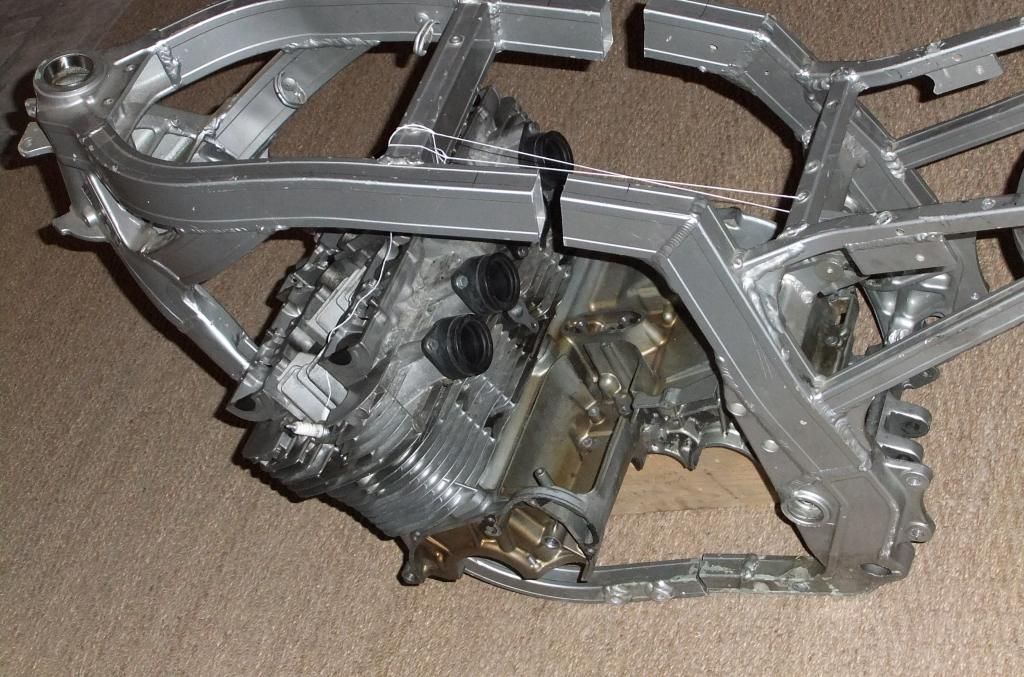
I finally gathered the courage to cut a GSXR 1100 G/H frame into two.
In fact, I found another frame without title to run this experiment.
Here are the two halves attached with a few strings just to get a feeling of what it would look like.
In one of the pictures, you will see the engine top case in place: it seems almost right?
The next question is to determine if I extend the top rails in a straight line ( that would help for carb spacing) or if I bend it slightly downwards to decrease the rake angle a little?
Any opinions?
PS: I'm still chasing for a lower engine case to complete the mock-up...
 Last edited by John Kat; 02-28-2015, 08:50 AM.
Leave a comment:

.png)

Leave a comment: