.png "Powered by vBulletin")
Originally posted by jsandidge
View Post
-
 Guest repliedQuestion, why did you replace these? I was just in my rear wheel to replace the drive spline, should I have done these too?
-
Nice work! Did you have a similar wood bracket or peice of padded steel on the other side and did you cool them in the freezer or silicon/grease them up?Leave a comment:
-
cush bushings
Replaced the cush bushings today. Had to take the old ones out to powdercoat the wheel. It was a bit fiddly, but this worked to press them in. Should have the rear wheel on by tomorrow!

Leave a comment:
-
Final drive
Making a little more progress. Got the final drive all polished up, swing arm and shocks installed.
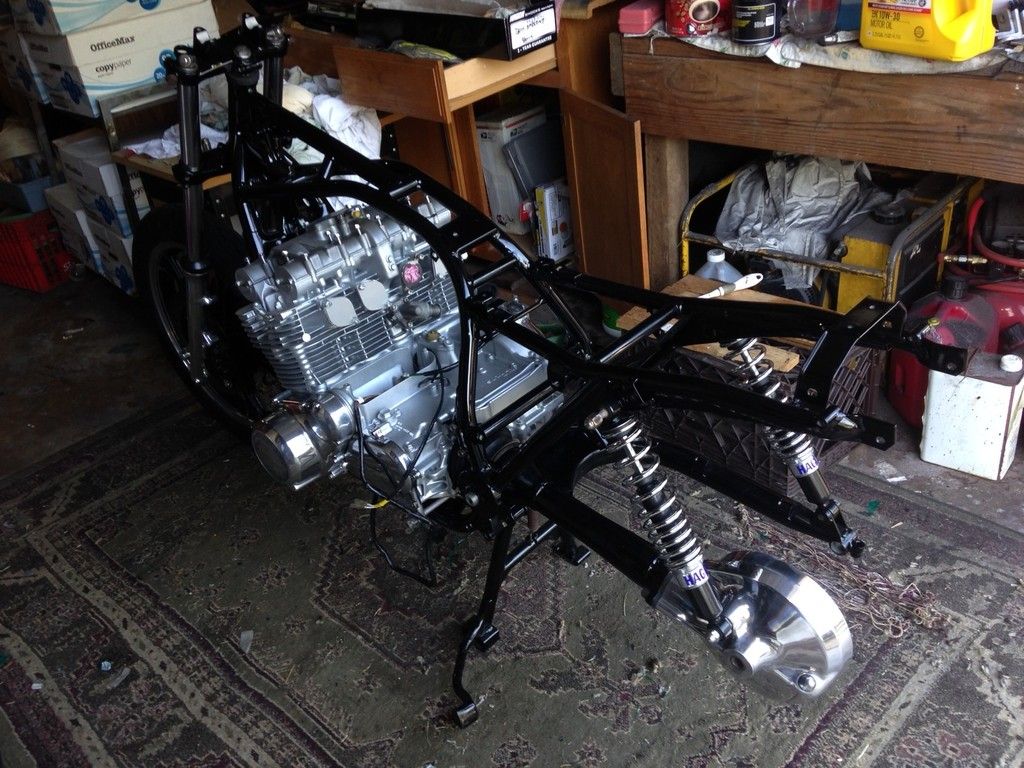
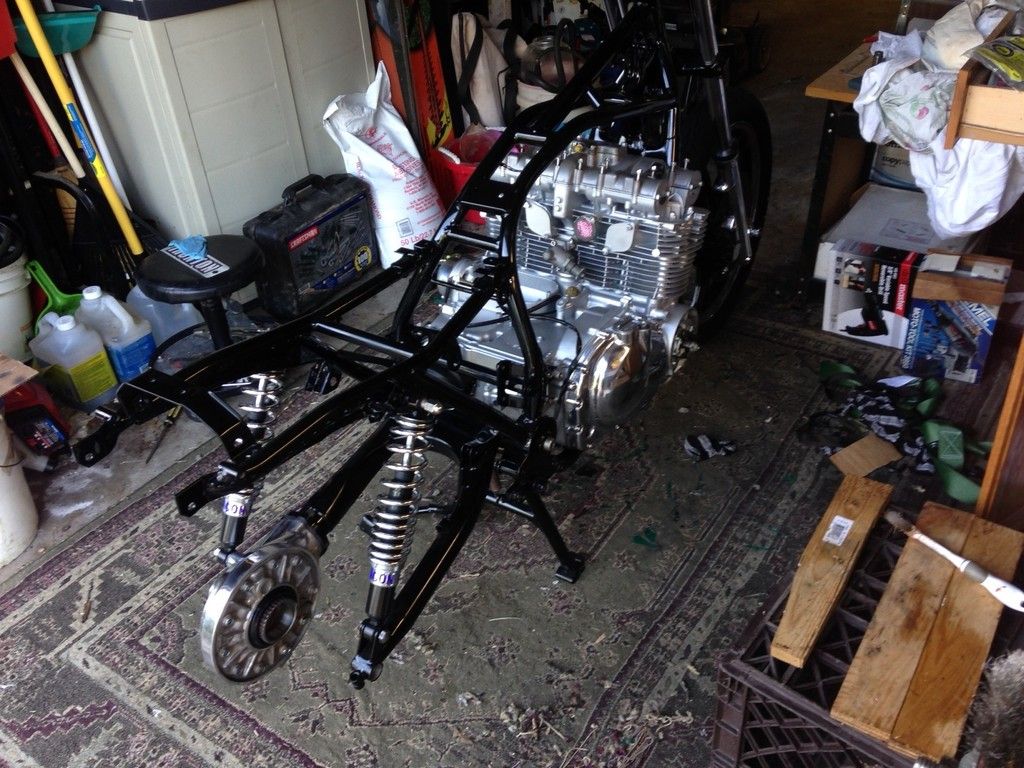
She is starting to resemble a motorcycle now. Next up is the rear wheel. Soon, she will be a roller!Leave a comment:
-
Not bad and the swaps make it an even better deal, thanks for the info.Originally posted by jsandidge View PostLeave a comment:
-
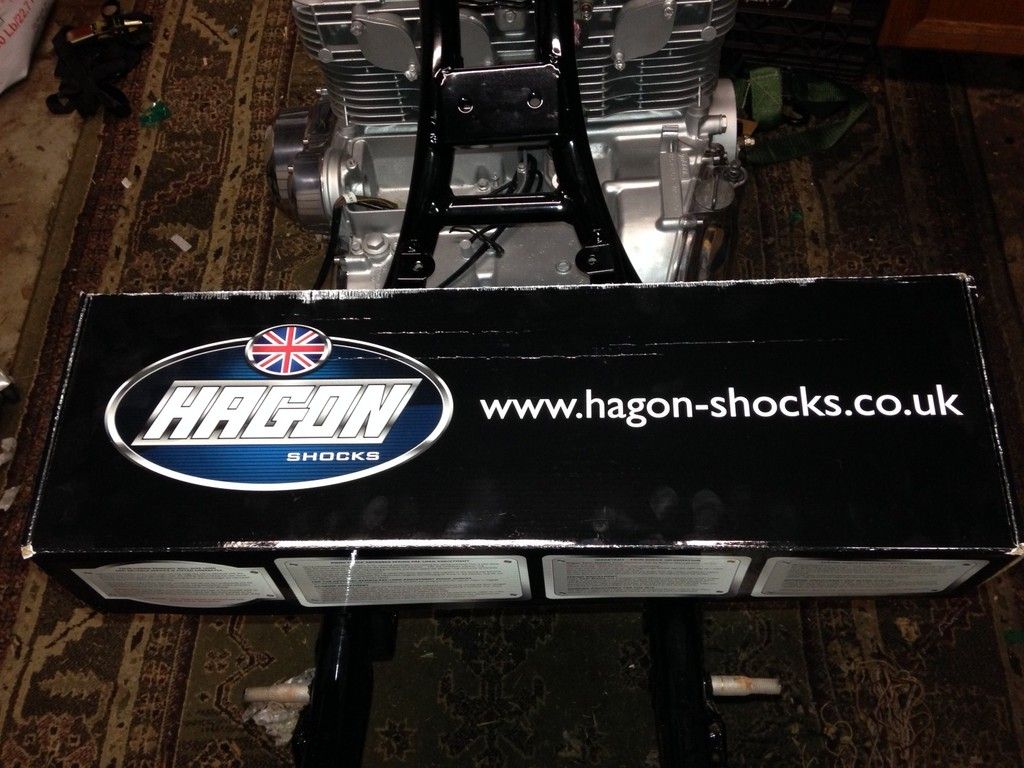
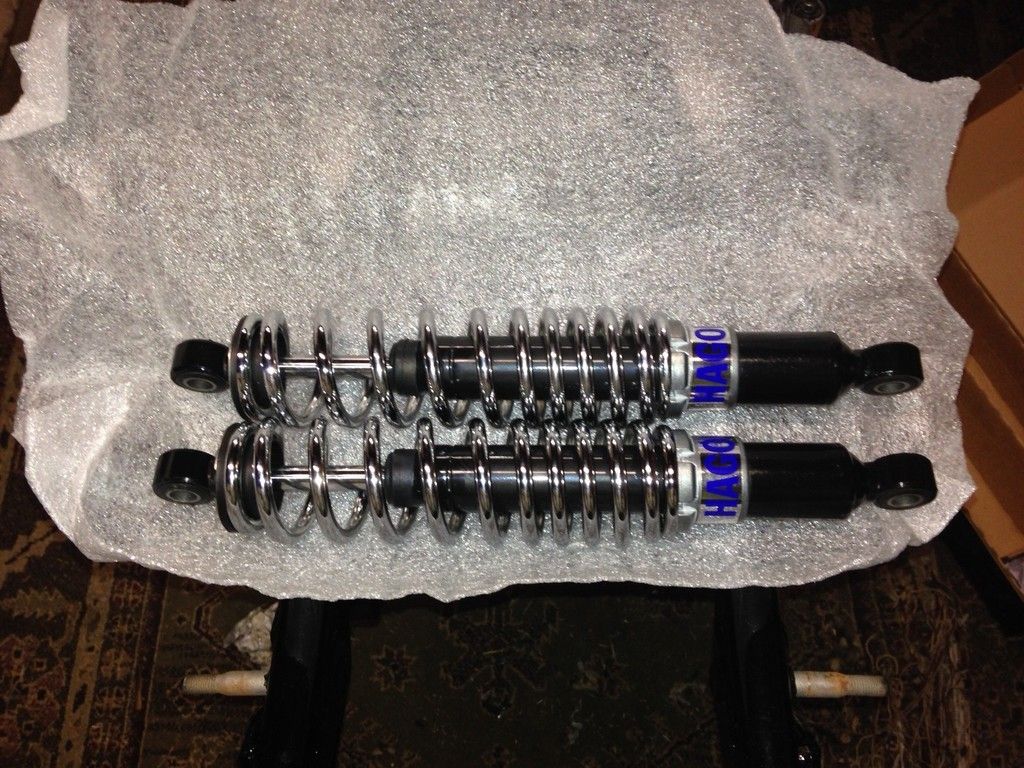
New arrivals!
Looky what showed up today! I'll polish up the final drive pumpkin and powder coat a few more parts before I mount them. Getting kinda ancy now!
Leave a comment:
-
Guest repliedNice work! I love that guy's videos.Leave a comment:
-
Awesome. That is a milestone - and a major one at that!
I hope to have mine in a little later this week. I just use a ratchet strap and a come along slung up over the rafters and slide it in from one side and then support it with a jack while I switch the back strap up over the frame to the other side. That method is slick though I might try it sometime..Leave a comment:
-
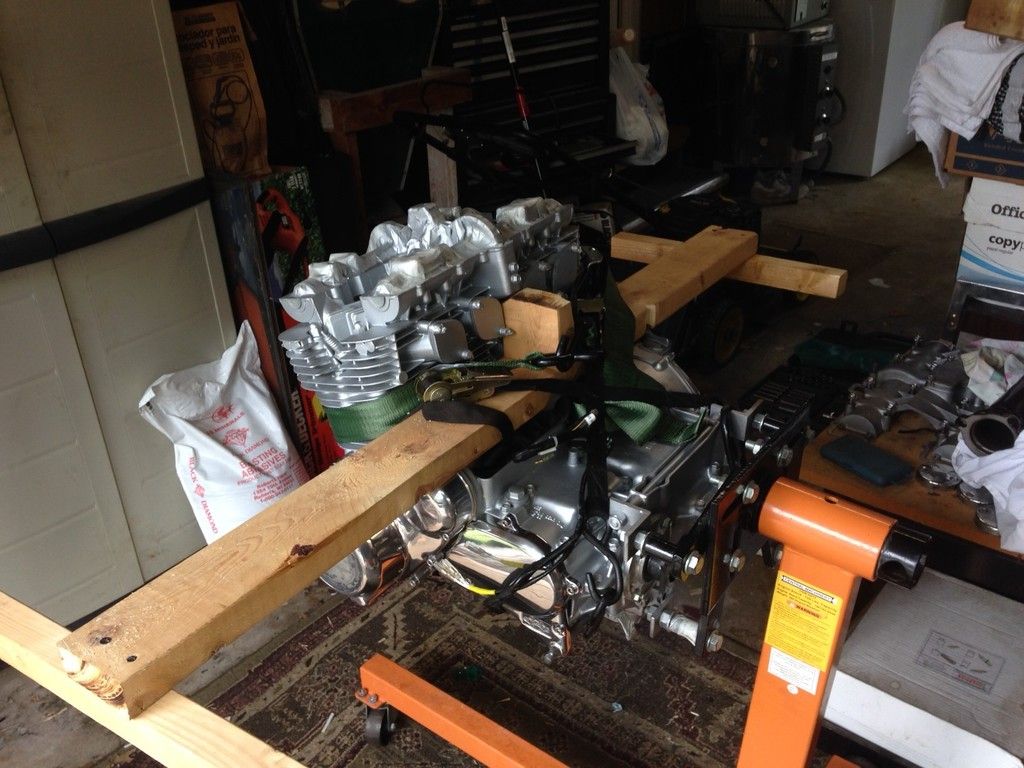
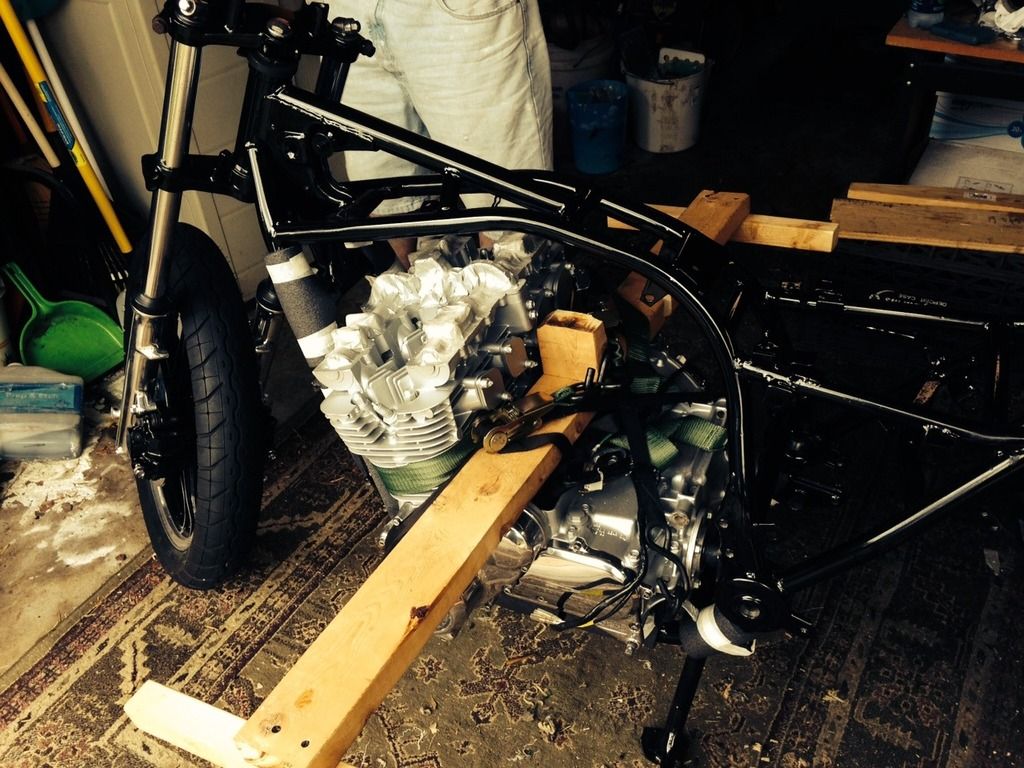
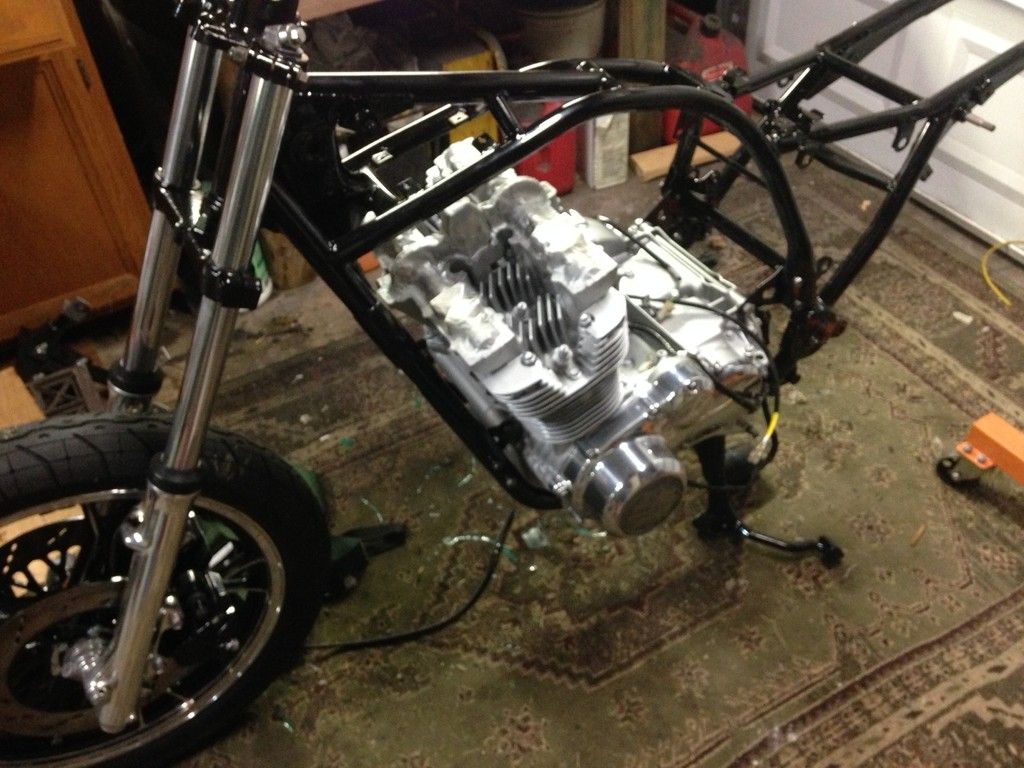
Motor in!
Yeah! Reached a milestone today, the motor is in! I took my inspiration from this guy. (Just had to try it).

My jig was modified a little from his design, but basically the same thing. My installation went a little smoother than his too, since I kept the upright shorter so I had plenty of frame clearance. Only took about 5 minutes to get the motor in and rear motor mount bolt in place. Couldn't have been easier.
A few pics for your enjoyment:
Leave a comment:
-
Lots of hand sanding. I start with red scotchbrite on a 3" pneumatic polisher. This gets rid of the grey oxidation. Next, I get rid of the micro-pitting and any nicks or gouges. I've done it with 220 wet, but it's a lot of work. So lately, I've gone with 100 dry or 80 wet. Follow that with the 220 wet to get rid of the sanding scratches. From there, it goes pretty quick progressing through finer and finer grades of wet paper. 400, 600, 1000, & 2000. Then, I hit it with the buffing wheel using the red tripoli bar then the white rouge bar, cleaning with alcohol after each step. Last, protect it with Wizards power seal.Originally posted by Nessism View PostLeave a comment:


Leave a comment: