-
The body parts look fantastic, Pete! Isn't it amazing how all those different compounds and pads work together to bring that kind of depth and shine. It's all a great system that works every time when taken step by step. That bike is gonna be so cool. -
Looks great.
I had to get a new tank, also. (Maybe the last one in the US)
As I screwed mine up using acid to etch the interior.
And, as you had noted, the silver is off, even from the original paint.
But I'm going to have to pay someone else to re-paint it. Way outside my skill set.Leave a comment:
-
Haha yep Larry, just over the water a little bit
I'll definitely have to tune in to that thread! I'm always keen to see your handiwork and I have a soft spot for those V7 Guzzi's also.
Cheers Greg and yeah I haven't been motivated enough to go and fix the older posts... it's quite tedious finding the photo in Flickr and editing each post.
I actually contemplated putting the centre stand bump stop in that position but I couldn't get my head around how to make it work neatly, so thanks heaps for posting! I may revisit that yet as it's a much neater idea than hanging off the footpeg bracket which I'm not really a big fan of.
In the meantime I had quite the successful day!
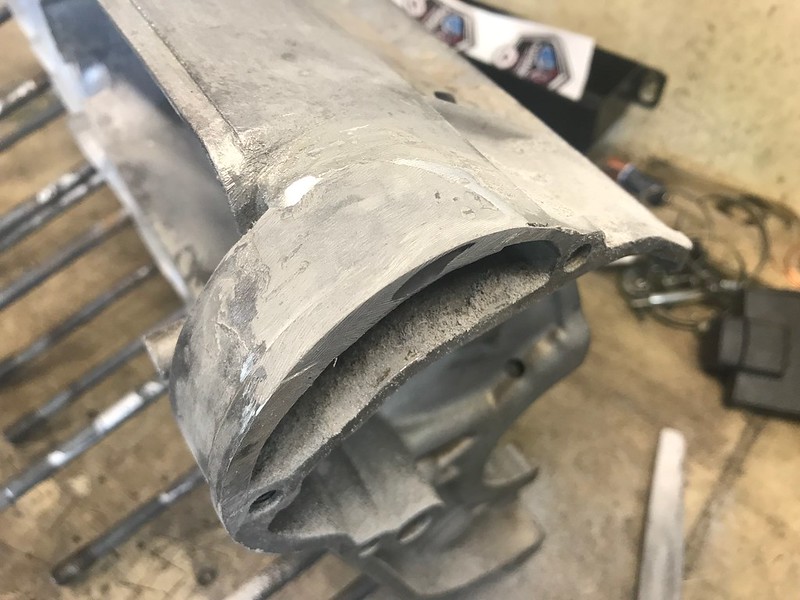
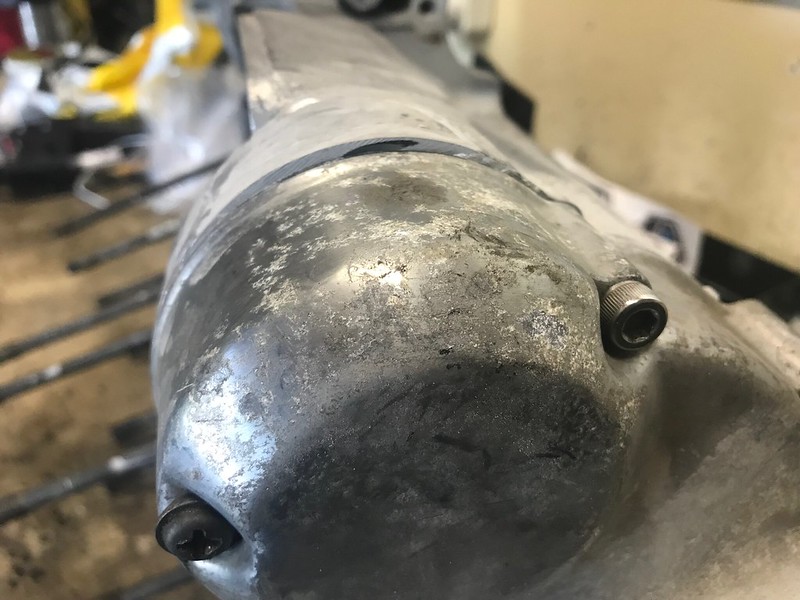
I filed back the JB Weld repair in the stator cover area, pretty happy with how it ended up. I don't think it will be noticeable once the cases are painted.
 Untitled by starpoint73, on Flickr
 Untitled by starpoint73, on Flickr
Then I broke out the new polishing pads and got to work.
Ultimate Compound on the white then yellow wool, then the fine cut cleaner on the orange then black foam, and then the glaze by hand.
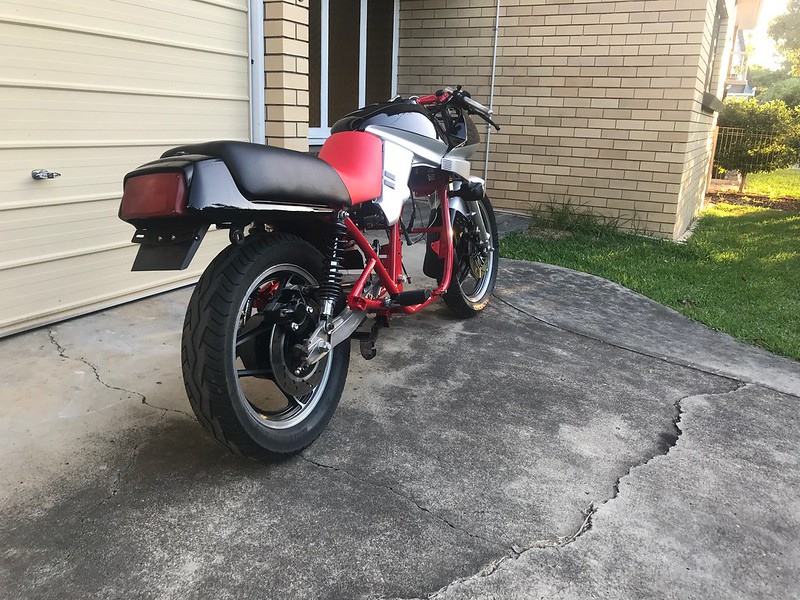
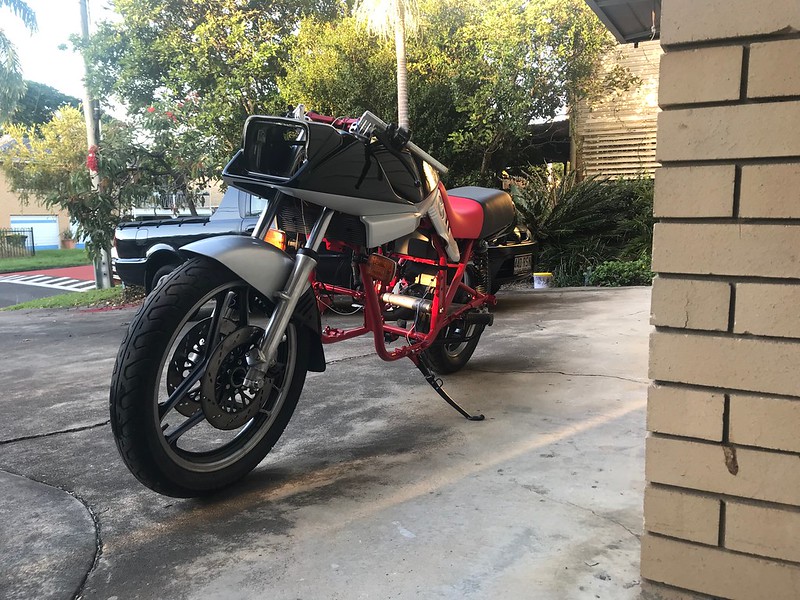
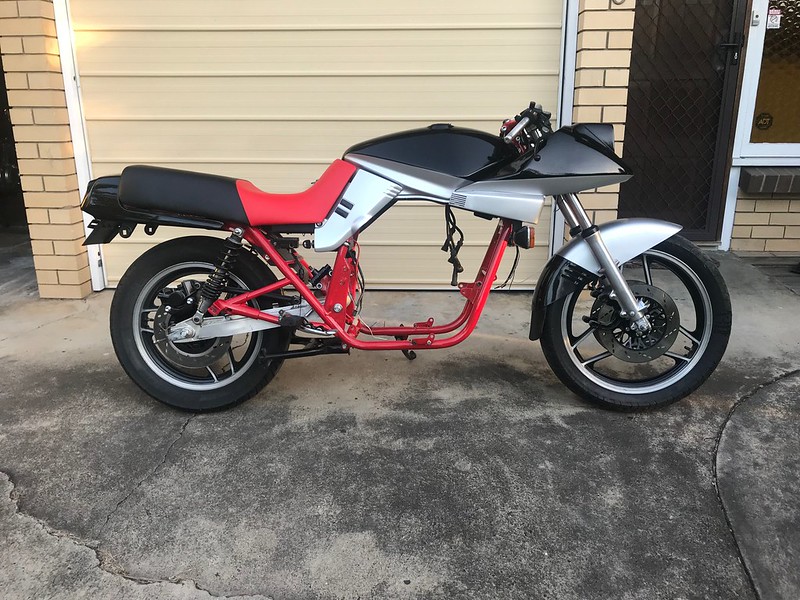
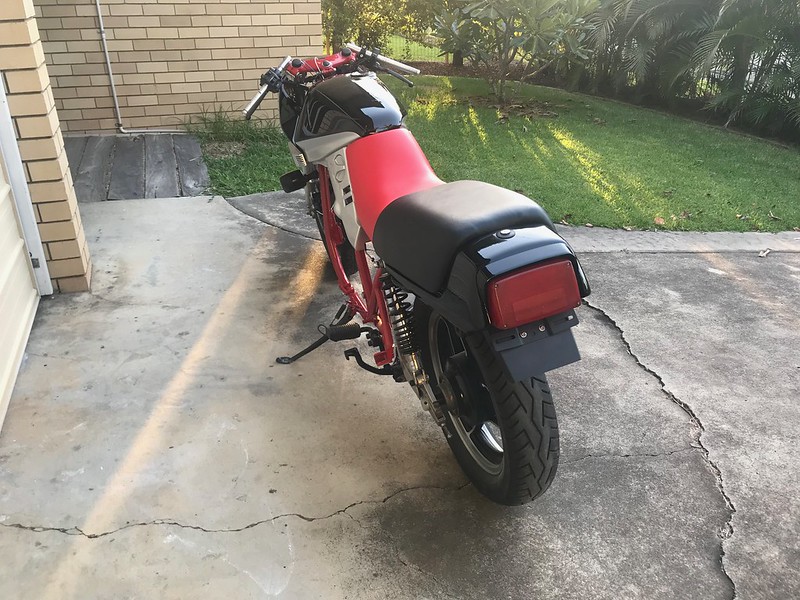
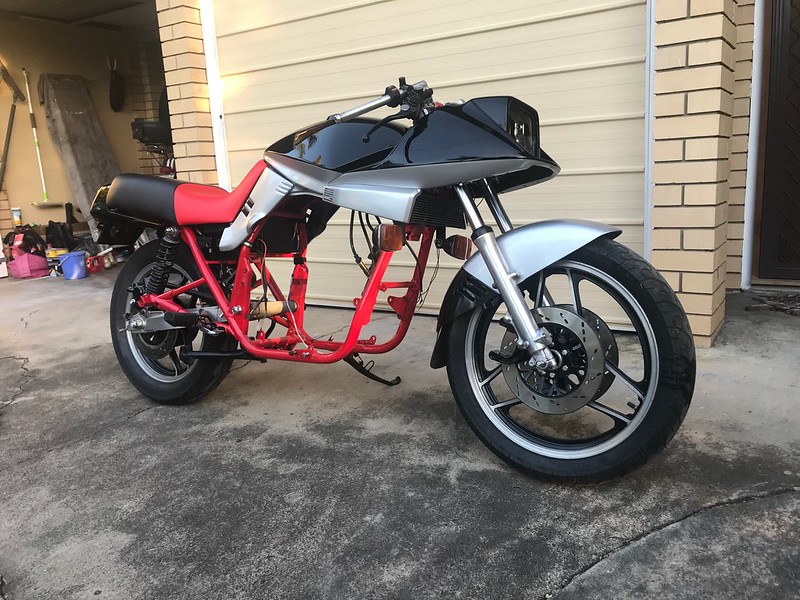
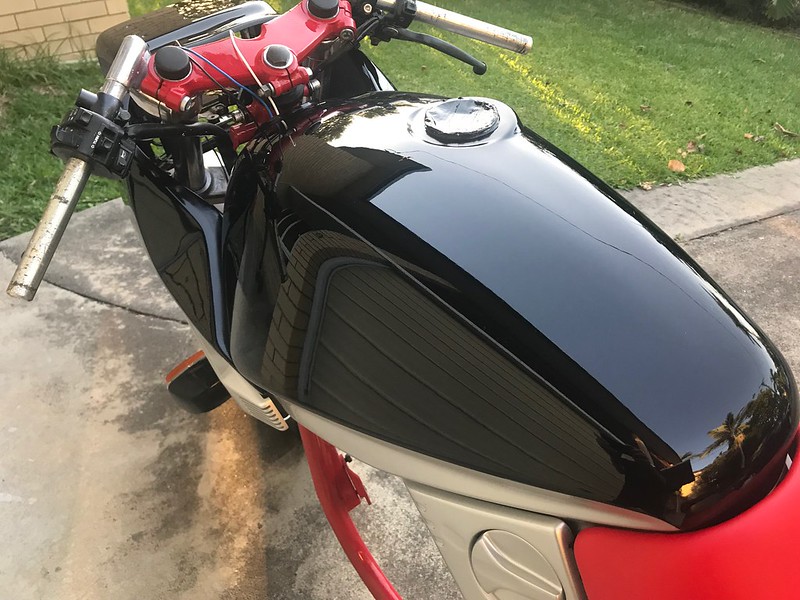
I thought the paint was looking pretty good after the initial cut and polish, but boy was I wrong! I'm absolutely stoked with how well it's turned out!
A bit late in the afternoon to get good light but I think the photos still do it justice.
 Untitled by starpoint73, on Flickr
 Untitled by starpoint73, on Flickr
 Untitled by starpoint73, on Flickr
 Untitled by starpoint73, on Flickr
 Untitled by starpoint73, on Flickr
 Untitled by starpoint73, on Flickr
I can get the pinstripes and decals on now, will endeavour to get that done during the week although it will somewhat depend on how much of a madhouse work is when I get back there tomorrow.
If I can get the Kat going as well as she looks I reckon I'll be on a winner!Leave a comment:
-
Been liking this thread. Shame photo bucket stopped hosting photos, as quite a bit are now missing.
Noticed your centerstand stop several pages back, and thought I'd offer a suggestion.
Bracket mounts on the left pivot of the centerstand. Makes it tidy.Leave a comment:
-
[QUOTE=pete;2469146]
PS: Larry, late reply? That was 2:20am my time when you replied, I reckon that was quite the early reply
Lol..I forget sometimes you're half way around the world..
I'm glad this is an educational lesson for other members, too. Happy to share.
I'm starting a new paint thread in the "Other Projects" section, also. I'm doing a mid 70's BMW 750 and a mid 70's Moto Guzzi V7 Sport side by side if anyone's interested in following along. Just got back from the shop and will load pics soon.Leave a comment:
-
Ah of course, with ya' now Larry! I didn't even contemplate the same compound on different pads, but that makes sense. I've only ever hand applied the glaze so that's cool, just realised I didn't even check the bottle to see if it can be used with a polisher or not
I'll likely only get an hour or two in today so I'm not sure how much I'll get done, but I'm keen to get stuck in.
Glad you're learning Steve! Larry's a good teacher and Daryl's been a great help too.
PS: Larry, late reply? That was 2:20am my time when you replied, I reckon that was quite the early reply
Leave a comment:
-
The stuff i am learning from this thread.
Again, thanks Pete and Larry for the ongoing lessons.Leave a comment:
-
Sorry for the late reply, Pete. Start with the Ultimate Compound with the white wool pad, you can use the same compound then with the yellow pad, move to the Fine-Cut with the orange pad and then the same product with the black pad. A bit different then you have listed, but I'm pretty confident that order will work nicely. The #7 product is just to maintain the finish. It's what you'll use for 2 months instead of wax while it cures. It's a wonderful product, but is hand-applied.Last edited by nvr2old; 04-14-2018, 12:23 PM.Leave a comment:
-
Okey doke need some clarification here Larry! Or Daryl if you know too
Grabbed the new polishing pads today so I'm all set to get back into it tomorrow, however I'm a little confused as to which to use for what... I have four pads and three products plus the wax which isn't going on now and that'll be applied by hand anyway.
They say:
White wool - cutting
Yellow wool - polishing
Orange foam - cutting
Black foam - polishing
I have the Ultimate Compound which I was using for the initial cut, then a fine cut cleaner, and then the glaze to polish.
I'm assuming I can do Ultimate on the white wool, then skip straight to the orange foam for the fine cut, then the black foam for the glaze.
Does that sound right? I'm sure there's a fourth compound I could use but that's all I have, and going by the Ultimate Compound bottle it should be ok to go straight to the fine cut after using it, and I reckon they're right going by the results I've seen with the old wool pad I was using.
 Untitled by starpoint73, on Flickr
Leave a comment:
-
I took my crankshaft for a drive yesterday, should know next week at some point what the options are to get it sorted. He said he likely has a better taper end around that he can replace the existing one with which will solve the thread issues nicely as well.
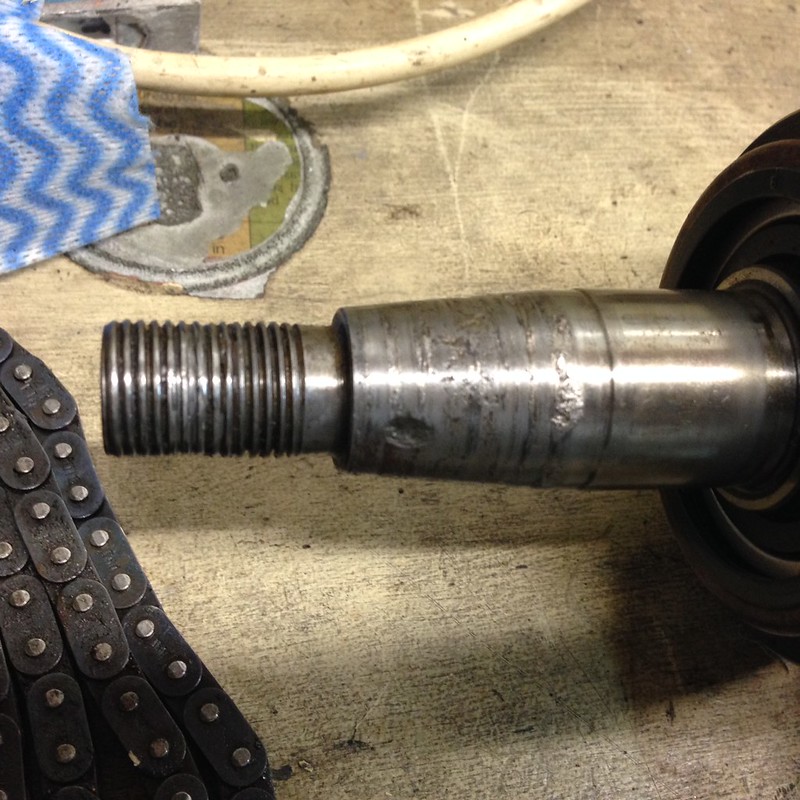 IMG_1525 by starpoint73, on Flickr
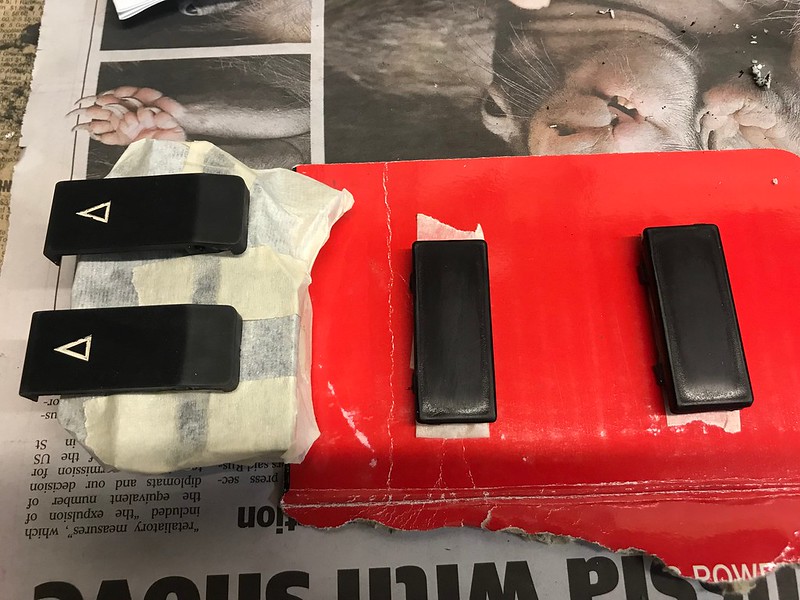
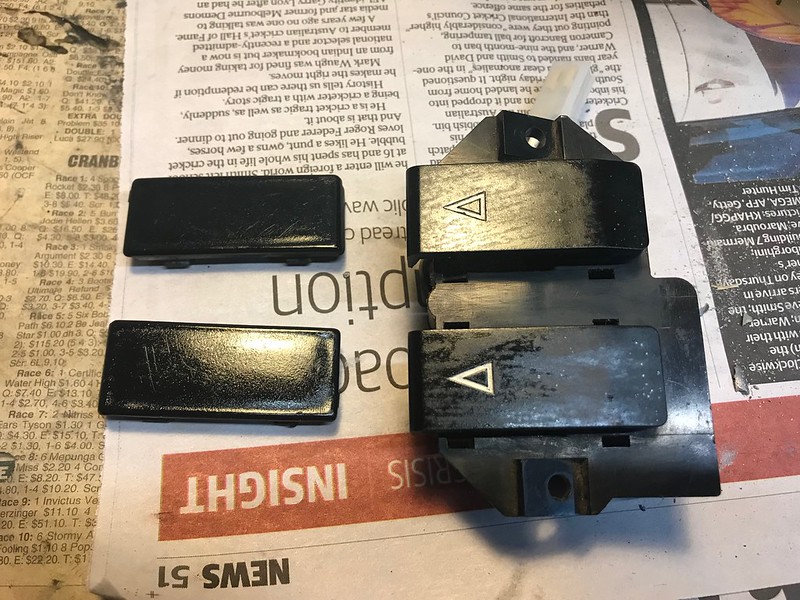
I decided I wasn't happy with how the side panel switches and filler panels ended up, and I discovered my aerosol plastic paint still seemed ok.
 Untitled by starpoint73, on Flickr
Gave them a quick rub back to get most of the scratches and marks out.
 Untitled by starpoint73, on Flickr
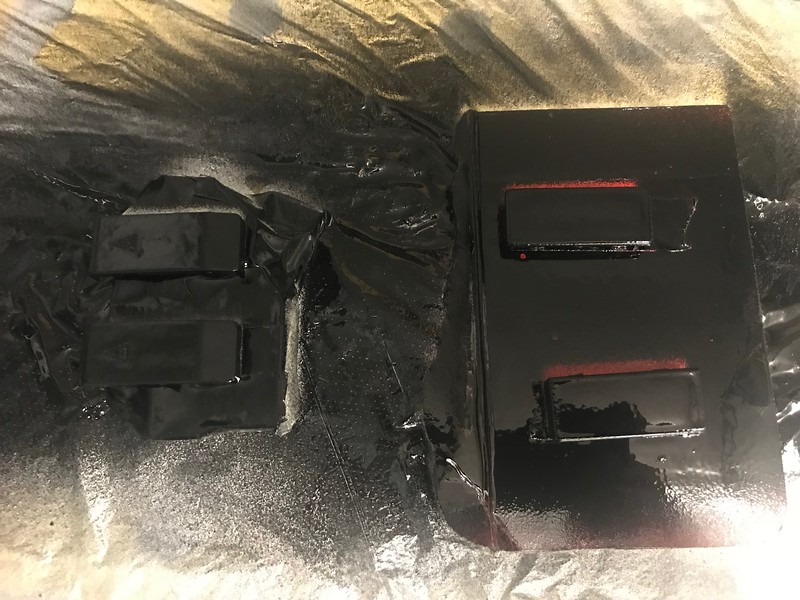
Four coats later they're a bit more presentable.
 Untitled by starpoint73, on Flickr
I have a white paint pen to redo the triangles too, they should be fully cured this afternoon.Leave a comment:
-
Cheers Larry, although I'll wait 'til I see it out in the sun before getting too excited
For the entire two paint jobs now I've just figured the fluid control knob did bugger all as it didn't seem to matter where I put it, it didn't seem to make a difference...")
Oh well, I know better now!Leave a comment:
-
The fender looks great, Pete. A perfect repair. I had to laugh about the fluid control knob..it does indeed make a huge difference where it's set at. I always tell people to start at the half way point, and then it usually needs to be turned out a bit more to be the right viscosity. Turn it in for the paint to be a bit drier, turn it out to get more material and to flow out better..which you have seemed to hit just right with the clear. It should sand and polish really well. Nicely done. You have snatched the pebble from my hand, Grasshopper...
Leave a comment:
-
Hmmmm I might have to give that a shot Larry, I was just going with the stock-ish idea of a little gap between the black and the pinstripe. I have 10 metres on that roll so there's plenty to give it a try and move it if I don't like it.
I also found a more glossy red on eBay today so if the satin doesn't look quite right I'll grab a roll and try that instead. Doesn't look to be any different quality to the one I got and similar price etc. https://www.ebay.com.au/itm/6mm-x-9-...MAAOSwaEhZKsR4
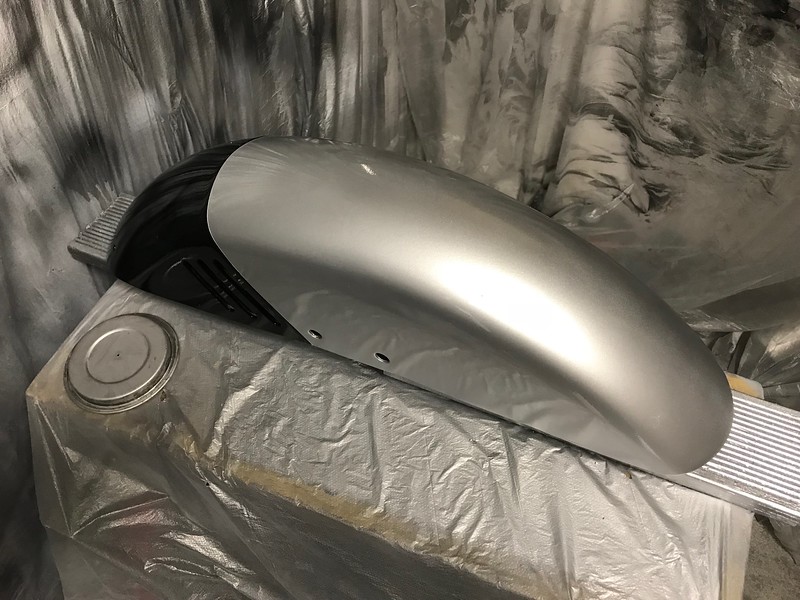
I got the front mudguard re-sprayed today, not going to touch it again now until I'm ready to cut and polish it on Monday.
Funnily enough I finally figured out how the fluid control on my gun works... I actually got to do some dry coats for a change! Despite the fluid control knob being 30mm long or so, all the control is in about the last 5mm... cheap guns are cheap for a reason!
I got 3 coats of primer on, then 3 dry-ish coats of silver, then 3 dry coats of clear and 3 wet coats. There was a good couple of hours between the silver and clear too while I went out for a bit.
Anyway, looked good when I finished, I'll check the level of orange peel tomorrow.
 Untitled by starpoint73, on Flickr
I think the side cover switches and filler panels are about as good as they're gonna get now too.
 Untitled by starpoint73, on Flickr
I also finished up the stator area repair, pretty sure I've built it all up enough and now just need to file and sand it back to the right shape. Definitely much improved over the dodgy repair that was there.
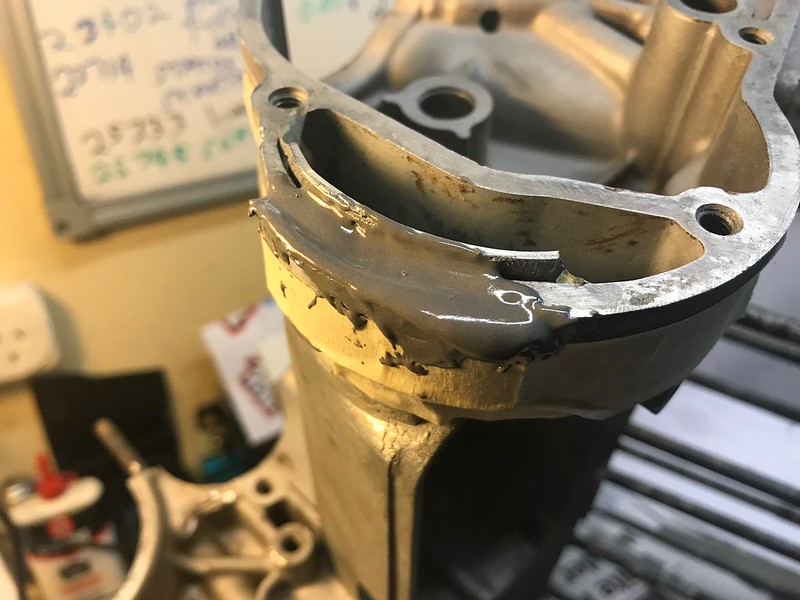 Untitled by starpoint73, on Flickr
Pretty sure I've found someone to sort out my crankshaft too which will be fantastic, hopefully taking it down to him in the morning.Leave a comment:
-
[QUOTE=pete;2468398]Ok
Also, my plan with the red pinstripe was to run the fine lines masking tape along the edge of the black on the tank and cowl and use that as both a guide and an even spacer so there'll be about 3mm between the black and the pinstripe. Make good sense?
Perfect, if you're not bumping the red stripe right up to the edge of the black. Personally, I think it would look better if the red was a break between the silver and black w/o any space between them, but that's just me.Leave a comment:
.png "Powered by vBulletin")
Required reading for all forum users!!!
Welcome!
Register to access the full functionality of the GSResources forum. Until you register and activate your account you will not have full forum access, nor will you be able to post or reply to messages.A note to new registrants...
All new forum registrations must be activated via email before you have full access to the forum.A Special Note about Email accounts!
DO NOT USE sbcglobal.net, att.net, bellsouth.net or email.com email addresses when registering for the forum! Email that our system sends out to these email servers is treated as SPAM and you will never receive your activation email, or any other email that our system may send out. Use an email address from gmail.com or some other email server.A note to old forum members...
I receive numerous requests from people who can no longer log in because their accounts were deleted. As mentioned in the forum FAQ, user accounts are deleted if you haven't logged in for the past 6 months. If you can't log in, then create a new forum account. If you don't get an error message, then check your email account for an activation message. If you get a message stating that the email address is already in use, then your account still exists so follow the instructions in the forum FAQ for resetting your password.Have you forgotten your password or have a new email address? Then read the forum FAQ for details on how to reset it.
Any email requests for "can't log in anymore" problems or "lost my password" problems will be deleted. Read the forum FAQ and follow the instructions there - that's what we have one for...
New users should be sure to read the FAQ as well as the posts in the Announcements forum. This will answer many of the questions you may have about how this forum works.
Before posting questions in the forums be sure to use the forum search function!!! Odds are your question has already been asked and answered before. And when posting, please make sure that you post to the correct forum.
Finally, be sure to check out BassCliff's website here. He has useful information that can't be found on this site. His welcome page containing useful GS information can be found here. Be sure to check it out!
If you are a returning visitor to the forum and can't log in using your old forum name and password, chances are your account is deleted. Just create a new forum account and you should be all set.

Leave a comment: