-
 Guest repliedThose Clutch and Brake levers look awesome! As for the perforated side covers, my vote is to go with the bottom half cut like in the second photo. Sweet job on making your own seat, really like how you did it!
 -
Finished the mounts for the gastank, and now I'm testing how the seat fits in relation to the tank. The mounts are adjustable with shims, so that the tank and seat will line up. I will try to get this line as horisontal as possible, but at the moment it slants towards the back a bit, as you can see. I have to take into consideration how much I can lower the bike in the front, as I don't want it much lower in the back. I'll have to settle on a compromise I guess.
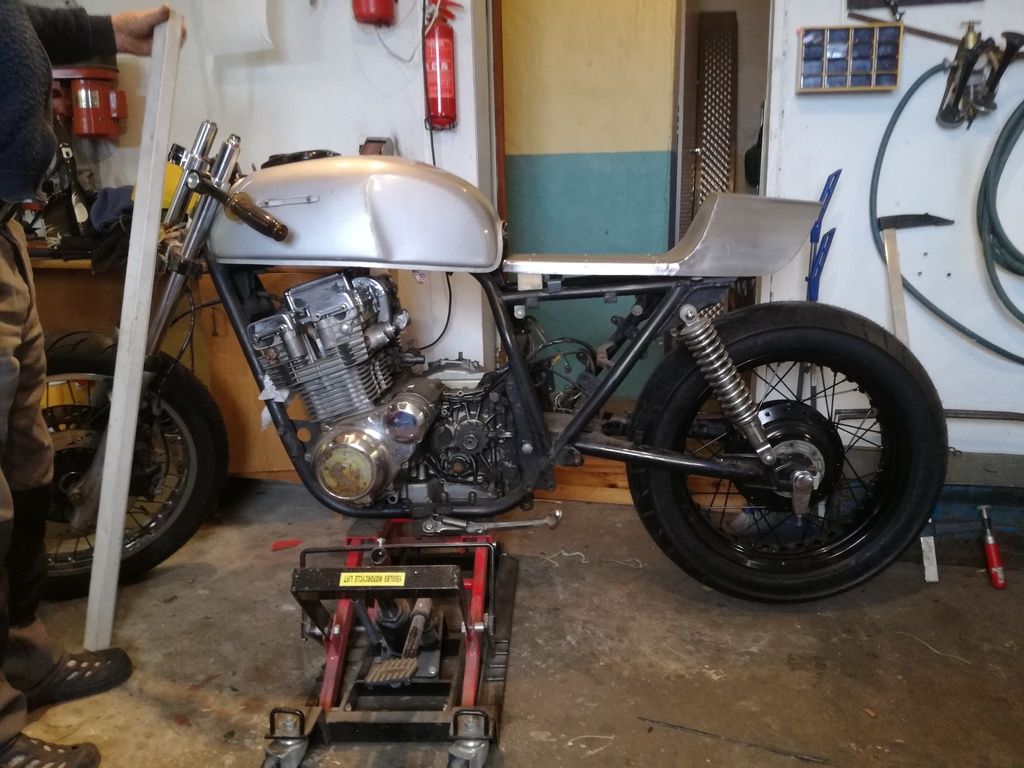
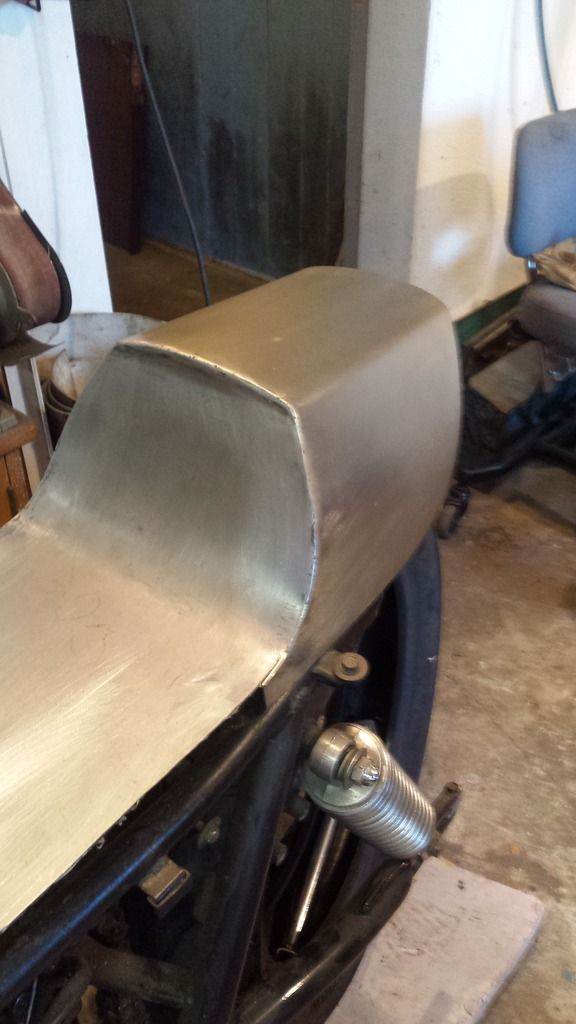
I also ordered perforated steel plates for the sidecovers. I'm not sure if I want them to be black or bare metal. I've also considered cutting away the bottom half, and just keep the top, like in the last picture. The covers will be on the outside of the frame, not in between. This is so it will hide that the seat doesn't follow the frame. What do you guys think? Would be great if you had some input, and maybe picures if you have done something similar


Leave a comment:
-
Thanx! Have been in Bergen a couple of times, but not by bike. I know the roads are fantastic, but it's a five hour drive from here. The roads along the coast towards Stavanger are also beautifulOriginally posted by jibledso View Post
Best of luck with your own build/restoration
Leave a comment:
-
Guest repliedSeat looks great!
I just saw the picture of the mock up of the bike, looks incredible.
Just realized you're right across the water from me, ever ride to Bergen before?Leave a comment:
-
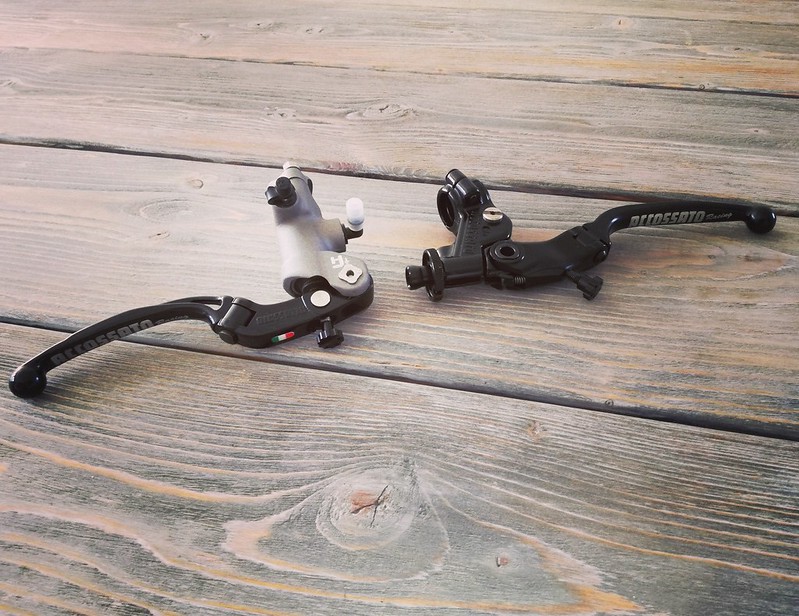
New adjustable ratio Accossato brake master cylinder and matching clutch came in the mail today Awesome quality!
 IMG_20170407_120737_277_zpsvko1uebs by Lars Krogh-Stea, on Flickr
Last edited by LarsKroghStea; 01-29-2018, 04:08 PM.
IMG_20170407_120737_277_zpsvko1uebs by Lars Krogh-Stea, on Flickr
Last edited by LarsKroghStea; 01-29-2018, 04:08 PM.Leave a comment:
-
Last edited by LarsKroghStea; 01-29-2018, 04:06 PM.Leave a comment:
-
Guest repliedLooking good!Leave a comment:
-
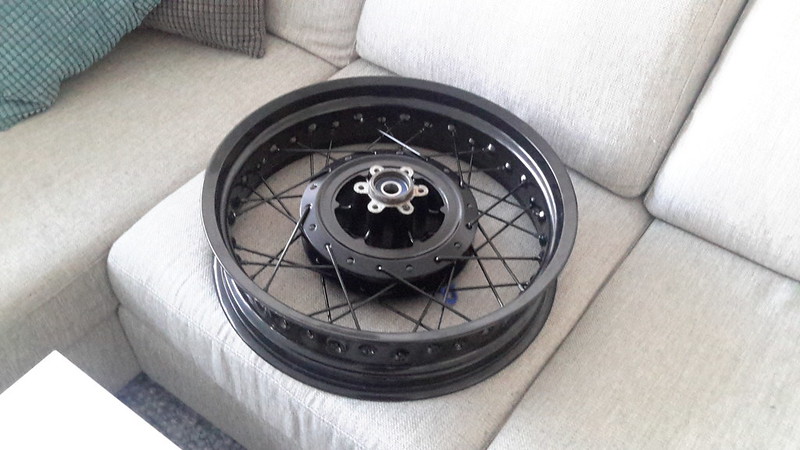
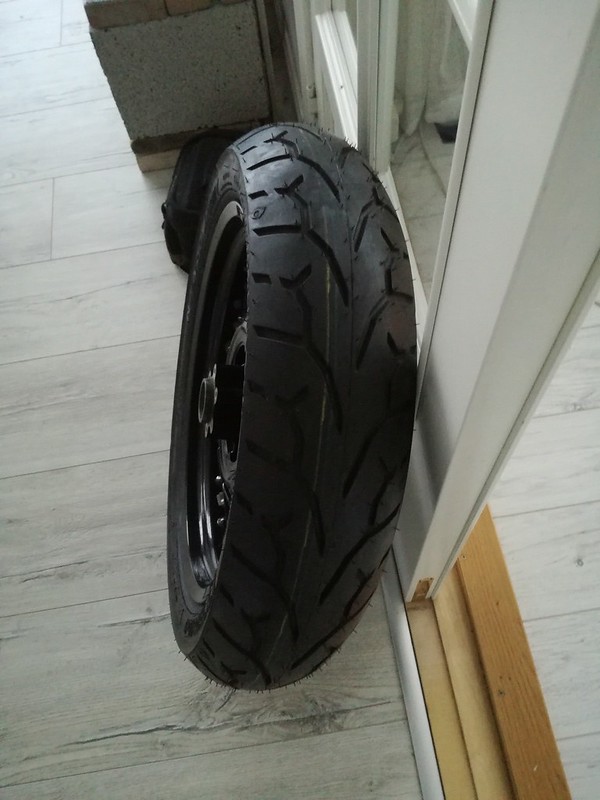
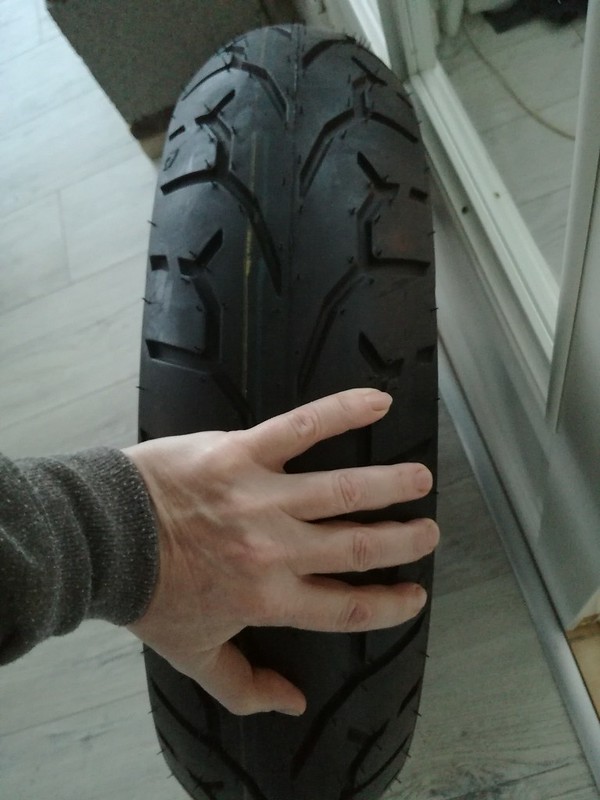
Rear wheel finally done 150/70-18 mounted on a 4.25" alu-rim
 20170112_101044_zps2gerfrjv by Lars Krogh-Stea, on Flickr
 IMG_20170208_083312_zpsnwkvjqnk by Lars Krogh-Stea, on Flickr
 IMG_20170208_083326_zpszszytnp8 by Lars Krogh-Stea, on Flickr
 IMG_20170208_083429_zpsdvpjvaa1 by Lars Krogh-Stea, on Flickr
Last edited by LarsKroghStea; 01-29-2018, 03:58 PM.
IMG_20170208_083429_zpsdvpjvaa1 by Lars Krogh-Stea, on Flickr
Last edited by LarsKroghStea; 01-29-2018, 03:58 PM.Leave a comment:
-
Hei, hyggelig ĺ hřre fra en naboOriginally posted by Benny A View Post Takk for det Sřkte opp din sykkel ogsĺ, og den ser skikkelig fin ut!
Leave a comment:
-
Guest repliedHej Lars..
Fed cykel du er ved at bygge. Glćder mig til at lćse og se mere..
Hilsen
Benny fra DanmarkLeave a comment:
-
To check the stance of the bike I've now decided to finish the wheels before I finish and mount the seat. I've ordered a set of 17/48 teeth 520 JT sprockets and the narrowest DID chain I could find; the vx2. Hopefully that will fit without the need for an offset frontsproket. I'm also in the process of measuring the hub and rim to get the correct spokes. Soon my bike will be rolling again ��Leave a comment:
-
My first welding project.
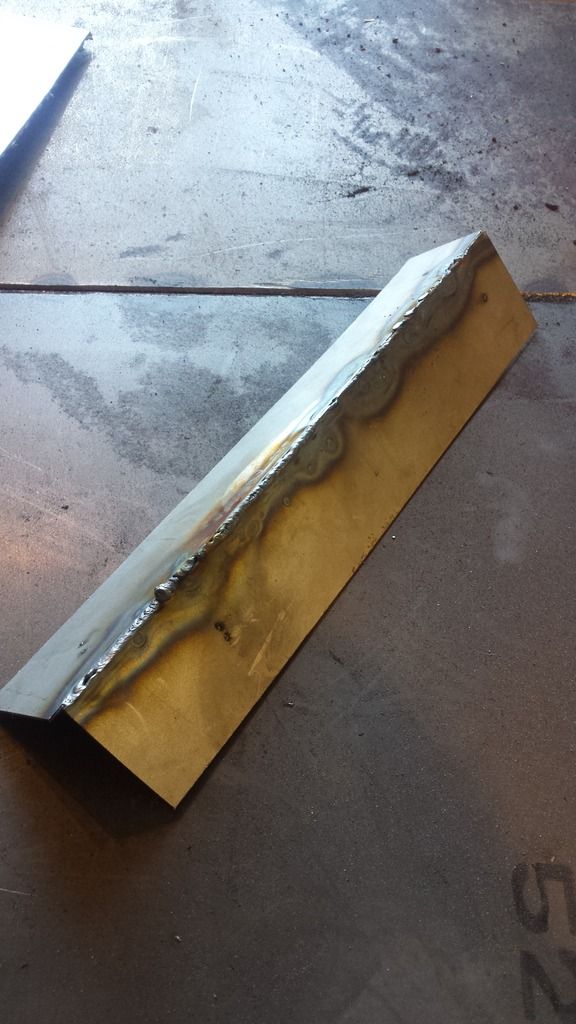
My second welding project.. Pretty steep learning curve, and the result isn't perfect, but I'm going for soul over perfect anyway I'm pretty happy with the metal not warping. Did a lot of short welds jumping around and taking pauses to keep control of the heat. Took an anglegrinder with a flappy disk and removed the excess metal. When I'm finished welding I'll use 80 grit paper in long strokes from front to back to make texture and finish off with Westwood diamond clear paint.
Leave a comment:
.png "Powered by vBulletin")
Required reading for all forum users!!!
Welcome!
Register to access the full functionality of the GSResources forum. Until you register and activate your account you will not have full forum access, nor will you be able to post or reply to messages.A note to new registrants...
All new forum registrations must be activated via email before you have full access to the forum.A Special Note about Email accounts!
DO NOT USE sbcglobal.net, att.net, bellsouth.net or email.com email addresses when registering for the forum! Email that our system sends out to these email servers is treated as SPAM and you will never receive your activation email, or any other email that our system may send out. Use an email address from gmail.com or some other email server.A note to old forum members...
I receive numerous requests from people who can no longer log in because their accounts were deleted. As mentioned in the forum FAQ, user accounts are deleted if you haven't logged in for the past 6 months. If you can't log in, then create a new forum account. If you don't get an error message, then check your email account for an activation message. If you get a message stating that the email address is already in use, then your account still exists so follow the instructions in the forum FAQ for resetting your password.Have you forgotten your password or have a new email address? Then read the forum FAQ for details on how to reset it.
Any email requests for "can't log in anymore" problems or "lost my password" problems will be deleted. Read the forum FAQ and follow the instructions there - that's what we have one for...
New users should be sure to read the FAQ as well as the posts in the Announcements forum. This will answer many of the questions you may have about how this forum works.
Before posting questions in the forums be sure to use the forum search function!!! Odds are your question has already been asked and answered before. And when posting, please make sure that you post to the correct forum.
Finally, be sure to check out BassCliff's website here. He has useful information that can't be found on this site. His welcome page containing useful GS information can be found here. Be sure to check it out!
If you are a returning visitor to the forum and can't log in using your old forum name and password, chances are your account is deleted. Just create a new forum account and you should be all set.


Leave a comment: